
Hello and happy Harry Potter’s birthday! This month really flew by and I can’t believe that August will begin tomorrow. July was full of vacations and family time, but it’s back to the real world, and I’m excited to share a quick and easy little project that can add a lot of personality to any room. I’ve been meaning to share it for about two months now, but when they go by as fast as July did, it’s hard to keep up!
I started by gathering the supplies:
- linen and thread for making the pillow cover
- cardboard
- permanent marker
- paint
- textile medium
- paintbrush
- paint dish and popsicle stick for mixing paint
- unused puppy pad for covering my desk
- (We had only used a few out of a pack of 60 when Pipsqueek became more or less potty trained, so I had to come up with something to do with them! They’re excellent to use for painting projects because unlike newspapers, nothing leaks through them!)
 |
| All the supplies |
I started by sewing the pillow cover out of some linen I got for $2.50/yard on the remnant table at my fabric store about a year or so ago. I made it with an envelope closure to avoid running out to the store to buy a zipper.
 |
| It’s a little hard to see in this photo, but if you look closely, the letter on the cardboard shows through just enough to serve as a guide for painting. |
The next step was to mix up my paint. I wanted the letter to match the accent wall in the den, so I used the little sample jar we bought when we tested out colors before we painted the walls. I mixed it with textile medium (which I found at Hobby Lobby for under $2) to prepare it for being used on fabric.
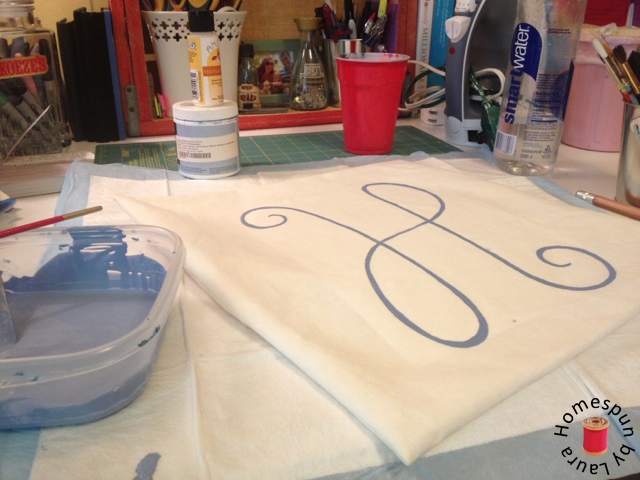 |
| Other options for making the letter would be selecting a favorite font, printing out the desired letter as large as possible, then tracing its outline with permanent marker, or using a store-bought stencil. |
Something great about this pillow, especially since the dogs wind up turning it over half the time, is that the H is the same upside down and right-side up, so the pillow doesn’t have to be turned a certain way to look right!

