Creating a system that allows you to see everything with a quick glance, use the food you have so it doesn’t go bad, and that you can easily maintain is the most important quality in organizing a pantry. In Week 6 of the One Room Challenge, I’m sharing tips to help you create your own system for an organized pantry that works for you – whether or not it’s pretty.
Because the One Room Challenge gained a bonus week this go-round, I decided to share the changes I’ve made in our pantry over time to make it work for us, and I’ll save the art and decor in the powder room for the big reveal next week.
You can create an organized and functional system for your pantry that works for you, and you don’t have to spend big bucks to do it. Over the past 8 years, I’ve dropped about $60 to add storage solutions that work for us, most of which have been simple DIY fixes. Winning the prize for Prettiest Pantry on Pinterest is irrelevant if it doesn’t work for you and your family!
You might wonder why an organized pantry is relevant to redecorating a powder room…it’s because our pantry is only accessible through said powder room (It’s actually not even supposed to be a pantry. I think the architect realized there was extra space under the stairs and said, “Why don’t we throw in an extra closet inside the bathroom and skip the pantry?” and the builder said, “Hey, what a great idea!” They could have laid out the kitchen differently and put an actual pantry in a much more accessible location, but I’m sure they saved a few bucks by doing it this way. Great job, guys.).
Pantry envy
We’ve all seen the beautiful, perfectly organized pantries all over Pinterest.
I’d love to have one myself, and I’m perfectly capable of making that happen. I’ve thought about it several times. But suppose I went to all the effort to make mine look like that – would it be worth it the time and resources I put into it, or would it wind up a big mess again after two weeks?
Beautiful? Yes! Organized? Yes! Realistic for me? Nope. Let’s face it, MY pantry would revert to its usual somewhat organized (to me) and incredibly cluttered (to everyone else) condition pretty quickly.
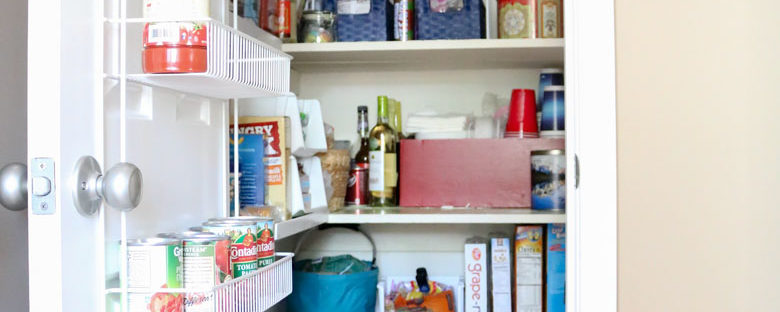
So you’re not going to find an amazing, beautiful ‘After’ picture of my super-organized, uncluttered, painted pantry at the end of this post. Instead, you’ll find a very real picture of my fully stocked, sort of cluttered, but surprisingly organized bathroom-closet-turned-pantry.
How to create an organized pantry that works for you
The system that works for me falls somewhere between a complete disorganized mess and a completely uncluttered space. Everything has a place and gets stored with like items, I know where everything is, and I’m able to quickly grab what I need. The Mister knows where to find pretty much anything he needs. You wouldn’t call it be pretty, but it works for us.
1. Put stuff where it’s most convenient.
Store items you use regularly within arm’s reach. For us, that’s spices, cereal, and sandwich-making supplies.
Infrequently used or bulky items should go high or low to save the valuable real estate for the aforementioned items. For us, that includes paper towels and extra baggies, and I’ll discuss it more in a minute.
Perishable items should remain in your sight. We once came home from vacation to find that some potatoes had rotted leaving a sticky mess in their wake. It was gross, and since then I haven’t let produce in the pantry out of my sight.
In our ‘Before’ picture, our system was already in place, but it had gotten a little extra cluttered.
2. If it’s not working for you, change it.
While you can’t move the walls or make a small pantry larger, you can make small changes that have a huge impact on the function of the space.
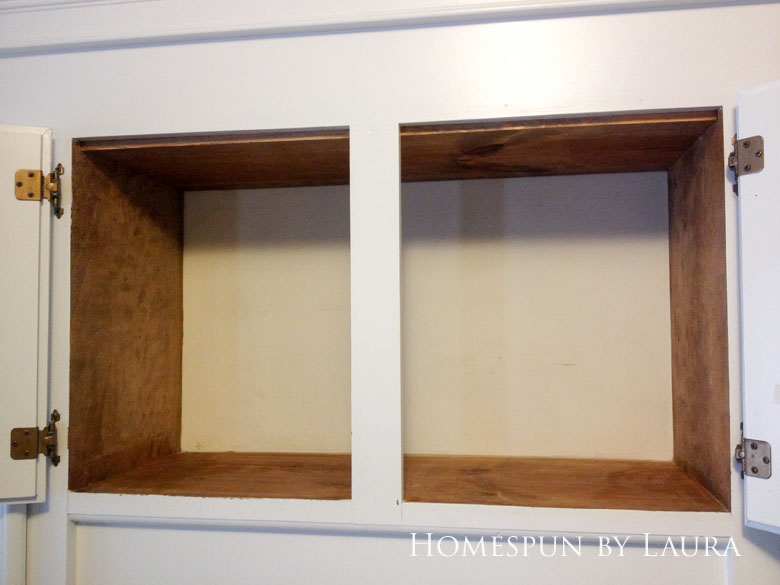
Example 1: As I mentioned earlier, our pantry is inside of our downstairs half bathroom. It’s incredibly inconvenient to walk from the sink/island where I do most of my cooking to access ingredients in the pantry, so after a few months in this house I moved the ones I found myself using most to the cabinet above the sink.
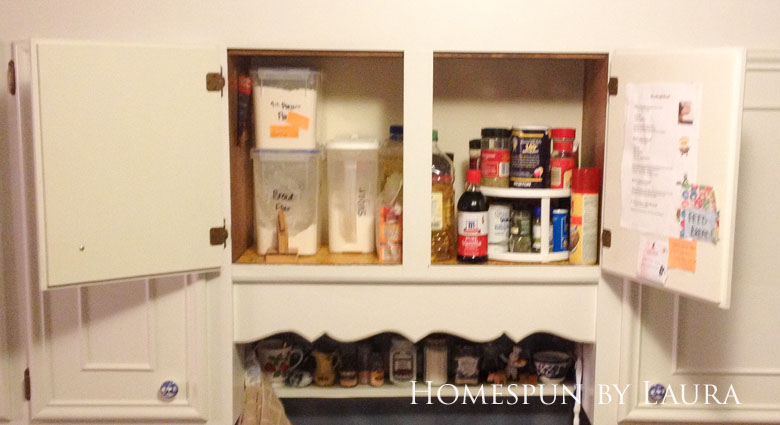
It stayed like this for about five years until I got sick of the lazy Susan. Stuff kept falling off in the corner, preventing the thing from turning, or getting pushed into the middle where it wasn’t visible.
I decided to put a narrow shelf on both sides of the cabinet to create non-moving space for the small containers, leaving plenty of room for the large ones in the middle. While I was at it, I painted the inside of the cabinet because at the time I was considering painting the inside of all the cabinets.
The amount of time it took (and the amount of paint I got in my hair…) made it easy to decide not to paint the rest of the cabinets, but I do love the way this one turned out!
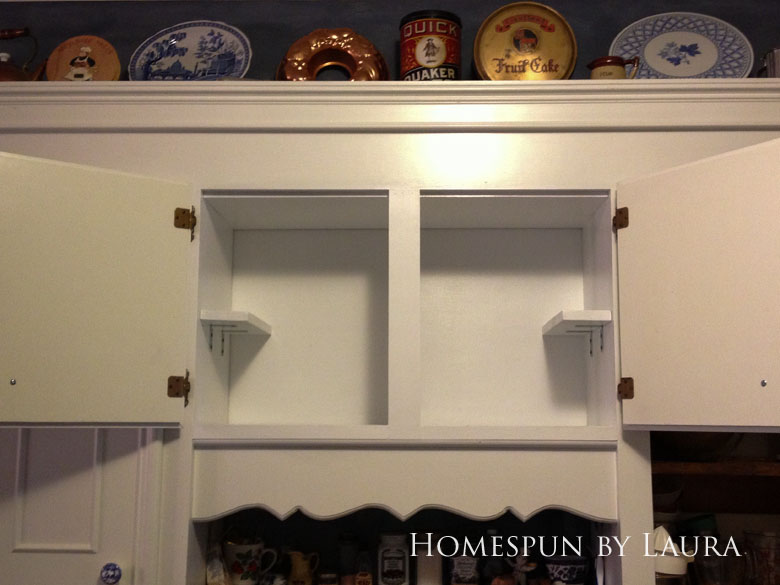
Over the last four years, the system here has changed very little and stayed shockingly tidy. It’s super convenient, and I wish I’d done it sooner!
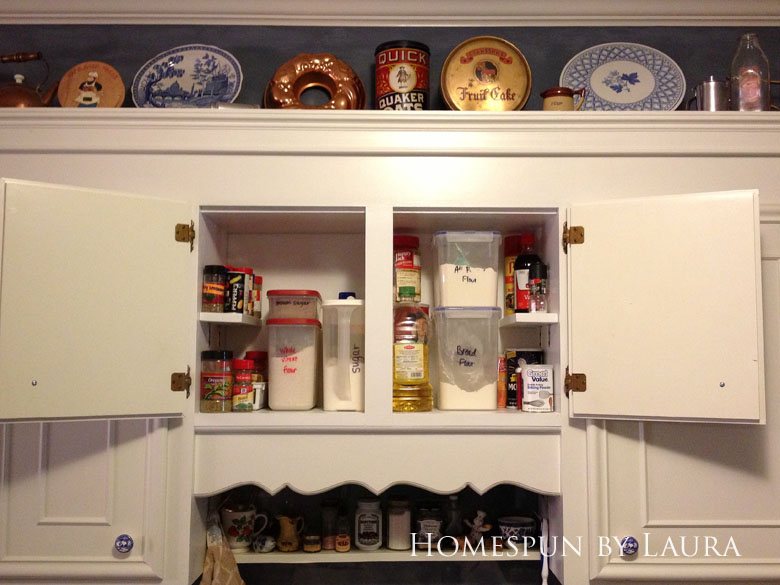
The containers you see here are the few exceptions to my aversion to use clear storage containers for everything. Since they’re stackable, they save space!
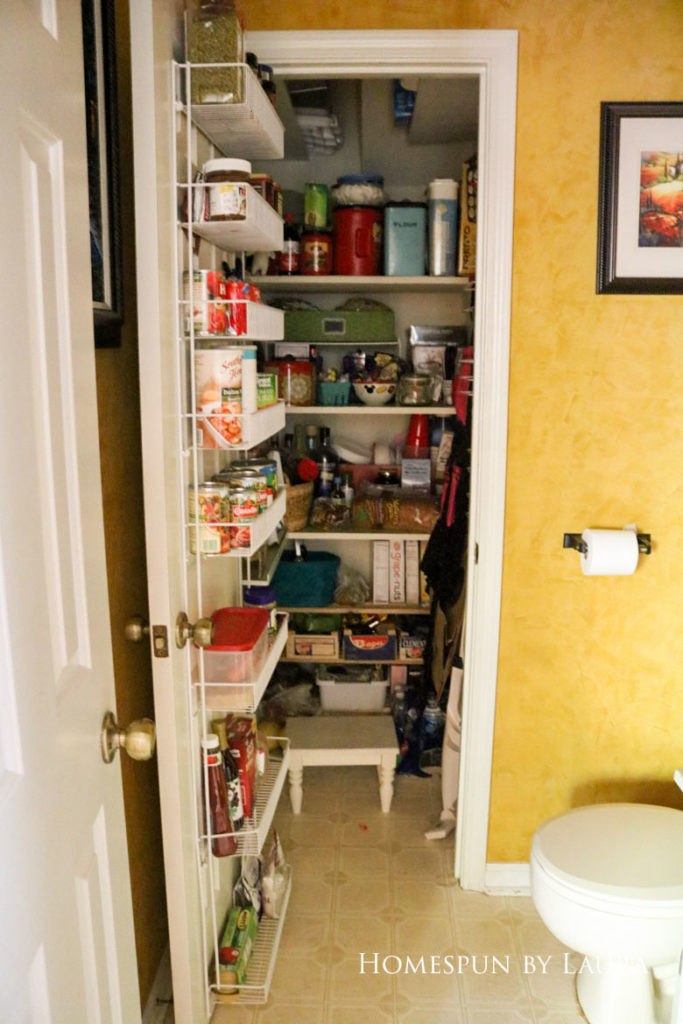
Example 2: The shelves in the pantry are about 2 feet deep, which makes it seem like there’s a ton of storage space. But all those small containers created a jumbled mess if I didn’t organize them almost daily. Even just putting cereal across the back of one shelf meant that all the space in front of it – half of the shelf! – was un-usable since we’d have to move anything in front of the cereal boxes every morning just to eat breakfast. Over time, we created solutions for this situation:
An over-the-door rack (except ours is screwed in; minor detail!) is a necessity for canned goods, marinara sauce, and larger spice containers.
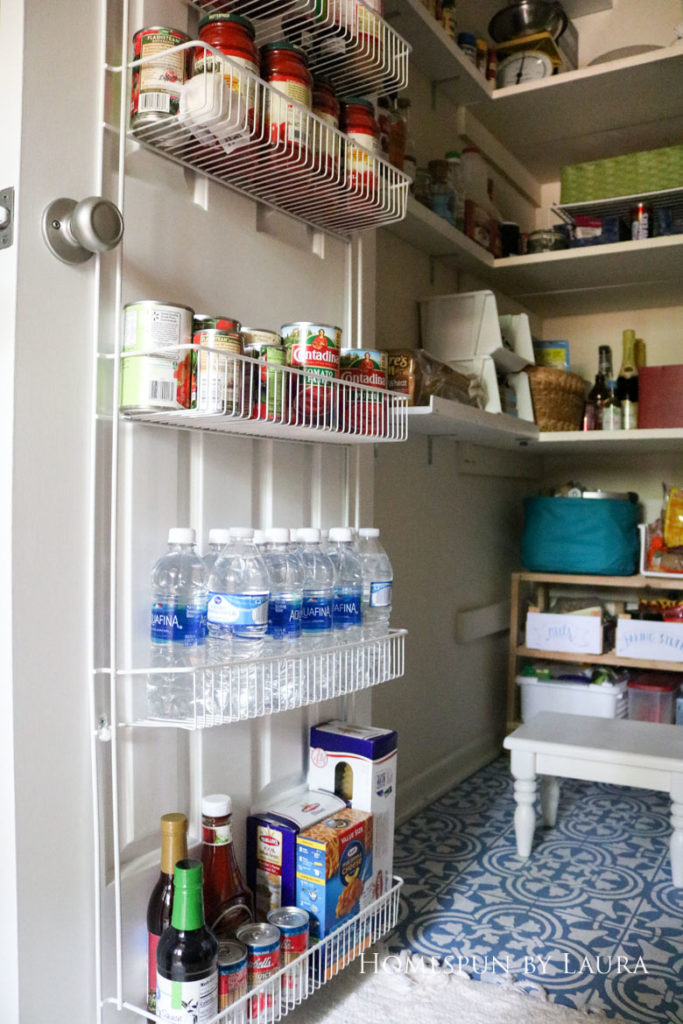
Two: Narrow wood shelving along one wall was an easy and inexpensive DIY fix for storing small spice containers, cooking oils, granola bars, and bread.
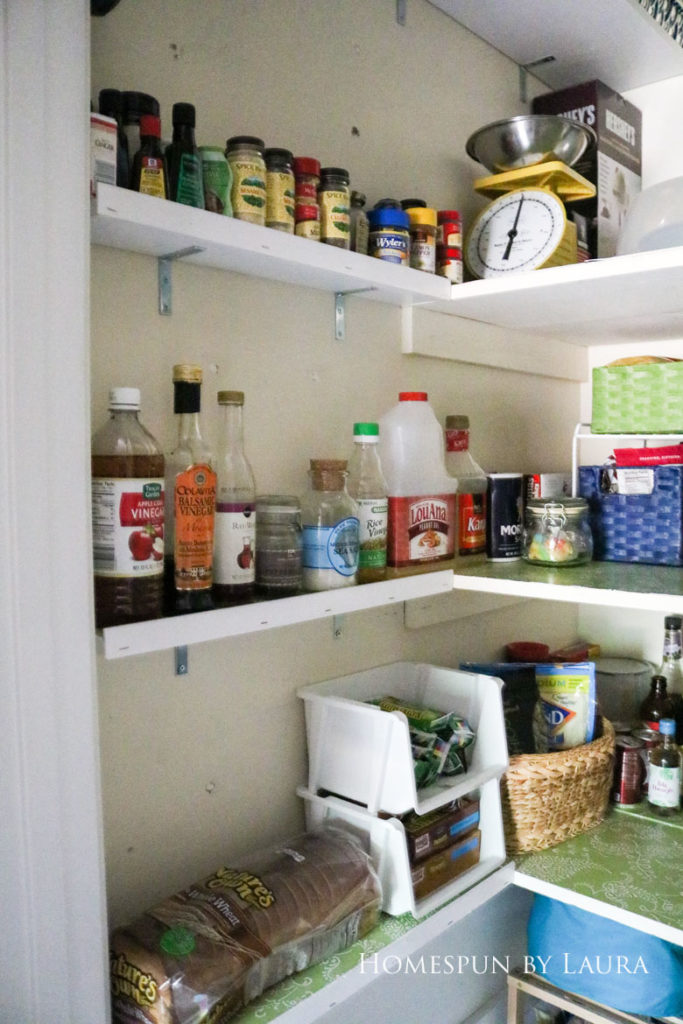
Please excuse the grainy pictures. There’s no overhead light in this afterthought of a closet, so I did the best I could. 🙂
Three: DIY overhead shelves created a space for rarely used items like extra baggies, paper towels, and my cake decorating supplies. They’re easy to reach when we need them but don’t take up valuable easy-to-reach space.

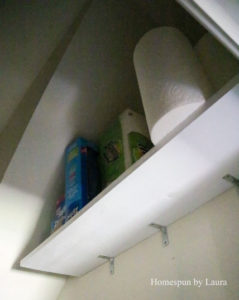
And I can reach them thanks to this stool I took out of my neighbor’s trash pile on pickup day about six years ago. A coat of spray paint made it good as new. Another coat of spray paint last week covered up six years’ worth of wear and made it look good as new again.
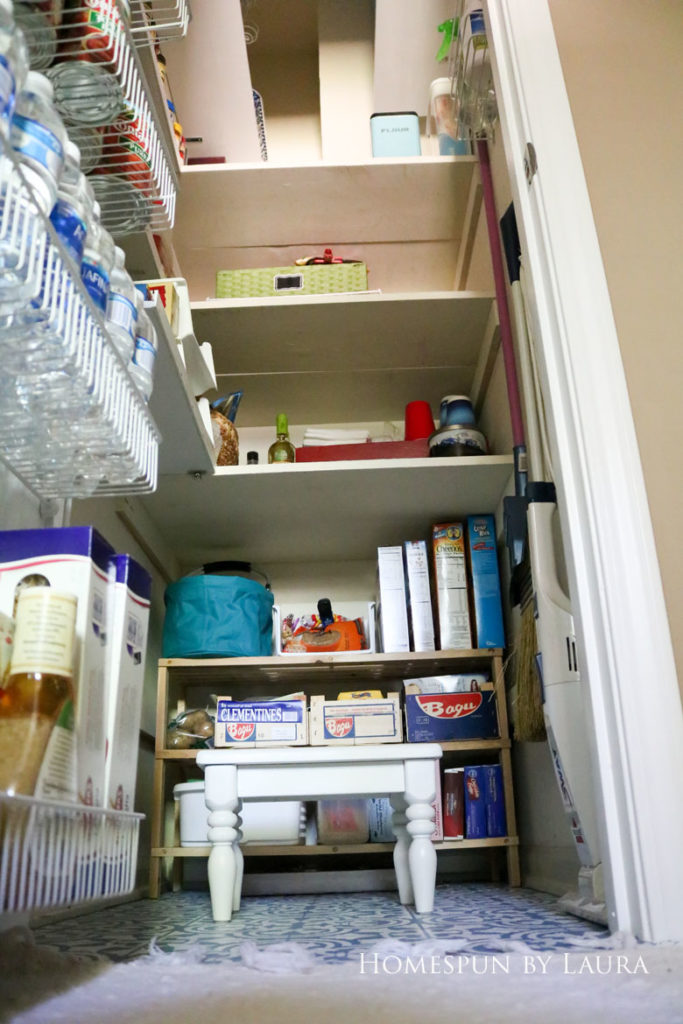
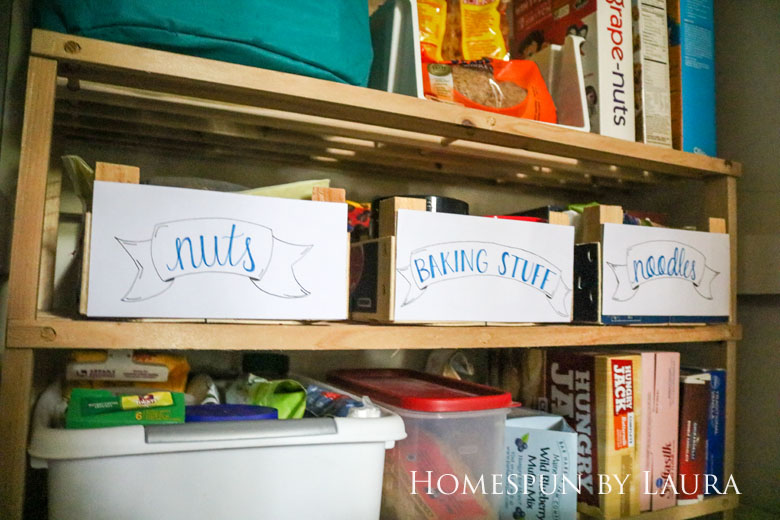
Four: A narrow shelf (see above) on the floor gave me a perfect place to store rice, noodles, nuts, cereals, and the baking ingredients that didn’t make the cut to be in the cabinets over the sink. When I couldn’t find an inexpensive shelf in the traditional places, I went to the closet organization section at Bed, Bath, and Beyond and found this wooden shoe rack on clearance for about $15!
This is the one place I did make an effort to add something pretty to the pantry last week. You’ll read about that effort momentarily after we get through the last of the meatier stuff.
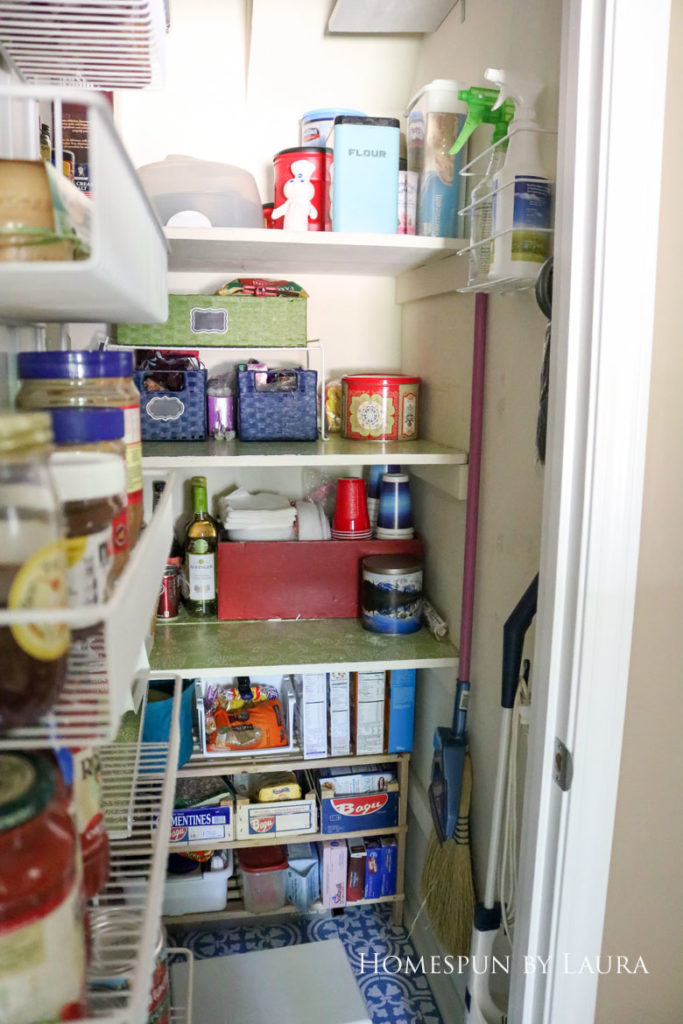
Five: Wire racks meant to be hung on the inside of cabinets created additional storage space against the wall and have stored a variety of items over the years: pasta, pudding mixes, spices, canned goods, and soft drinks. After my recent effort to clear out some of the superfluous items in the pantry, they sat empty. Now the only one that remains holds cleaning sprays and the ones that I removed made space to hang the broom and feather duster in a slightly more convenient location than their previous homes.
Six: Use bins and tins to corral like items – but only if this works for you! For me, it’s out of sight, out of mind with many things, so I use bins and tins sparingly. Case in point: the two blue ones you see here contain candy. Chocolate candy, to be precise. They’re almost at eye level. They’re so easy to reach. But it never fails that Easter and Valentine’s chocolates are still floating around in them at Christmas time. In fact, if you look closely at the one on the right, you can see my chocolate Easter bunny…from 2016. My recent purge obviously didn’t extend to my chocolate stash.
3. Eat what you have.
The best way to create a cluttered pantry is to not eat what’s in it. Check the pantry when you make your grocery list and make sure to plan for meals that include the ingredients you have. If you’re not a list-maker, snap a photo before you head to the store and check it as you make your purchases.
When you find yourself building up too much of one item because you forget whether you’ve got it at home, make plans to use it! I ate way too many peanut butter and jelly sandwiches for lunch in September because I realized we had three containers of peanut butter, but my efforts cleared out some clutter, so it’s a win…
4. Don’t overcomplicate it.
If you’re not going to keep up with pouring all your cereal, flour, etc. into clear storage containers, don’t spend your money on them! If you’re going to forget about snacks and other ingredients in a bin, don’t put them in one!
While it would have been visually appealing to buy a bunch of matching pretty baskets and containers, paint the interior of the pantry, and make sure I never oversupply it…I know I would not keep up with the process for more than a few weeks, and I’m not going to all that effort and expense to set myself up for failure (it also would have blown the budget for this project!). When I come home from the grocery store, I want to toss the 16 bags worth of groceries into their places on the shelf and get on with my day, not mess with pouring cereal and noodles into clear containers.
Making it pretty is just the icing on the cake. If you have the time and money and motivation to do it, do it! If not, accept having a functional space. Find the balance that works for you!
the result
Most of the tips I mentioned above happened over time, but I did make a few changes during course of the One Room Challenge. Since the materials for last week’s DIY framed mirror busted my budget (by a whopping 11 cents!), I had to switch back to using items I already have to complete the remaining tasks on my list.
This week, there wasn’t much to do besides continue eating extra food and shifting a few things around to clear up most of the clutter. The most involved part of ‘making over’ my pantry were the easy DIY labels I made to dress up the free storage boxes I was already using. Don’t overcomplicate it, remember?
DIY pantry labels
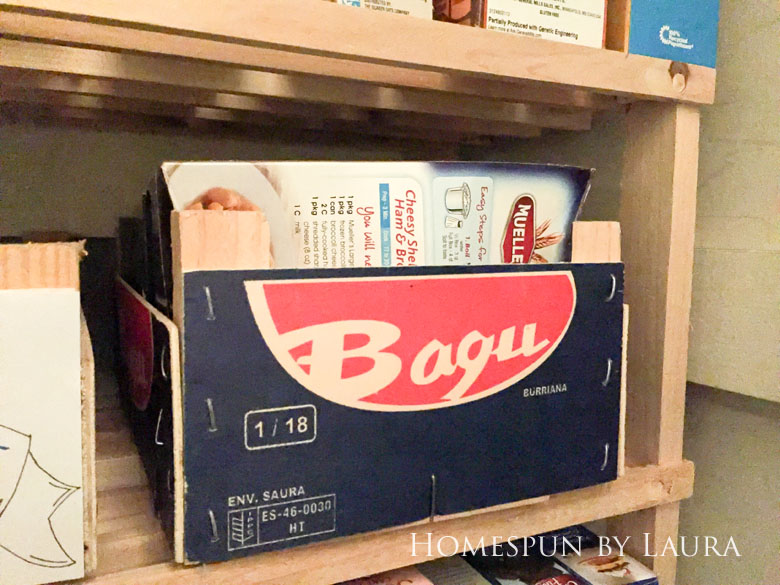
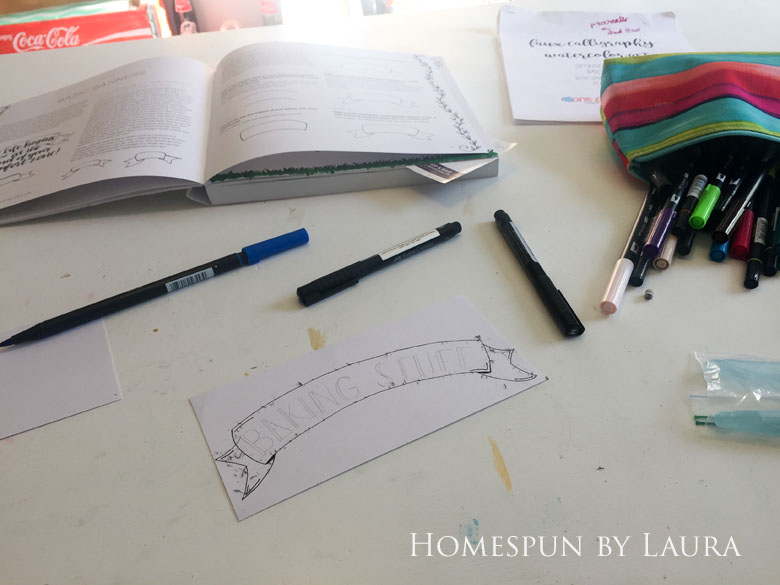
I did decide to make pretty labels for the Bagu crates on the floor shelf. Learning how to write pretty letters with Handlettering for Relaxation by Amy Latta, which I purchased from her at the Haven conference in July, has been an enjoyable way to unwind at the end of the day. I decided to use my new skill to make my new labels (that’s an affiliate link by the way).
I started by measuring the front of the boxes onto which I’d place the labels. We don’t love clementines, but my parents eat a lot of them and I’ve been the lucky recipient of some of the boxes the clementines come in. They’re great for storing small packages, boxes, spices, etc.
Then I cut some white cardstock down to size and started sketching out my design.
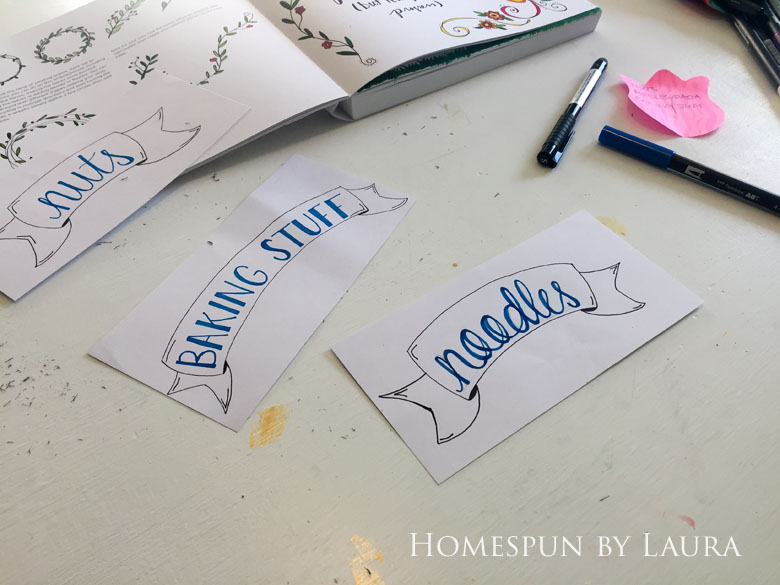
And then I taped them on! It turned out that all the boxes weren’t the exact same size, but the difference is small and not really noticeable unless you’re looking for it. (2020 Update: These labels are still holding up after two moves and 2.5 years of use, and they’re not even laminated!)
I had to lie down in a really awkward position to snap this photo, which was completely unnecessary. 🙂
The containers were free, and so were the labels, so I’m not complaining!
Our pantry won’t win any prizes for being pretty, but that’s fine by me. It works for us and that’s the most important part!
Here’s a parting side-by-side before and after for you:
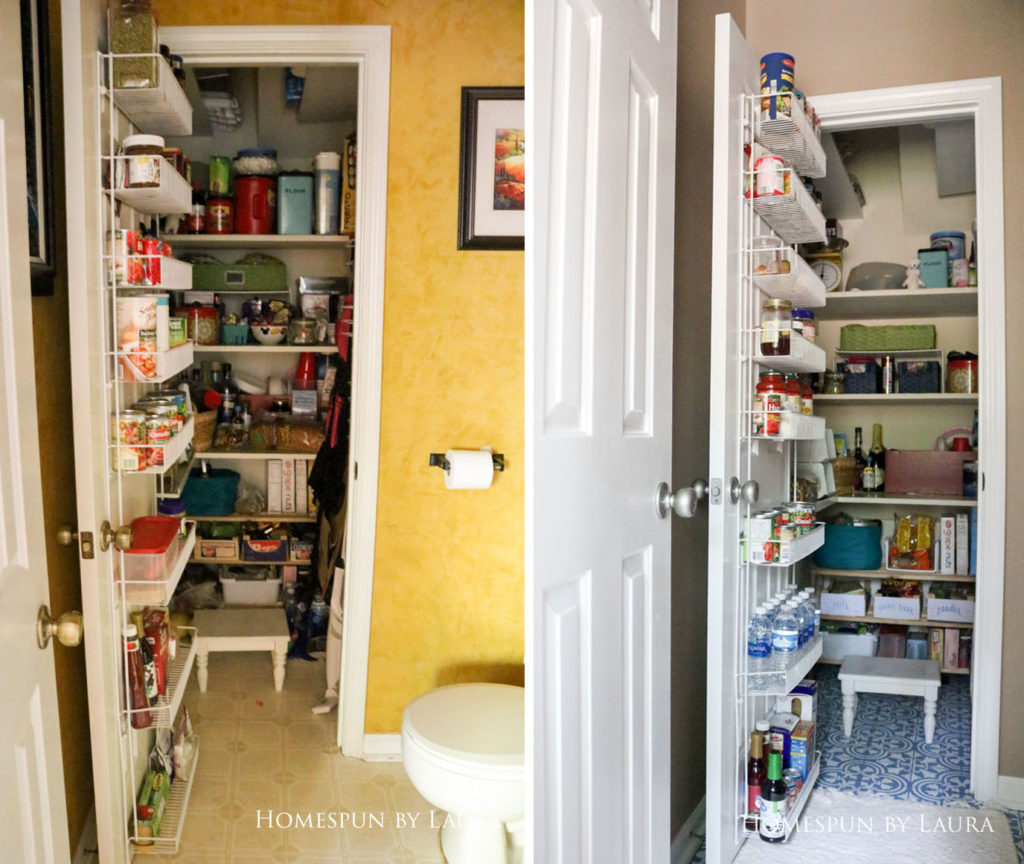
You might notice that a lot of things barely even moved. But it is a lot more organized now thanks to a few tweaks and tossing out expired food that had gotten lost in the depths.
What’s left?
Remove wallpaperPaint trim + door frames, doors, and vanityPaint wallsReplace faucet(replaced in June; not part of the budget but it feels good to check it off the list:-))Update light fixture with spray paint and new globesPaint floorReframe mirrorReplace door hingesSpray paint doorknobs + cabinet hinges and knobs + towel & toilet paper holdersPaint ceiling(to make the whole thing one color)Organize the pantry(for at least the 4th time)
And the one thing I forgot to add to the original list: the fun stuff! Some simple – and free – art and decor are all that remain to finish off this little space.
budget breakdown
Since I was able to use paper, pens, screws, and paint we already had, this was another $0 week!
The totals from Weeks 1-5 bring the grand total so far to $75.11, just a few cents over the budget I set at the beginning of the project:
Remove wallpaper (Week 1) – $0
Paint vanity and hardware (Week 2) – $0
Paint ceiling, walls, doors, & trim; replace hinges (Week 3) – $0
Stencil linoleum floor; update light fixture (Week 4) – $62.81
DIY framed mirror (Week 5) – $12.31
Thanks for stopping by, and make sure to come back next week for the full reveal! You can check in on the other One Room Challenge participants here.
Laura