When we toured our house for the first time in February of 2009, the kitchen was one of the main things that stood out to me. It wasn’t particularly fancy and it certainly hadn’t been updated, but I loved the wall color and white cabinets, and it was bigger than the kitchen we had in our apartment at the time, so I liked it.
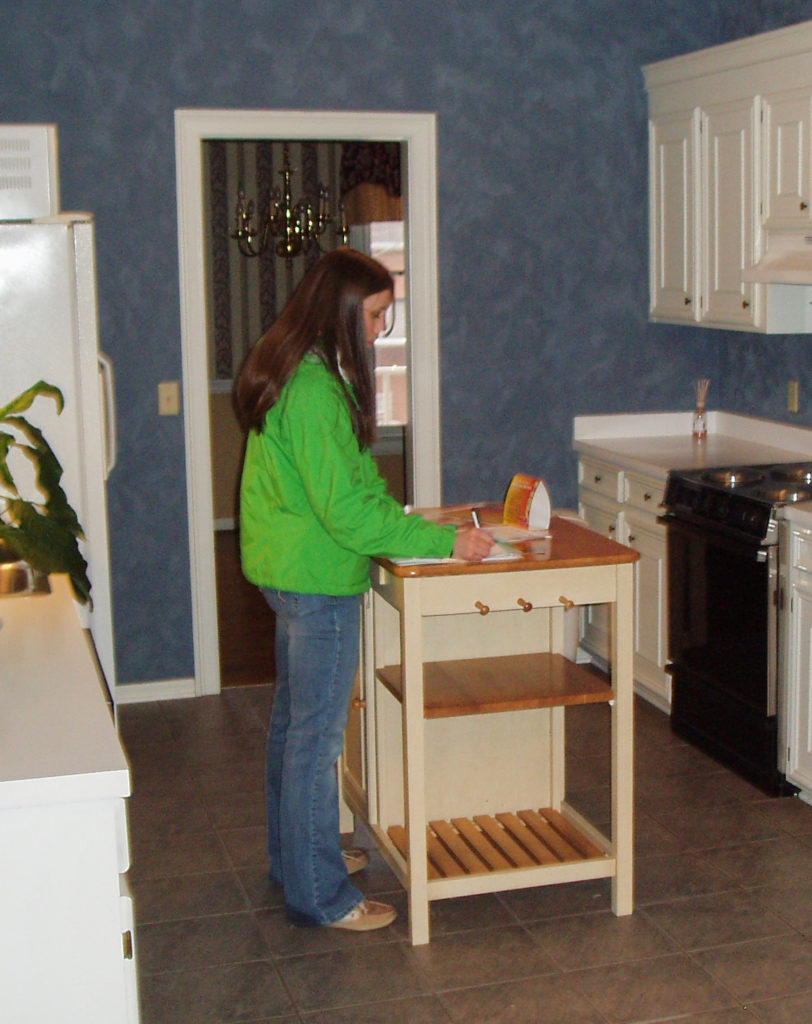
On the day we toured this house, I took some notes standing at the island.
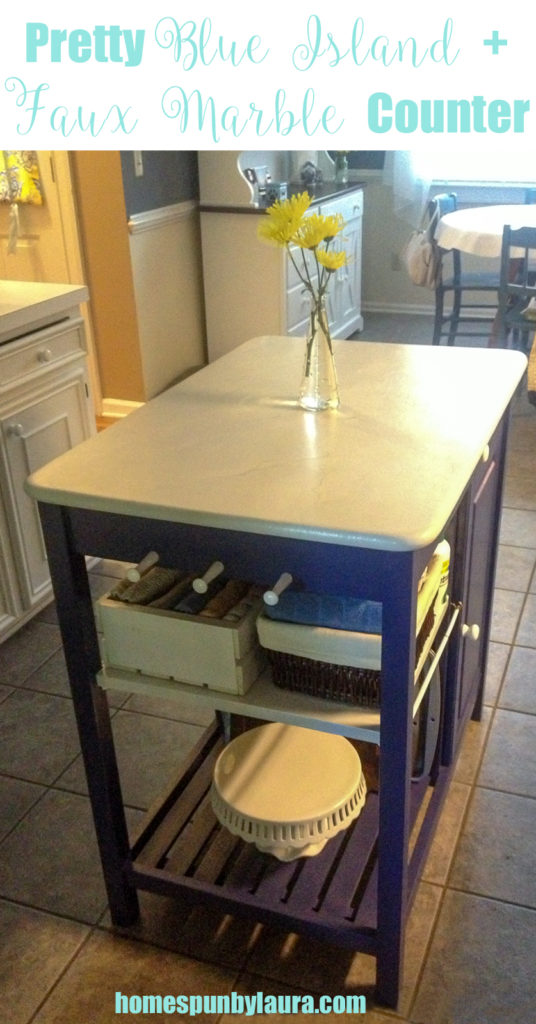
It’s a galley-style setup, but it has more space between the two sides than the typical galley, leaving just enough space to drop a small island in the middle of it, which the previous owners had done. The counter space is pretty limited, and without the island I wouldn’t have enough space to do much of anything, so it faces pretty heavy use.
But it was ugly. I never even noticed how ugly it was until I finished this project. I got the idea to paint it when I stumbled upon a picture of a dreamy kitchen with white cabinets, white counters, and an amazing navy island.
I originally wanted to paint the base of my island navy, remove the existing wood top, and replace it with a scrap piece of Carrera marble. When I went out to find out the price of a piece of scrap marble, though, the cost and my budget didn’t meet up. SO, I took matters into my own hands.
I had read about someone doing a faux marble counter in a magazine at some point, so I decided to do some research online. I found two very helpful resources here and here and gathered my supplies.
I had to put things on hold for a few days and started the project on the day we returned from a trip to DC to visit my brother, who lives in Pittsburgh. We met in DC since it was a shorter drive for us and we only had a few days. I hadn’t been there since early in high school, so it was nice to go back as an adult. It was a fun trip but I was ready to get home and start painting!
I chose a couple of colors, got samples, and painted them on each side of the island so I could see both paints in different light at different times of day. Our kitchen is pretty dark despite the huge picture window at one end of it, and I didn’t want the navy to come out looking too dark or black.
 |
| I had already begun testing paint samples before I remembered to get before pictures! |
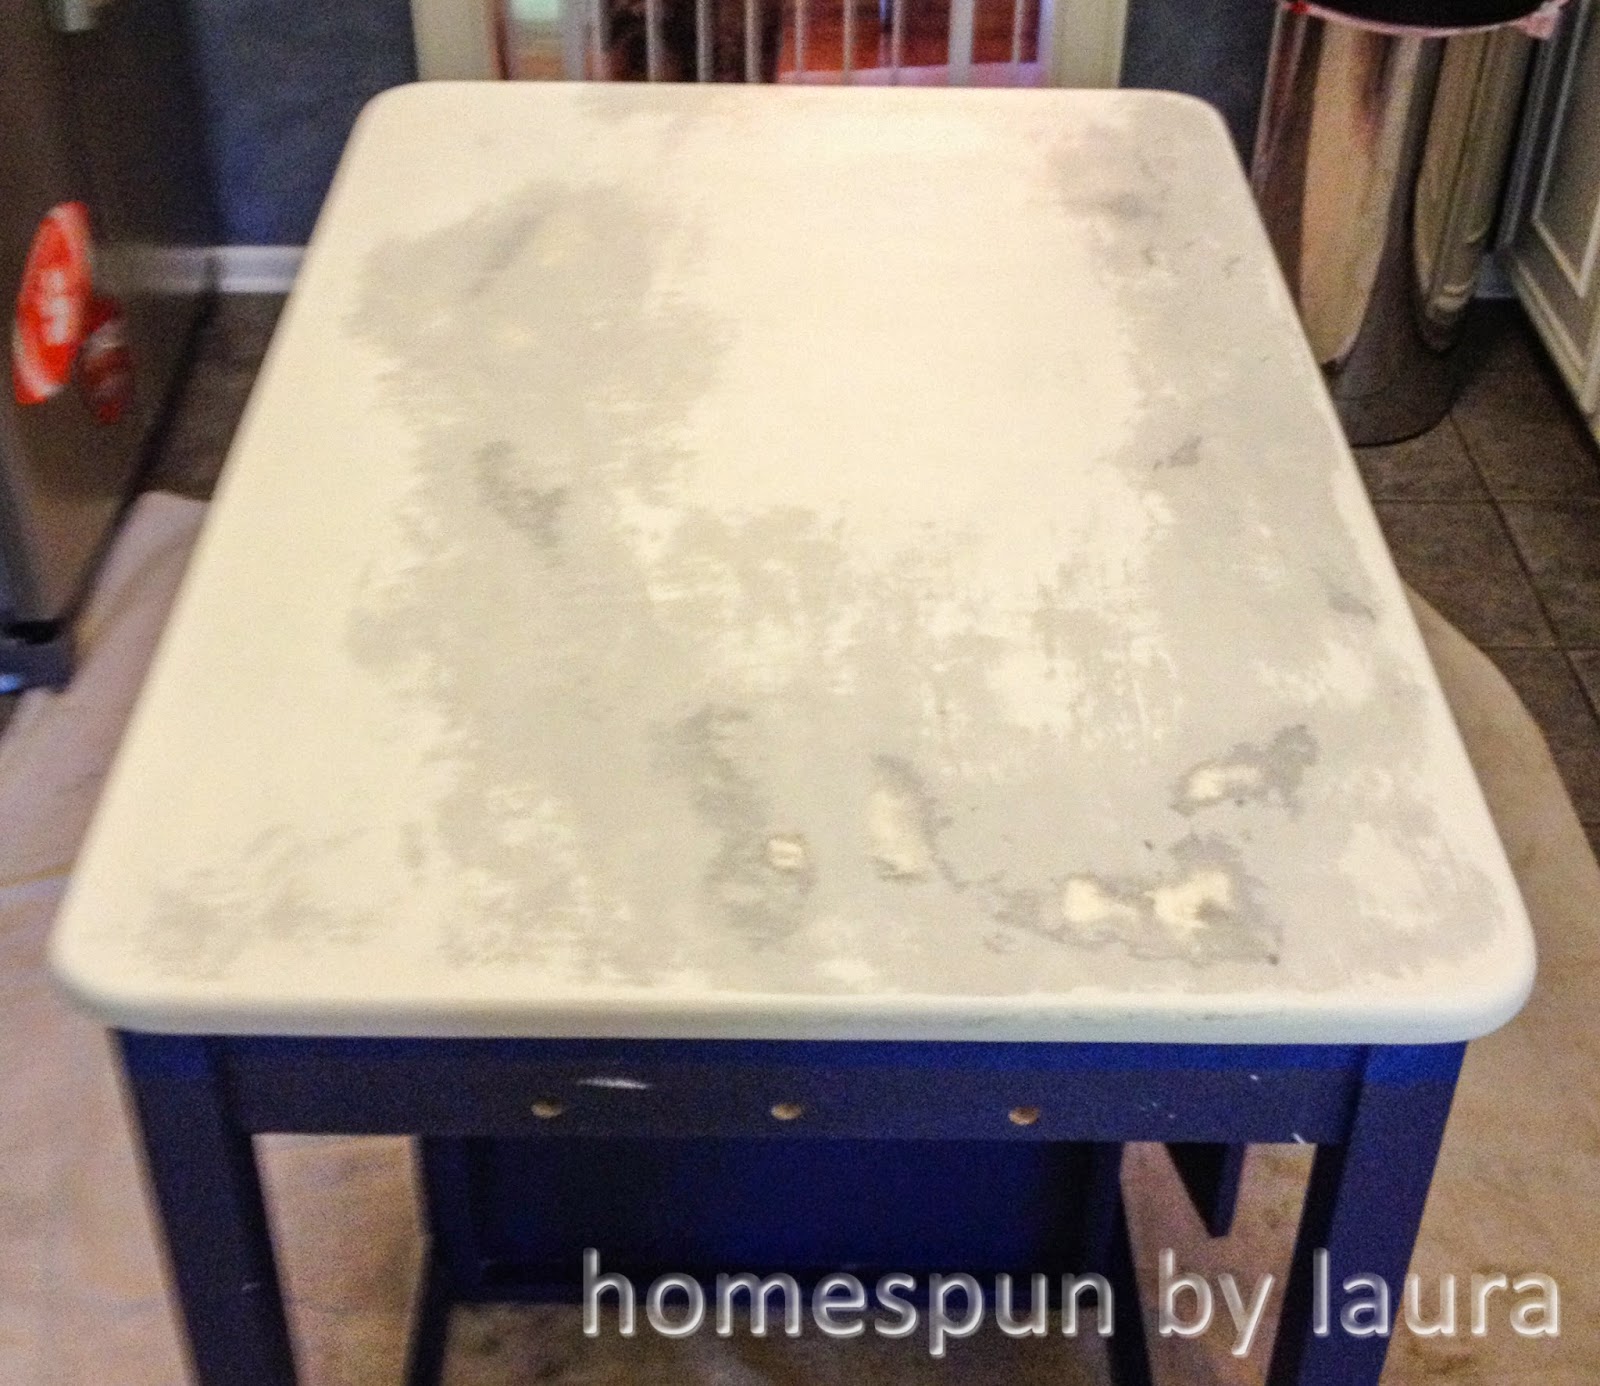
After settling on a paint color, I started with sandpaper. Lots and lots of sandpaper. We have an electric sander but for some reason it didn’t occur to me to use it – probably because I never had before. So I sanded for a REALLY long time. As you can see in the ‘before’ photos above, I tend to use the same side all the time – all that use and cleaning had really worn down the finish, so that side required much less sanding!
When I finally finished (and cleaned all the dust off of the counters, stove, dogs, and myself), I taped off the edges under the counter and covered its surface with the countertop paint. In hindsight, I probably just needed a bit of white primer, but it’s too late for that now!
 |
| Just getting started |
 |
| Got it covered |
 |
| Caution: countertop paint has a super strong smell |
The paint required 3 days to dry, so I took some time to catch up on laundry from our trip that I had been neglecting and cleaned the house.
At the end of the 3-day drying period, I taped off the bottom and pulled out the paint I had decided on, Enchanted Navy, and got to work painting the base. It required 2 or 3 coats to make sure all the little nooks and crannies were covered.
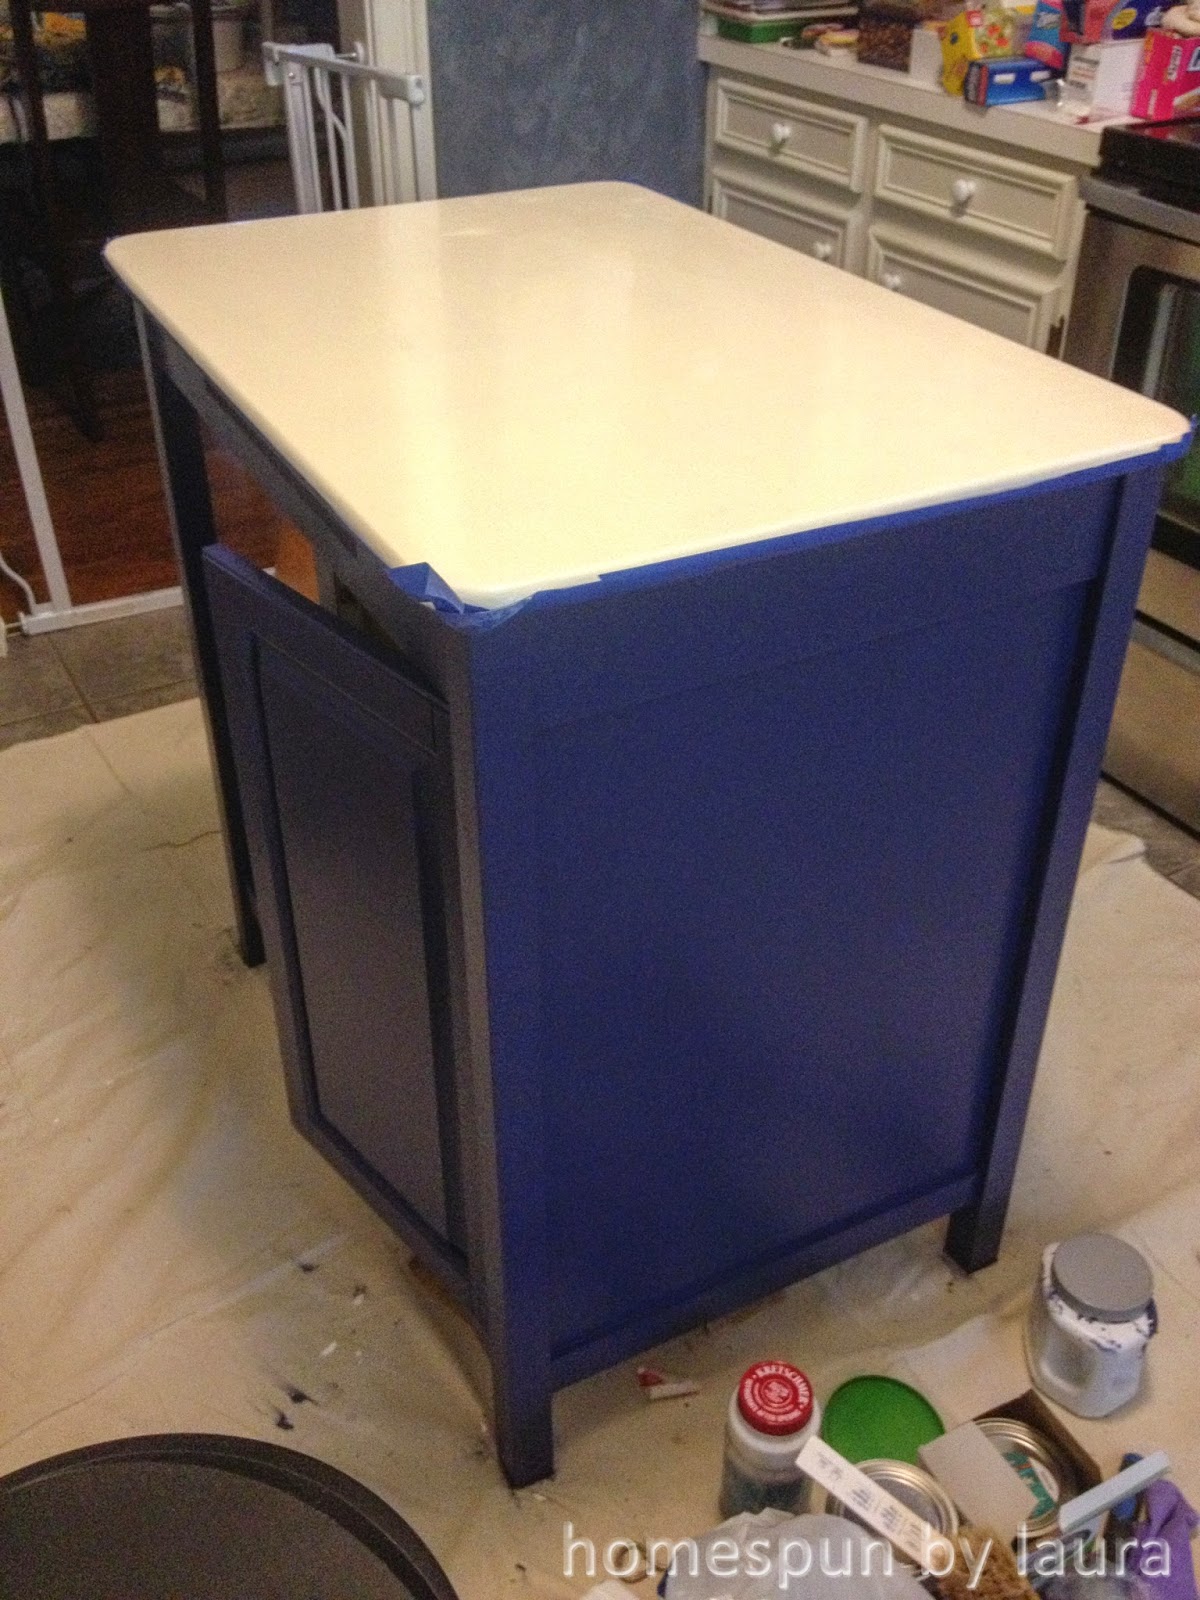 |
| It’s starting too look pretty!! |
Once it was dry, I got to mixing up the colors for the marble design. I used a dark white, light gray, and medium gray, and followed the tutorials I’d found to the best of my ability.
 |
We have a marble-top cabinet that was once my grandmother’s.
I carried the top outside and used it as a guide while I mixed colors. |
I wasn’t at all satisfied with my first attempt, plus, the paint started cracking! I still don’t know exactly what caused it – whether I went too thick with the countertop paint, or if maybe the humidity was too high when I applied it, or if it was the fact that I’d added water to the acrylic paint I used to paint the marble design, as the blogs I’d read suggested, or even the fact that I painted the marble design in the garage, where humidity would have been higher than in the kitchen.
 |
| I wasn’t a fan of the outcome on my first attempt |
I first tried painting over it with some white acrylic paint, but the cracking came through that layer, too, so my only option was to sand it down and start over.
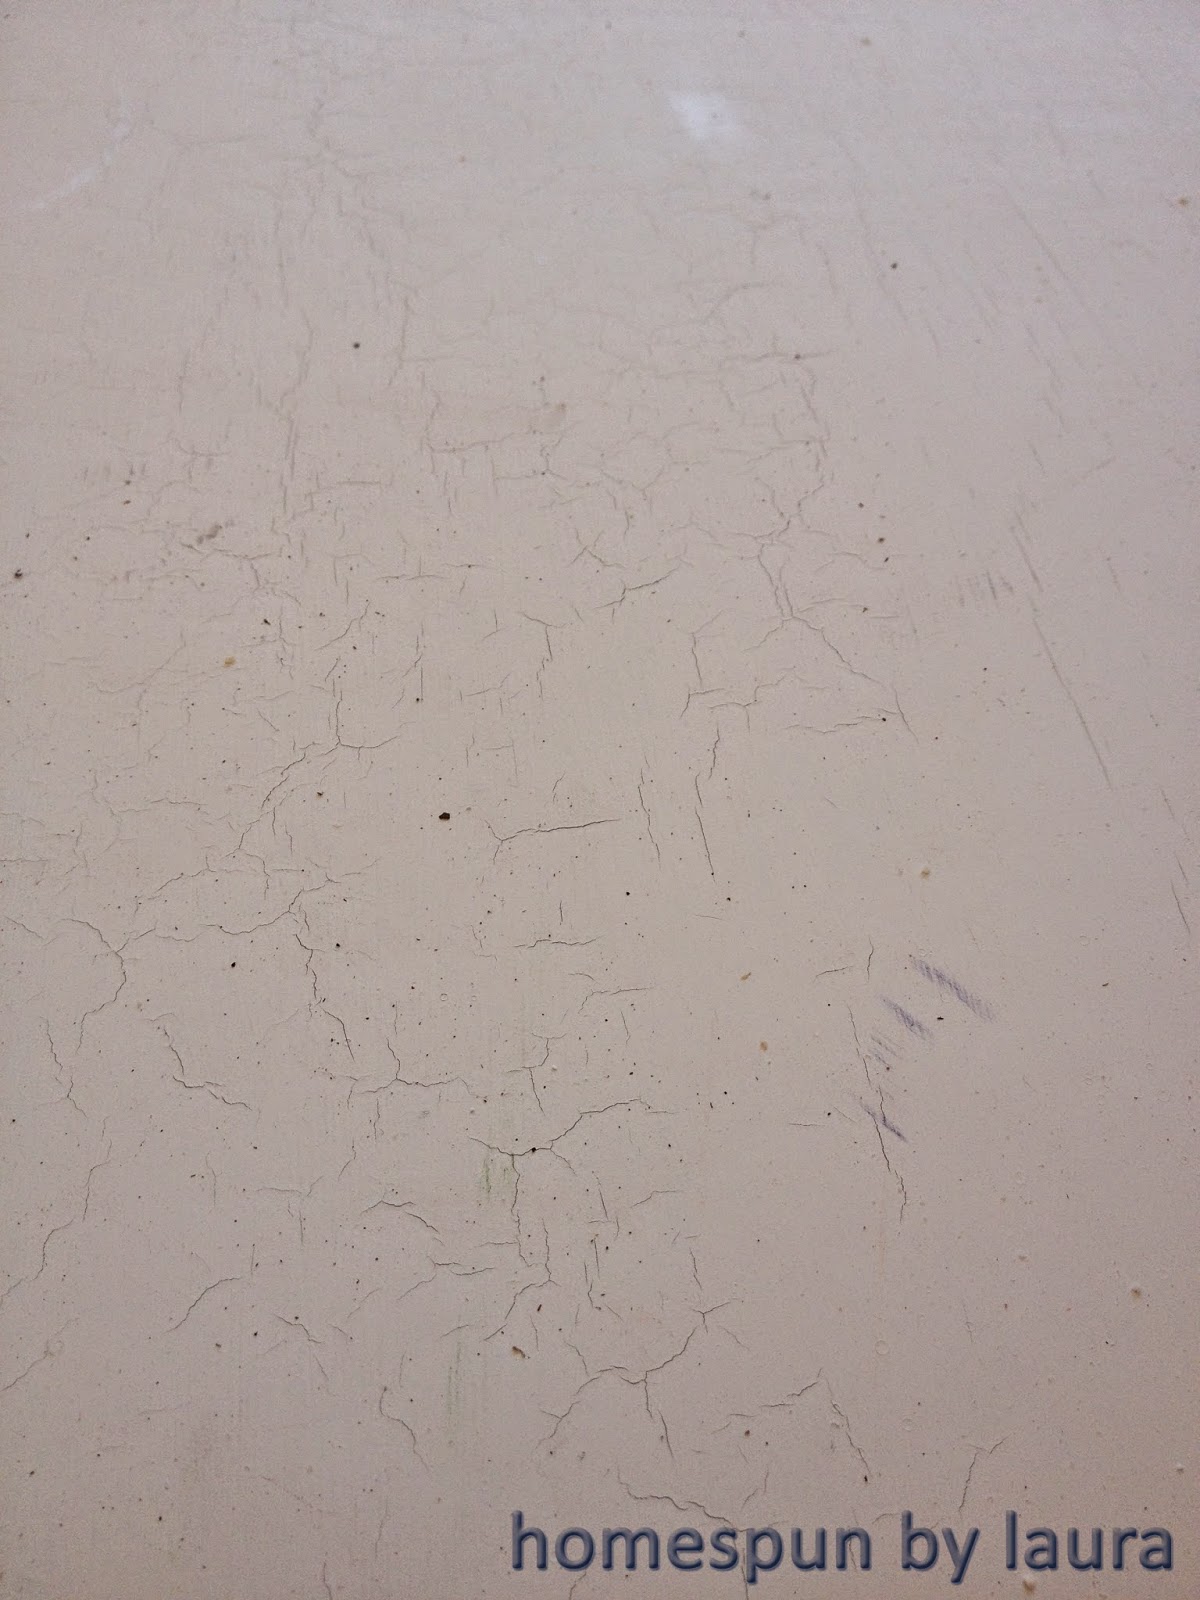 |
| Cracking paint!! |
So the Mister showed me how to use the power sander, and I started over with a thin coat of the countertop paint.
 |
| Getting a fresh start |
It doesn’t look like much here, but the surface was smooth and ready for a new coat of countertop paint.
 |
| Ugly! |
During my second 3-day waiting period, I painted the wooden hardware with some glossy white paint.
 |
To make sure I got an even coat on all the knobs, I screwed them onto a piece
of thick cardboard, which kept them upright while I sprayed them. |
After the countertop paint had settled 3 days later, I gave the marble technique another shot.
 |
| The base layer of the second attempt was far better than the first attempt |
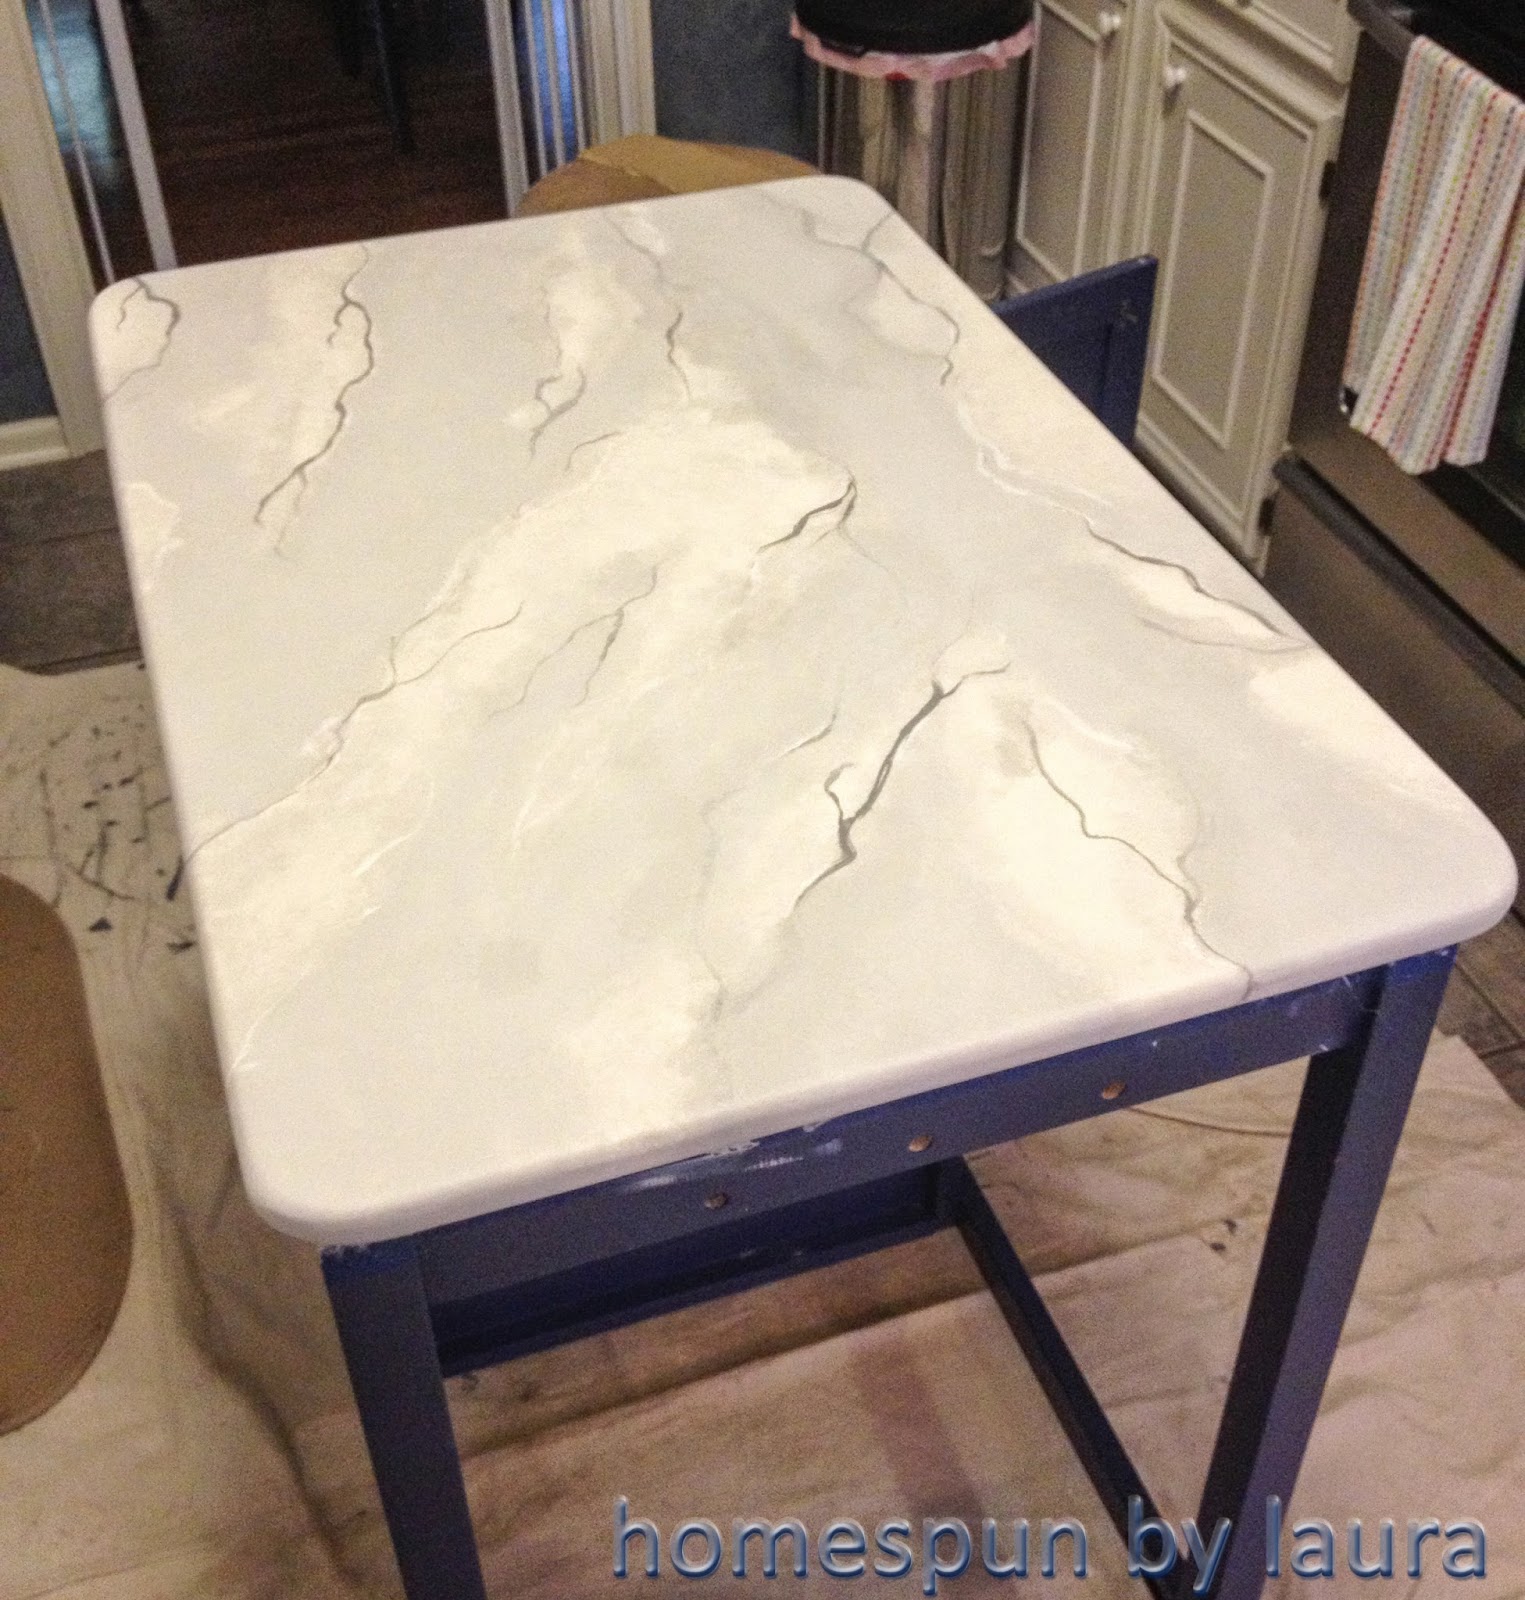
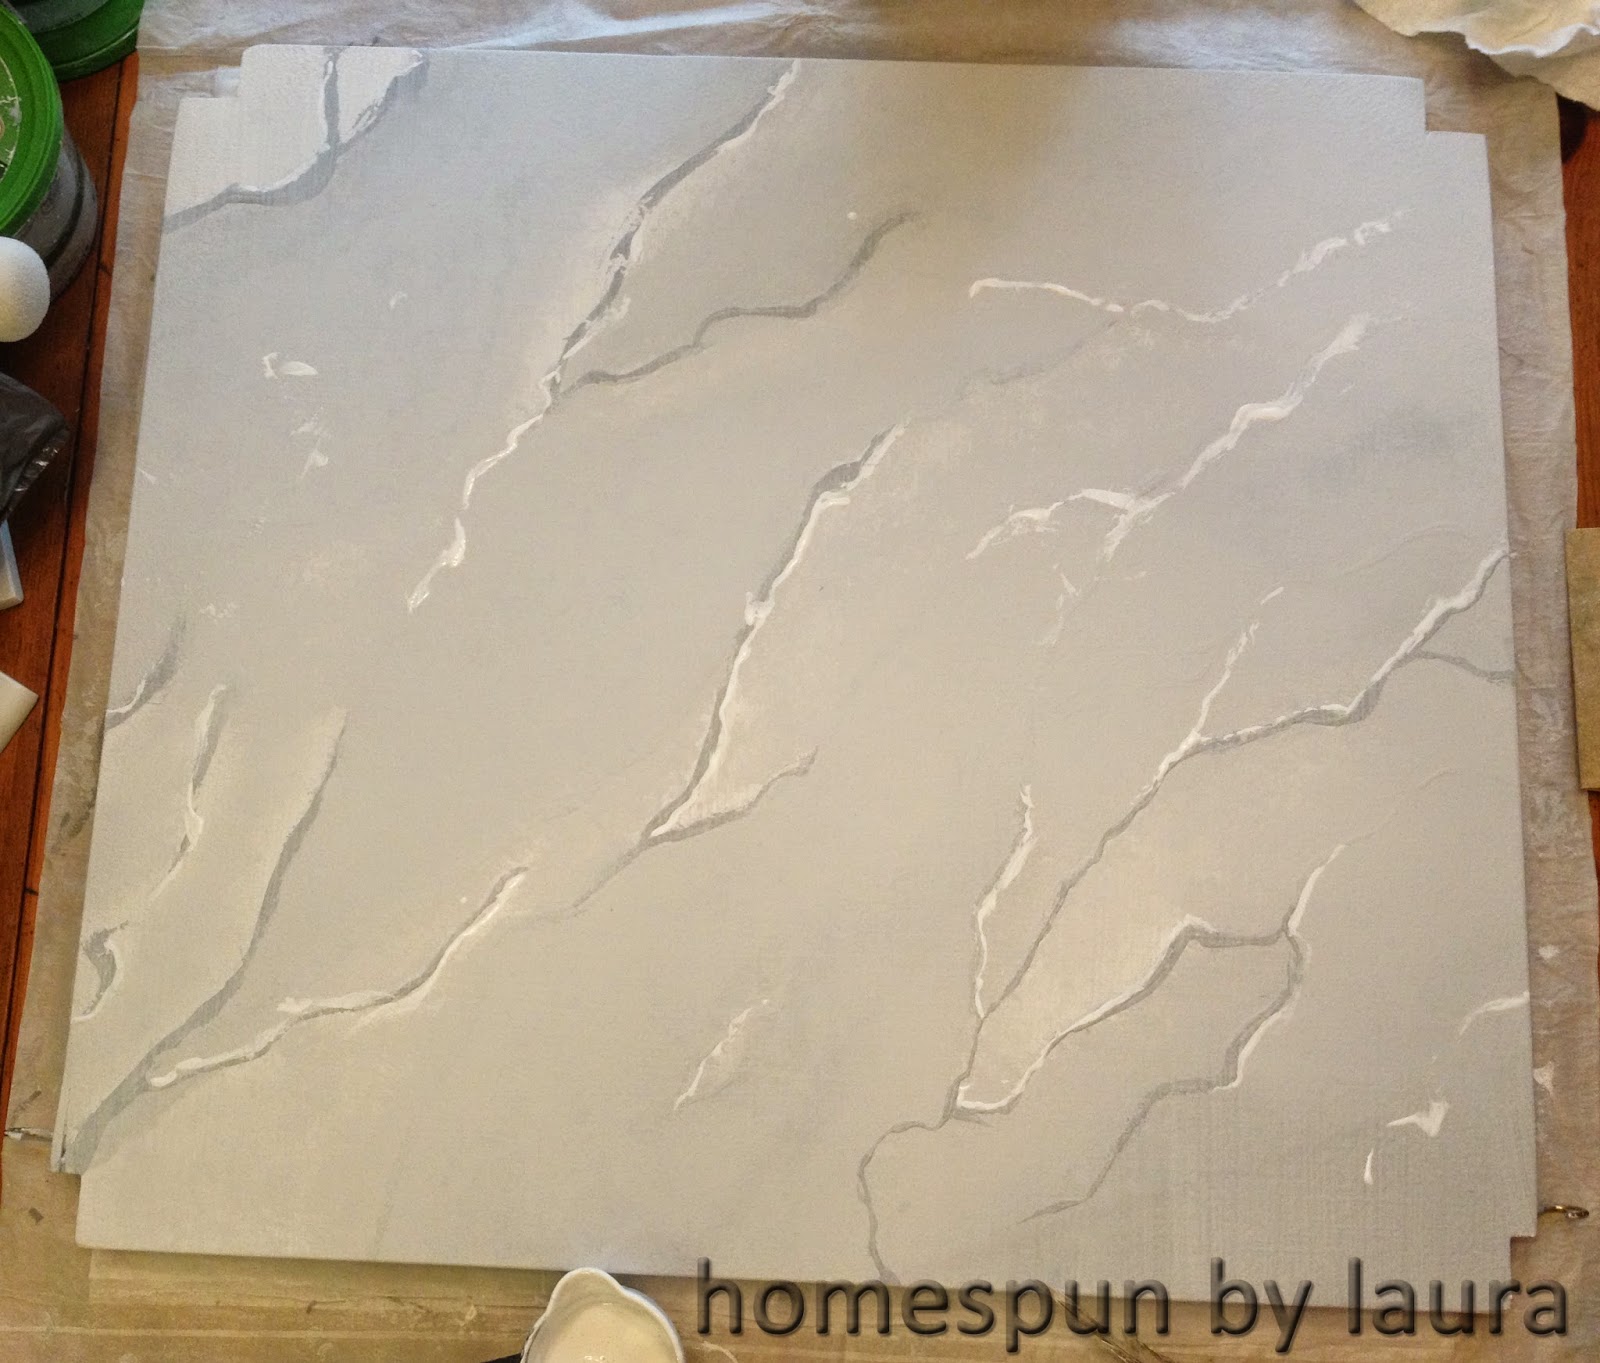
After getting the base of light and medium gray down, I went back and added some veins, sometimes sponging over them with lighter gray to make them look farther away, like real marble looks.
After I was finished with the veining, it all just looked too dark to me.
 |
| Getting there! |
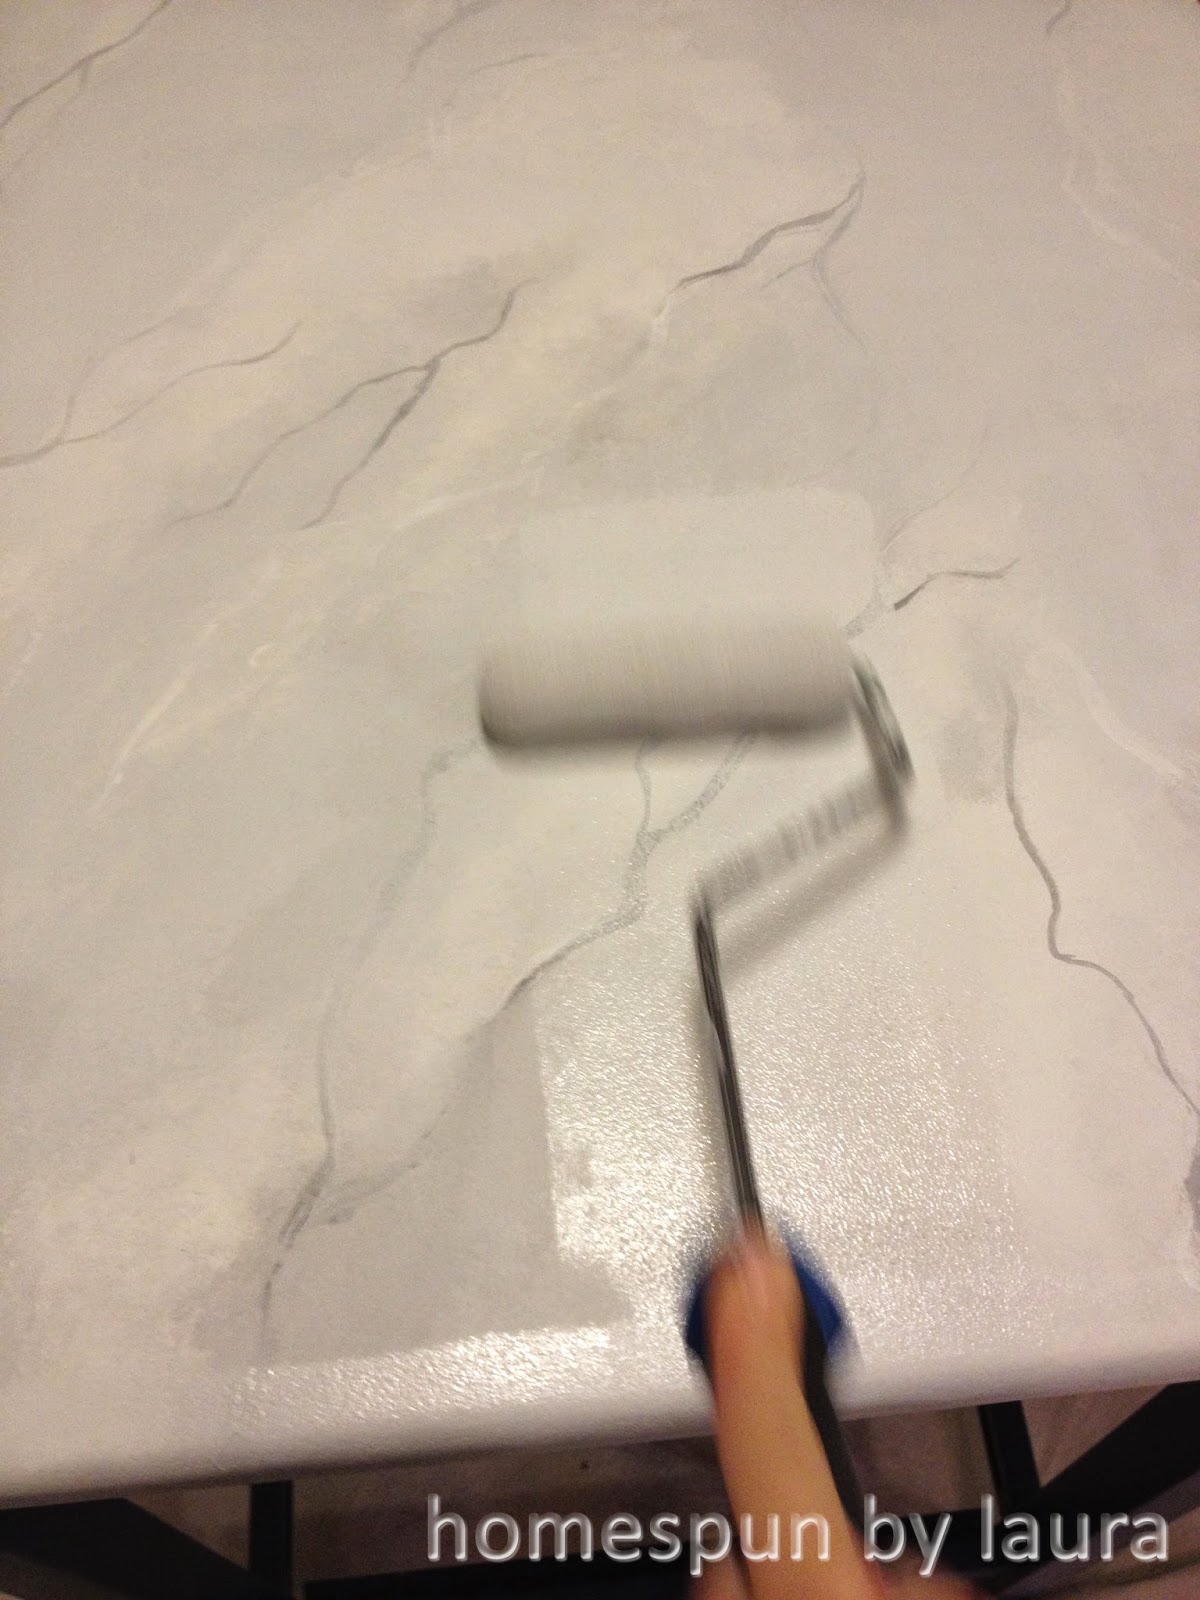
I wanted it to look similar to the piece from my grandmother’s cabinet, which has very faint veins, so I decided to roll a very thin layer of white paint over the entire surface to tone it down and was very happy with the outcome.
 |
| Lighten up! |
 |
| Much better!! |
The acrylic paint dried pretty quickly, but I let it sit overnight so I could make sure I was still satisfied with it the next day before moving on. The next morning, I was still happy with the outcome, so I got out the Polycrylic and put down a thick coat. I wanted to make sure my pretty paint job was well protected and could withstand the heavy use it would face.
Turns out, it was too thick. It took a LOOONG time to dry to the point that touching the surface to test it didn’t leave a fingerprint. Even three weeks later, putting a plate down on it for only a few minutes would leave a little ring, which would even out and disappear after a few hours. It did finally dry to the point that it could hold up to normal use after a couple of months. For such a heavily used countertop space, it made food preparation a bit challenging during that time. But was all worth it in the end.
The shelves and drawer came next. One shelf and the drawer got a few coats of Enchanted Navy, and the other three shelves got a coat of primer (that turned out to be gray, not white like I’d expected – oops!). Two of those shelves went inside the cabinet, so I just left them.
 |
| I had to lock the little dogs out of the kitchen during the painting process |
The third shelf is visible, so I repeated the faux marble technique on it. Since I started with gray as a base for it instead of white, it turned out a bit darker, but it has a couple of baskets covering it and it’s not that obvious how different it is from the top.
 |
| Marbled shelf |
The last step was to put a layer of Polycrylic over the navy paint on the base so I’d be able to clean it when needed. The navy sample I got was huge (a quart!), so I had enough paint (which came in eggshell) to cover the whole piece and decided against buying another quart in semi-gloss. I used a MUCH thinner coat of the Polycrylic, and it dried overnight.
I was really happy to remove the island contents from the dining room table when I finished painting!
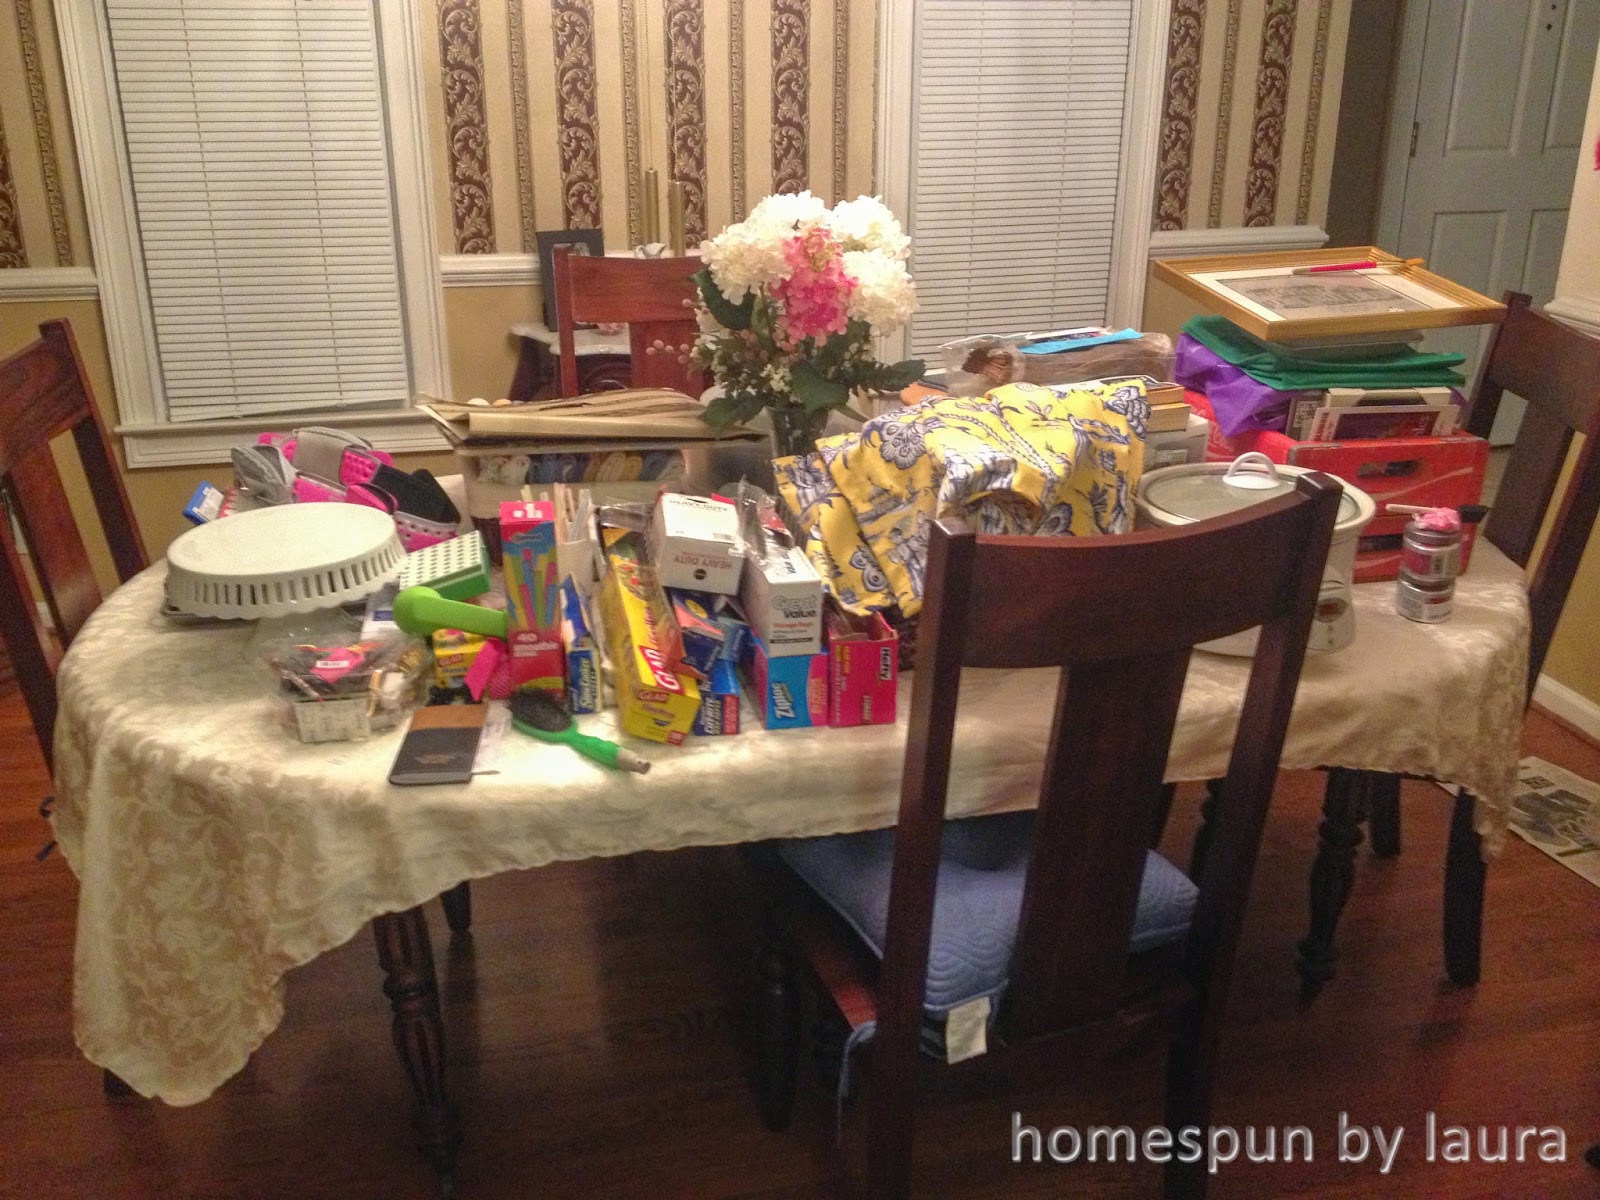 |
Going into the dining room every time I needed a baggie or
tin foil got old after a few days |
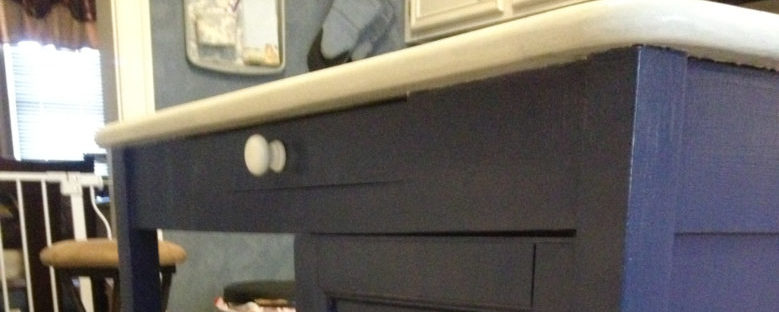
You’re always going to be your own worst critic, but even so, I’m pretty happy with the outcome of this one – redo and non-drying Polycrylic included – and it’s holding up well almost a year later! It has stumped a few friends and family members who’ve seen it – since it’s wood and not cool to the touch like real marble, it takes them by surprise. If you don’t look closely at it or touch it, it really is hard to tell.
Last month, I picked up a little bouquet of yellow pom pom flowers while I was getting groceries, and they made a nice addition to the kitchen for a couple of weeks. They lasted a surprisingly long time for $4 flowers and added a little something extra to these after pictures:
Time: 2 weeks start to finish (~5 work days)
Total Cost: ~$40
Thanks for reading!

Thank you for your pins, shares, tweets, and likes!