


Since this is the fifth time I’ve participated in the One Room Challenge, I should have known it would be an impossible challenge to complete within the allotted time frame while simultaneously caring for a newborn baby.
When the ORC began in early October, I had a four week old baby weighing in under 6 lbs, wearing Preemie clothing. Now at its completion, she’s ten weeks, over 9 lbs, and moving from Newborn to 3 month clothes! Of course, with fattening up a teeny, tiny baby as my primary focus, the room is not 100% complete, but we’re making progress.
Warning: This post contains unedited photos of an unfinished room taken by an unrested new mom. 🙂
To quickly recap the project, I’m creating a gender neutral vintage toy themed nursery (with a few easily reversed girly touches) for our two month old daughter and any subsequent children that may come along. We moved into our house less than three months before she arrived, so our main focus for her bedroom (and the rest of the house!) was to create a functional space without worrying much about how it looked. Now that she’s here, I’m taking her room from functional to fun!
Welcome to my reveal for this fall’s One Room Challenge! The One Room Challenge is a six-week-long event where participants focus their efforts on making big changes in one room in their house. It’s a lot of fun and a lot of stress – but even if (when!) you don’t finish your space, the camaraderie sure helps push you along!

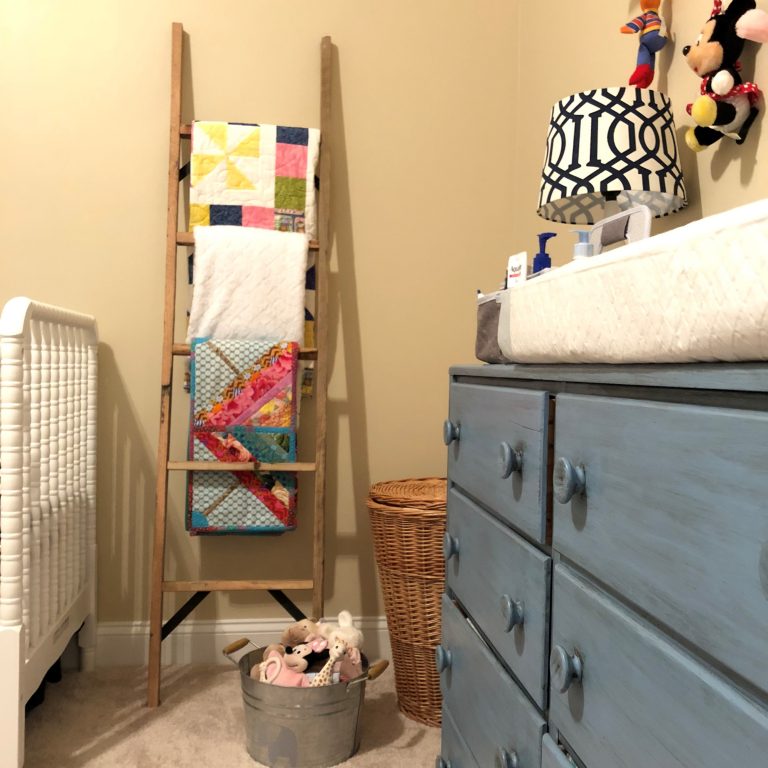
An amazing ladder made from salvaged wood displays two of the beautiful handmade quilts we were fortunate to receive.
Vintage Toy Gender-Neutral Nursery
I never knew exactly how much an infant turns your life upside down and inside out until I had one of my own, so I had no clue that it would be utterly impossible to complete some pretty basic items on my to-do list. That said, in hindsight, I’m pretty excited with the progress we’ve made in the room and looking forward to working on the rest in the coming months.
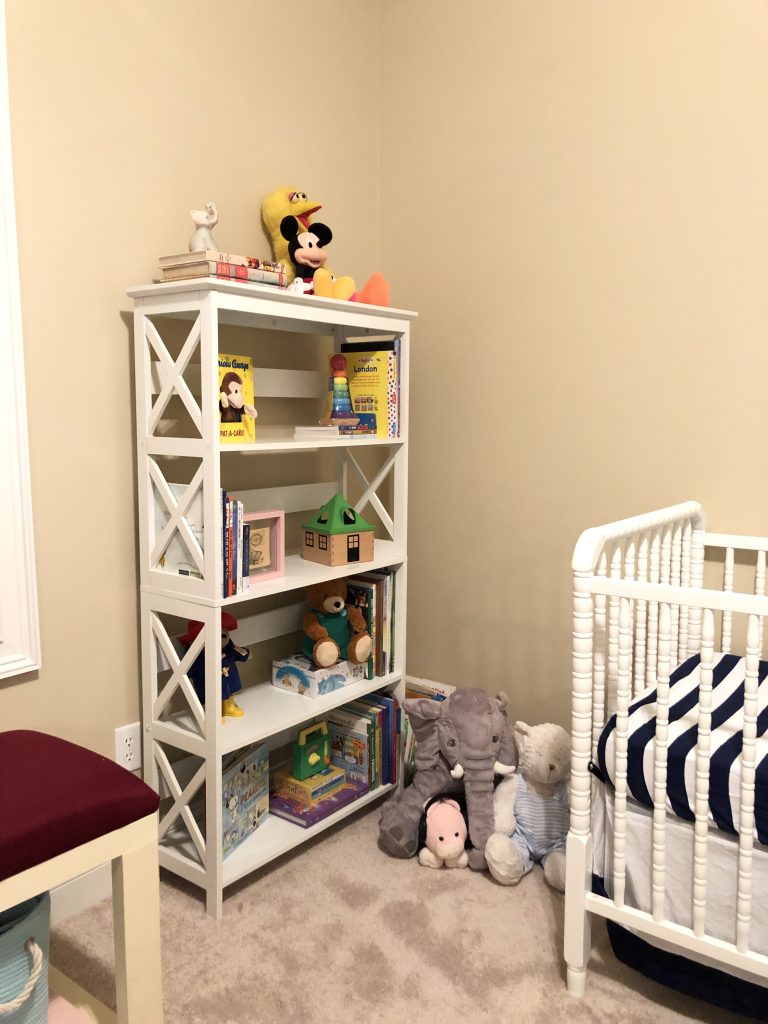
Purchase old children’s books at thrift store to use as art. I didn’t have much luck at the first thrift store I tried, but I hit the jackpot at the second one. I left twelve bucks behind as I sauntered out with a huge box of children’s books in varying conditions. I wound up with several duplicate sets of books so chose the ones in poor condition to cut up to use for art. So far I’ve only incorporated the books in a few places, and it looks great so far.
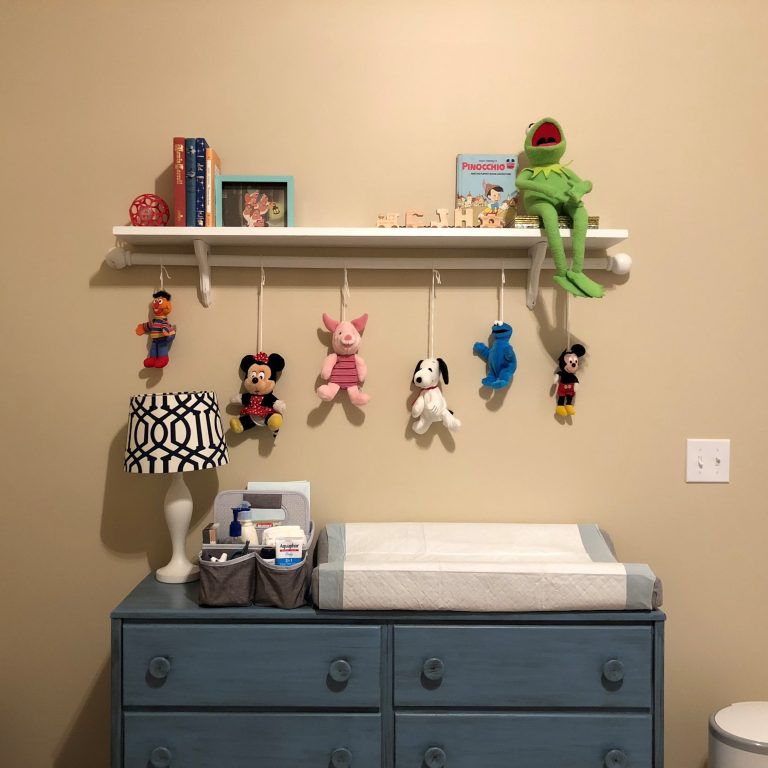
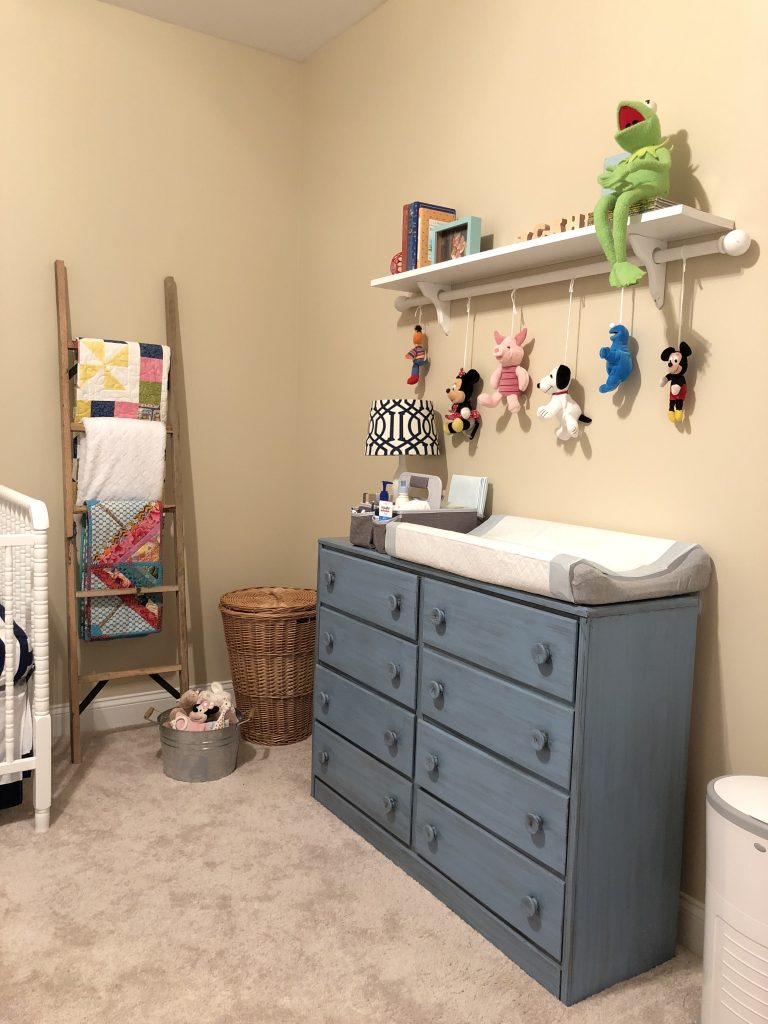
The dresser her great-grandmother antiqued in the 80s is just large enough to serve as a changing station, eliminating the need for excess furniture.
Create a vintage toy lamp with ribbon trim on lampshade. Putting this one under the ‘success’ category might be stretching it a little… I did get the ribbon onto the lampshade after keeping it on the goals list two or three weeks in a row. The ‘toy’ part of the ‘vintage toy lamp’ is a little lacking at the moment…there are precisely 3 (yes, three) sad little toys hanging out at the bottom of it because that’s all I can locate in the mess of boxes. When I find the box containing the ziplock bag of my old toys, I’ll load them into the base, too.
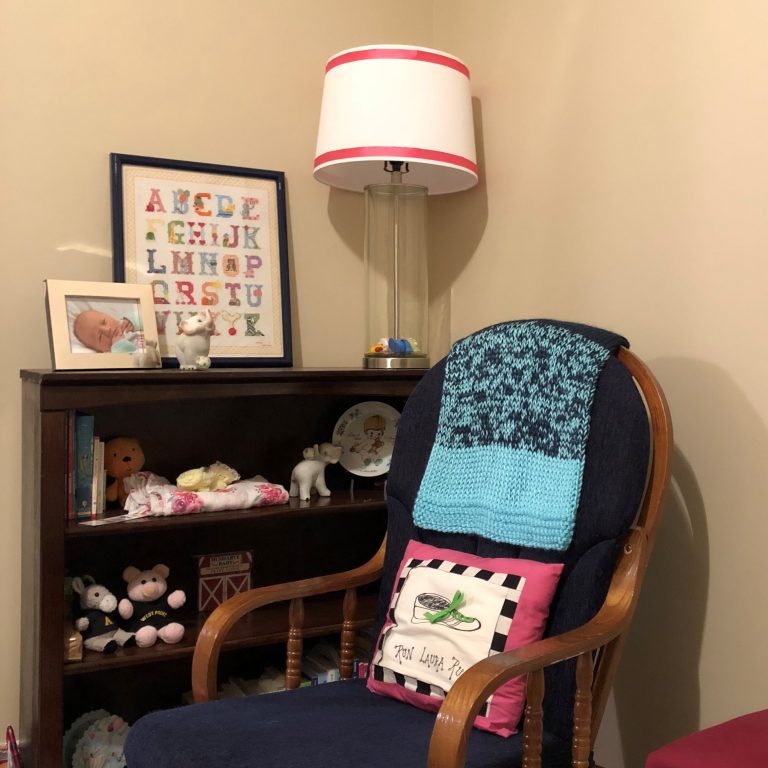
I might have tossed a few random things that were scattered on the floor onto the bookshelf, forgotten about them, and then taken photos of it to share on the internet. 🙂
Buy or DIY a ladder to hang blankets. I about thought I wasn’t going to find what I wanted within my target price range – and I definitely wasn’t going to get around to DIY-ing a ladder anytime soon – when I found the perfect ladder precisely at the top of my budget. Last weekend, the Vintage Market Fair (a traveling market featuring antiques and handmade goods) came to Columbia, and I managed to sneak away for a few hours to take a look around. In addition to the ladder, I also found a new desk chair, which I’ve been searching for for some time. Double success!

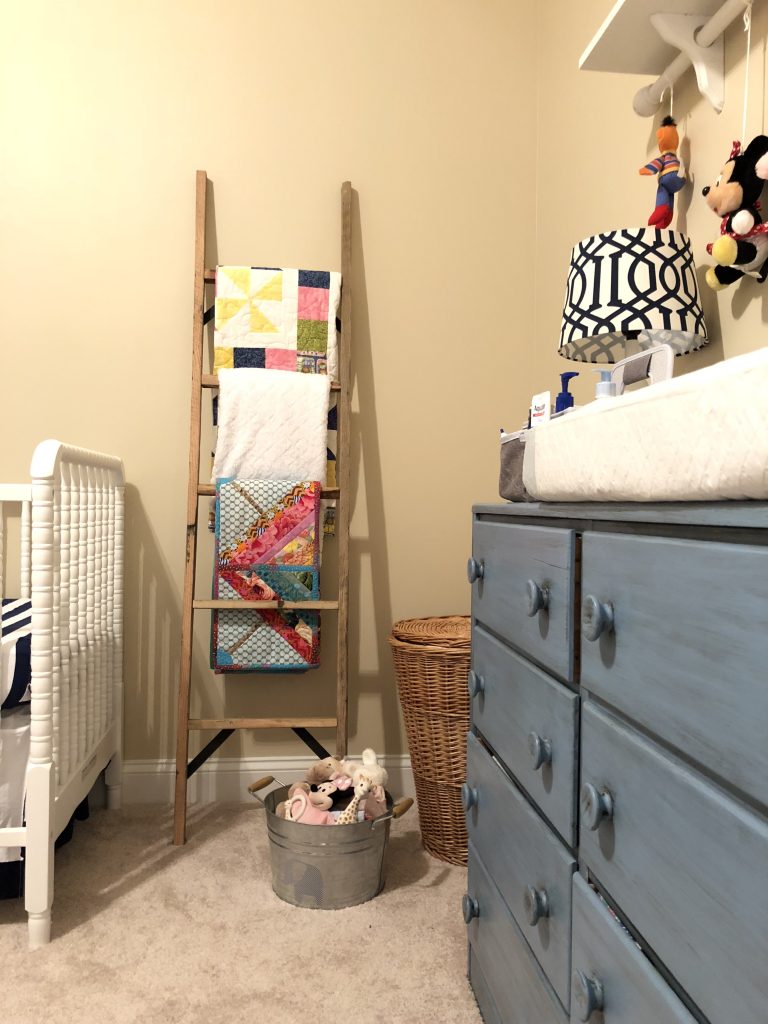
The craftsman who made this ladder is old-school: instead of business cards or a website, he had a printed piece of paper with his phone number and email address at his booth!
Use DIY Medal Display Shelf from old house to display toys, photos, and art over dresser/changing table. The original plan for this shelf was to use it as a curtain rod with a display above it, but the window is too wide. Plan B: use it on the opposite wall instead. It wound up being the perfect place to display some toys and books more visibly, and even provided a rod from which to hang an easy DIY mobile – a last minute addition to the plan – just as Little Miss was starting to notice hanging objects. Right now, Snoopy is her favorite to look at from her perch on the changing pad!
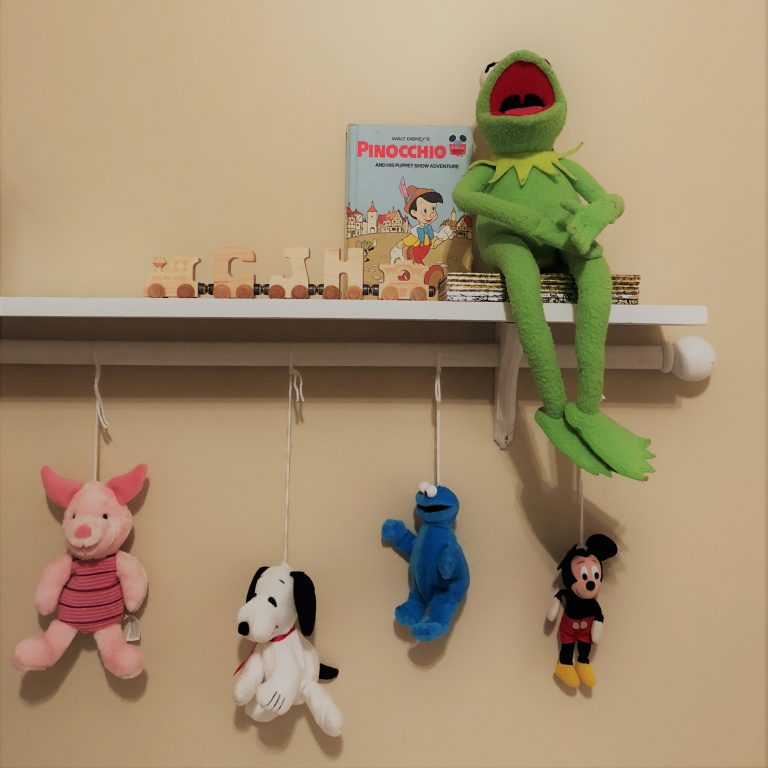
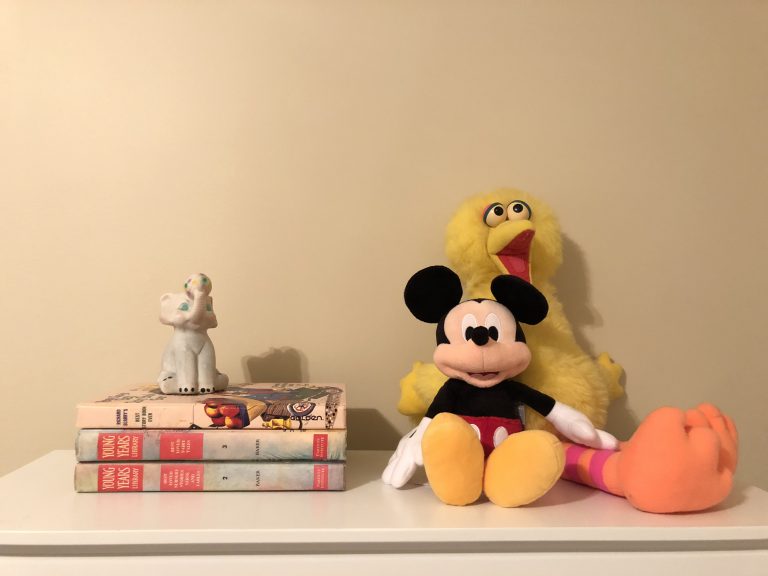
All the creatures you see here belonged to me when I was a child, and they live on in baby girl’s bedroom now. That Mickey is from one of my first trips to Disney World back in the late 80s!
Find a pretty keepsake box to store special papers, hospital bracelets, etc. I wanted to start this box before the pile grew too unwieldy. It doesn’t have a home yet, but the box contains some of the special items mentioned above.
Use blank wall in closet to create hairbow storage/display. The hairbow wall in the closet is probably my favorite part of the entire room so far. I love the girly twist, and one day if a boy ever lives in this room would be easy to convert to a Lego wall (like the one in this episode of Fixer Upper) or something equally awesome.

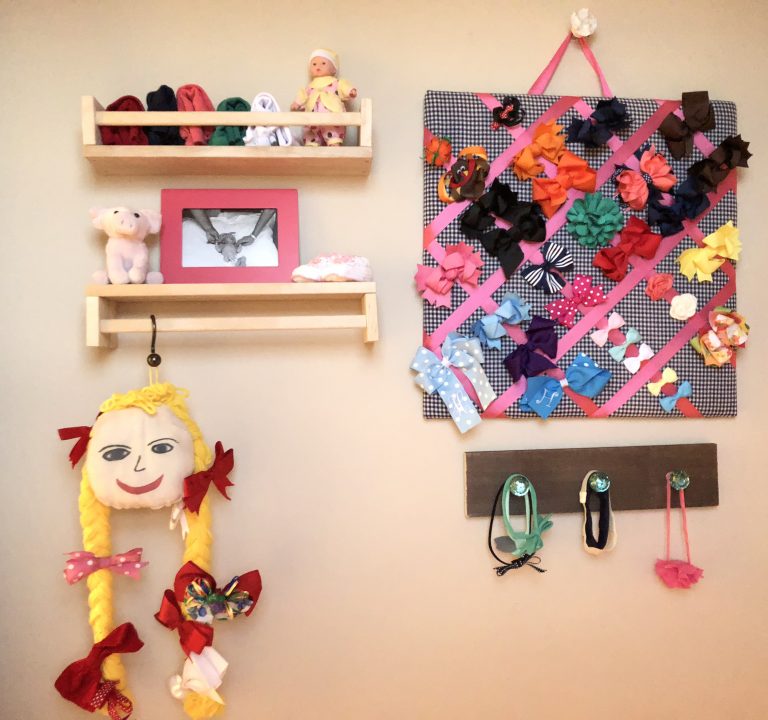
My mom made the hanging lady for my hairbows once upon a time. I always thought she was a little scary when I was a kid, but I think it’s pretty cool that she now hangs in my kid’s room!
Better organize the large but cluttered closet. Accomplished both by completing the hairbow wall and by sorting through the stuff that cluttered the floor and shelf above. And working our way through some of the diapers…
Replace light fixture. Change of plan. I decided that the fixture I ordered looked too small for the 10-foot ceilings in the room, so I sent it back. Unfortunately from its pictures on Wayfair, I couldn’t tell how small it was. I decided instead to do a cheap, easy DIY version of the same lamp at a savings of $50! Problem: When I went to Lowe’s yesterday, I forgot to buy the supplies. Oops. I blame my forgetfulness on lack of sleep.
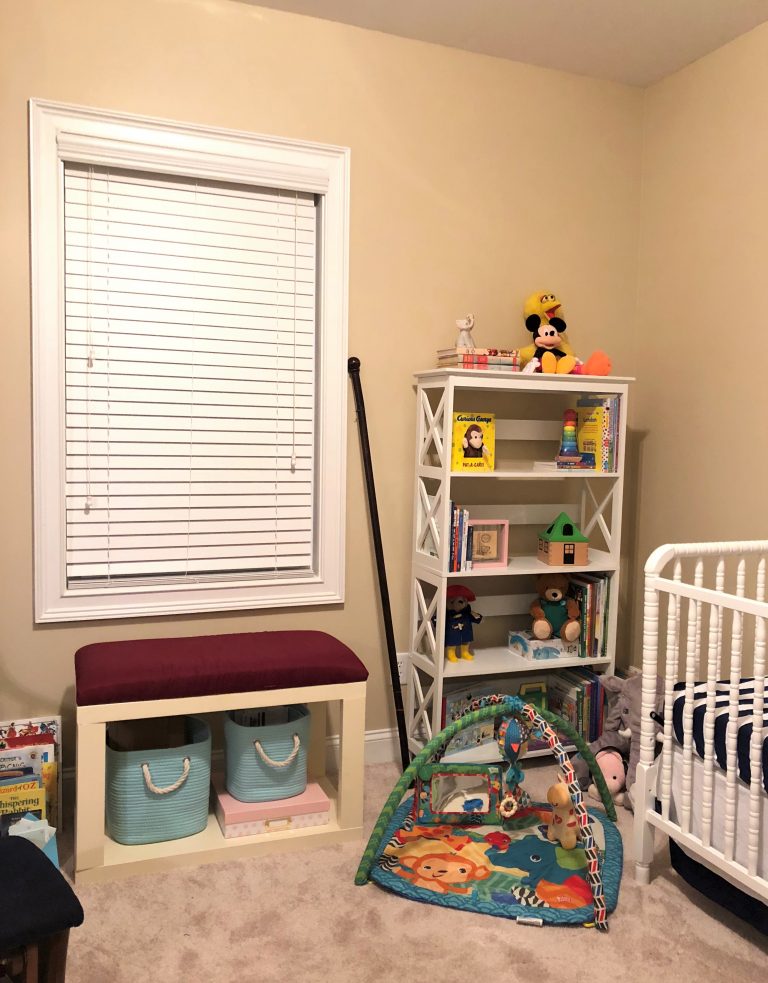
Find pretty bins to store toys, books, blankets, etc. in window bench. While I wanted to keep the cost of this room to a minimum to preserve money in our budget for diapers, wipes, etc., I did want to buy quality items that I actually like instead of settling for something cheaper. These fabric bins are sturdy and should hold up to use over the years. Plus, they’re washable!

What kind of a reveal post has no curtains hanging over the windows?! This one!
That leaves us with…
As an ‘after’, the photos below are a little lacking. They’re not incredibly Pinterest or Instagram worthy, but they were taken at night at the end of a long day, and they represent the best I could do with our new life circumstances!
I’ve never been one to make a design decision just for the sake of making it; I like to mull over my options until I’ve found the option I like best. Therefore, I have a big, blank wall of possibility above baby girl’s crib. I’ll also choose a wall color – and hopefully even paint it – in the coming months! Keep scrolling for a few more current ‘after’ photos and remaining my remaining to-dos.
I knew from the beginning that I wanted a white Jenny Lind crib. It’s the perfect vintage look for both our house and the room.
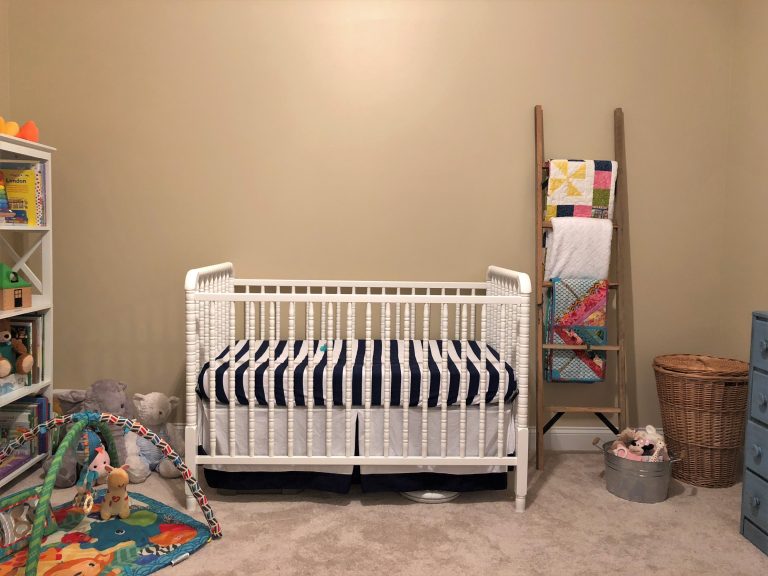

I had planned to lengthen the crib skirt to hide all the stuff we’re storing below it, but of course that remains on the wish list of items to do in the future. At the crib’s highest setting, this standard length skirt doesn’t quite do the job.
Good friends of ours happened to be at Disney World the day our little lady was born. When they got our news, they bought her first Mickey! I found the little elephant while antiquing in Waco, Texas a couple weeks after we found out about our little human.
Vintage toy gender-neutral nursery – items To Do by end of December (hopefully)
Six weeks seems like a long time until you give yourself a to-do list as long as your arm to complete while simultaneously holding an infant in said arm. Over the coming months and weeks, I’ll continue to work on the following items as I’m able. Hopefully, I’ll get the job done before her first birthday! That gives me 10 more months…:
- Paint and reupholster (or slipcover) glider – purchased for $15 at a neighbor’s yard sale years ago
- Paint and re-cover window bench
- Create an oversized piece of art to hang over crib
- Possibly add a rug to the center of the room
- Replace light fixture with either a ceiling fan or prettier fixture
- Select paint color; paint wall (keep eyes open for rebate at Lowe’s – often offered around holidays like Columbus or Veterans’ Day)
- Create rubber ducky themed bathroom featuring souvenir rubber duckies and décor items left over from my college bathroom
- Various other small DIY projects, including:
-
- hang and lengthen curtains (ceilings here are higher than at our old house),
-
- sew a second changing pad cover
- Dream idea: reconfigure closet interior with DIY wood shelving to better utilize the space
until next time…
I hope to choose another room in our new house to focus on in the Spring One Room Challenge. I have no idea at this time which room that should be, but I’ve got about 6 months to decide. In the meantime, don’t forget to take a look at the other great One Room Challenge projects! Most of them have a true reveal for you to see… 🙂


Now that the six weeks are over, I’m going to push my to-do list to the back burner and enjoy sitting on the couch with my baby girl just a little bit more – I’ll never look back and wish I’d completed her room more quickly, but I will wish I’d taken every opportunity to snuggle with her while she’s tiny.
Thanks for stopping by…and come back again soon to check out our progress in the Vintage Toy Gender Neutral Nursery over the next few months!
Laura
This post contains affiliate links, which means I make a small commission at no cost to you if you purchase an item seen here. Hosting a website isn’t free, and I thank you for helping to keep Homespun by Laura on the internet!