What started out as a poorly configured beige box of a closet is now a beautiful, colorful, & moody space doubling as functional storage and a mini playroom for our 1-year-old daughter. Want to create a DIY closet shelving system of your own? Read on to find out how we maximized both the space and style in this builder grade closet!
*******************
I want to hang out in this closet all day.
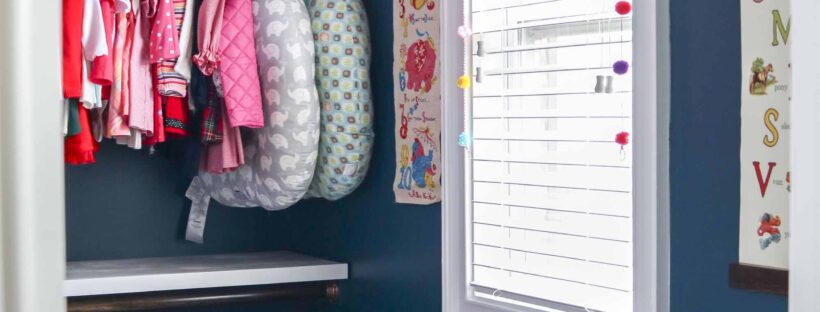
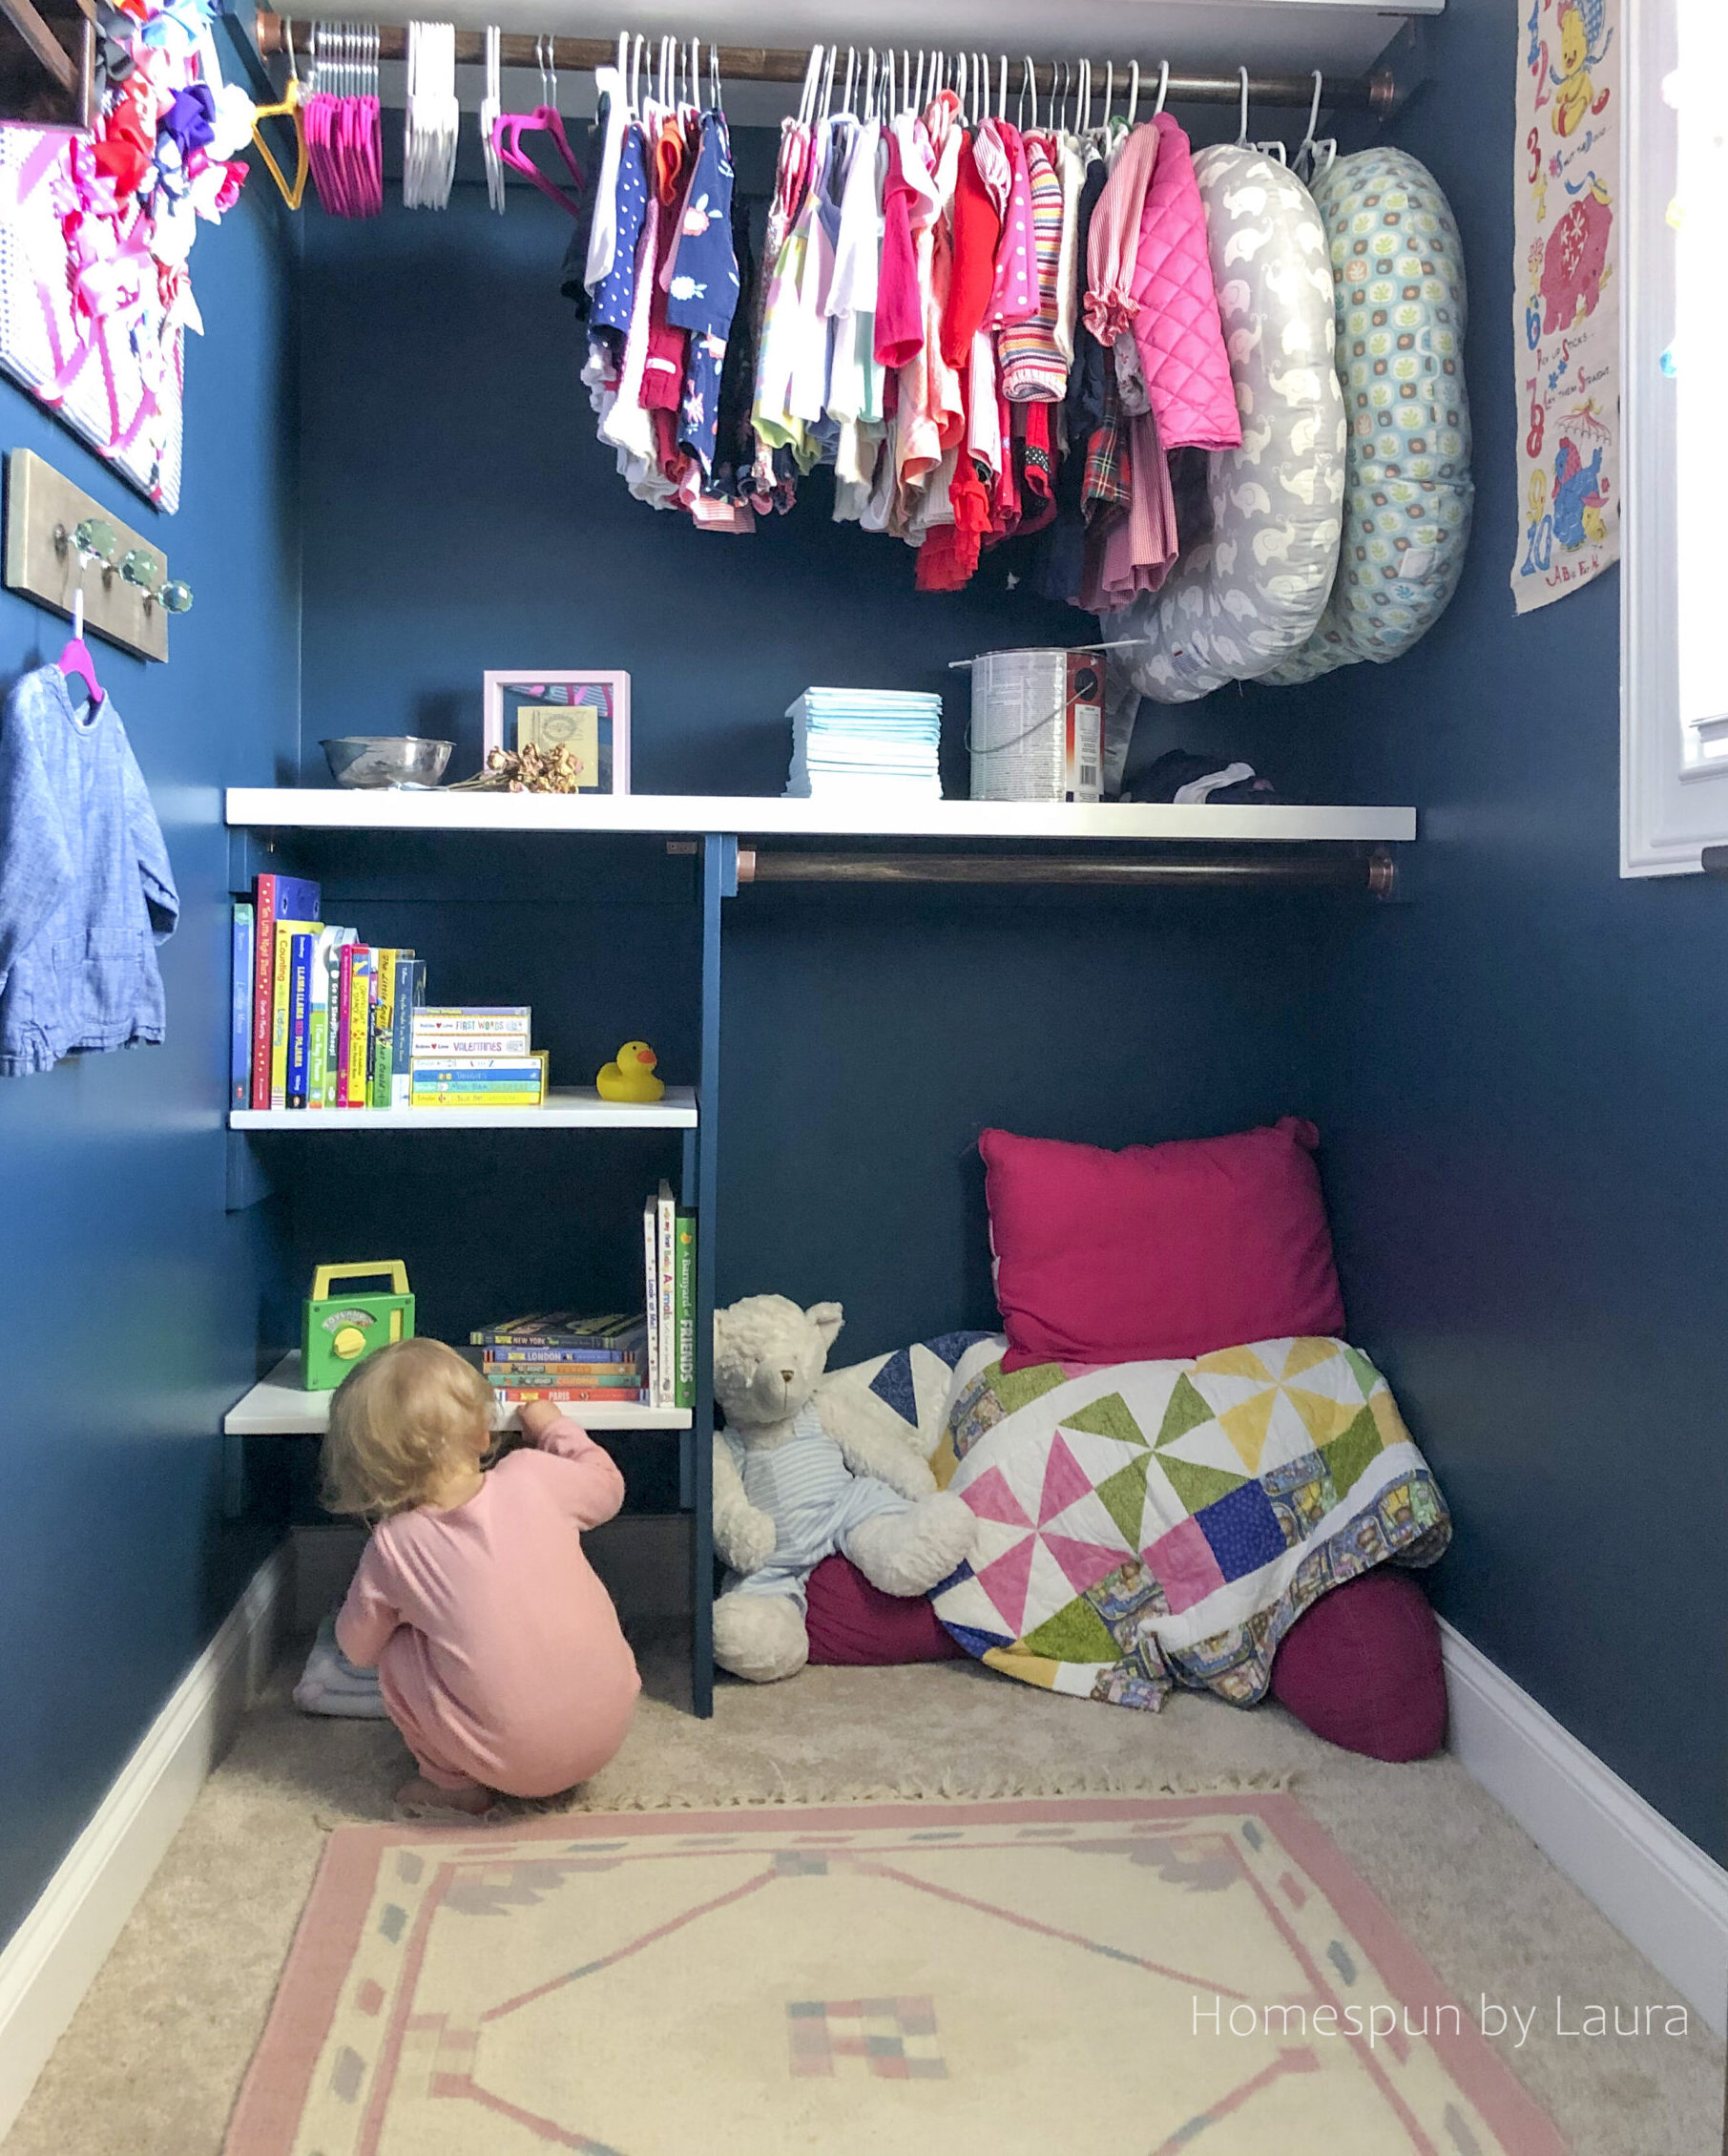
The DIY closet shelving system we created in our daughter’s closet has significantly improved both the function and style of her bedroom, and it’s seriously my favorite place to hang out in our house. Since it’s the nursery closet, so that probably sounds a little bit weird. I’d tell you why I love it so much, but I think these two photos will explain it better than my rambling words could:
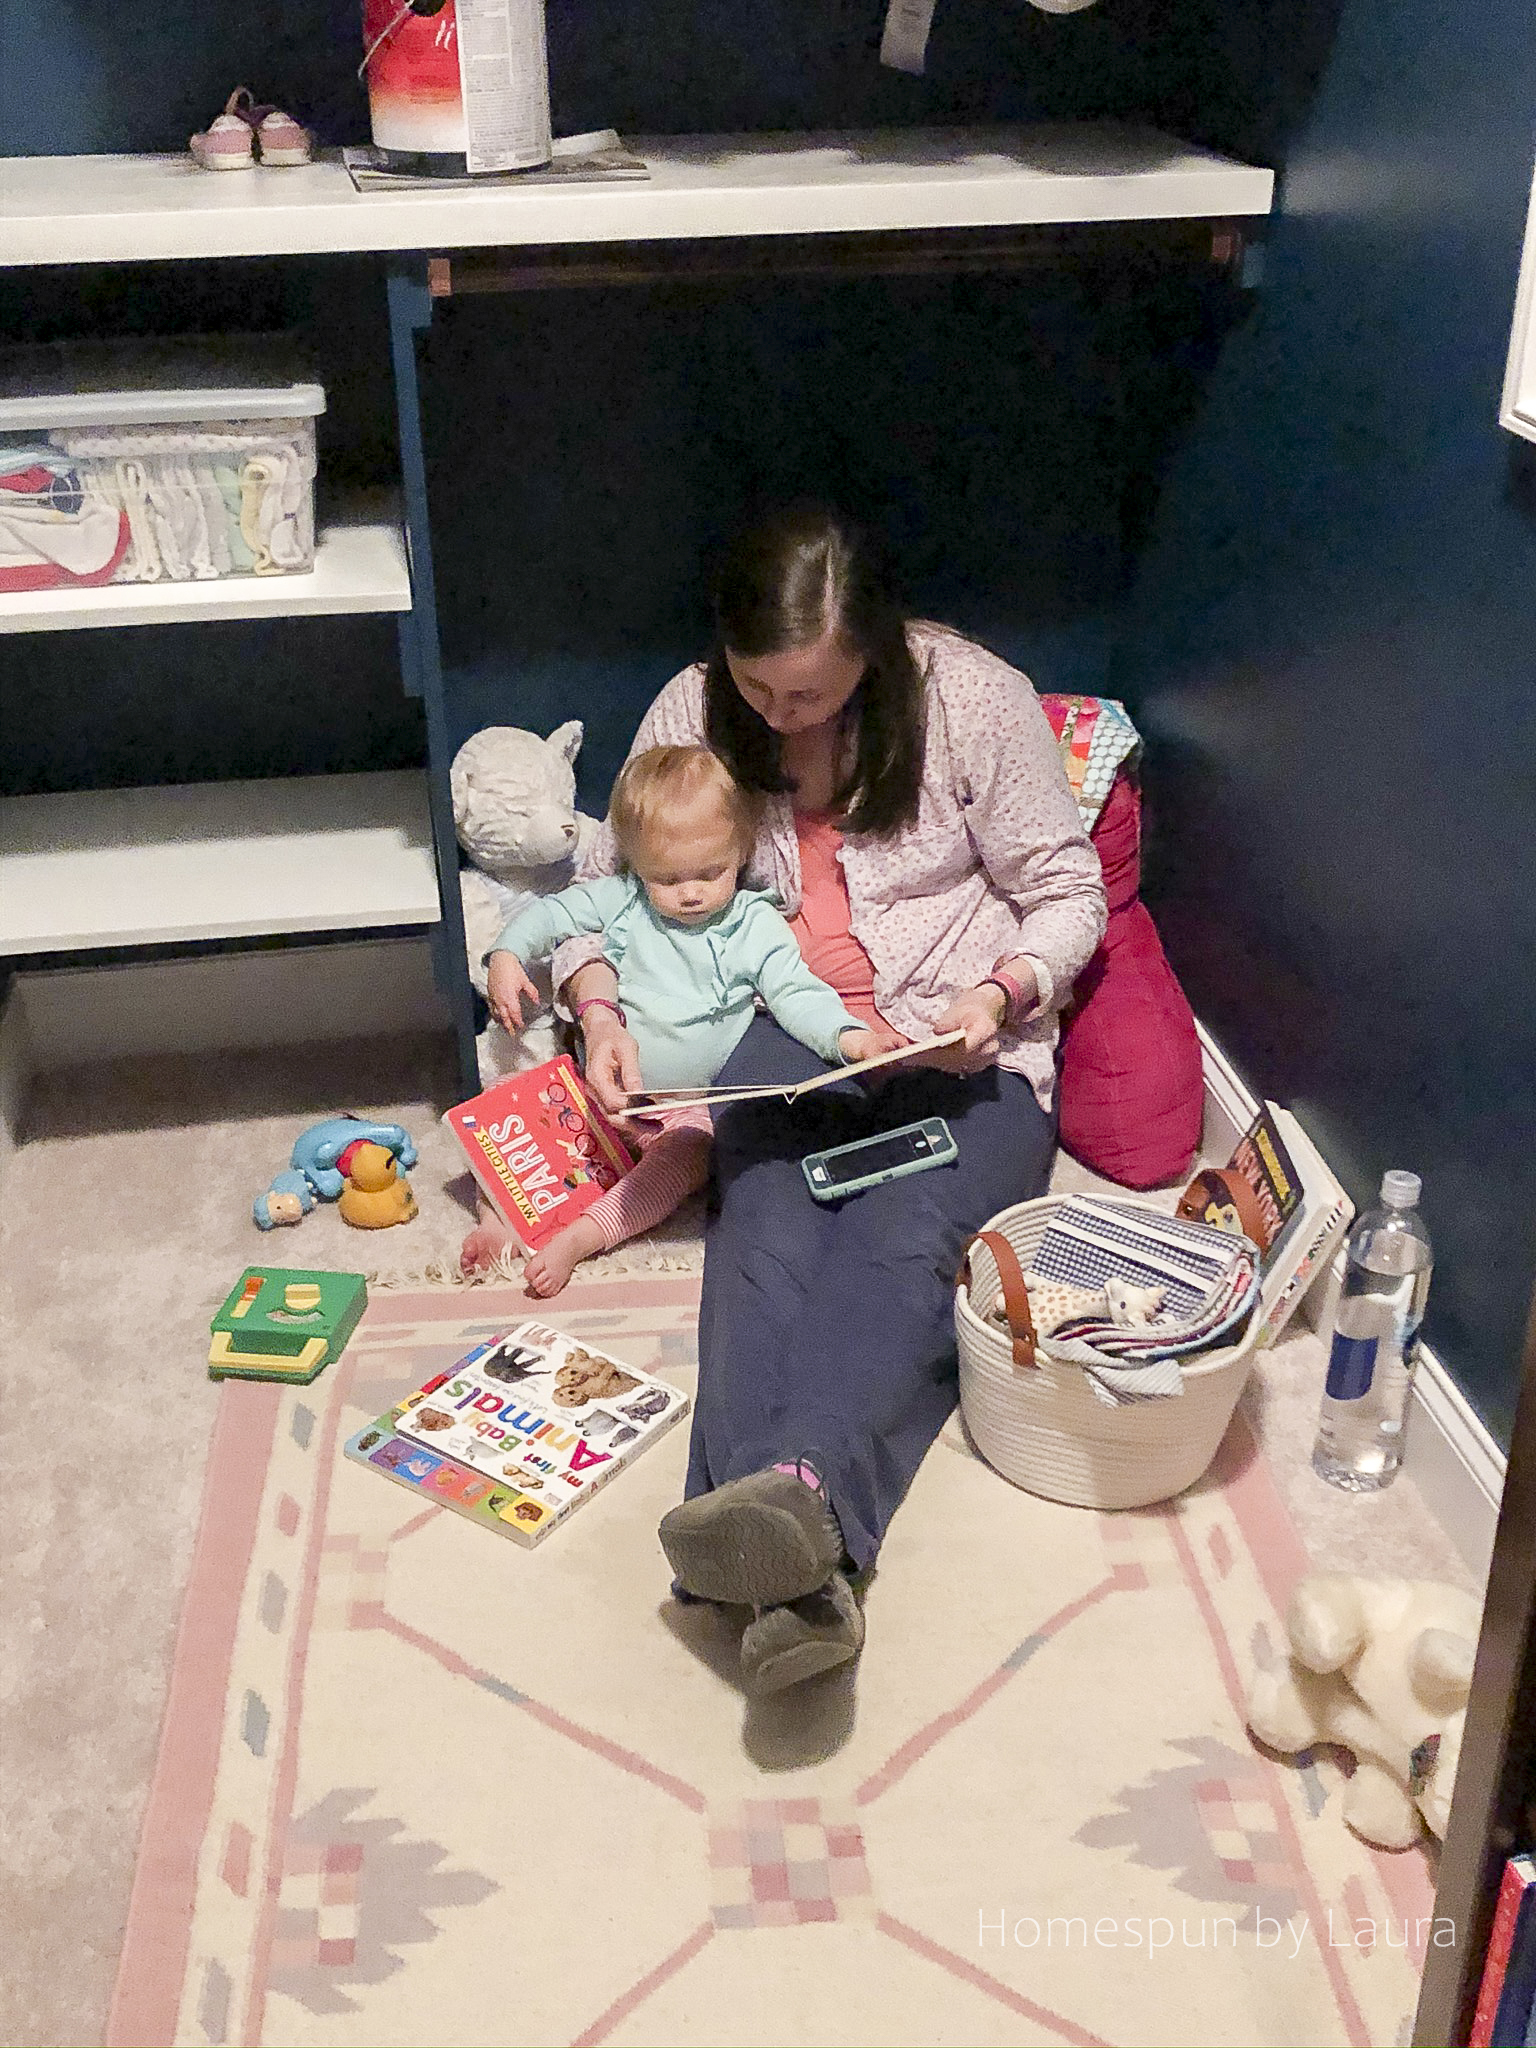
Every parent should have a little space like this to sit and read with their child. It’s the most fun part of our bedtime routine, and also where we spend some time on Friday mornings, our weekly observance of ‘pajama Friday’. It’s pretty straightforward: the girl and I hang out in our PJs all morning. We snuggle in the ‘book nook’. We read books (as one does in a book nook!). We listen to Sesame Street singalongs (CDs recorded from the records I grew up listening to back in the 80s!). We enjoy not having anywhere to be at any particular time. It’s a special way to end the week.
But it used to be a nightmare.
It wasn’t always like this.
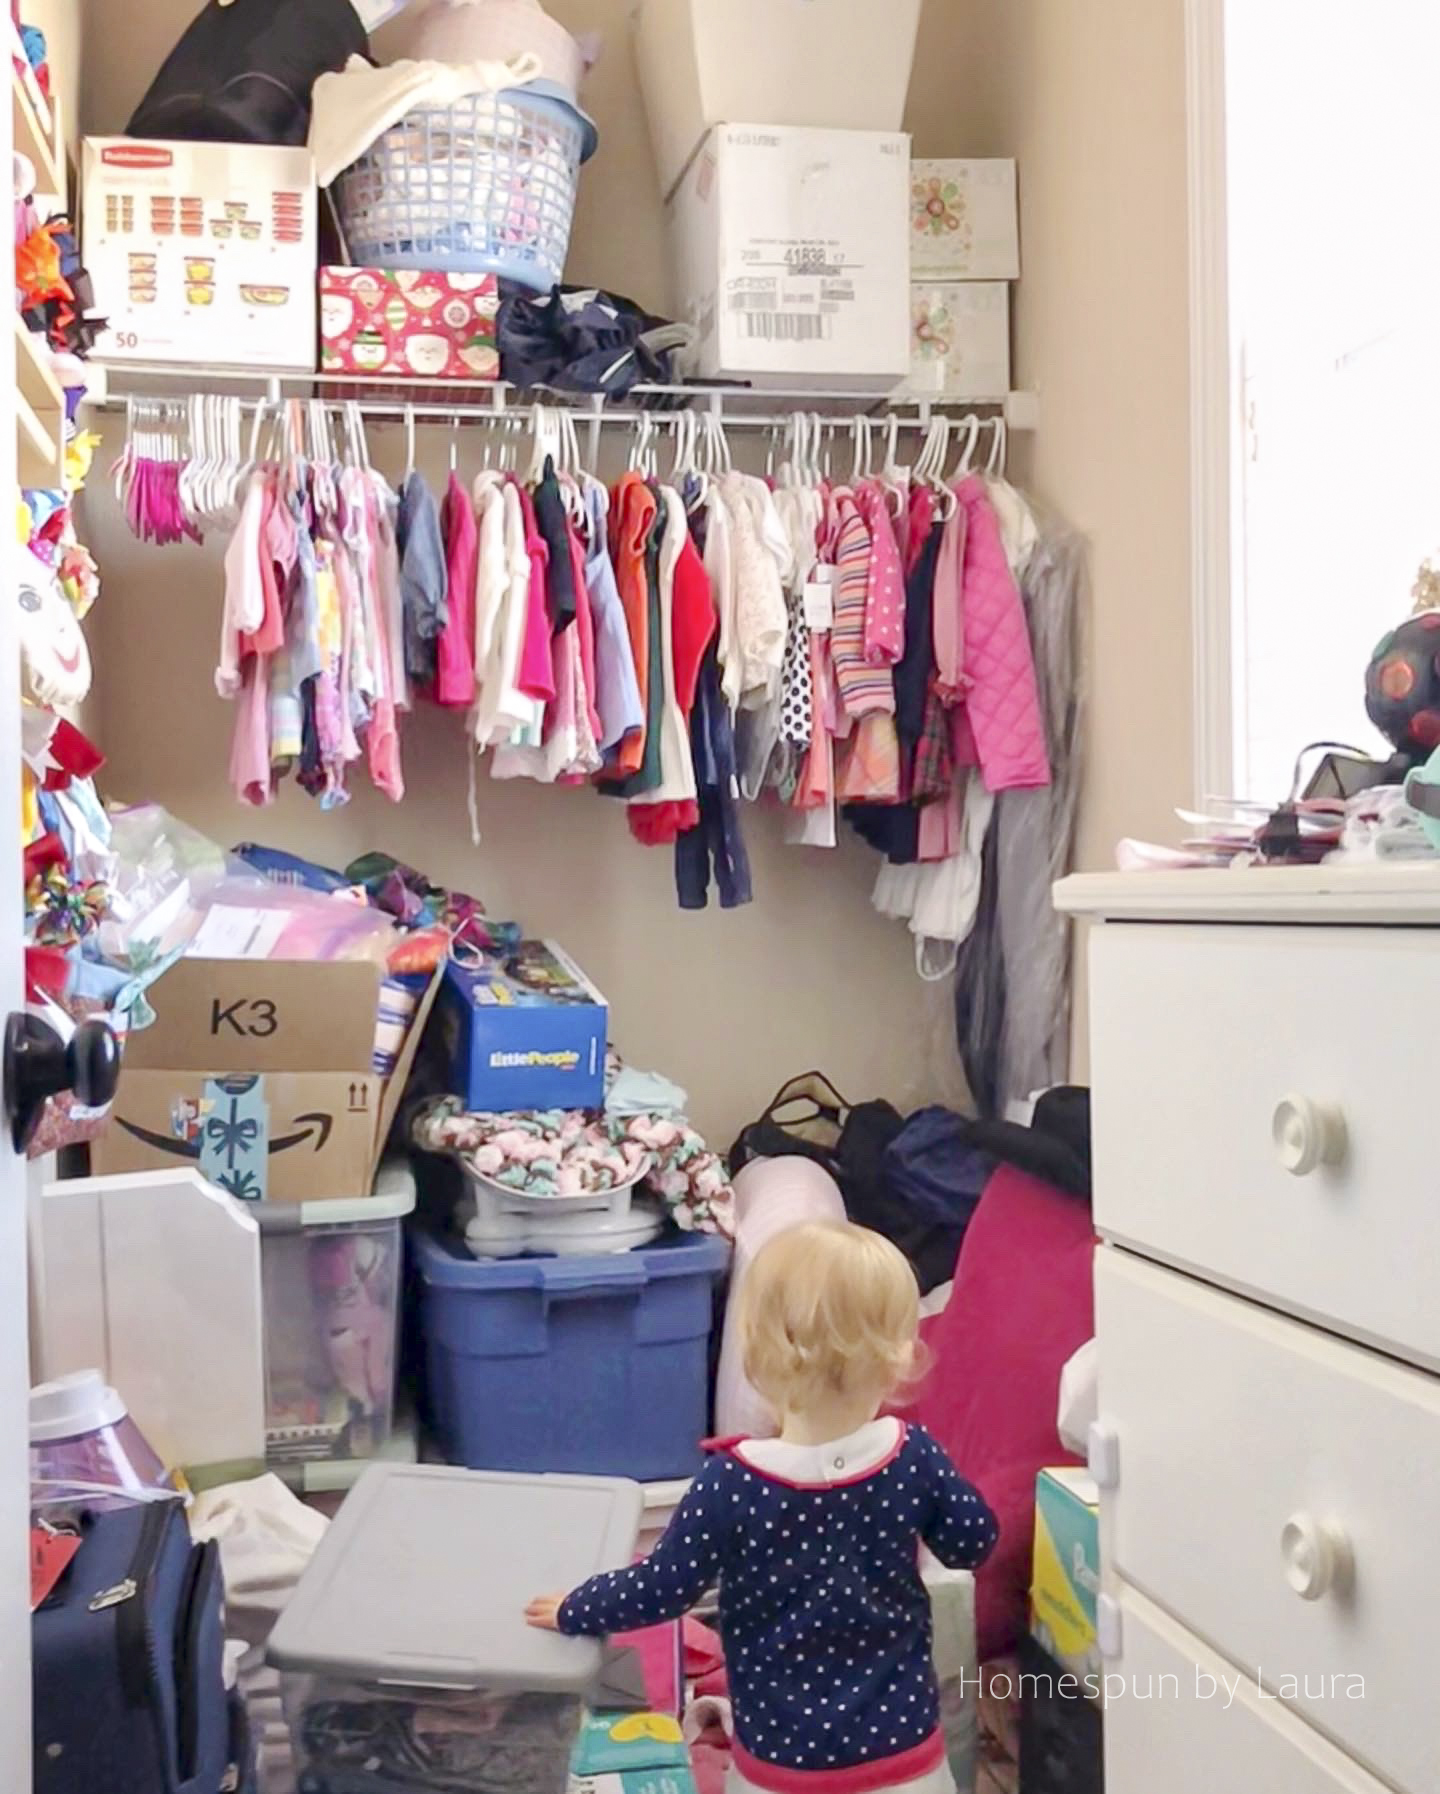
The girl’s closet had been bursting at the seams with outgrown clothes, toys, and bulk diaper purchases for months. The existing ‘system’ didn’t take advantage of the surprisingly large space: the builders seemed to think that a single wire shelf was enough of a ‘system’ for this closet.
They were wrong.
We replaced that sad wire shelf with multiple levels of wooden shelves and added an additional rod. That shelf didn’t go to waste, though. We mounted it above the closet door where it’s out of sight for extra storage.
The plan
I sketched out multiple versions of the closet layout over the course of nearly two years. Prior to even closing on the house back in 2018, I sketched out the first version (we were on a train in France on a ‘babymoon!’). Several slightly different iterations came to mind in the intervening two years. About a week before we began construction, I finally landed on its current layout. Funny enough, it was very close to my original idea – sketched out long before the baby even arrived!
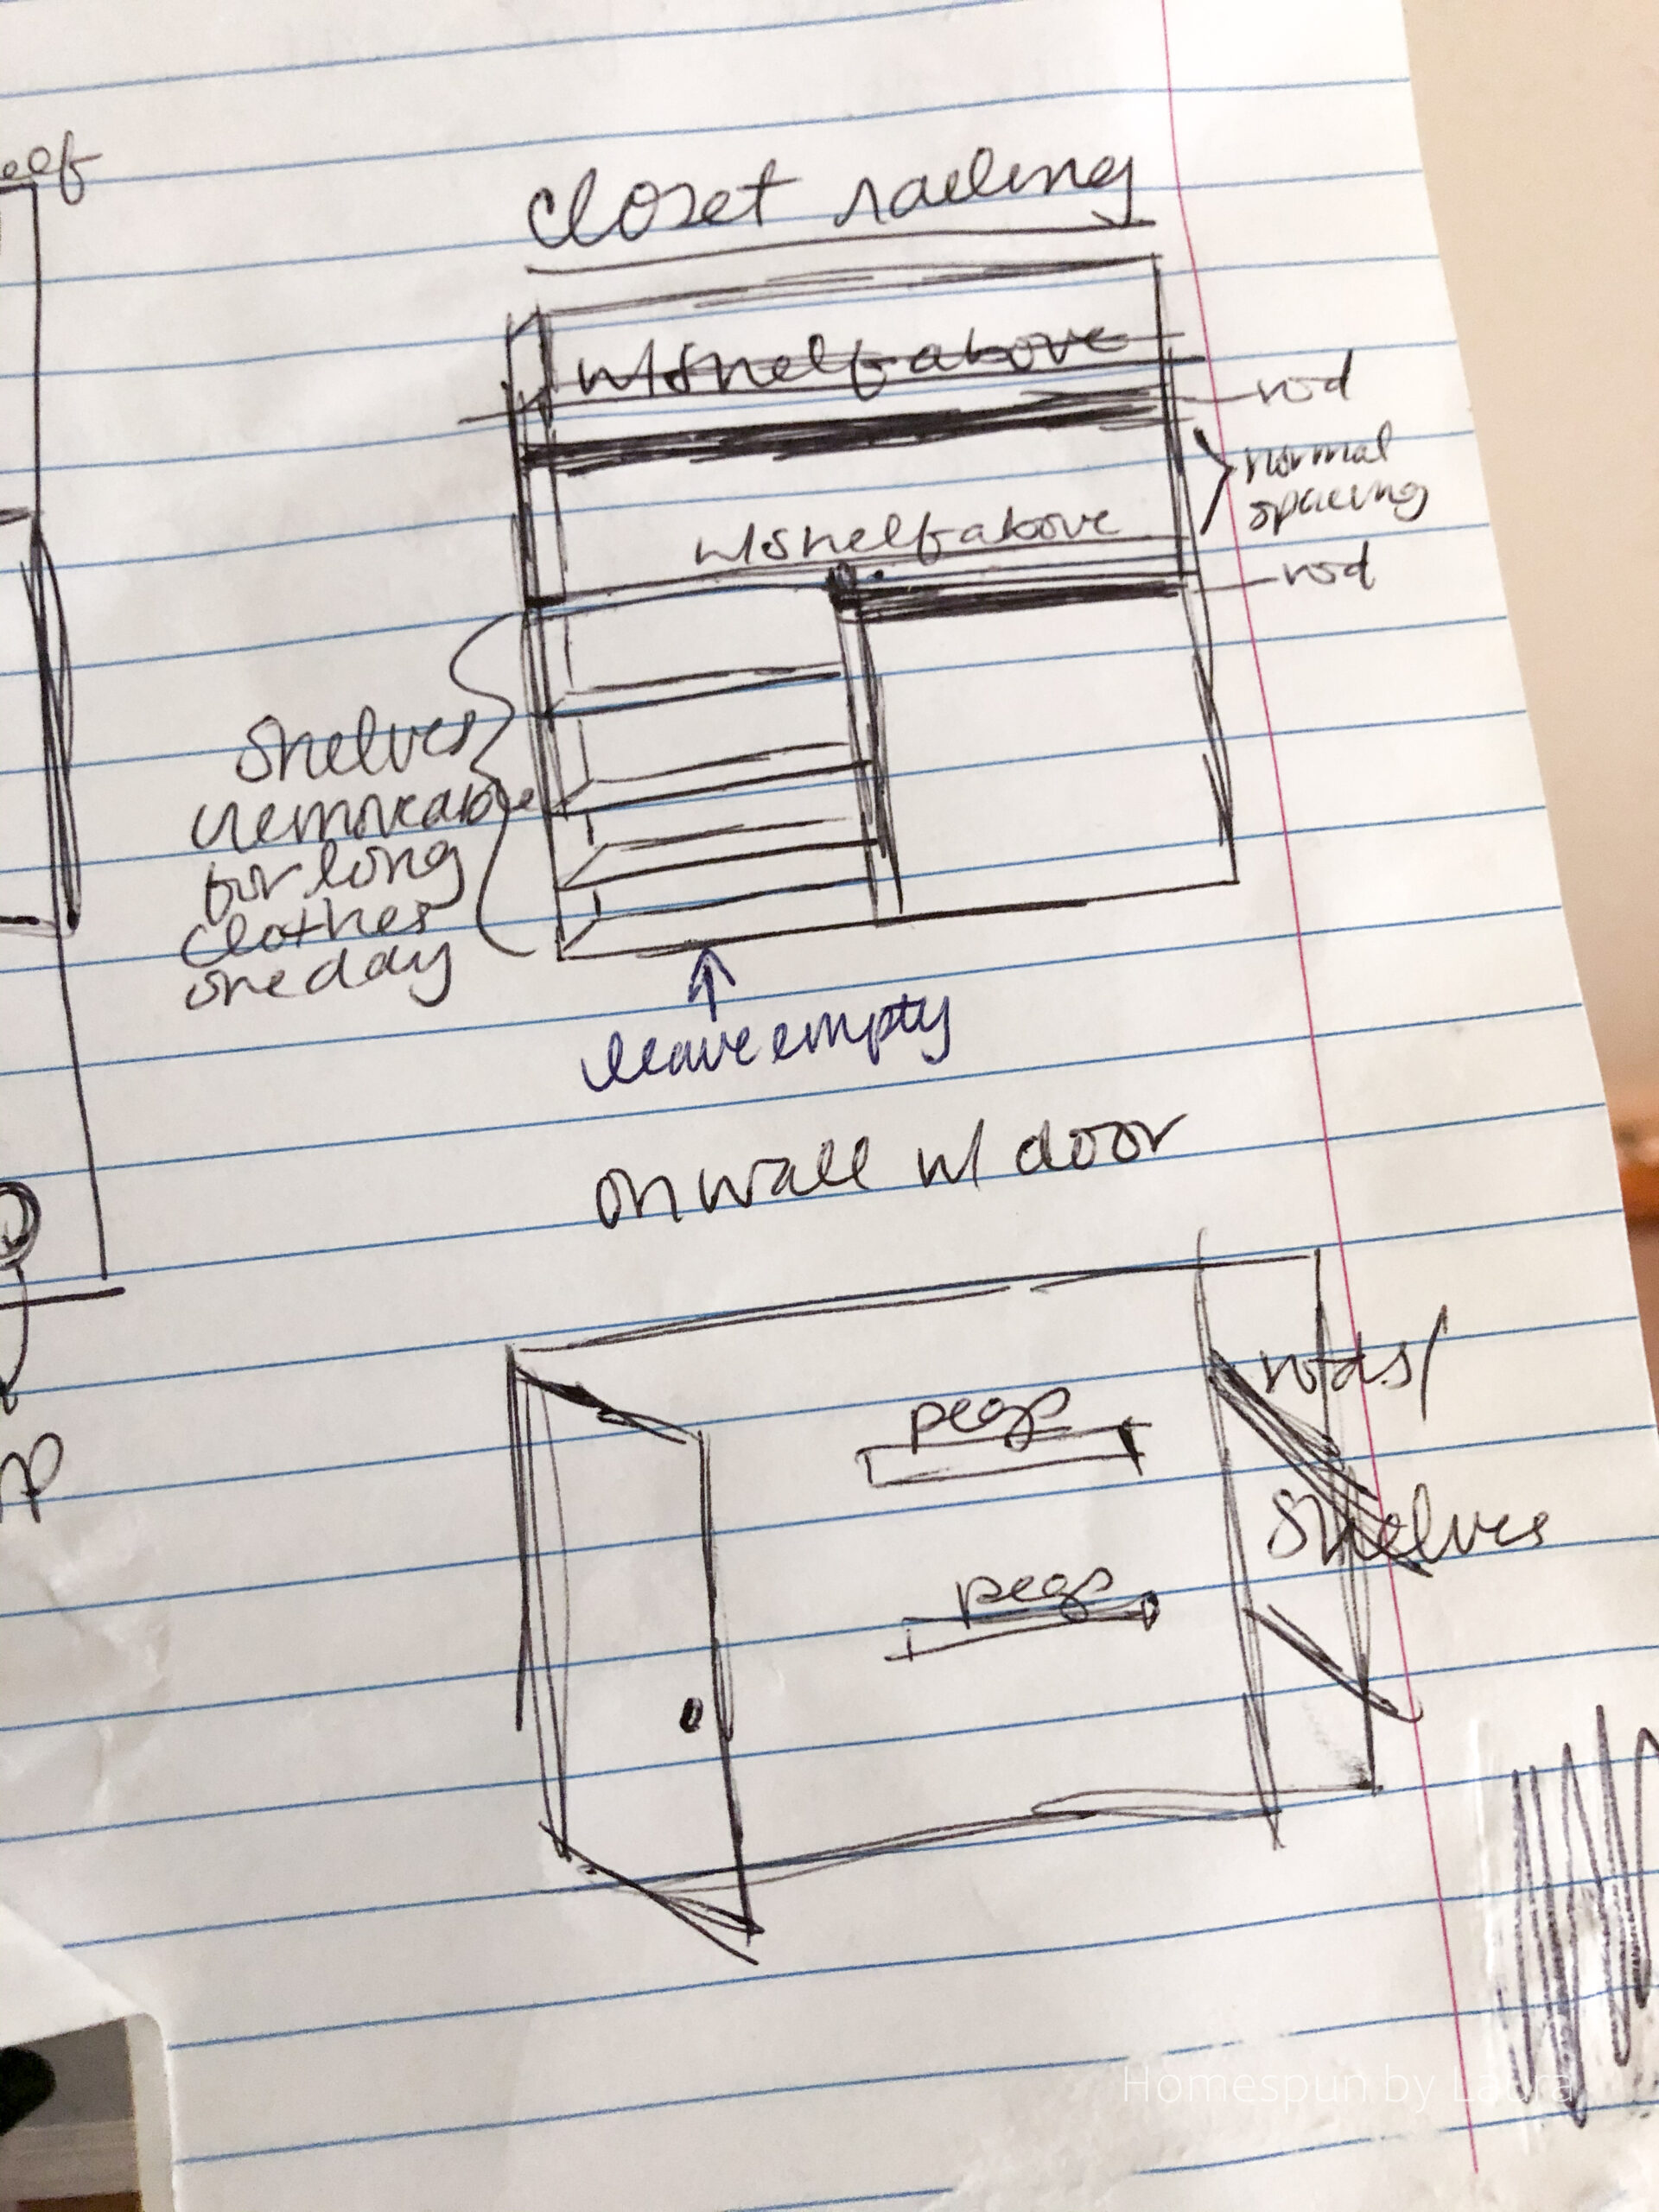
One of the early sketches, very similar to the final result despite the multiple variations I drew out later.
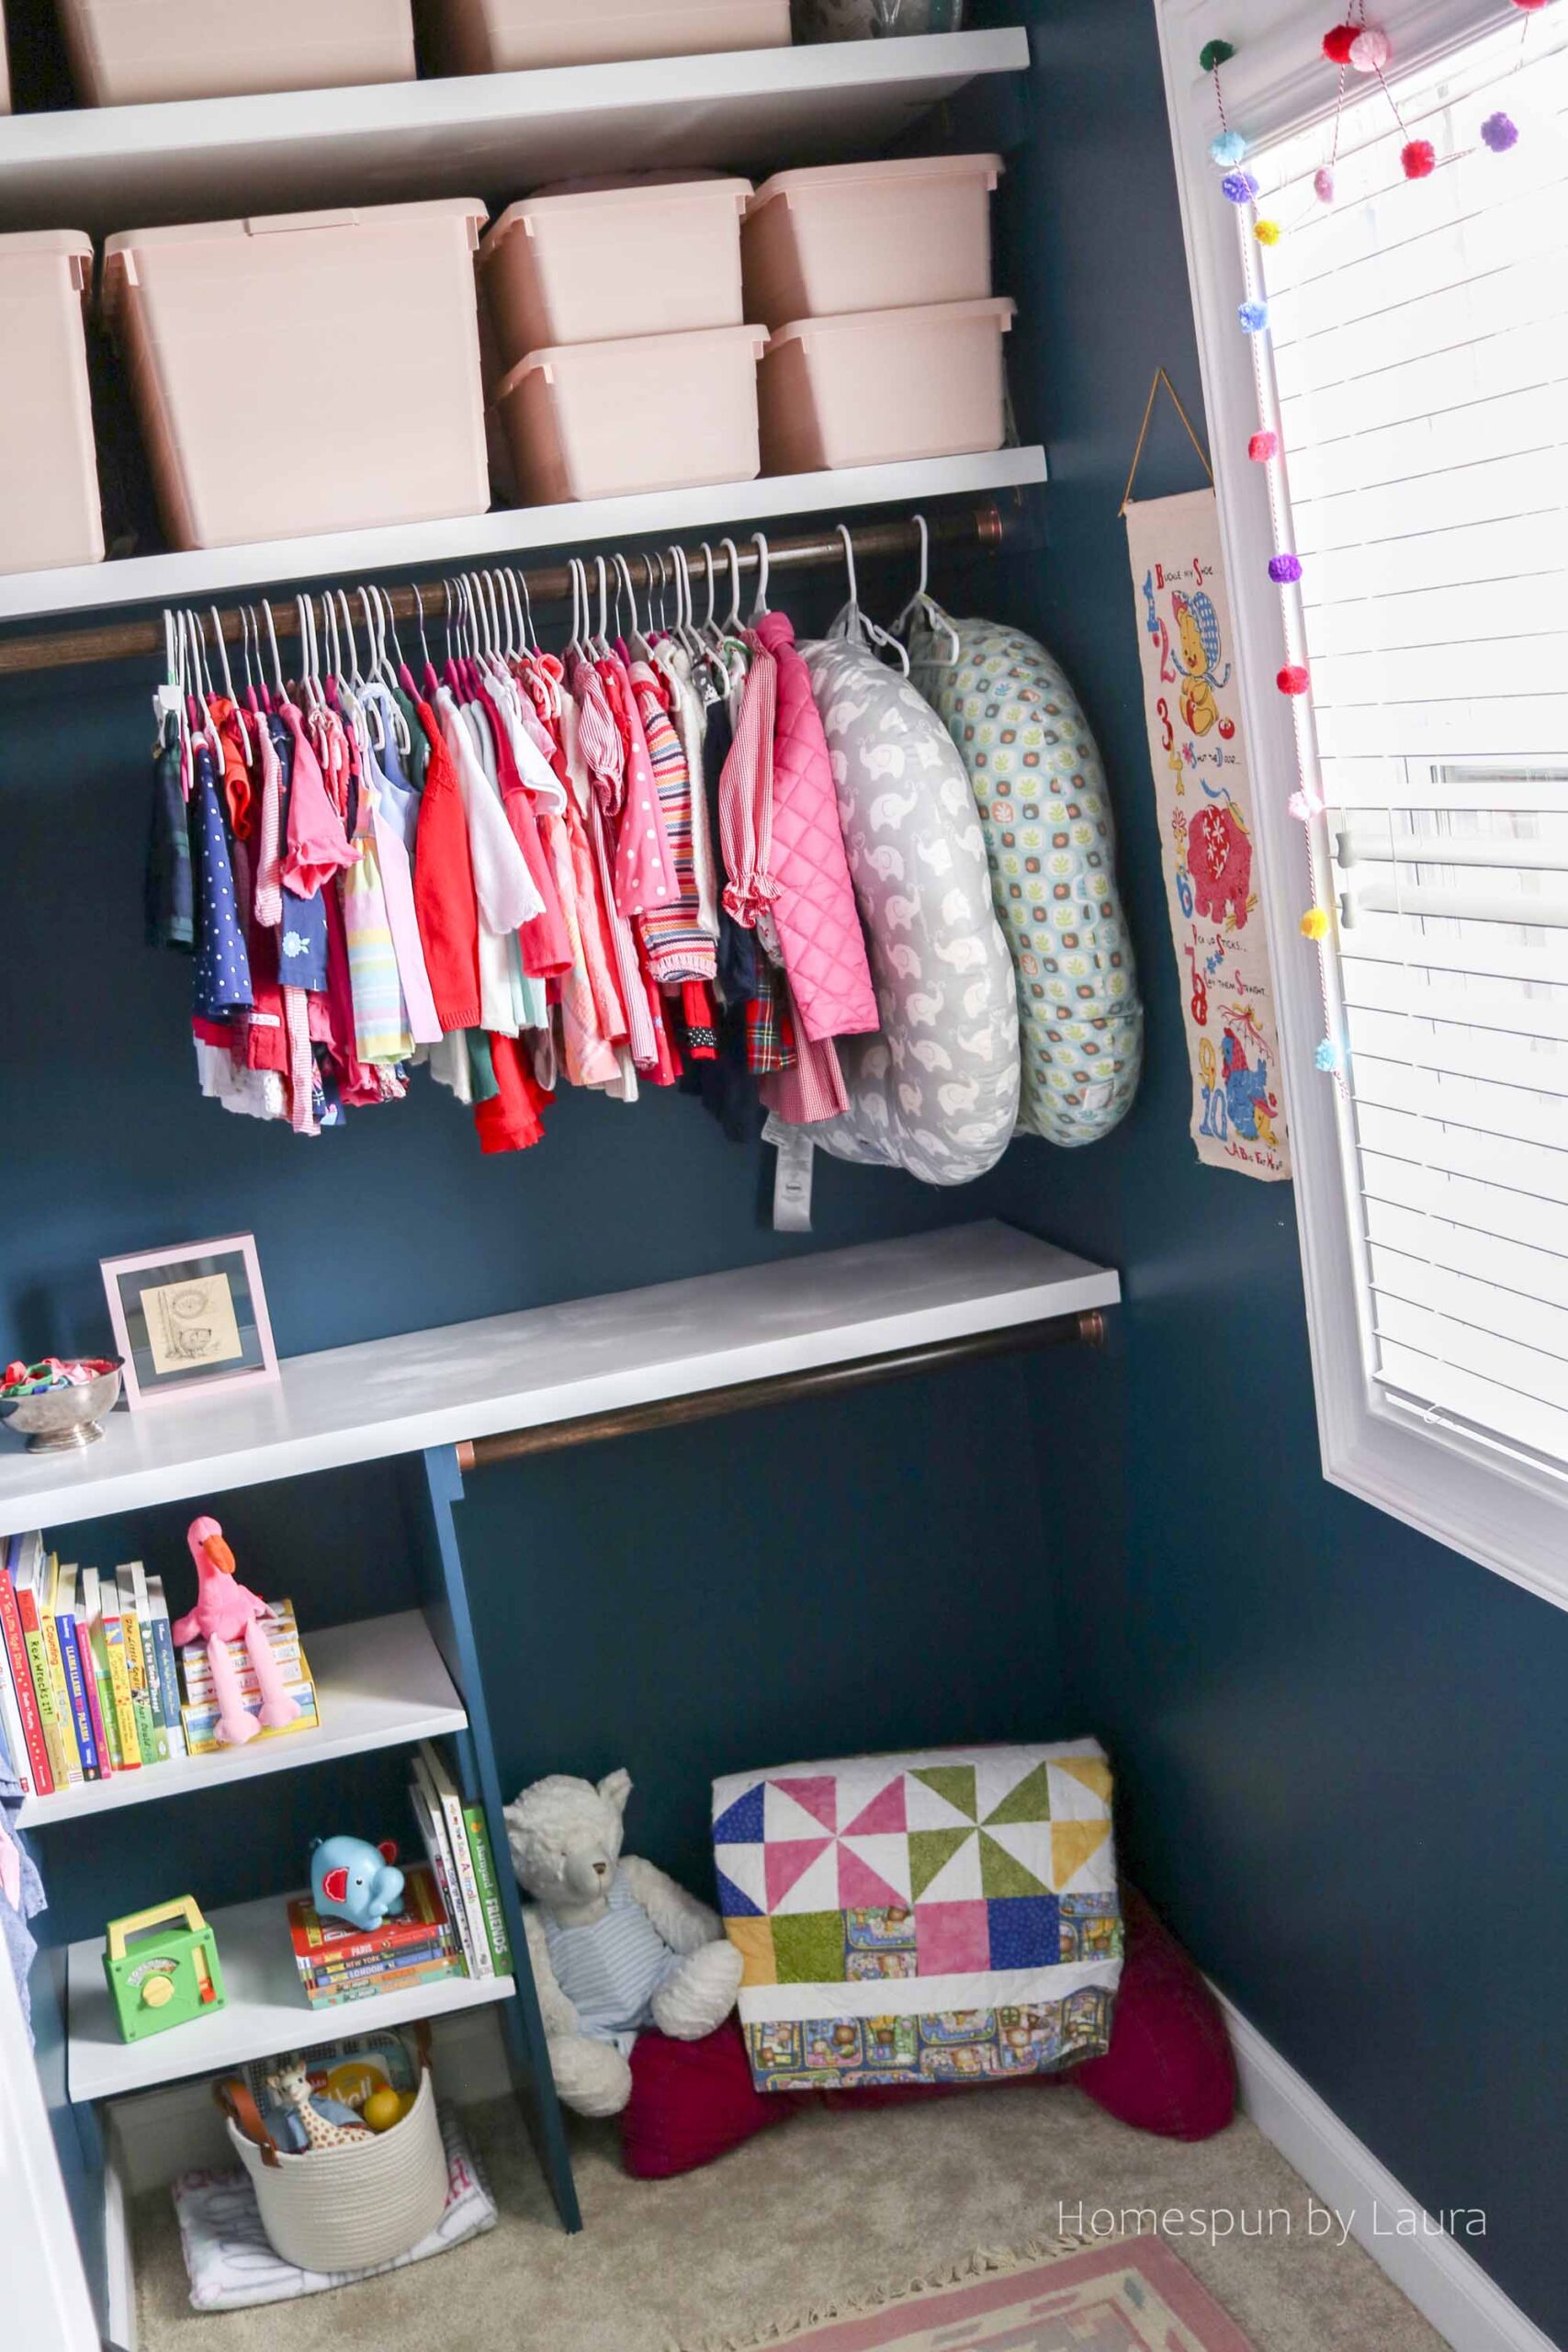
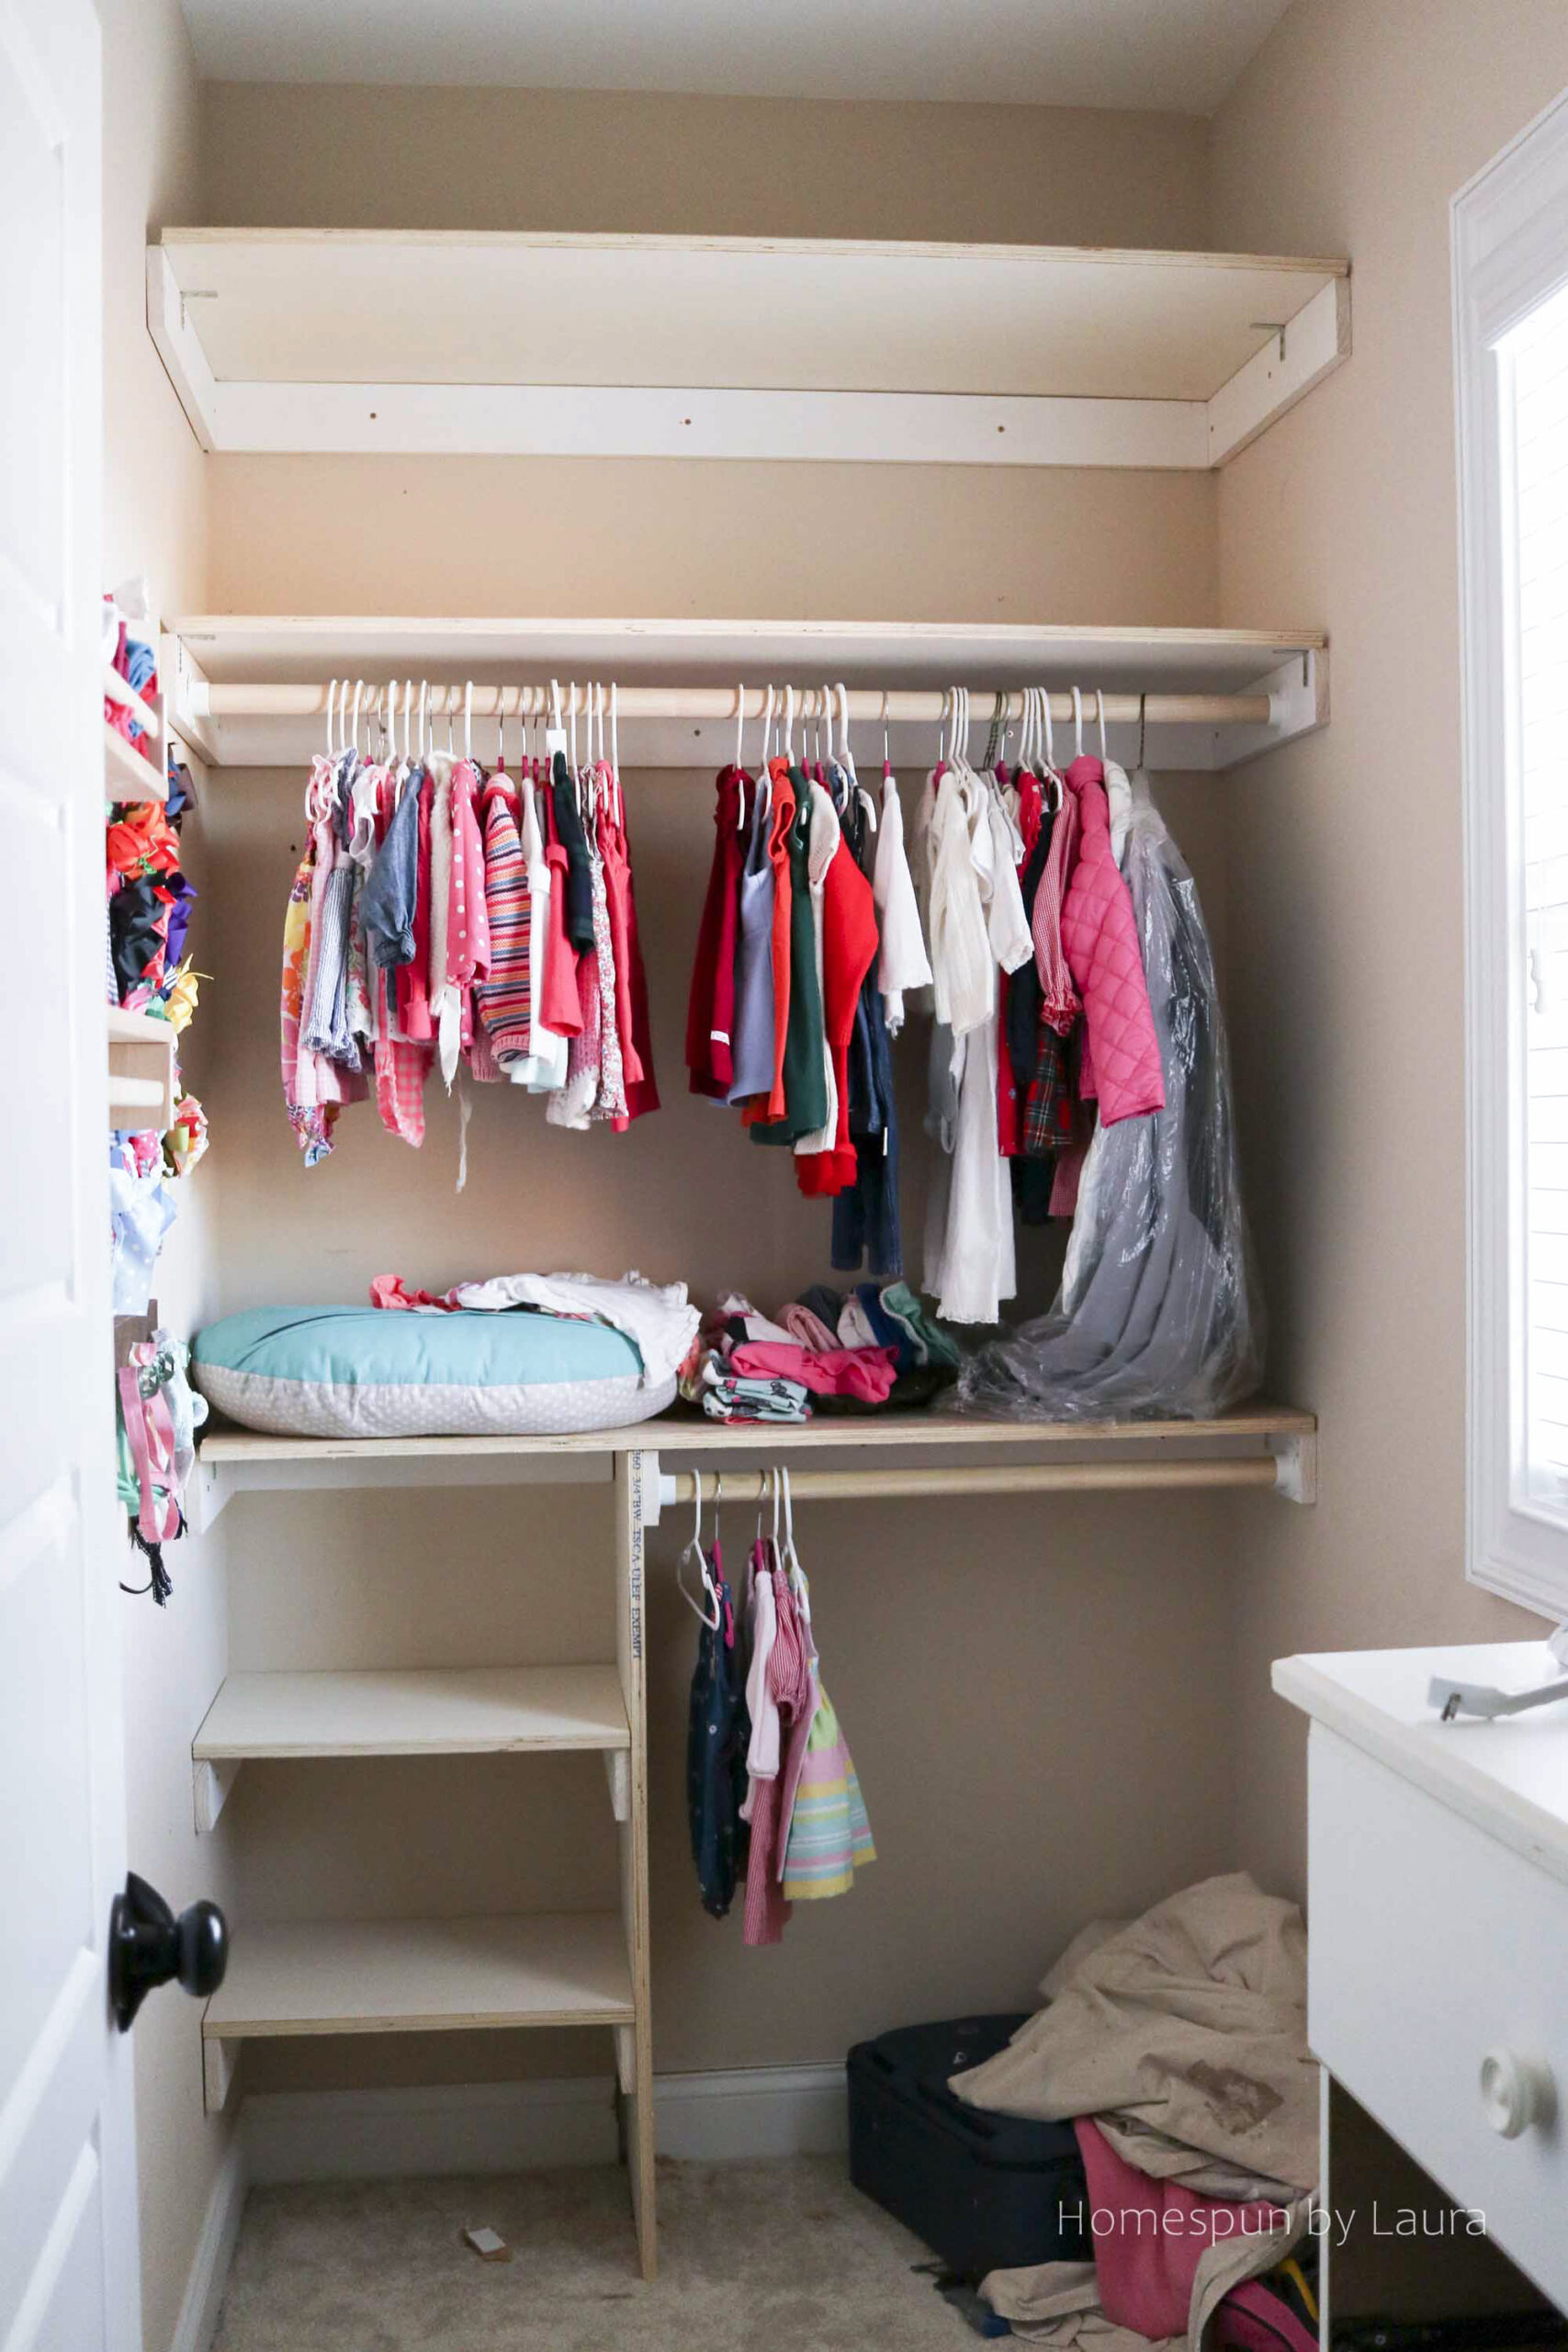
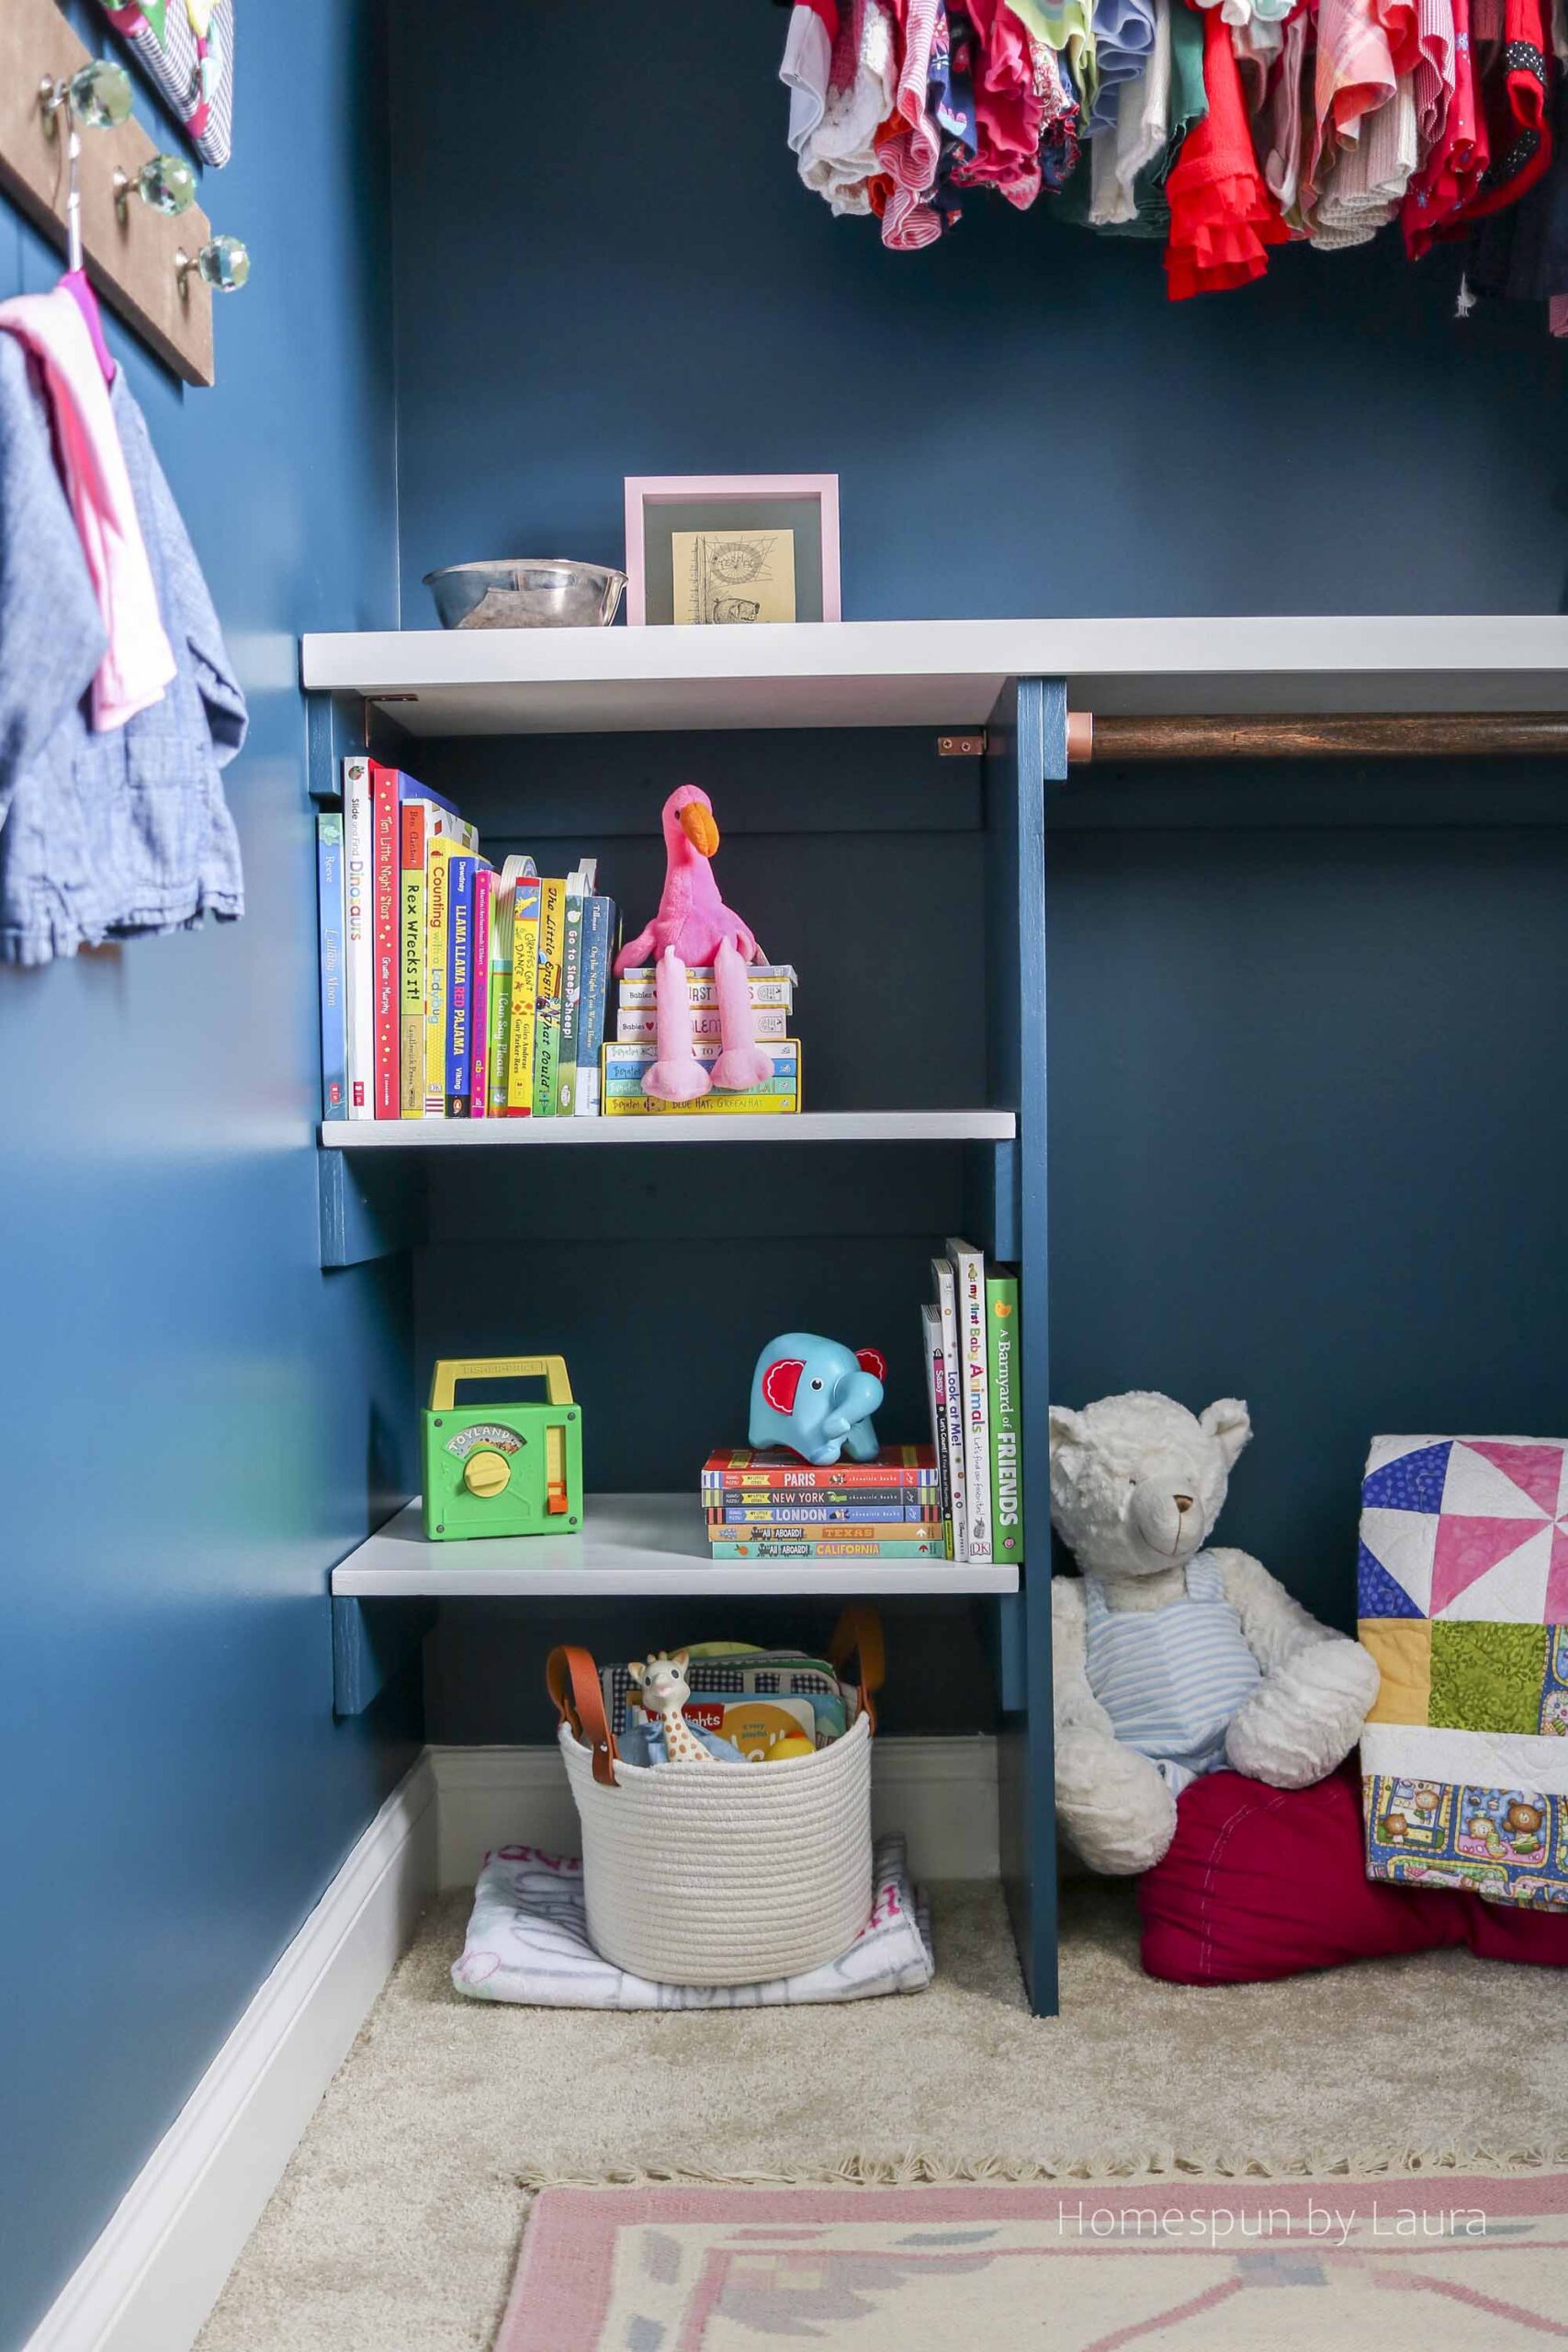
I landed on this arrangement because it seemed to be the best option for clothes belonging to a person of any age while maximizing the storage potential of this fairly large space. What I didn’t want to do was create a closet that was specifically designed for tiny clothes, preventing us or future owners from ever using this room for a full-grown person: the lowest full-width shelf and mini shelves on the left can be removed to allow for longer clothes like adult-sized dresses can hang on the far left side. Two rows of itty-bitty clothes all the way up to adult shirts could occupy both levels. OR, the bottom right can be left empty of clothing to create the most comfortable little book nook, such a fun unintended result of this project.
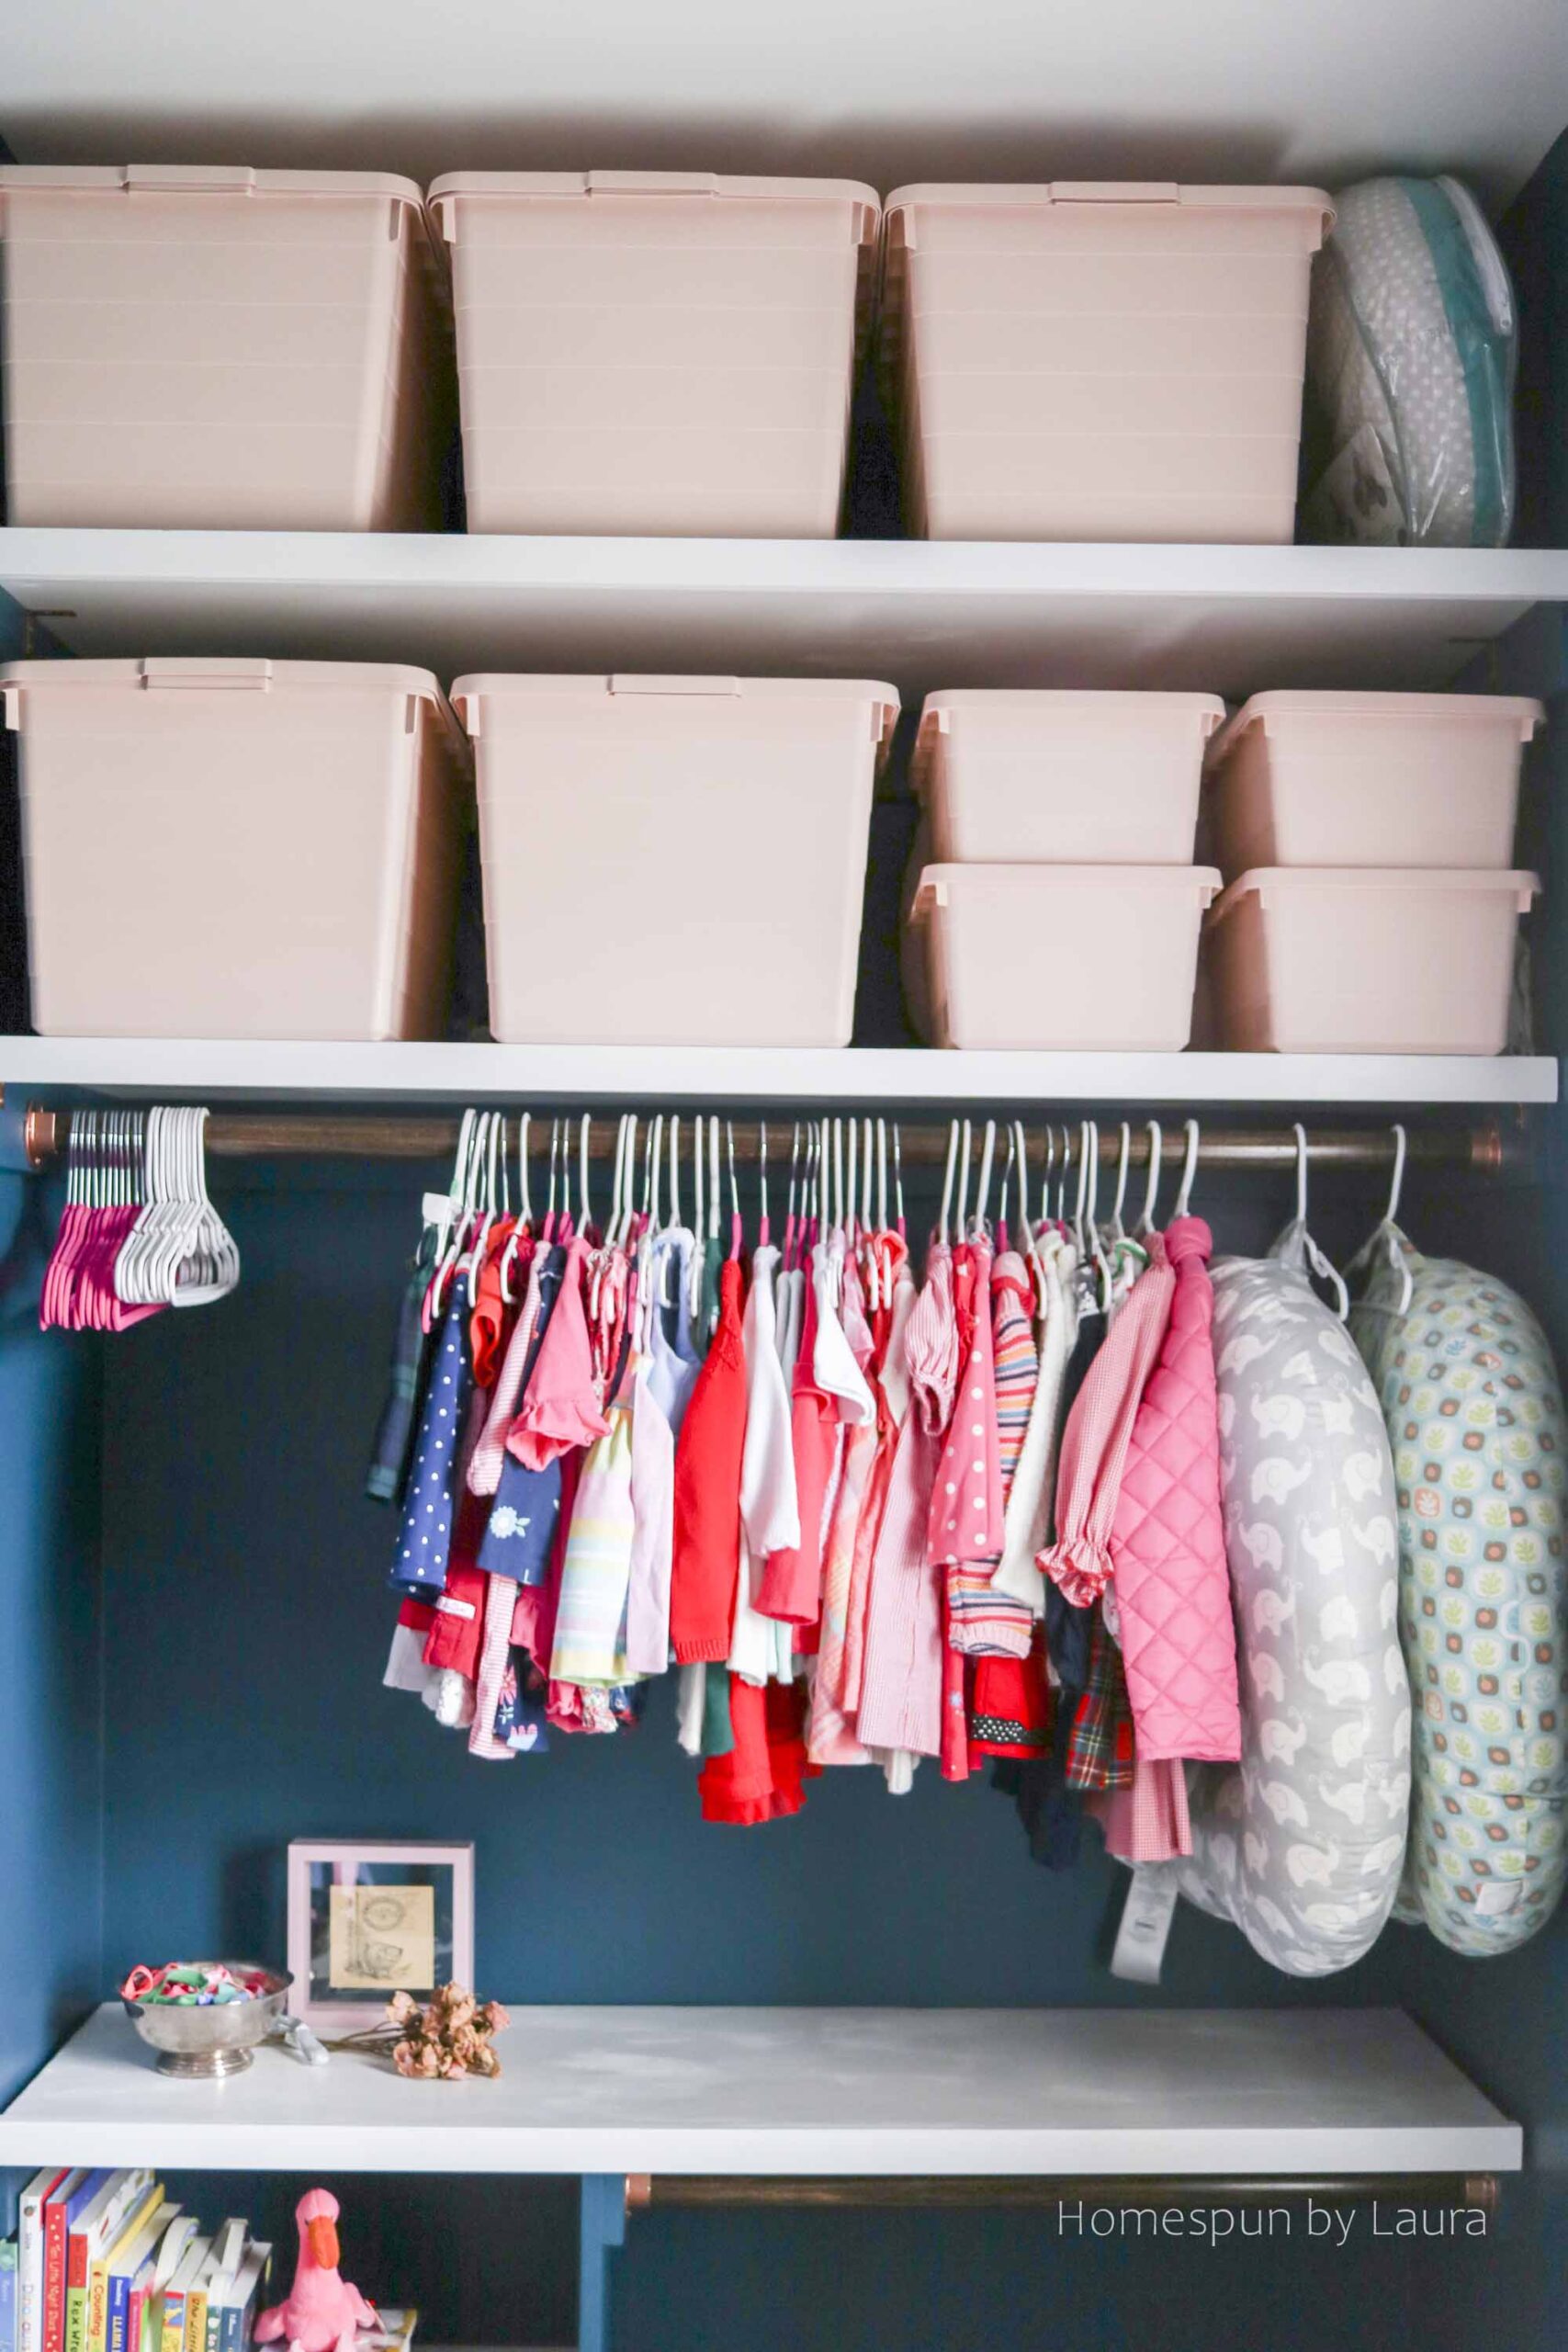
Another requirement of my plan was to utilize the 9′ ceiling to its fullest potential by adding a second overhead shelf. To determine the right height for the two upper shelves, we measured the large plastic storage bins (from IKEA) that hold various outgrown and not-yet-grown into baby and toddler items to ensure that both high shelves were tall enough to contain a row of bins.
There was no exact science to determining the distance from the upper bar to the white shelf below it; I just grabbed a few of my shirts to ensure that we left enough space for adult clothing between them.
And then we got to work!
How to Build a DIY Closet Shelving System
1. Take Measurements and Sketch Out your Plan
Make sure you double-check your measurements before you cut. Our full-width shelves wound up being about 1/3″ too short because I didn’t do that. It worked out ok, thanks to this creative and inexpensive method for making the shelves look bulkier and more expensive: I nailed a CORRECTLY MEASURED 2″ slat across the front of each shelf, and now they look more substantial, though they’re plenty substantial and not going anywhere (more about this process later)!

Pretty AND functional: the corner braces widen the base of support and prevent disaster in the event of shifting shelves.
Since we used some scrap wood from the stash in the garage, these shelves are not all the same thickness; one is only 1/2″ thick while the others are 3/4″ thick (tall). Those slats across the front also hide that fact, which is a nice bonus! To ensure the shelves stay secure, we also added small corner braces (L-shaped brackets) underneath in case a shelf somehow shifts a bit.
2. Remove EVERYTHING from the Closet
I’m a little embarrassed to say that even a month after we finished this space, there are still a few remnants of items bound for the attic sitting in the corner of the master bedroom. Somehow there was just so much stuff in here! Old books and toys from our childhoods, the shocking mass of infant things we don’t need to access to for a couple of years, the clothing that the girl actually does wear now, the clothing she’s outgrown already, and clothing that she’s yet to grow in to. All this for one small girl!
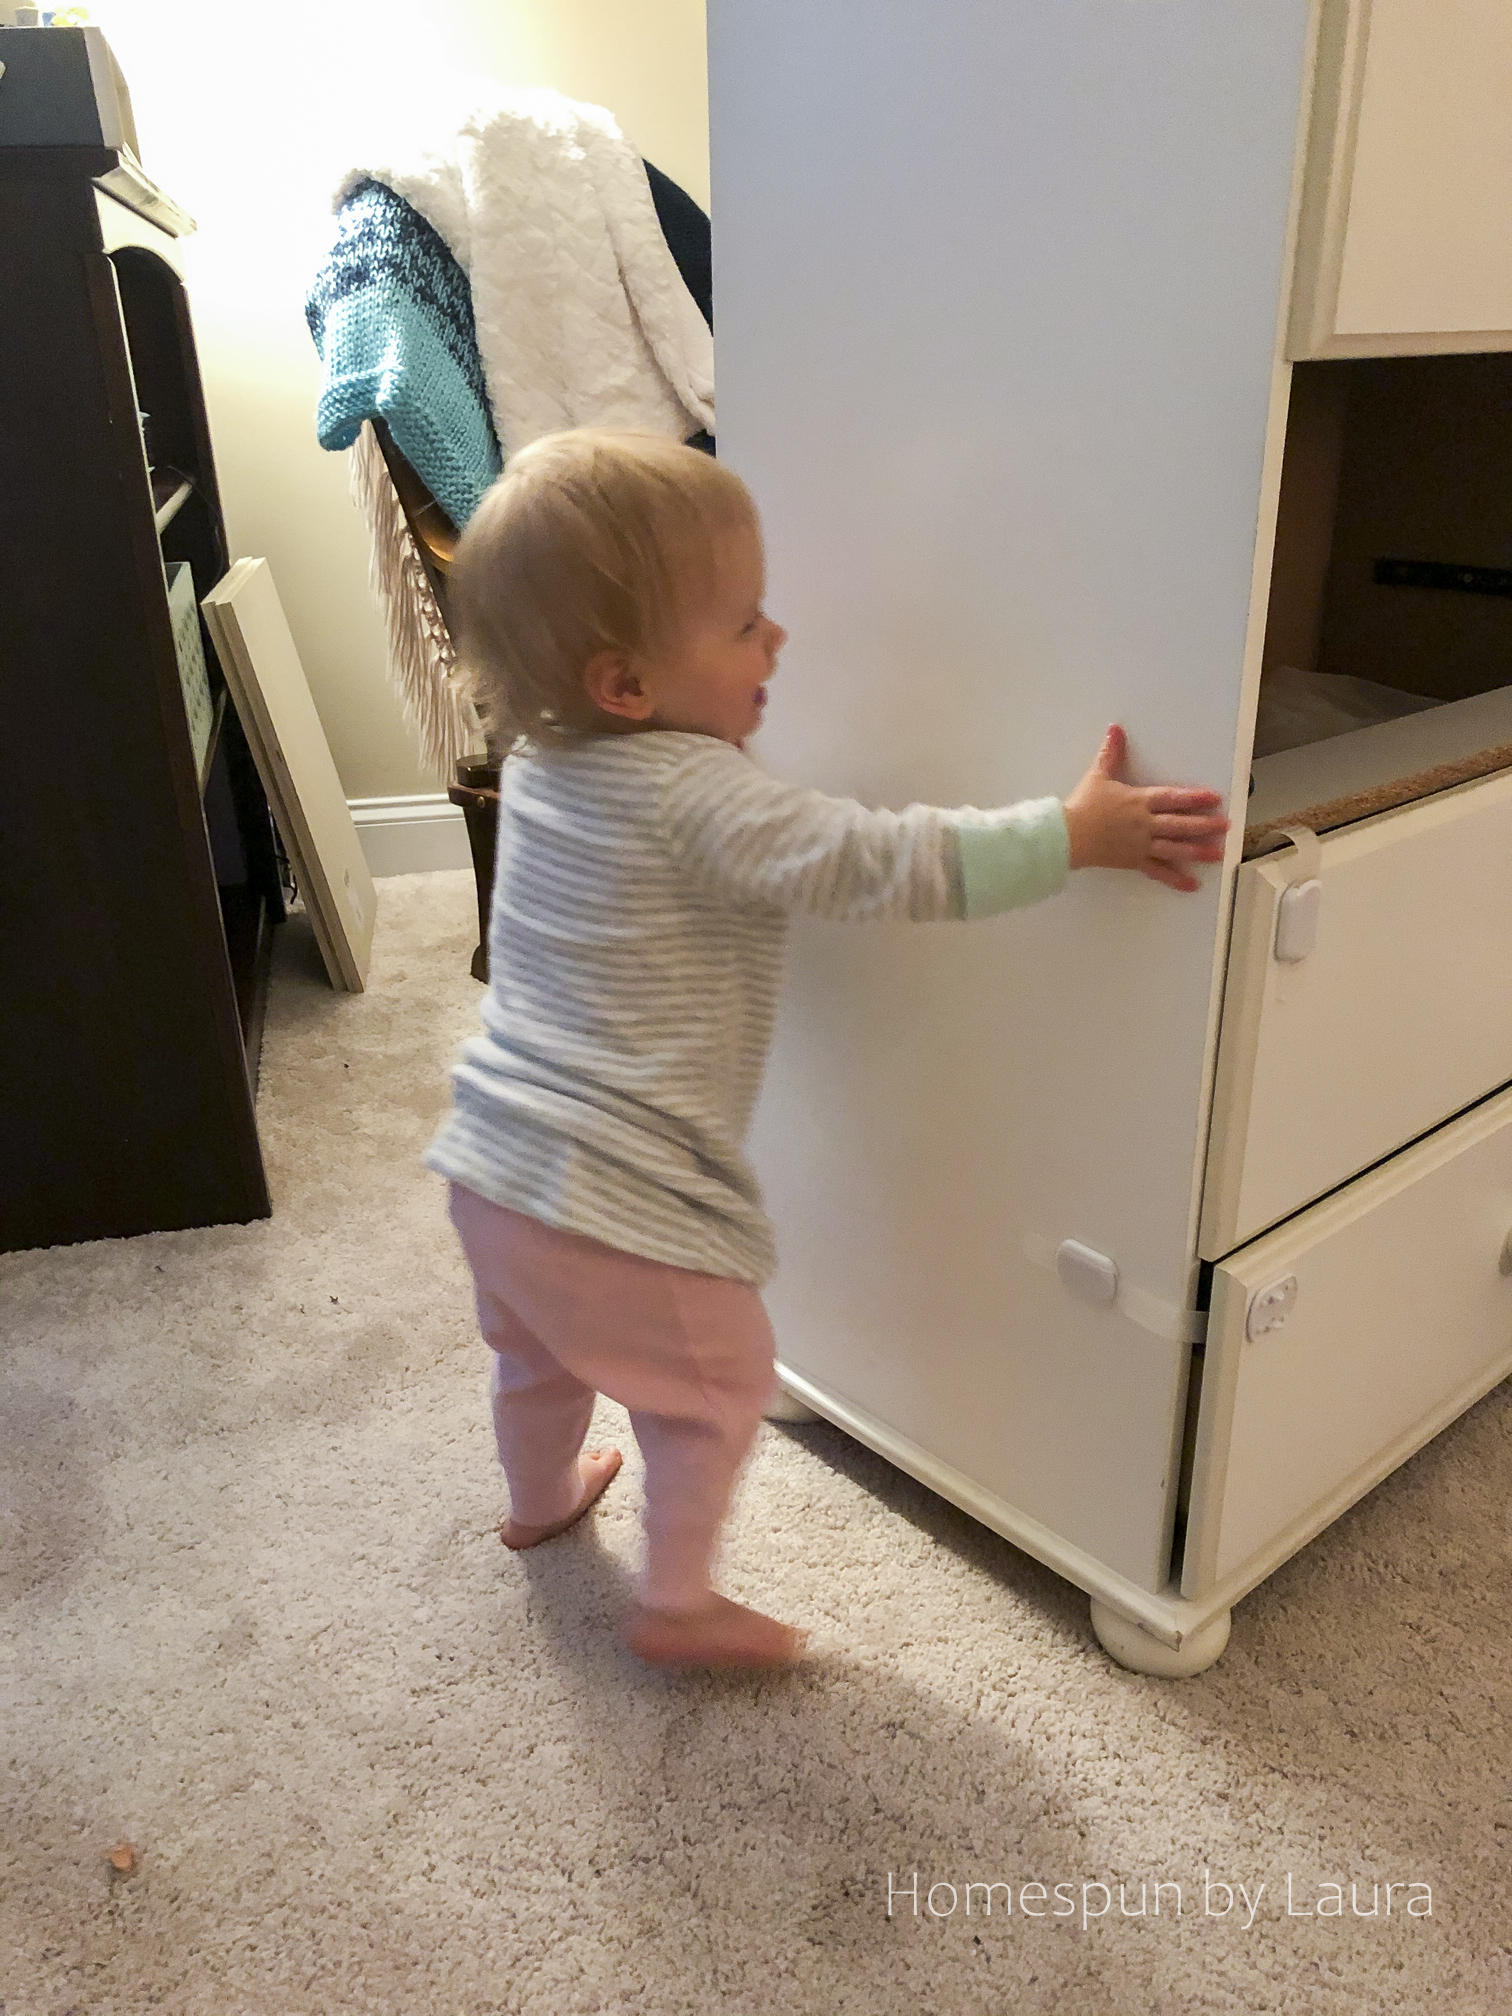
My assistant helped me move a big dresser out of the closet.
I relocated it all to our bedroom, where it exploded and filled all the extra floor space we have. During nap times when I couldn’t get into the closet, I sorted through things to donate, sell, store in the attic, store in the closet, and actually hang in the closet.
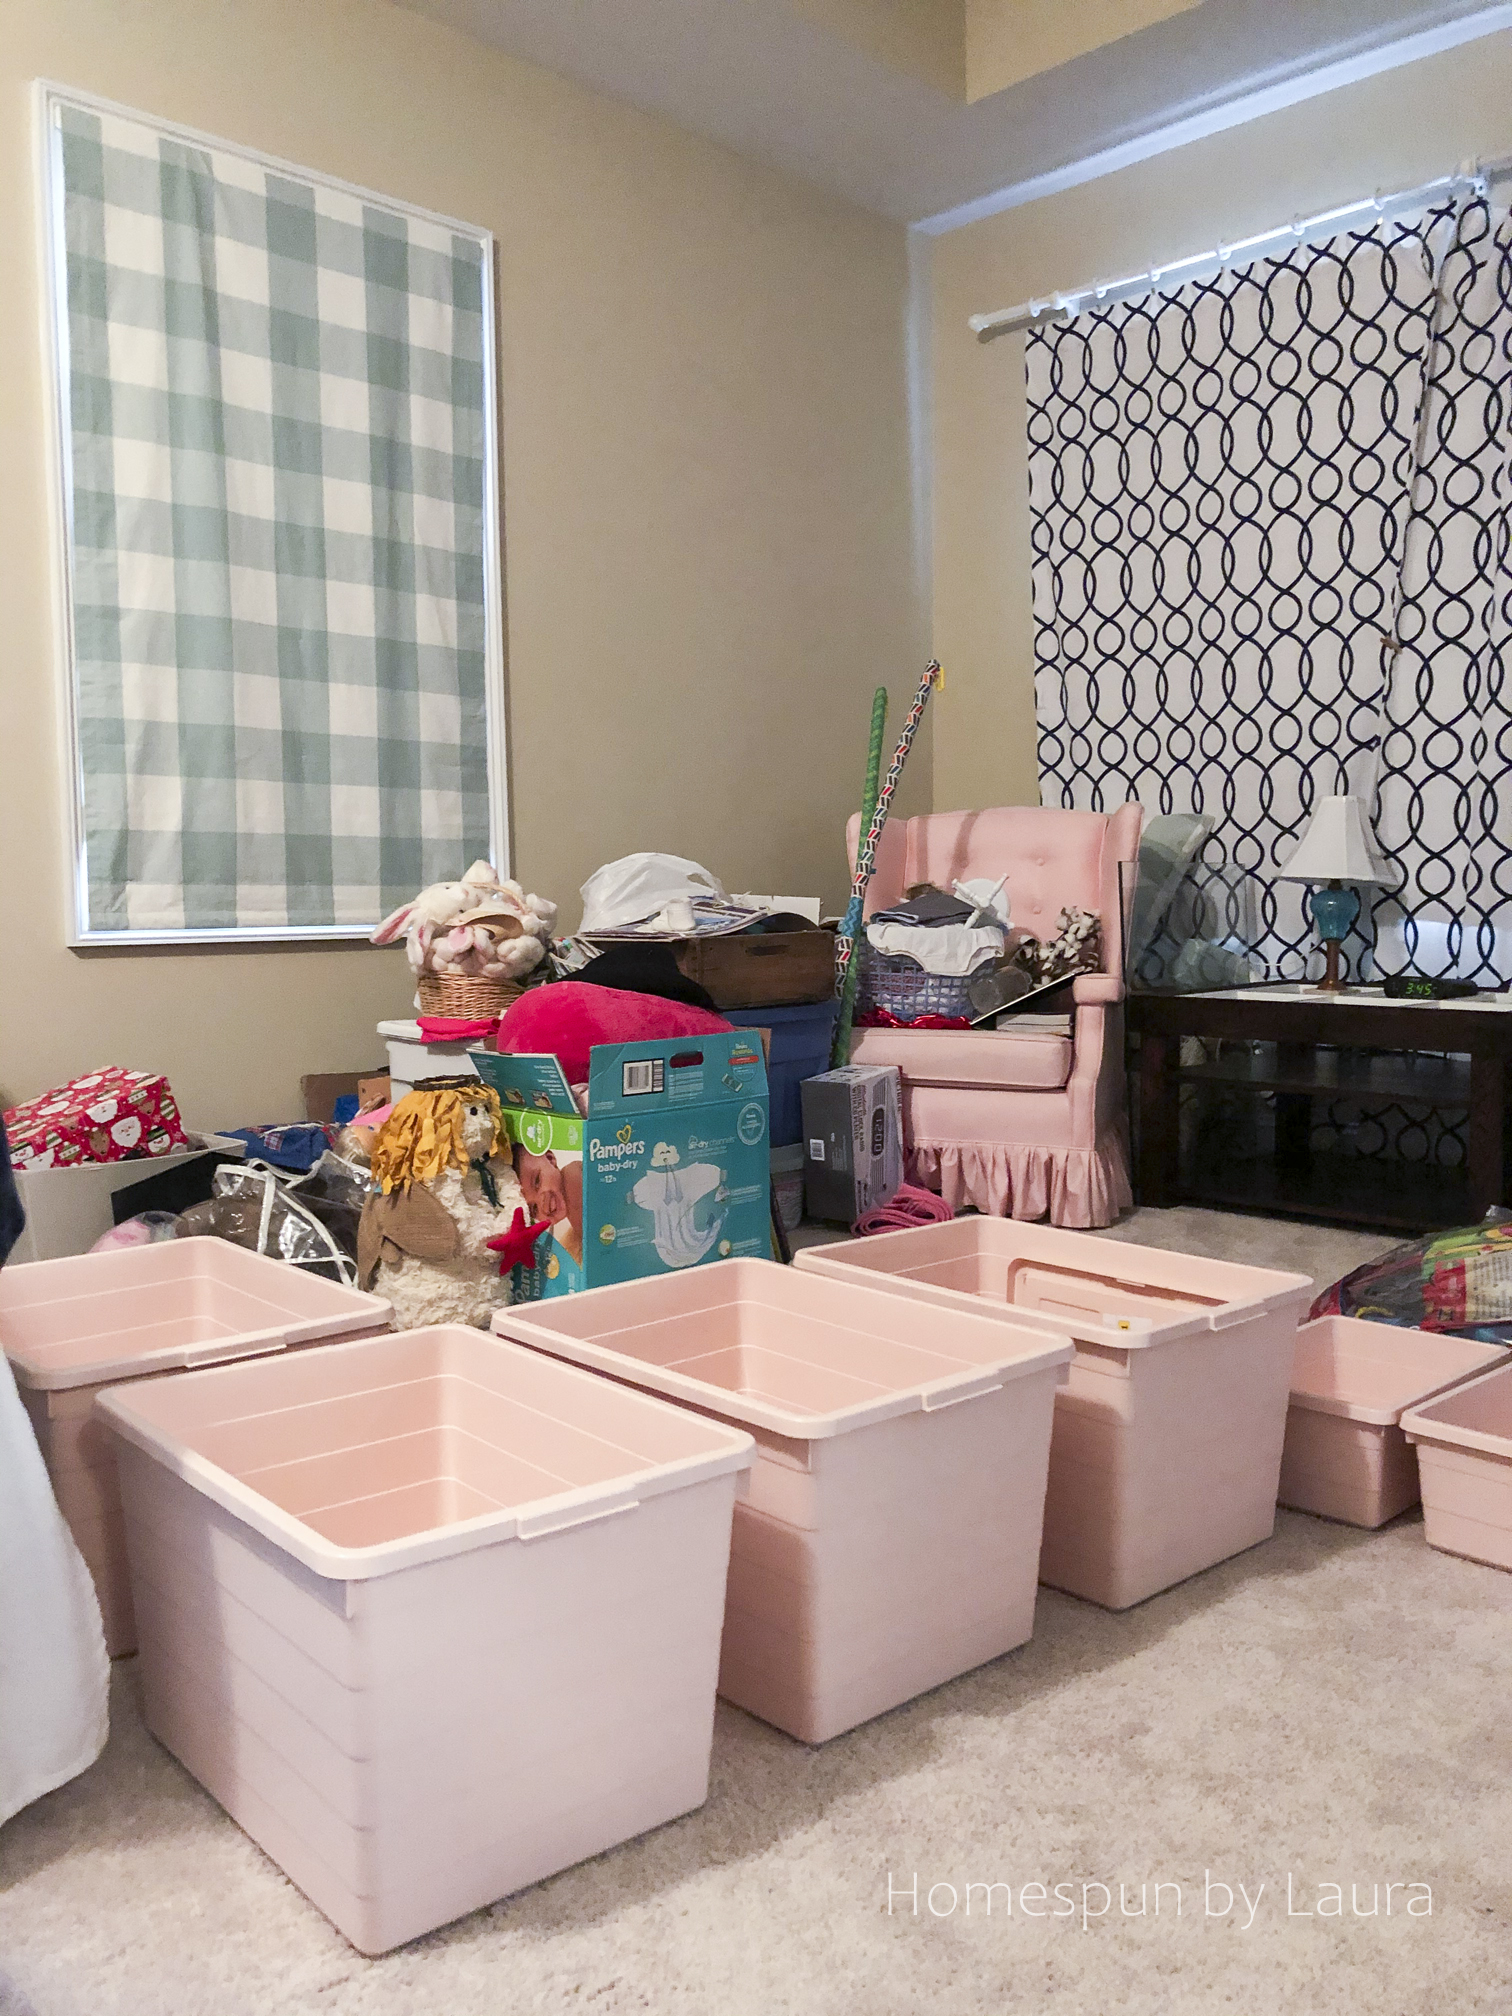
All the stuff.
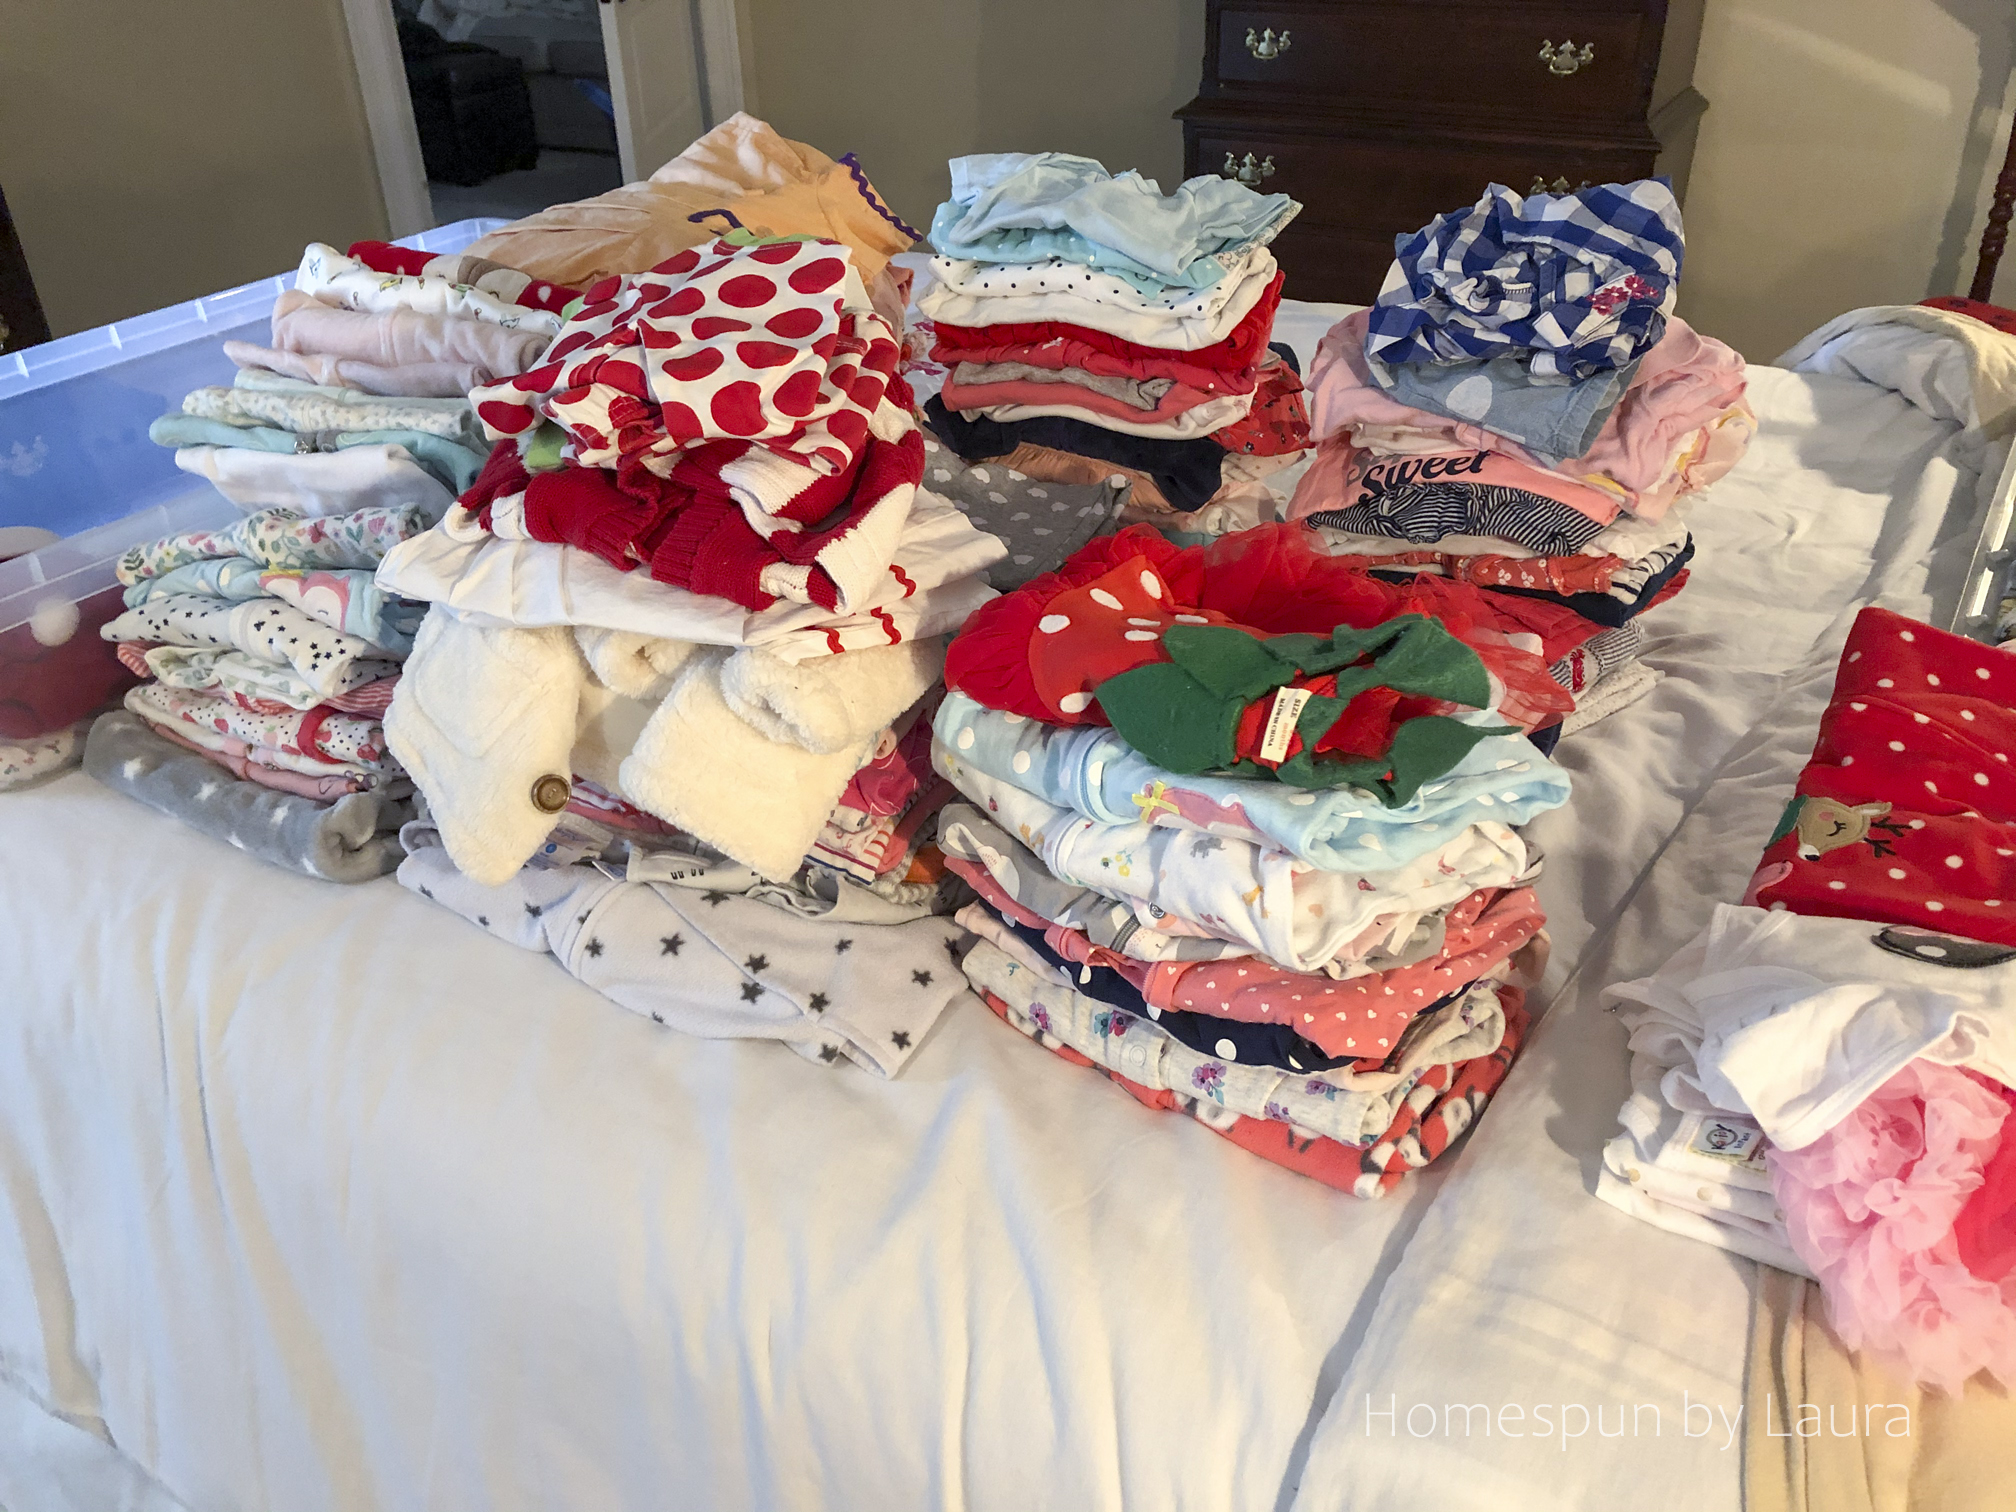
All the clothes.
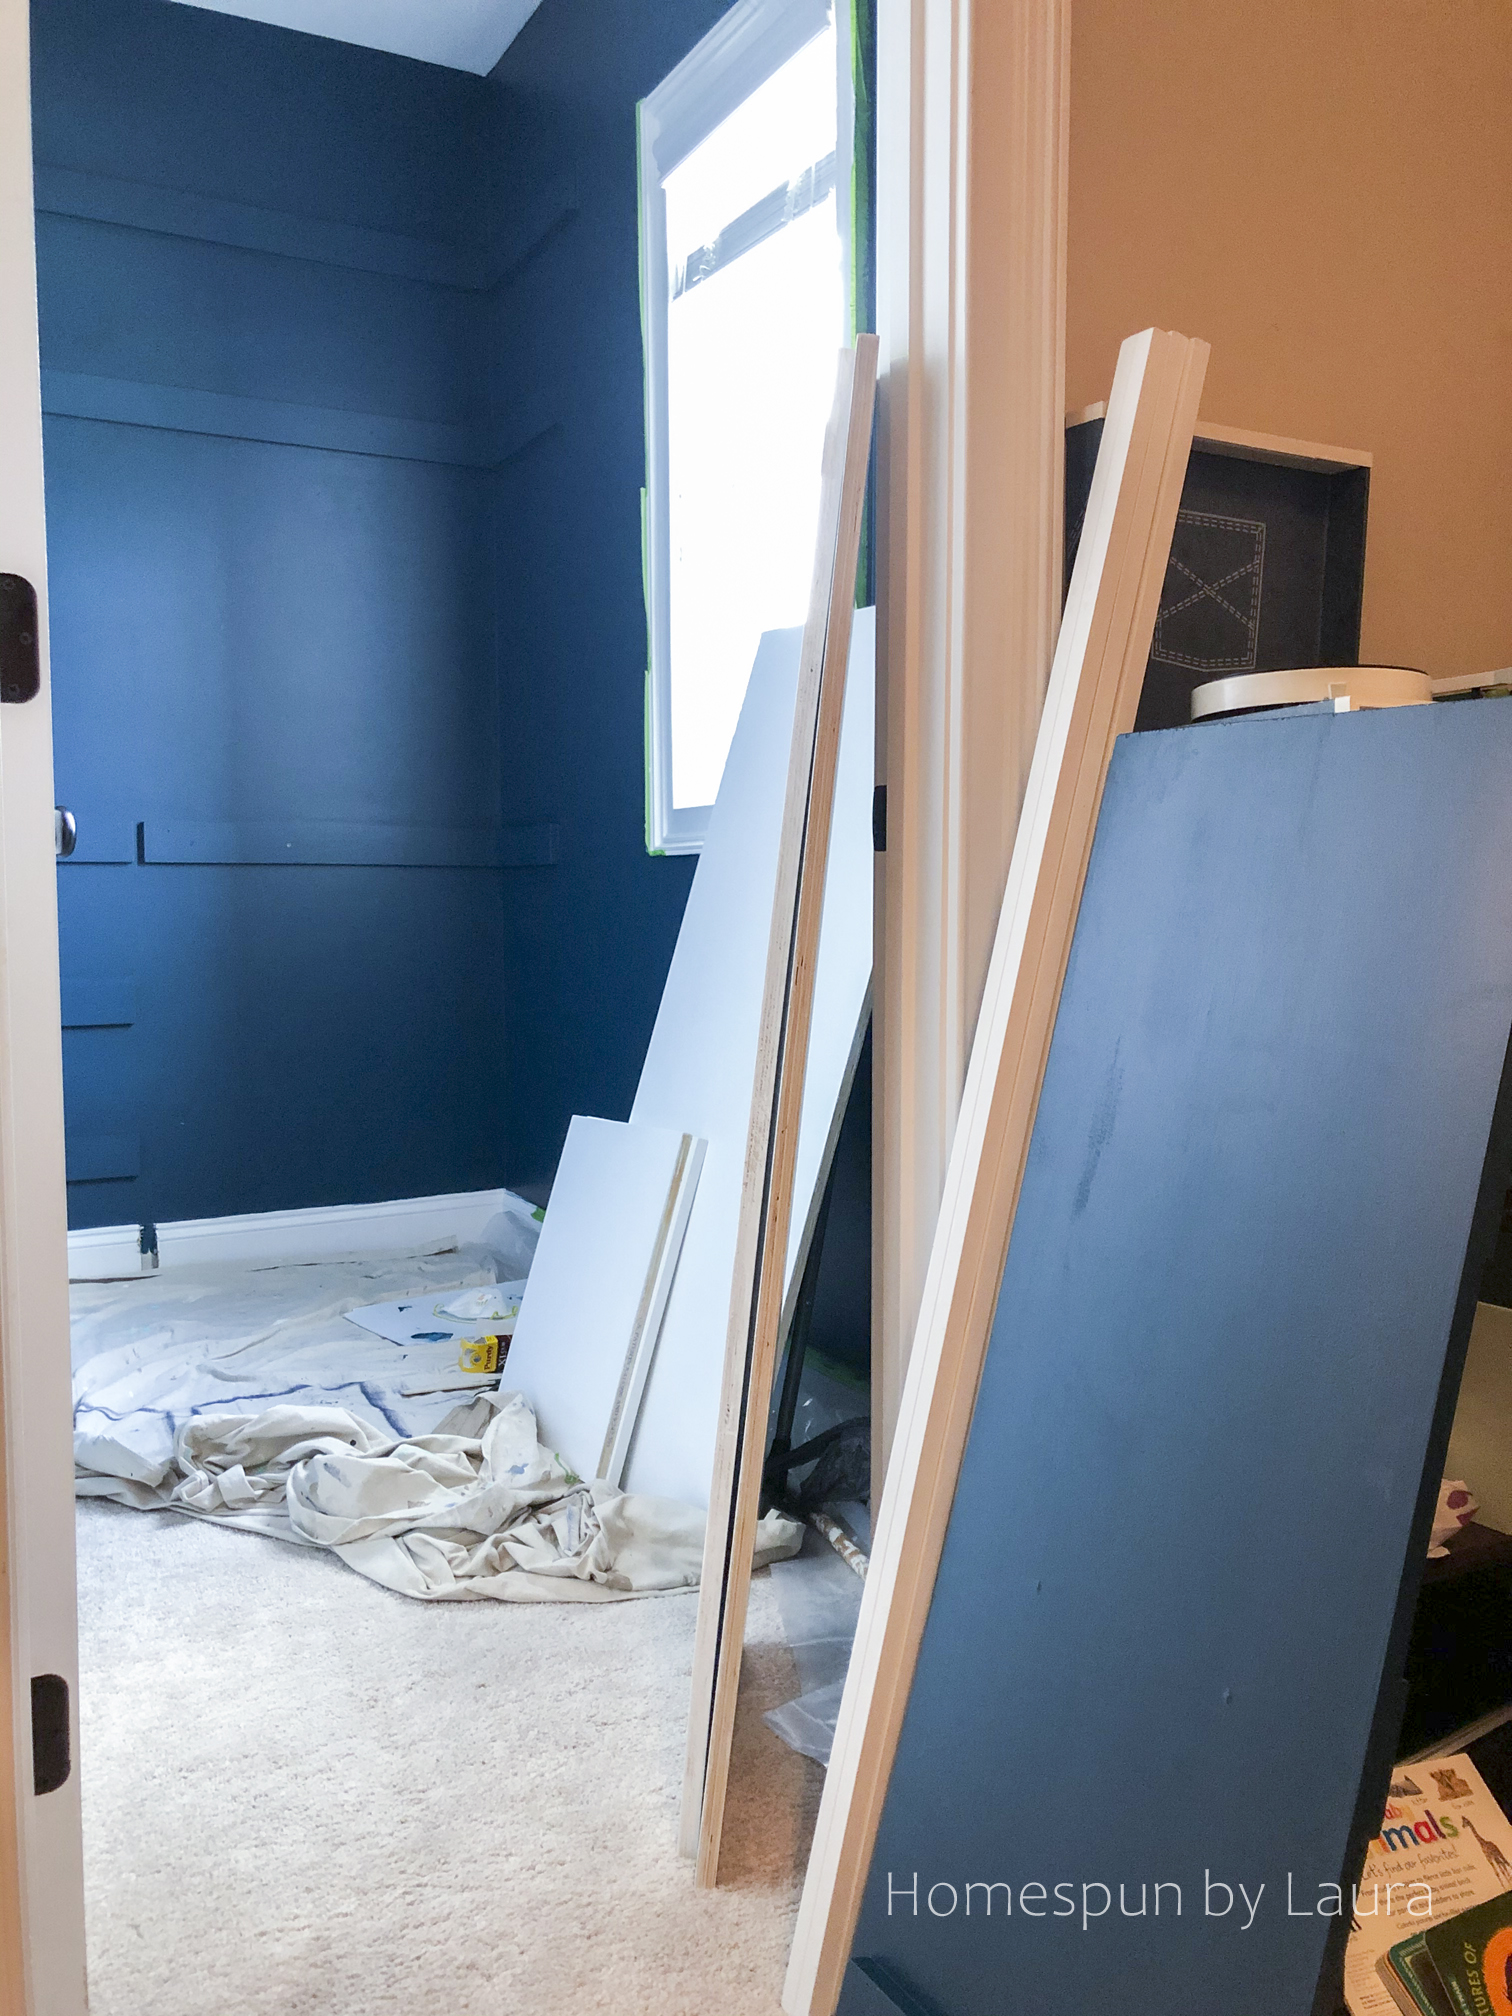
That left us with an empty beige slate.
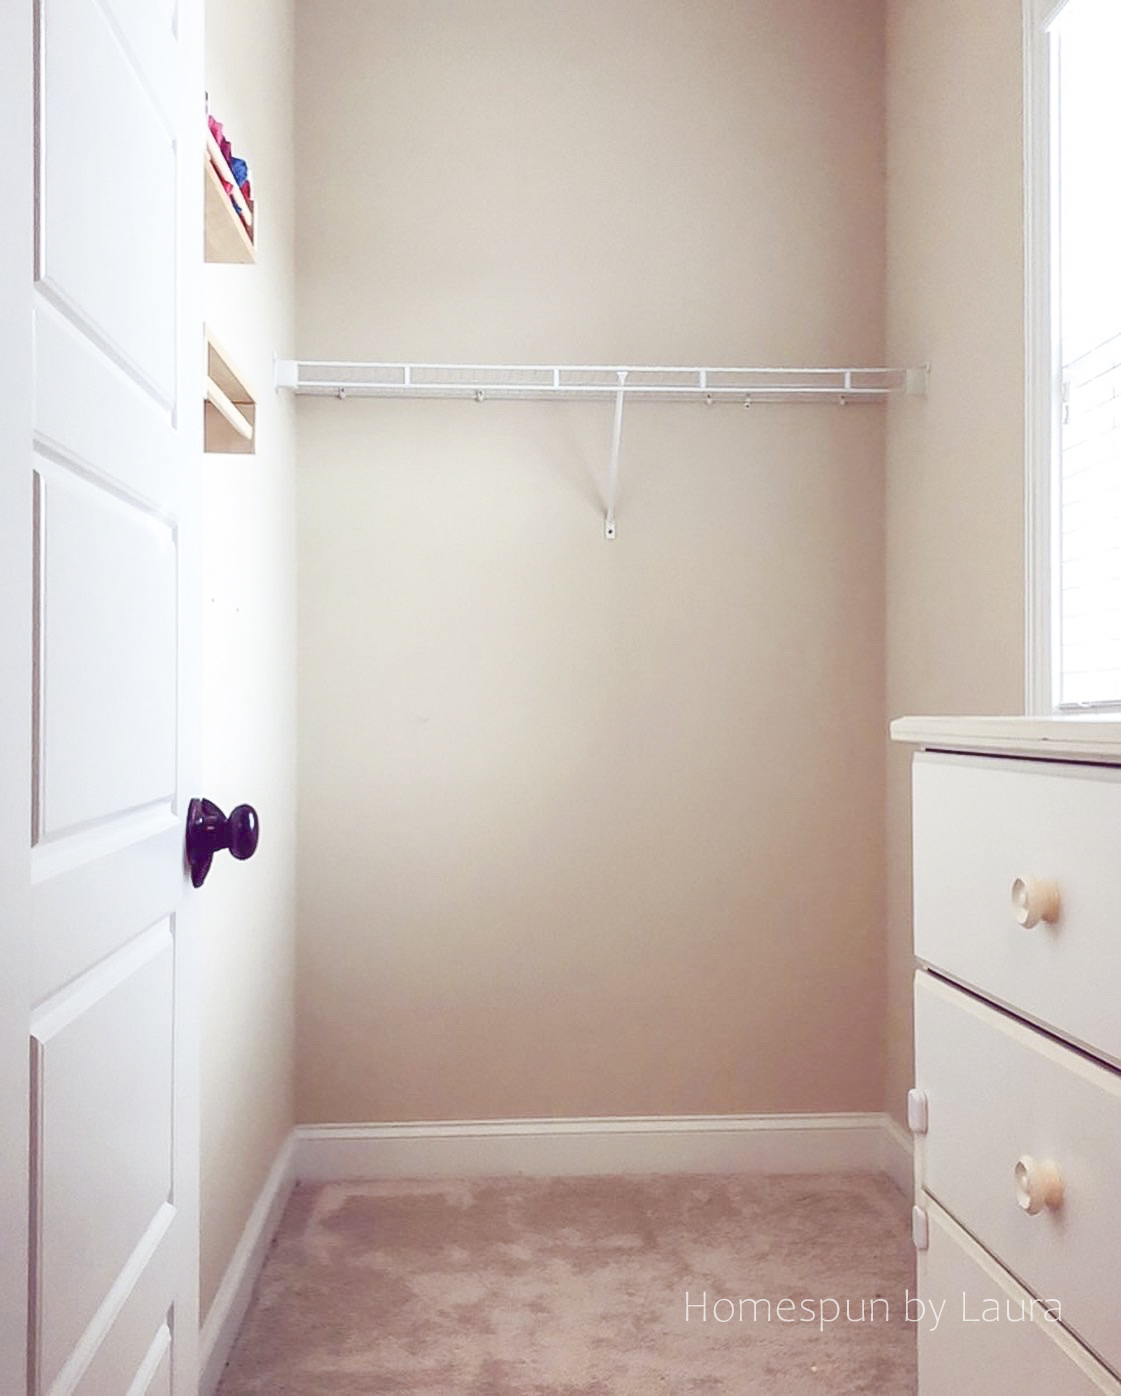
The wire shelf came out next.
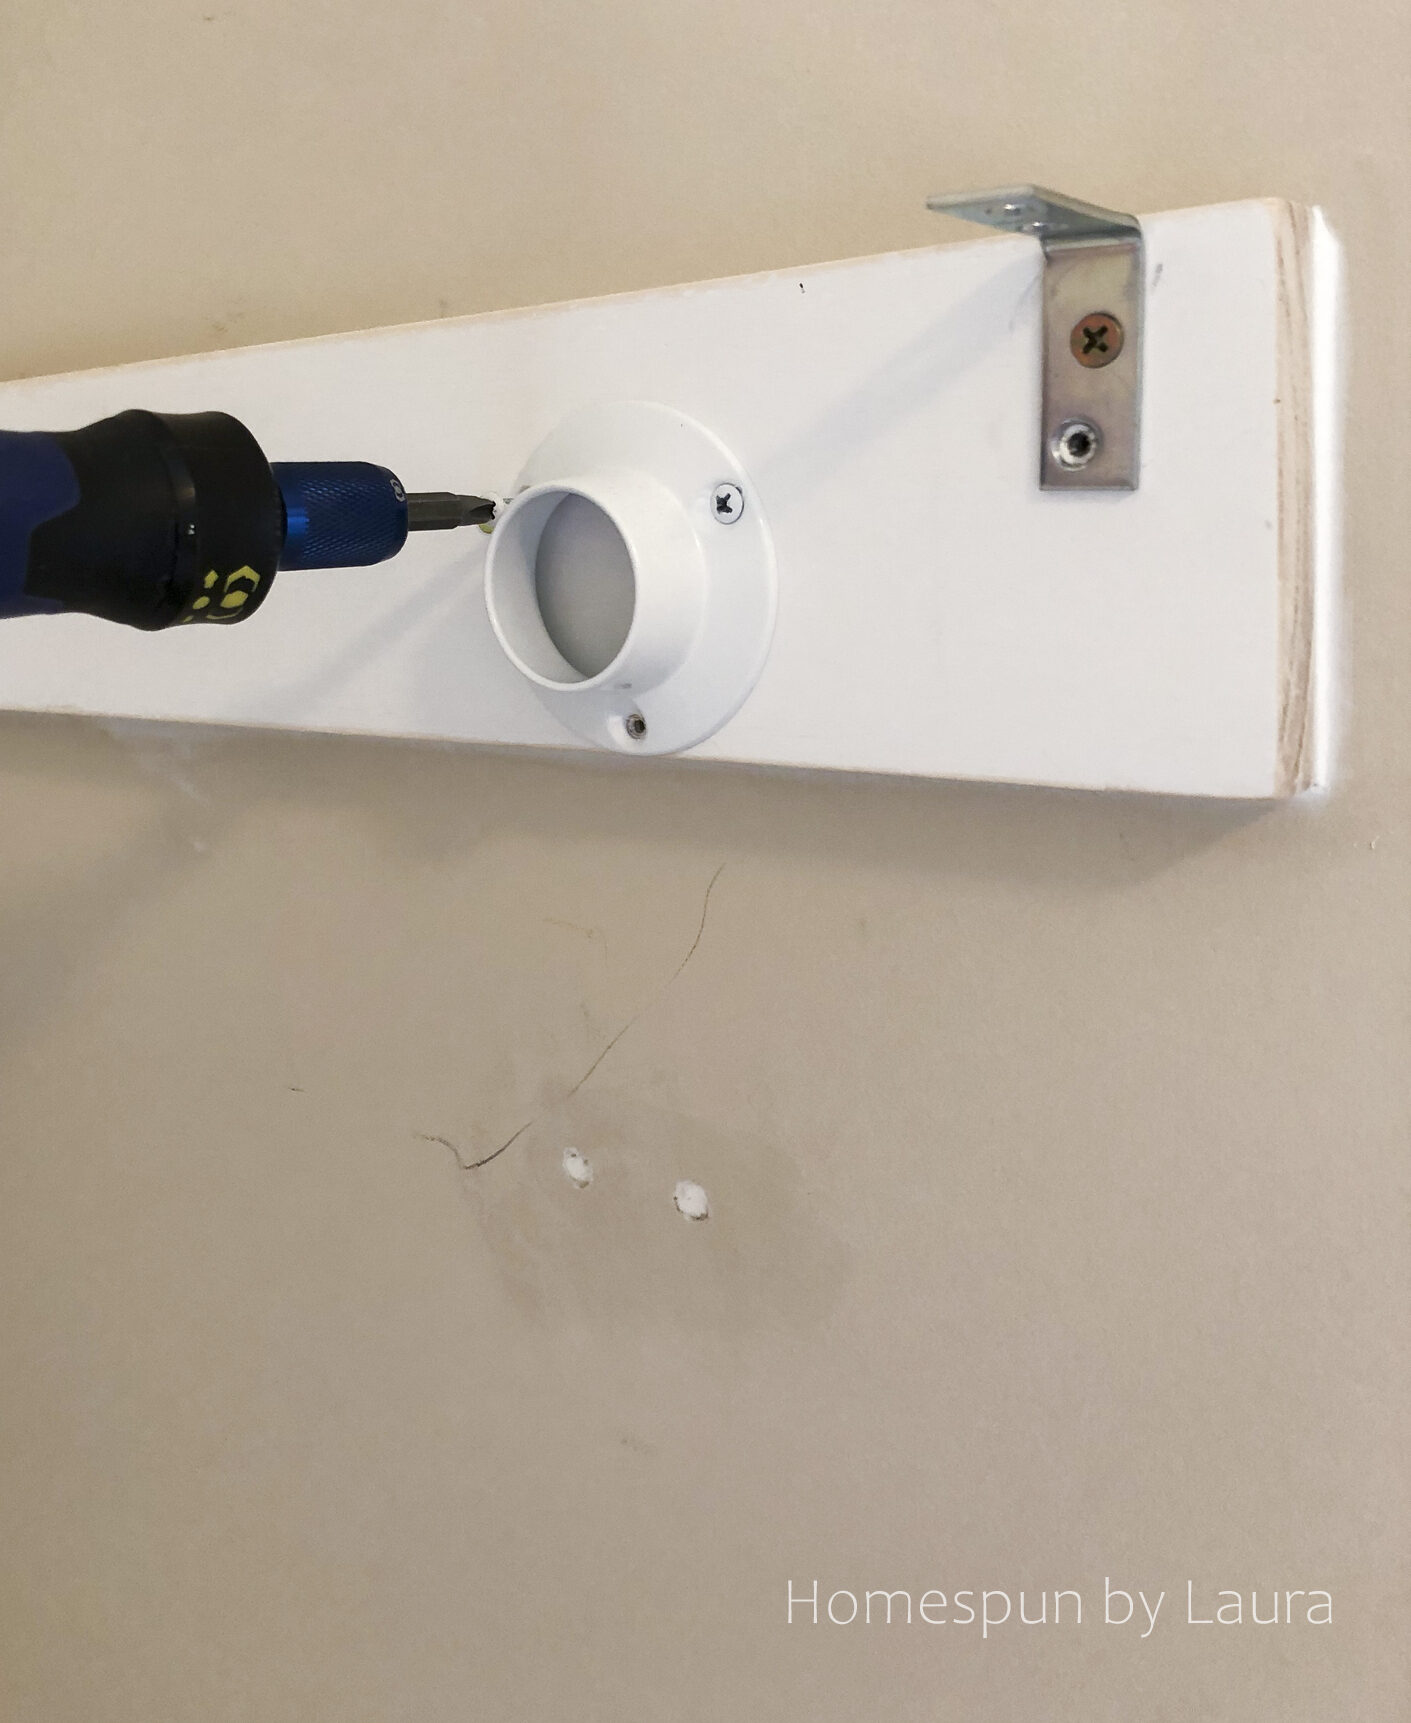
3. Install ‘floating’ shelf support system
Before I moved on to painting the walls, we first installed the pieces of wood on which the shelves would sit, creating the illusion of floating shelves. I chose primed boards, even though they cost a little more, to save time. Don’t forget to give them a light sanding first!
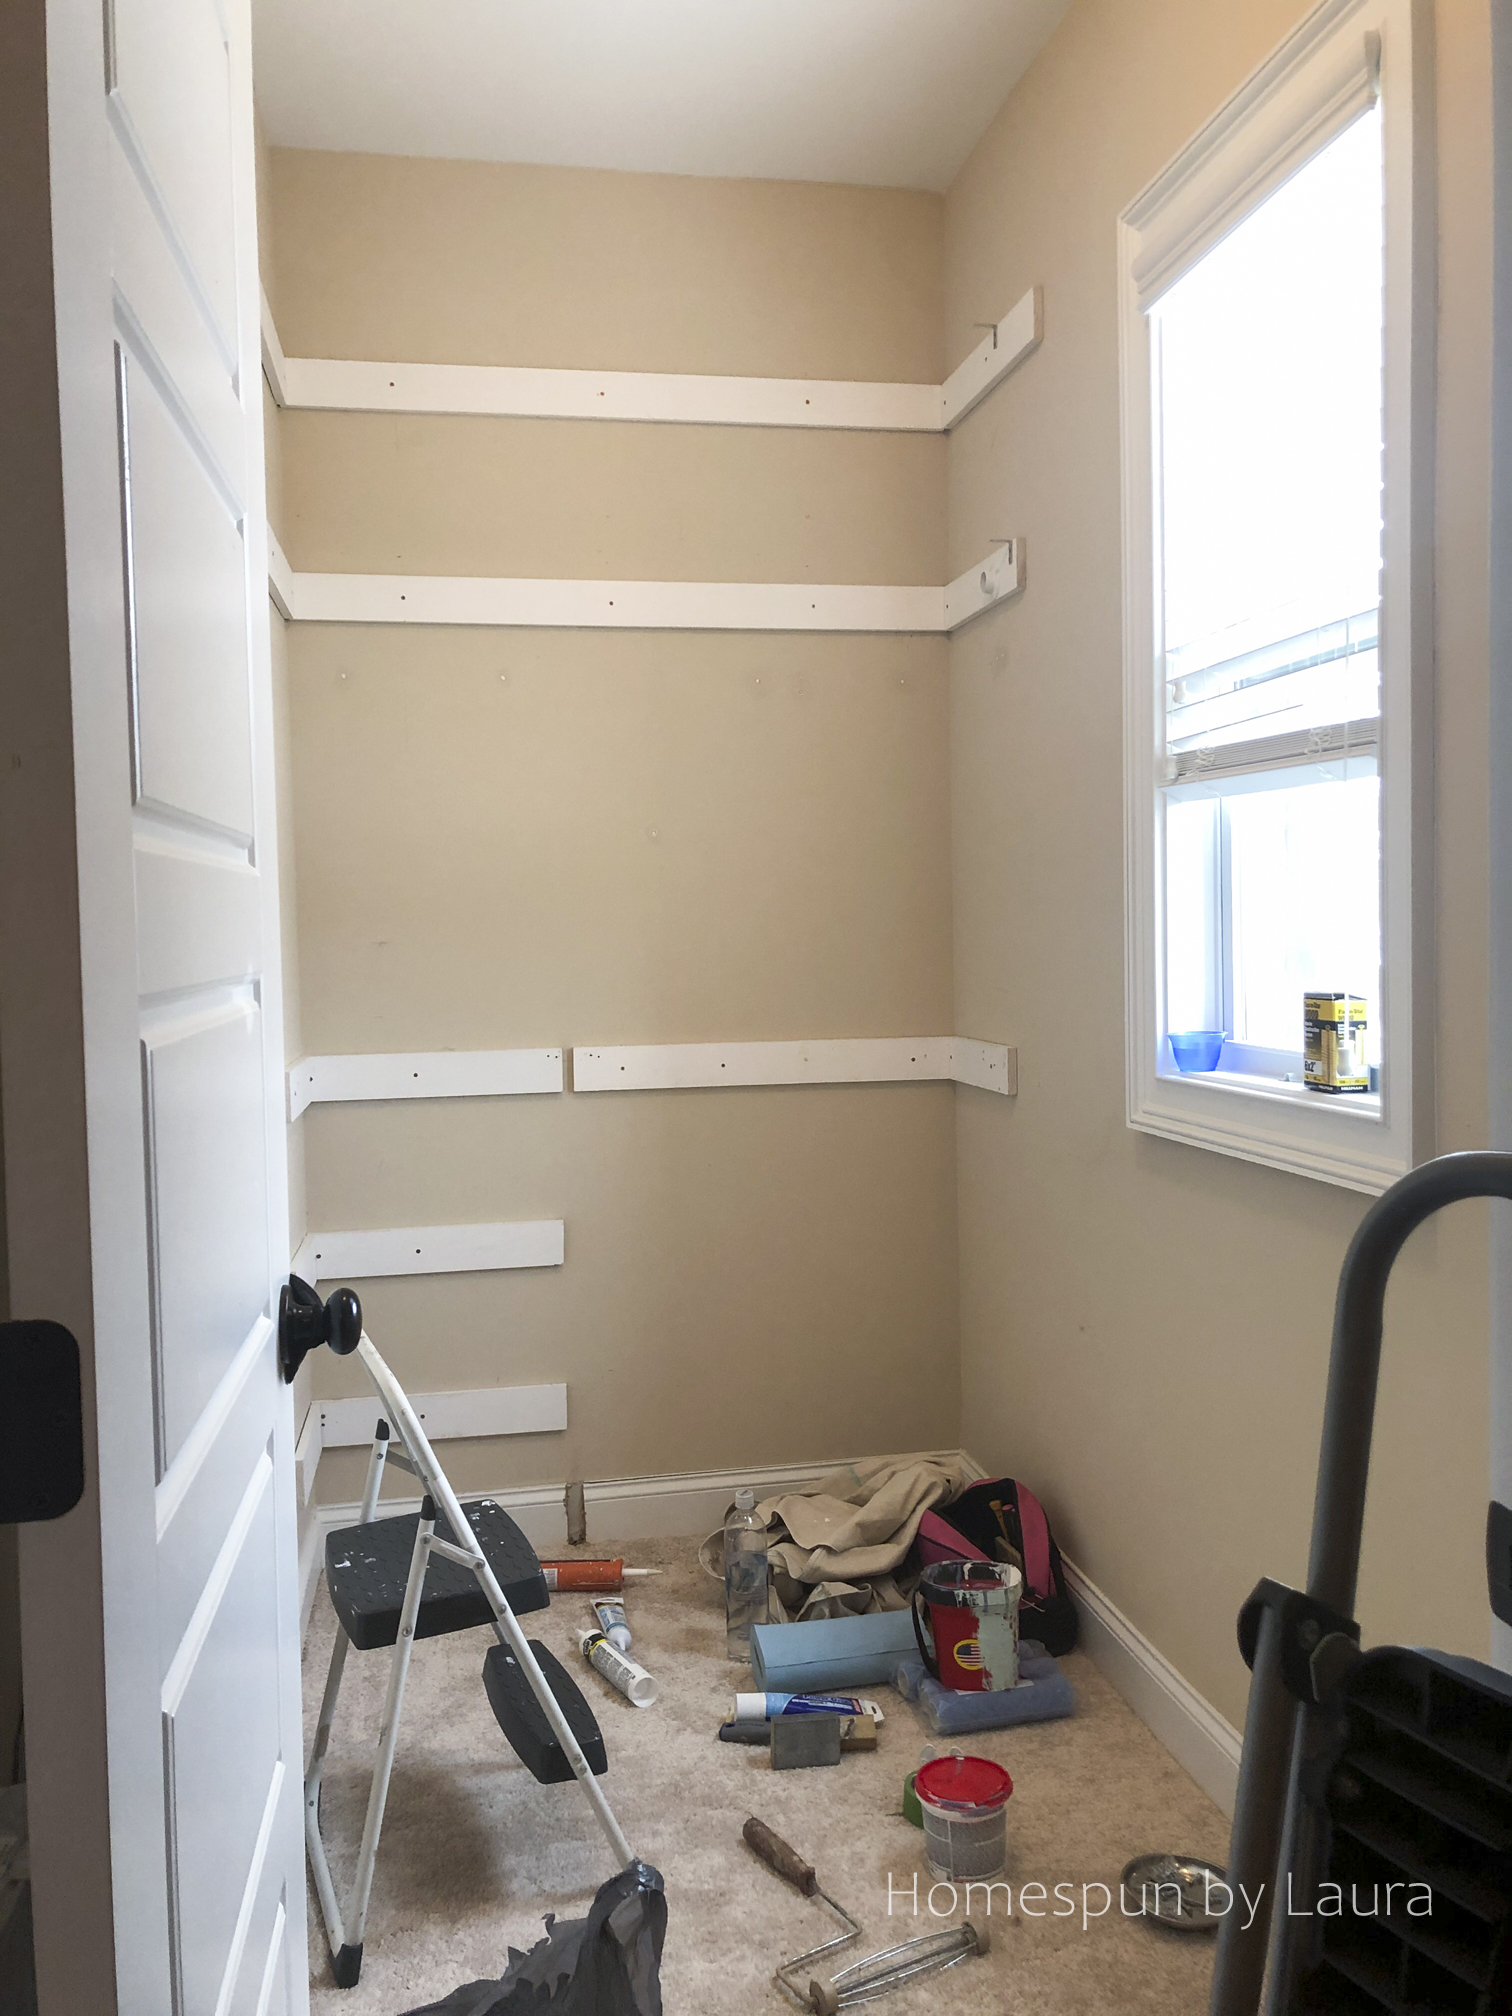
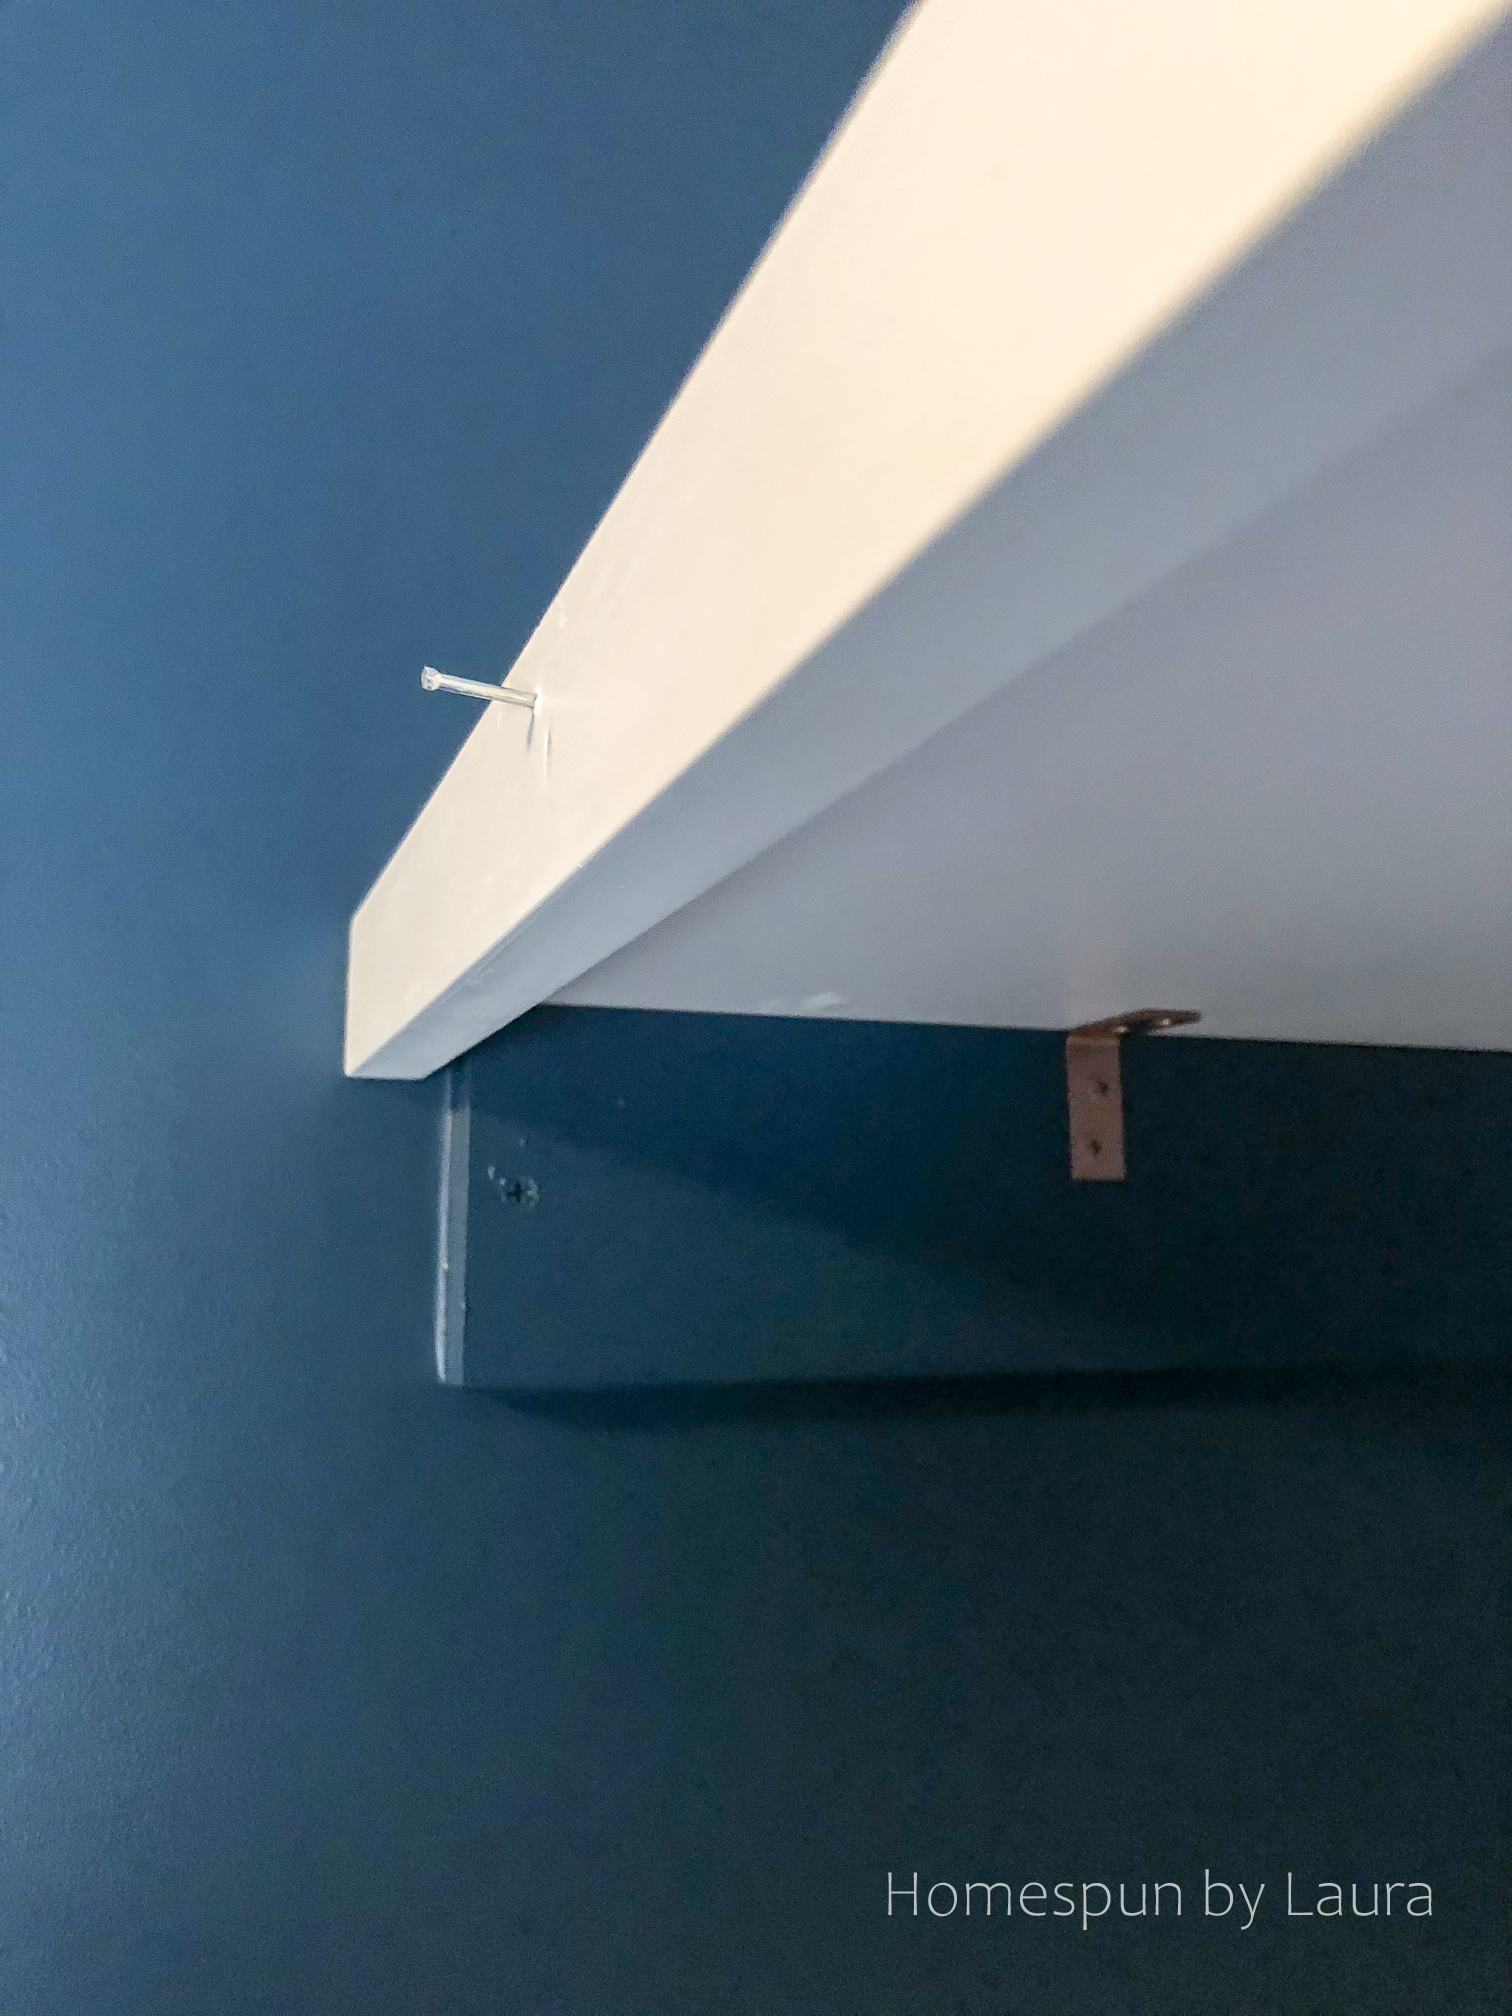
These are the boards to which we attached those corner braces I mentioned a minute ago. Basically, three sides of each shelf sit on a 4″ x 1″ piece of wood screwed into the studs. You can see this if you look at the top shelf in the photo below:
The cost for the four primed 12 foot boards I needed to build this system was actually the most expensive part of this project, but it 1) Cost much less than buying fancy brackets, and 2) Is nearly flush with the wall so allows for more storage underneath (when brackets stick out from the wall to support a shelf, they eat up a lot of valuable shelf real estate!).
This system removes the need for expensive brackets and holds the (shocking!) weight we’ve put on the shelves. Seriously – one of those bins is so heavy I had trouble putting it on the shelf without help, but the shelf barely budged when I did.
4. Sand, Prime + Paint/Stain Wood for Shelves and Rods
Sanding + Priming is my least favorite step of most projects because there are just so many little things to do. In this case: sand, prime, paint all the shelves. Sand, prime, stain, polyurethane the rods. Sand and spray the hardware. Wait while it dries between coats; in the meantime, run upstairs to paint a wall, and don’t forget to go pick up the girl at preschool!
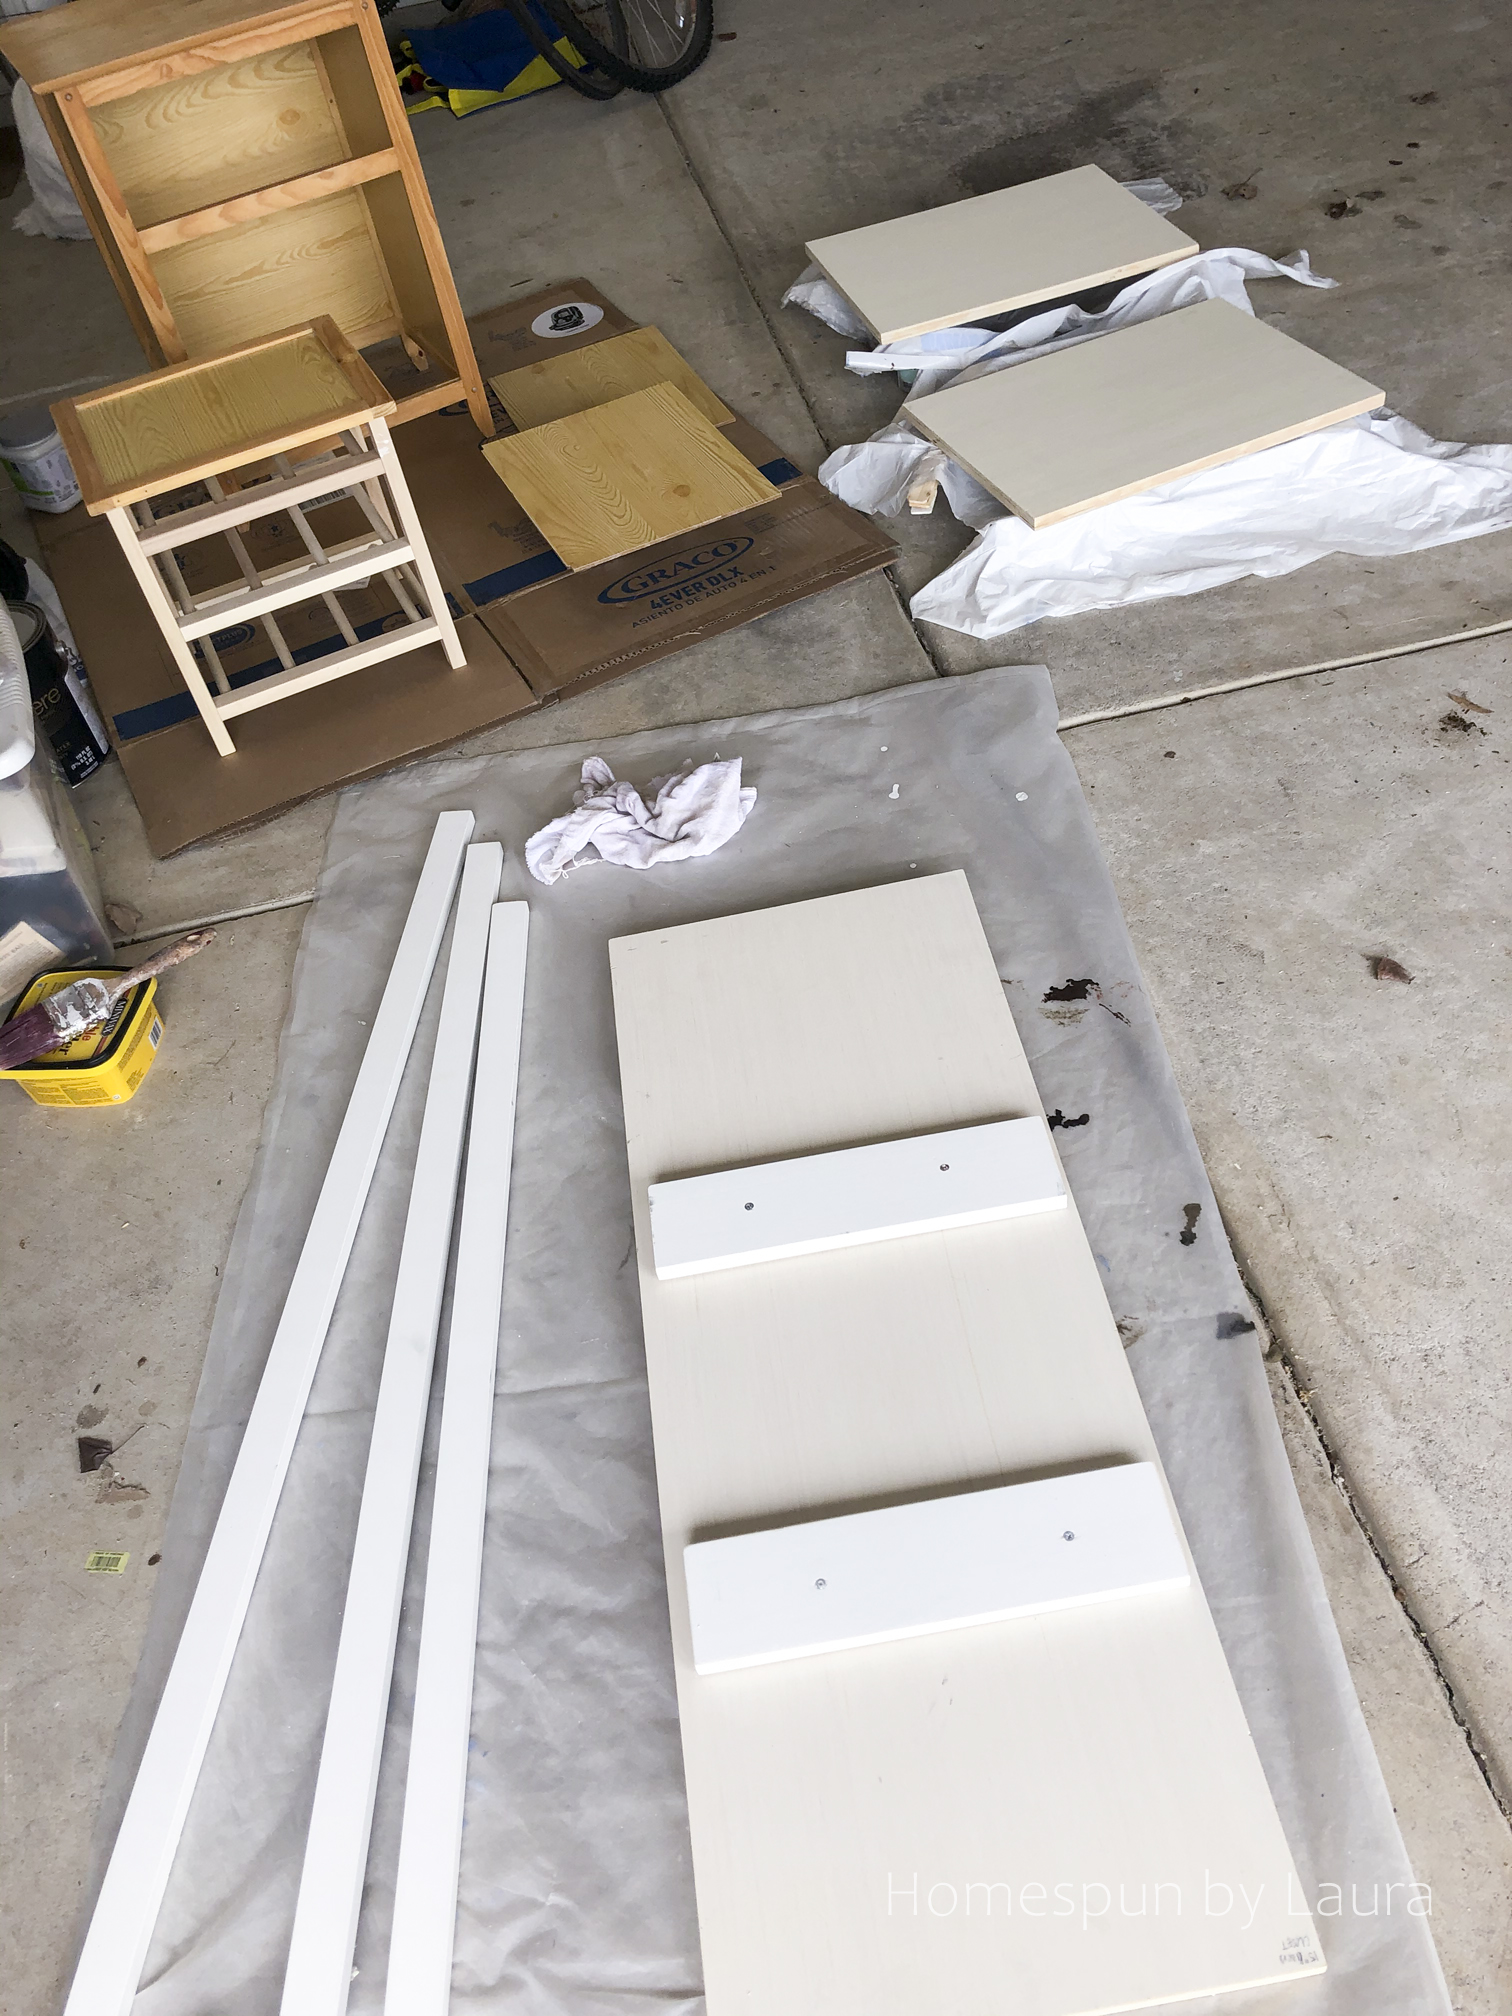
Just a few of the items that needed sanding, priming, and painting laid out in the garage.
Obviously, it ‘s a vital step and was well worth it in the end. But it was annoying and felt never-ending while I was in the middle of it!
TIP: I saved time (and paint!) by ONLY PAINTING THE BOTTOMS of those top two shelves way up high; no one will ever see the tops! For the bottom full-width shelf, I only put one coat of paint on the bottom since it’s less likely to be studied (unless, of course, you lie there in the book nook and stare at it!).
5. Prep walls for paint
This is another step I really don’t like but that’s completely necessary. I caulked between the support boards and the wall, removed all the hardware, and filled in the holes the wire shelf left behind (and a few others we had made accidentally).
6. Paint walls
What would be the point of creating a cool DIY closet shelving system and leaving the walls a drab yellow-y beige? I went way out of my comfort zone with the color in the closet, and it was the right choice.
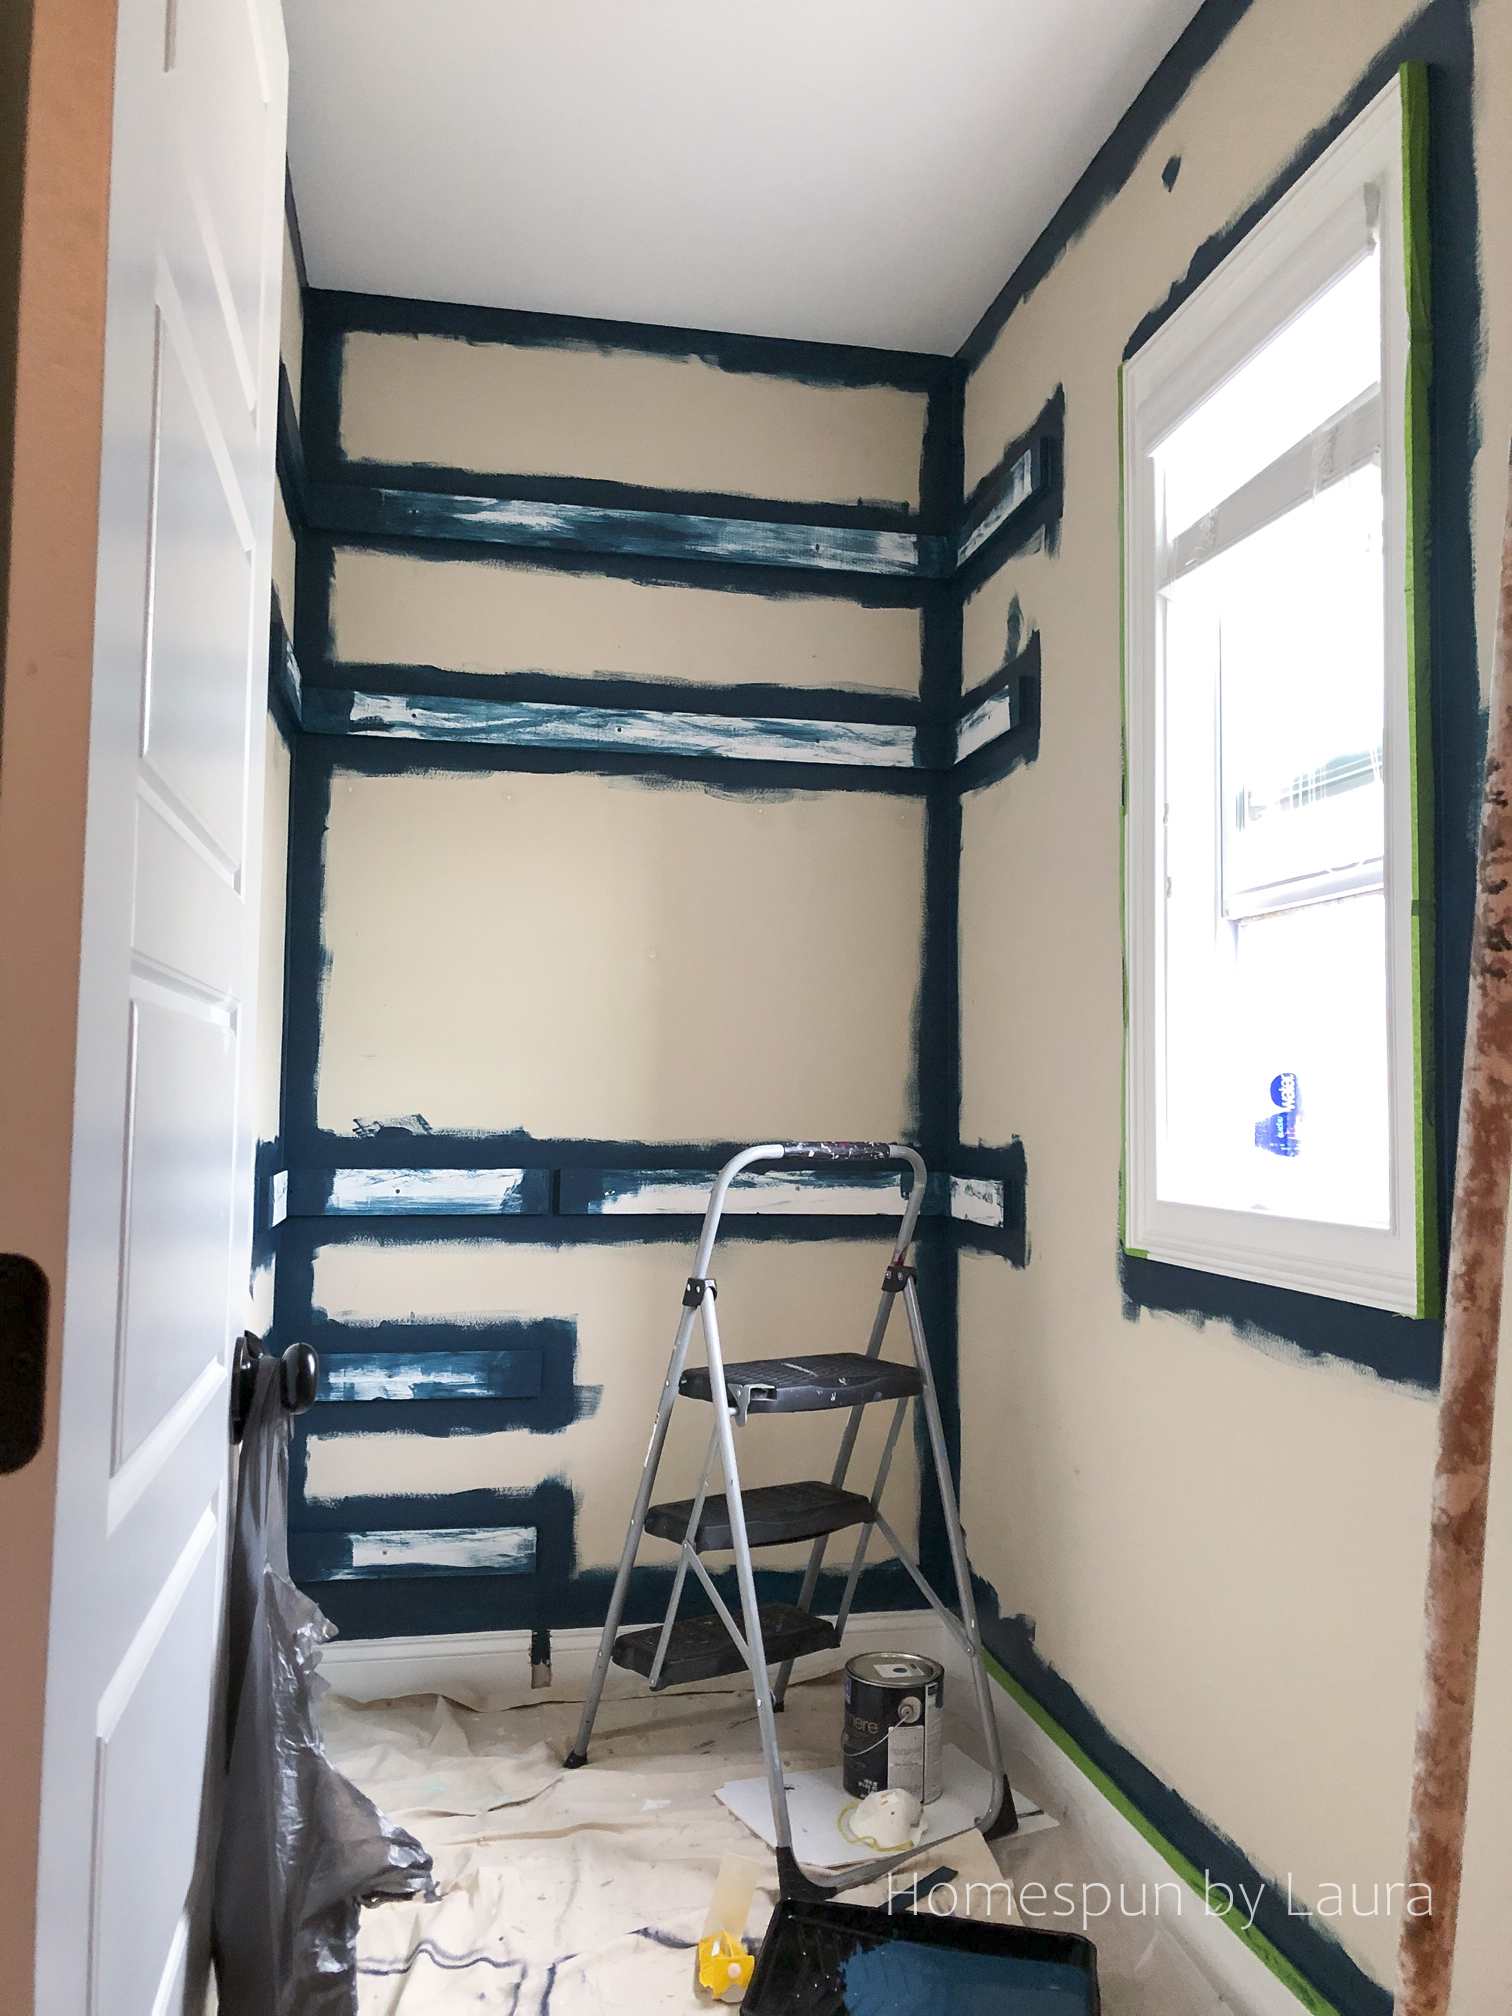
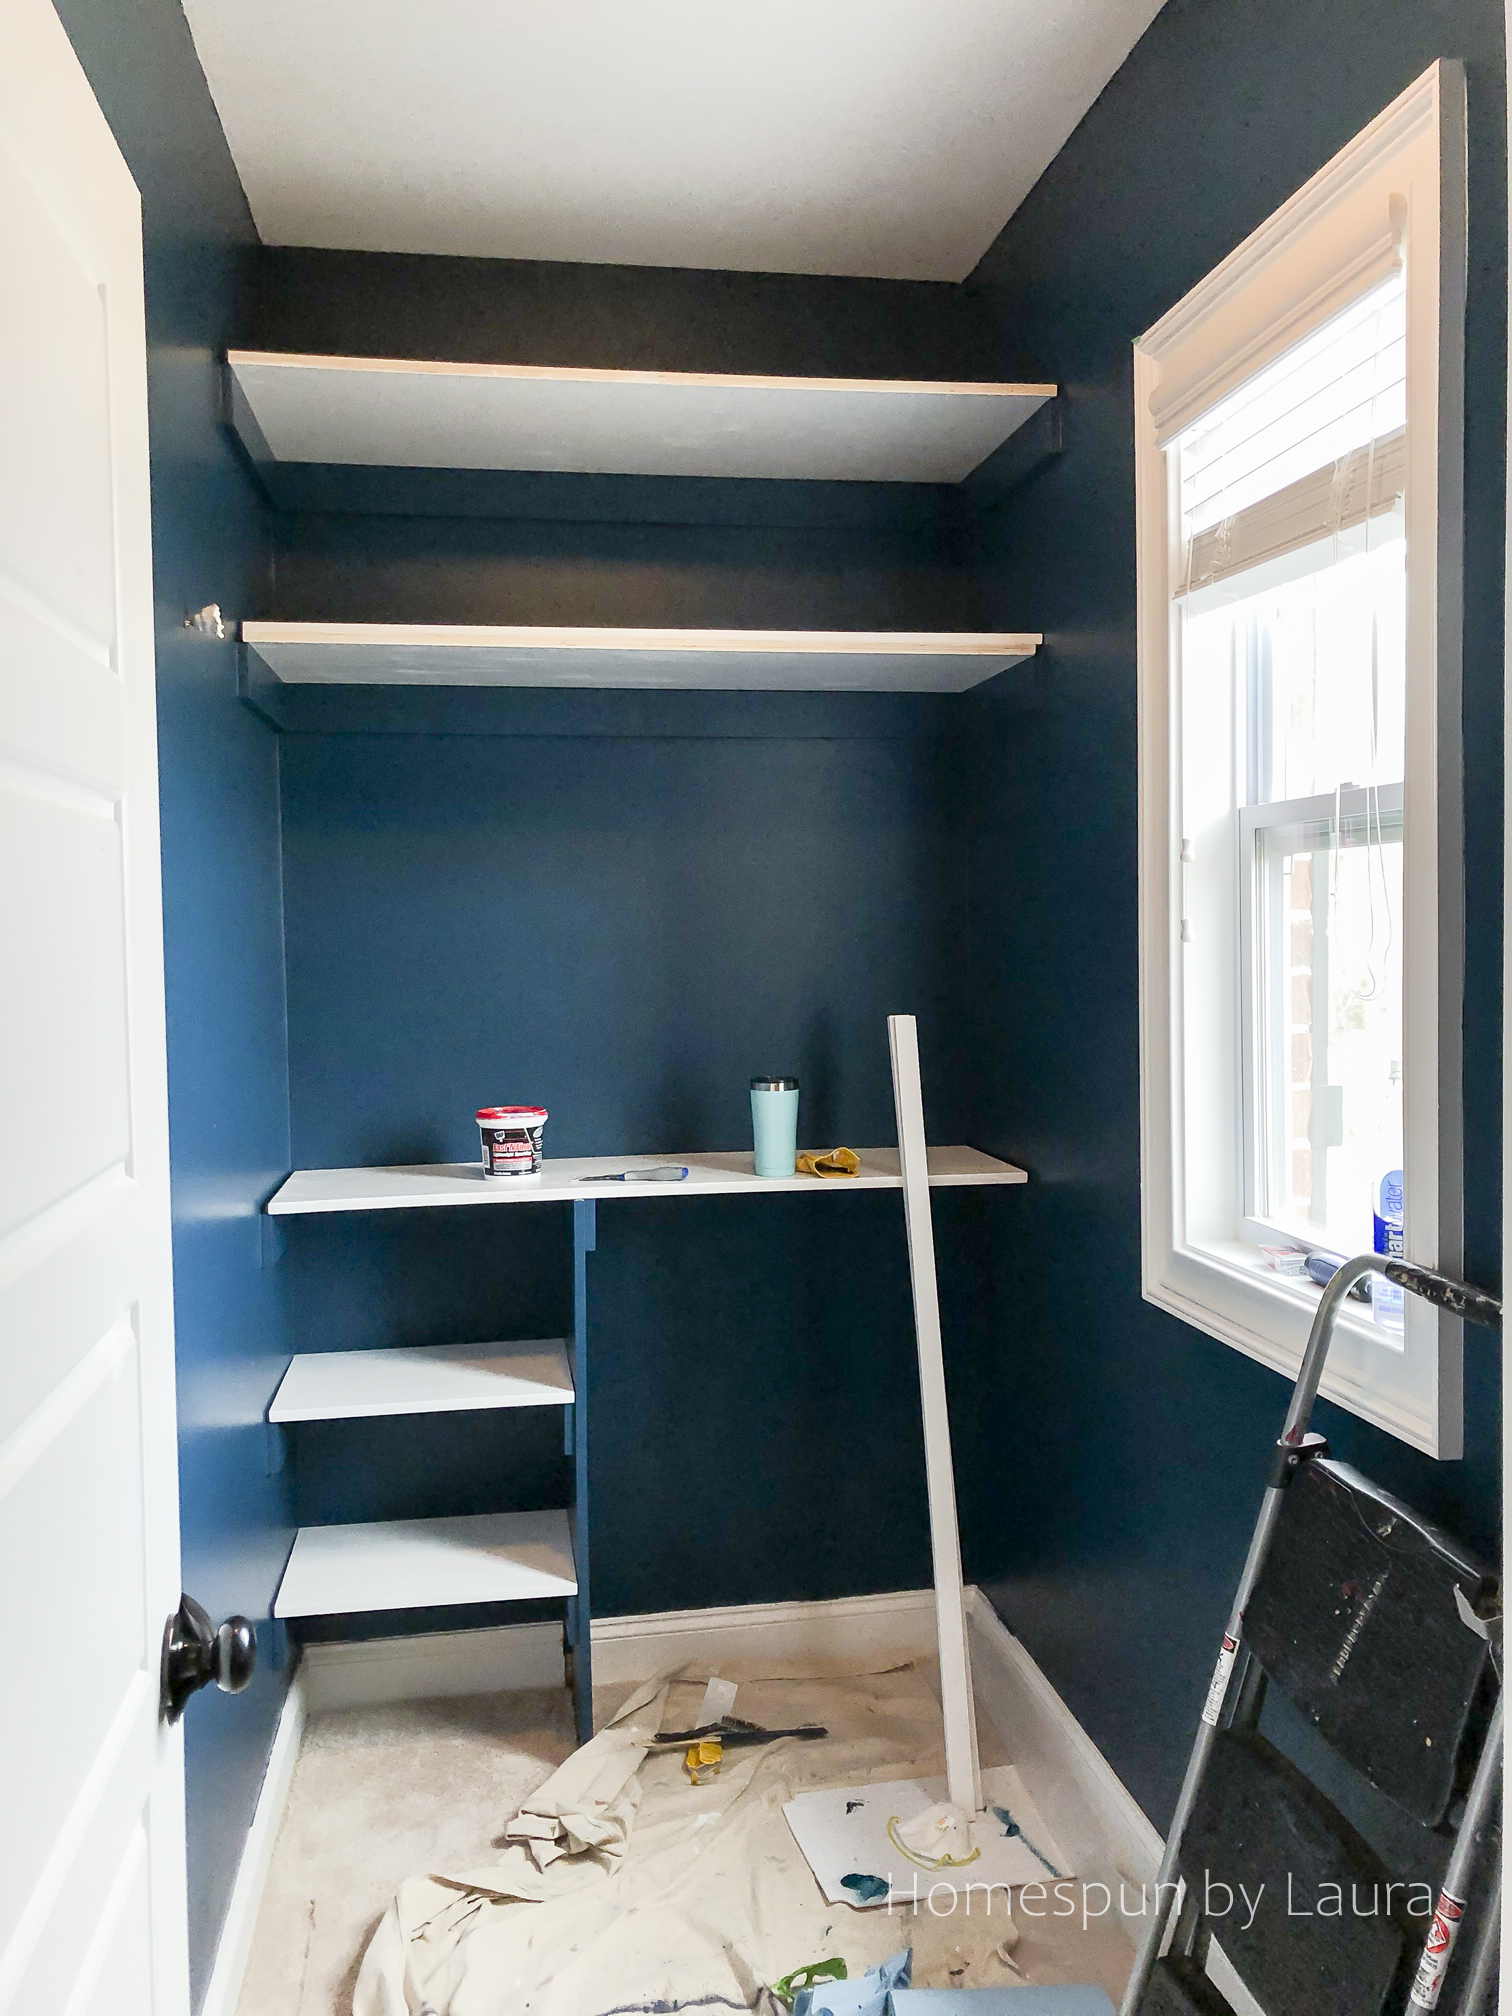
Painting the newly-installed support pieces creates the illusion of floating shelves.
 Those wooden pieces just blend into the background!
It took three coats – a full gallon, minus a few leftover tablespoons – to paint all four walls plus the riser (in the foreground of this picture). And when I look at the walls, my discerning eye can still pick out a few areas where three coats wasn’t enough. I’d never used such a dark color before and was surprised at how much paint it takes to truly cover a wall with it. I love it though and wouldn’t change it! The color is Moscow Midnight by Sherwin Williams.
We set up the pack’n’play in our bedroom for afternoon naps while I painted. It took several days to get all the coats on, and we wanted to let the room air out with the windows and door open so the smell dissipated by bedtime each of those days.
7. Install shelving!
Once ALLLL the painted things were dry, I lugged all those shelves and rods upstairs. The top two full-width shelves are pretty heavy because the wood is fairly thick to support the weight we’ve stacked on them, so I definitely got a workout that day.
Remember to add the shelves very carefully to avoid scratching the new paint job on your walls!
Next, I reattached all the newly copper hardware and hung the rods.
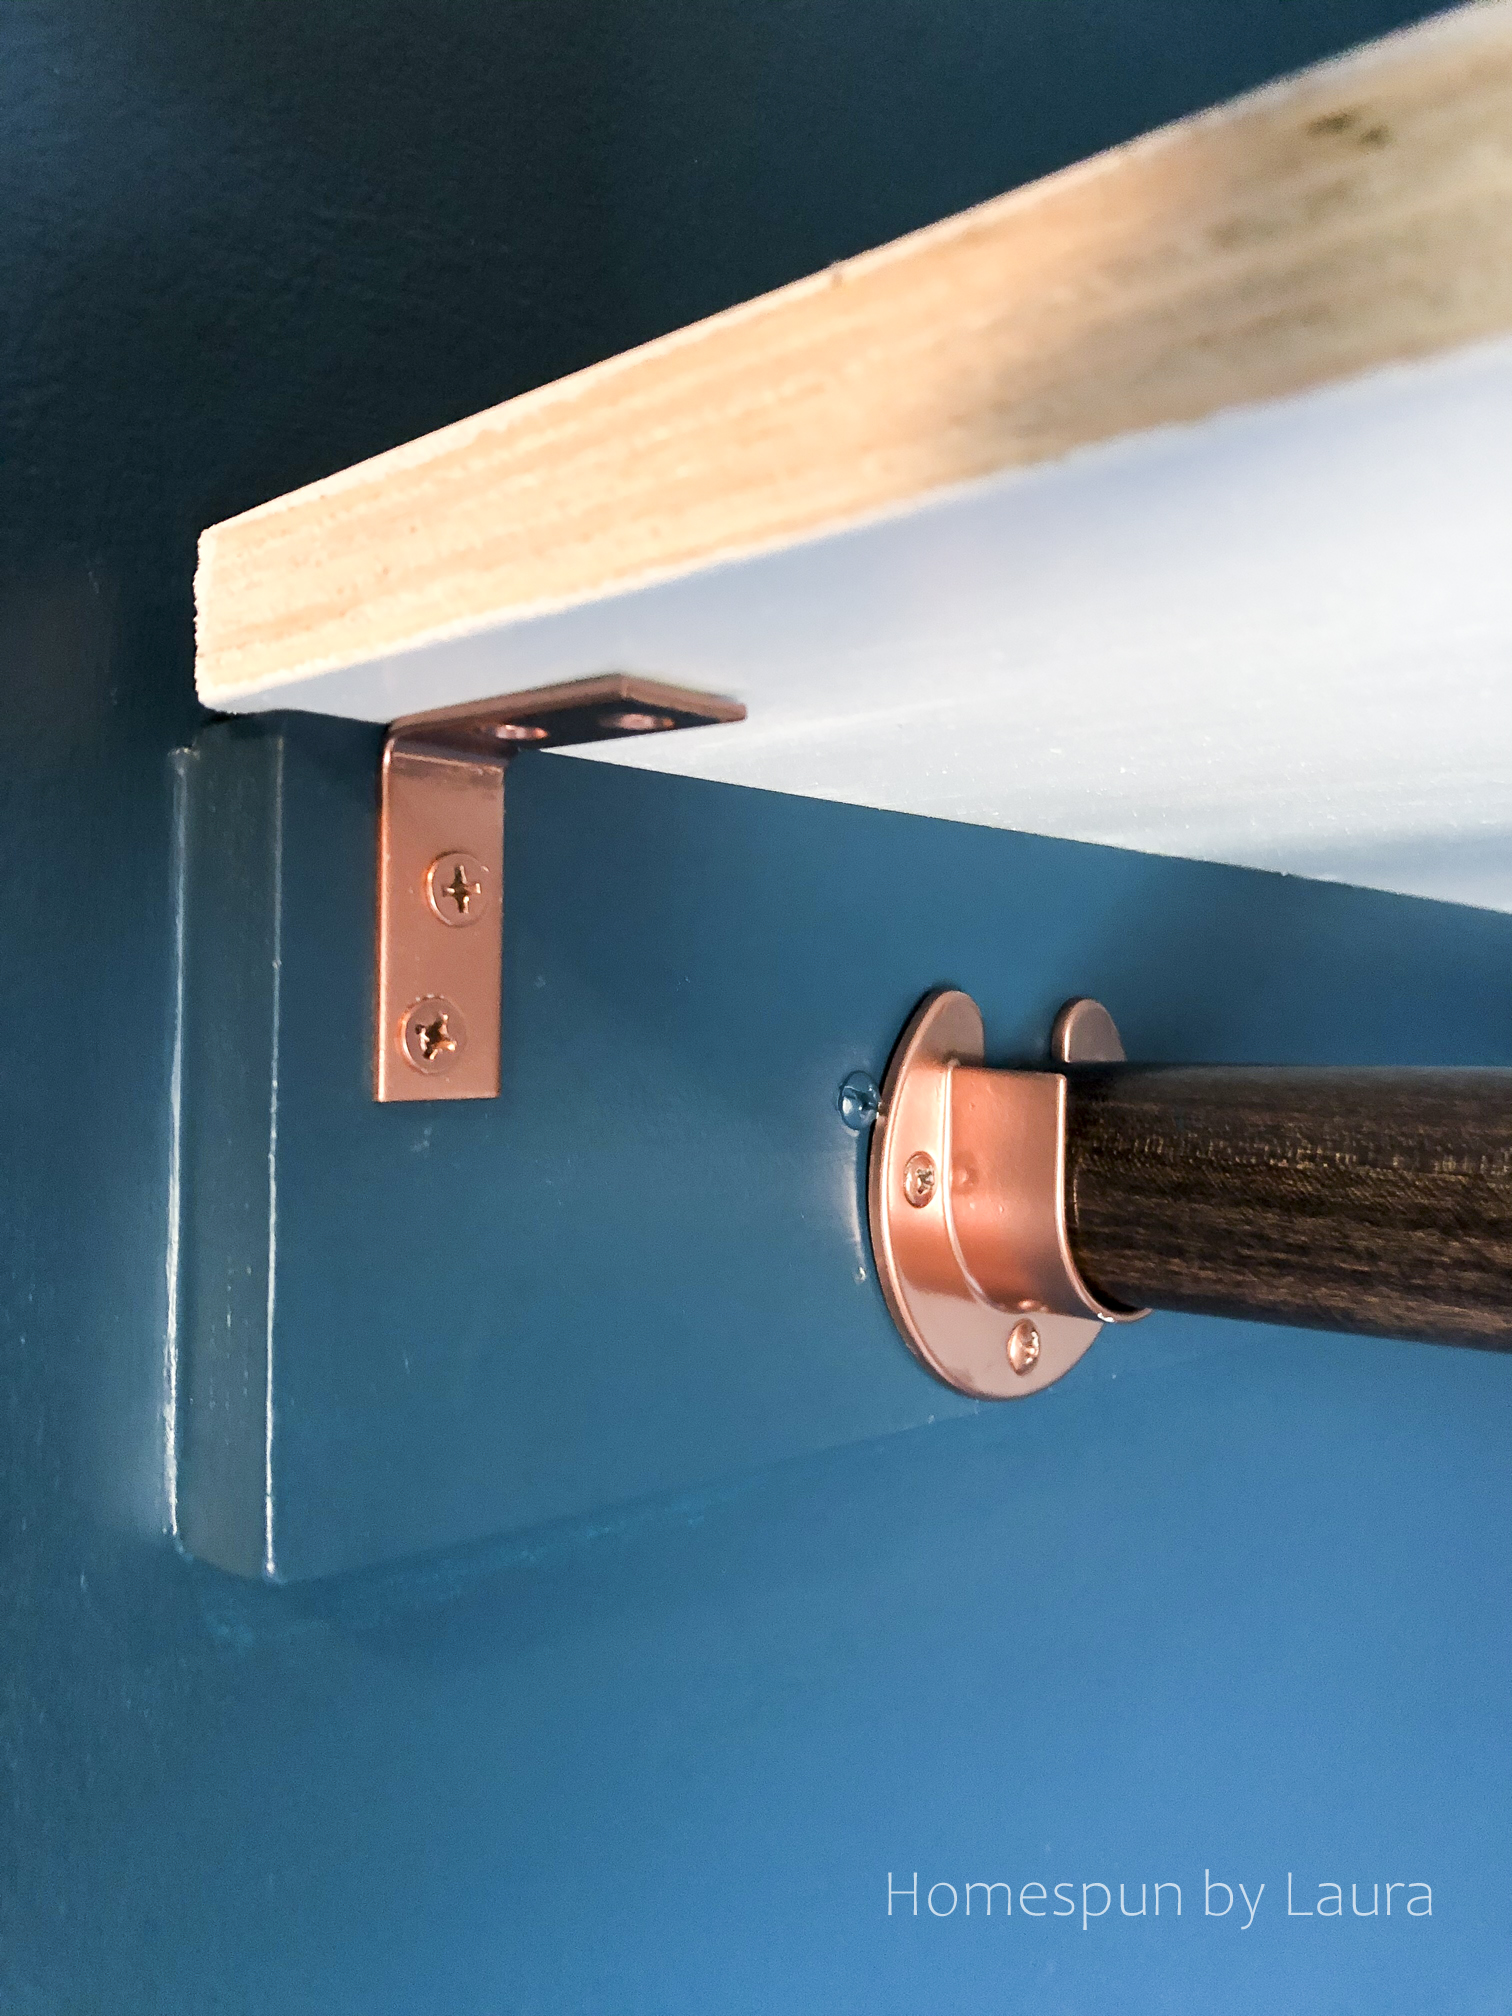
The spray painted hardware got a little scratched during installation, but I don’t think anyone but me will notice (there’s a tiny white chip on this rod holder).
8. Finish the Space
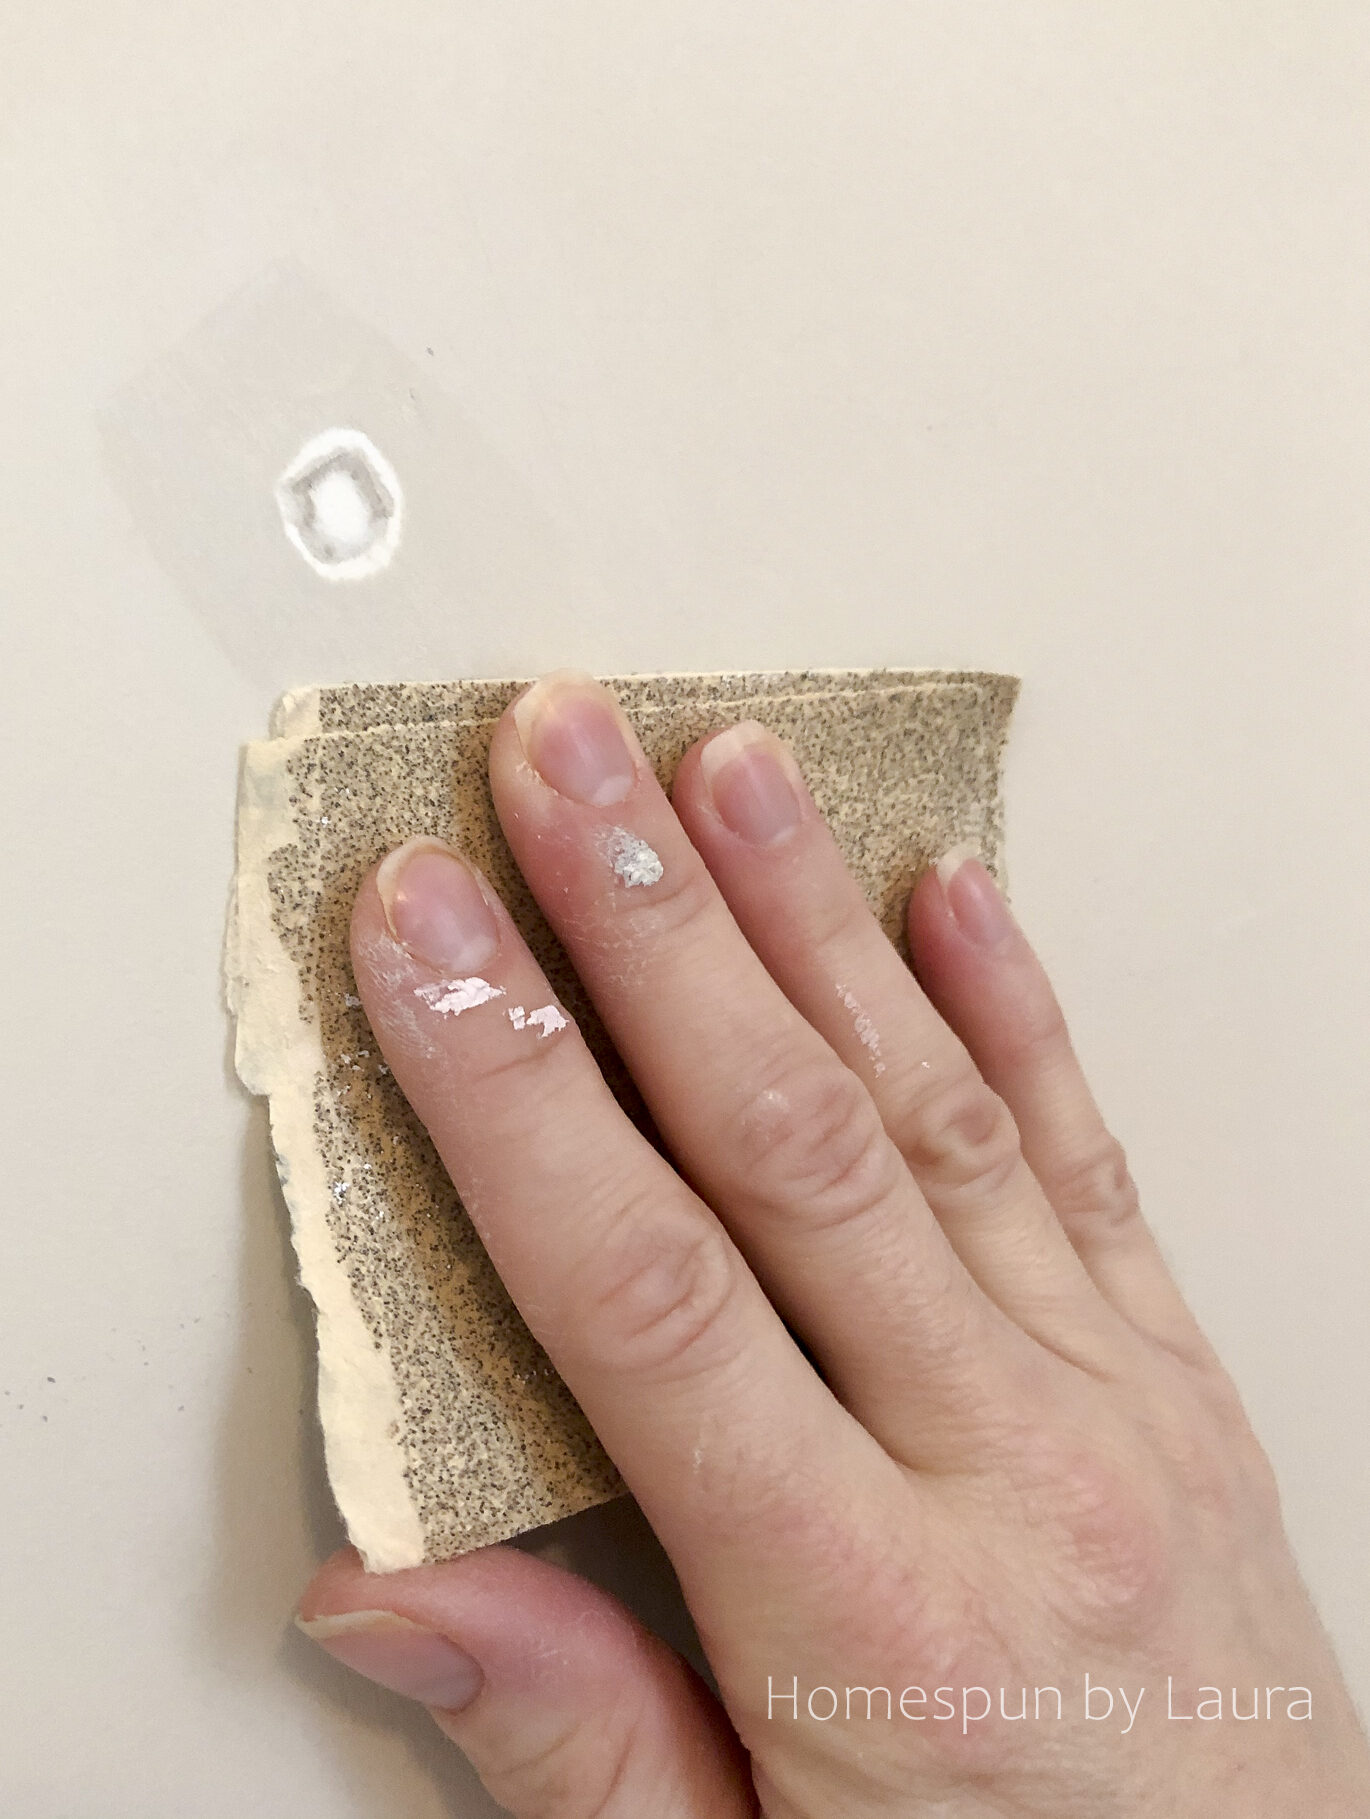
The baseboard needed attention where we chopped out a gap so the vertical riser would sit flush against the wall (it’s secured to the wall with some of those corner braces so it can support the horizontal shelves that attach to it). I used drywall spackle for this step; it’s easier to mold than wood filler, and our wood filler is always just about dried up anyway!
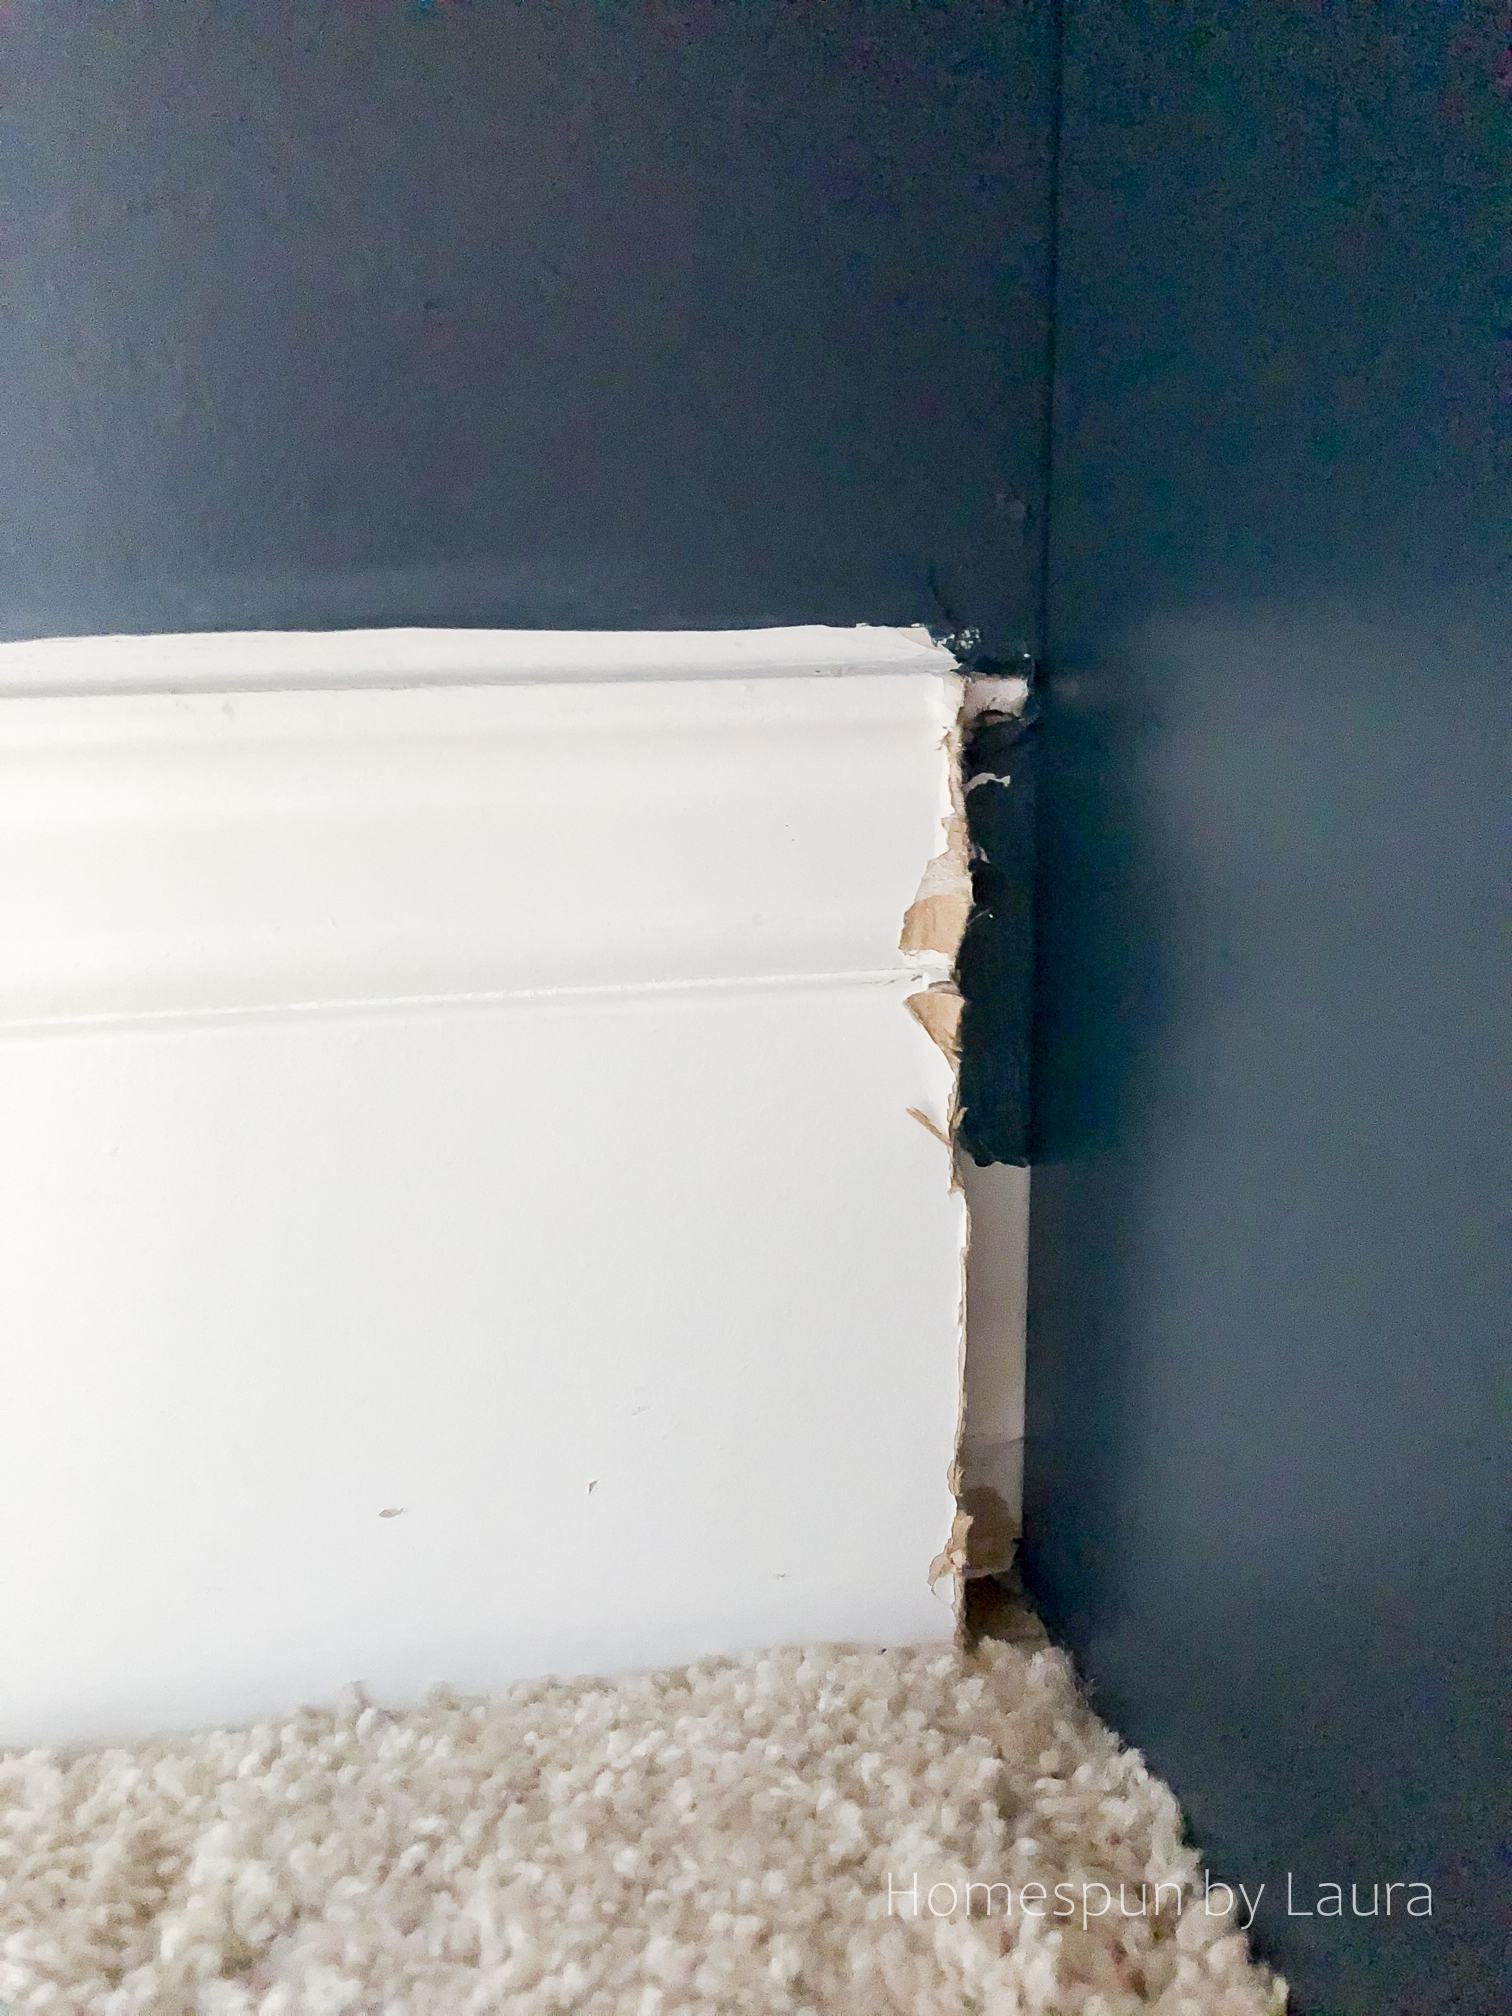
Fall into the gap.
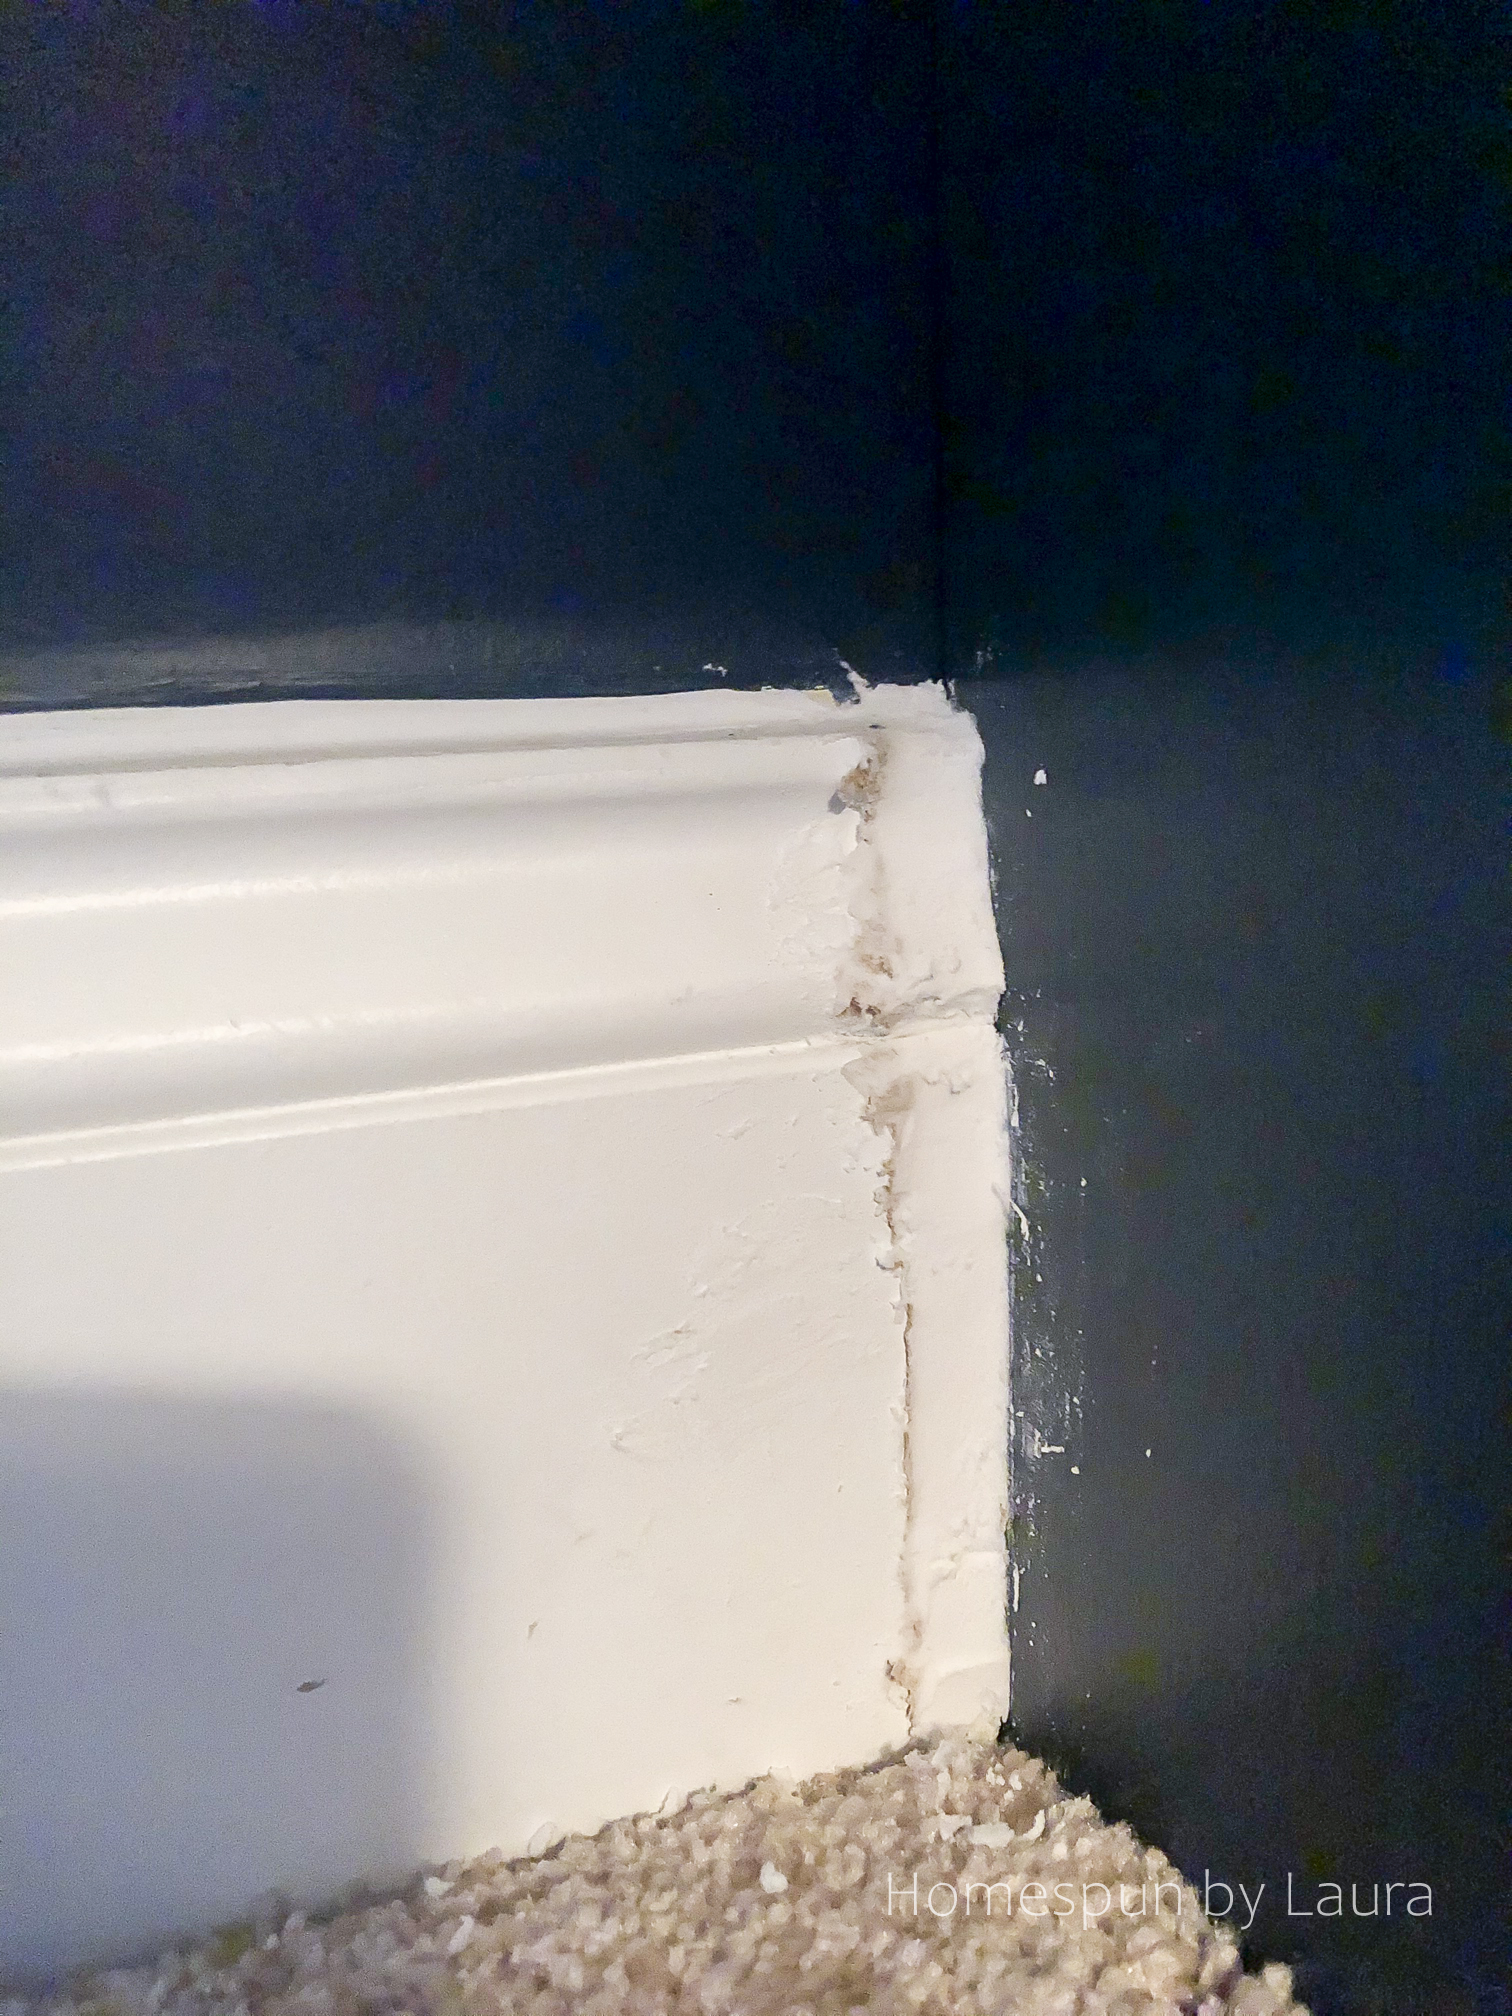 First round of spackle; waiting to sand.
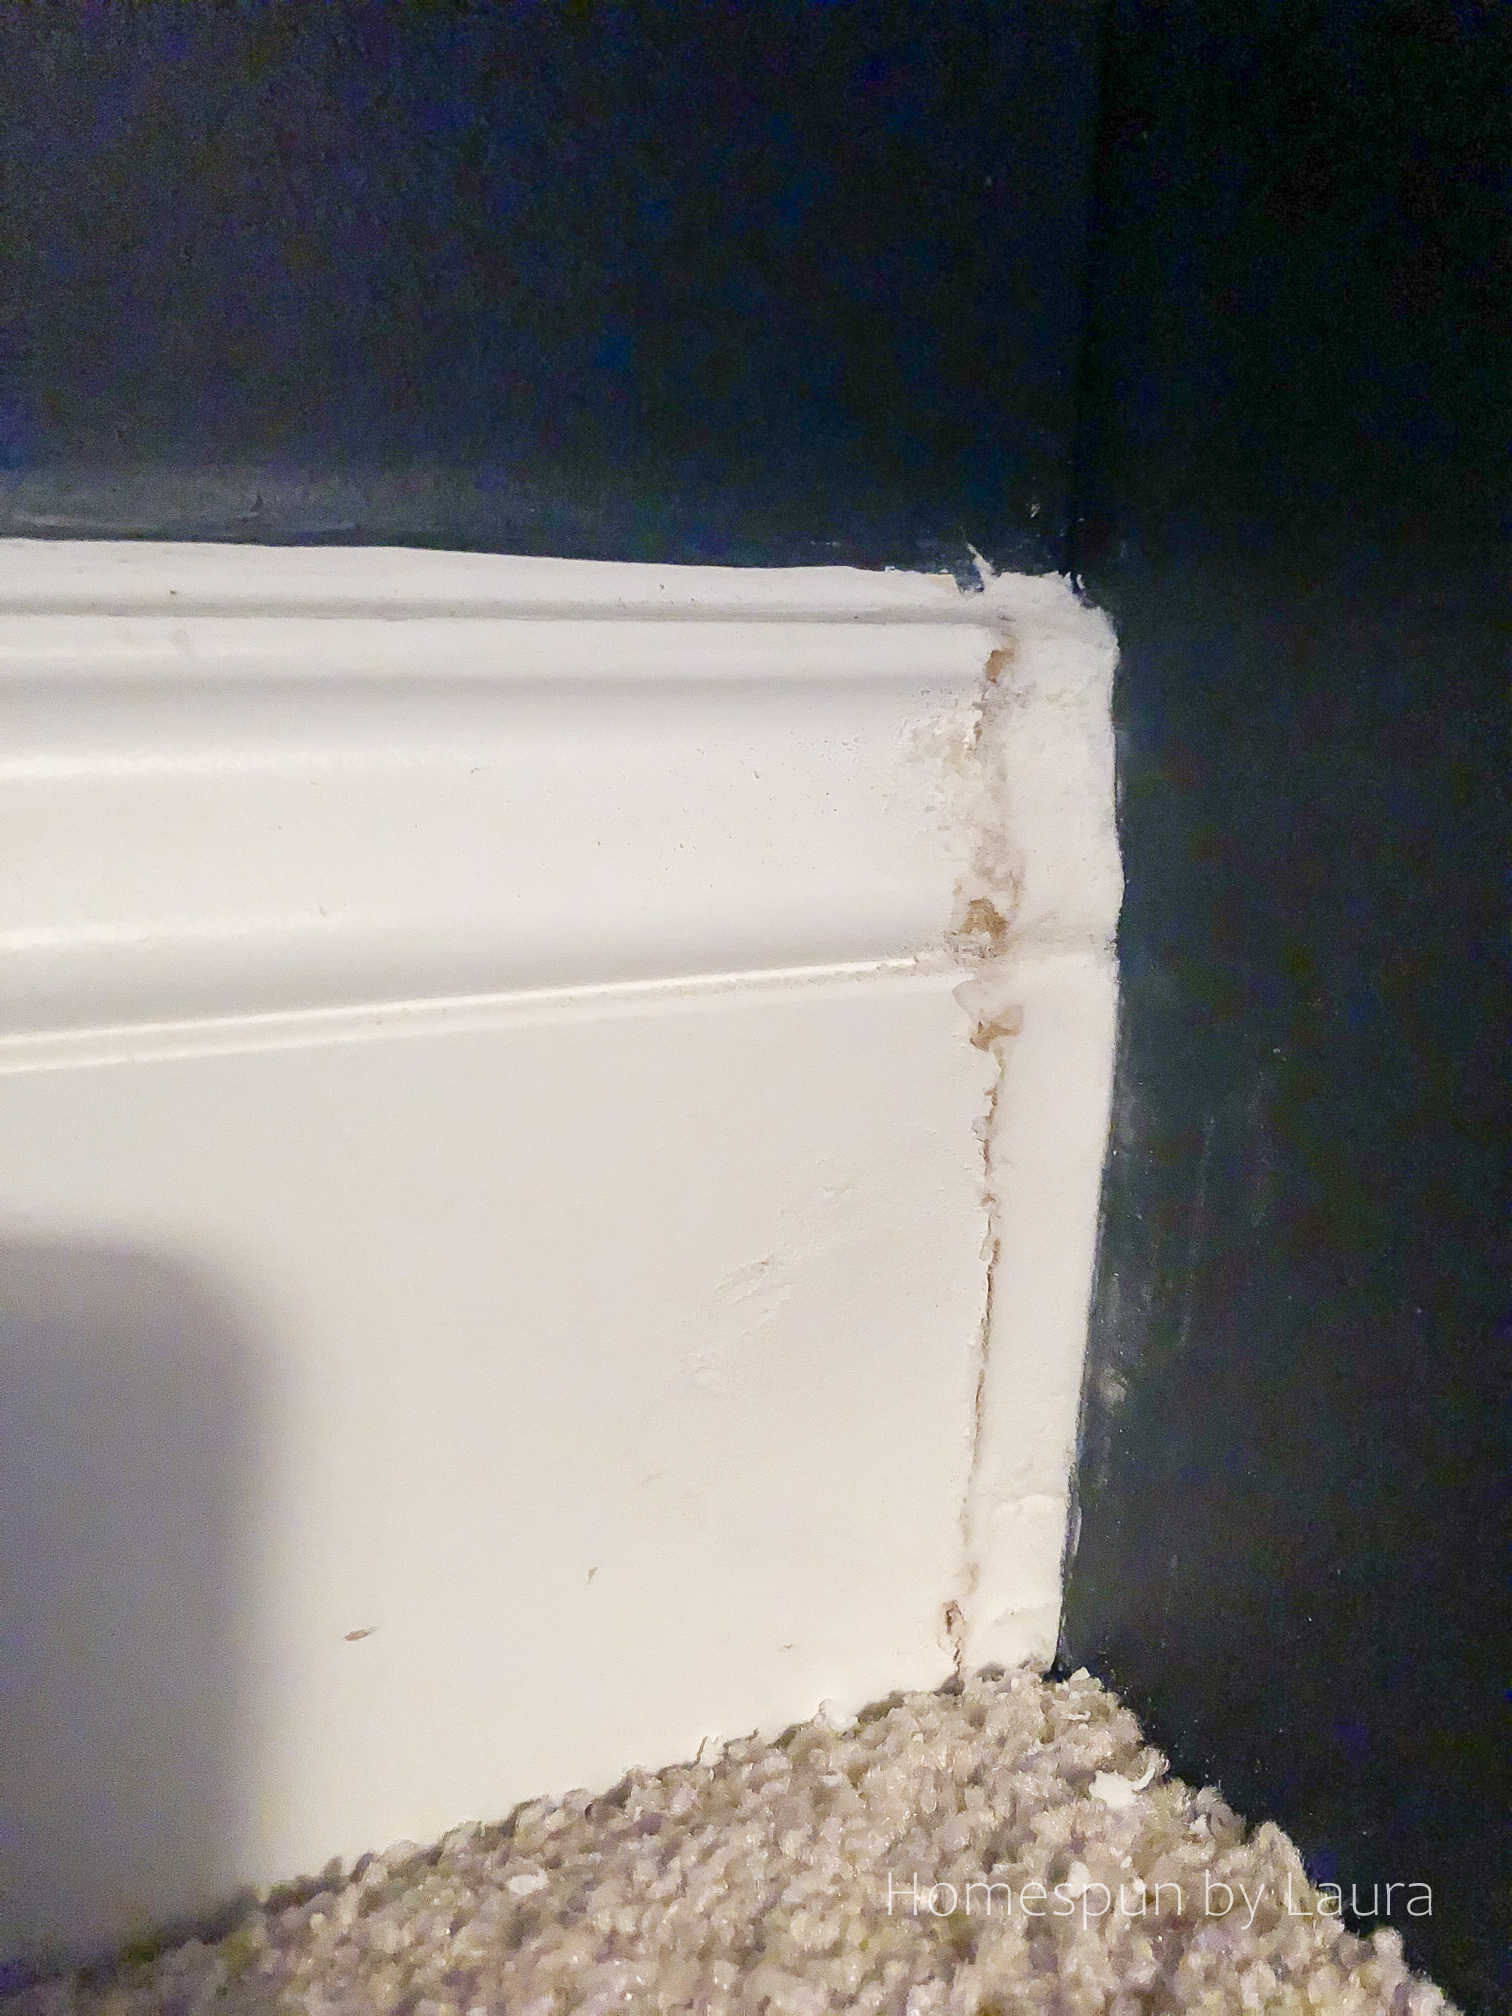 Spackled, sanded; ready to be painted!
It didn’t have to be perfect since this little corner is pretty well hidden by the shelves. I gave it a quick coat of paint and called it a day.
While the spackle dried, I added the primed 2″ boards to the fronts of the full-width shelves. I hammered the nails until they just barely came through the boards to make it easier to attach them to the shelves.
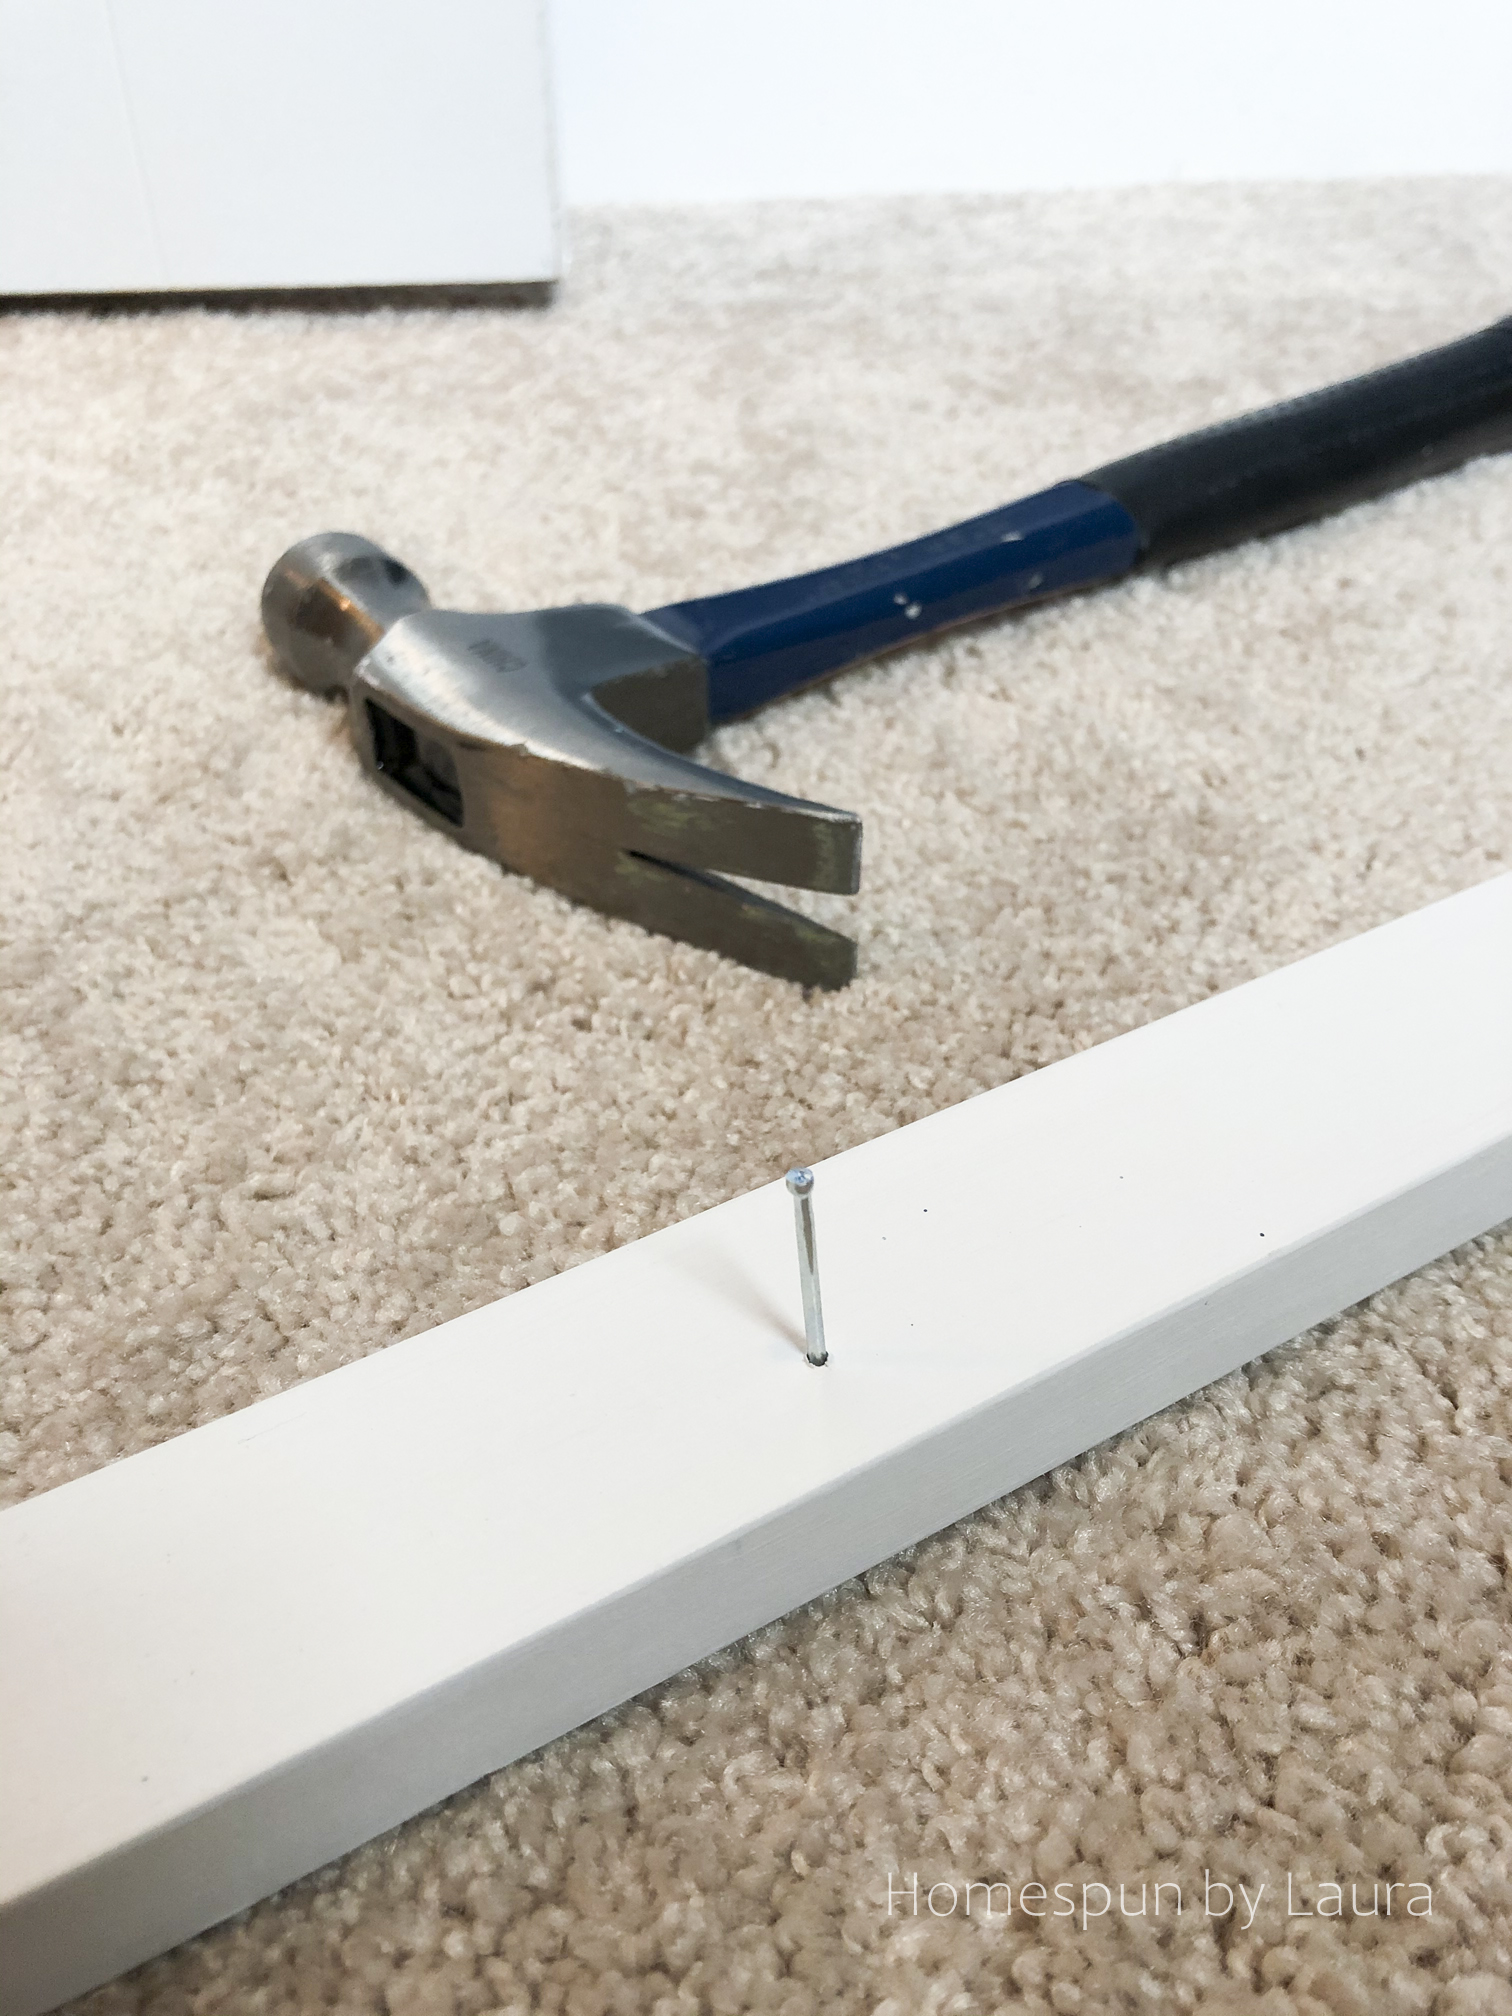
Starting the nails before the boards were on the shelves was helpful since I was working on this step solo.
 Three nails across each board did the trick.
While I had it out, I filled the little nail holes in with some of the spackle and gave them a quick coat of white paint so they’d match the rest of the shelving.
isn’t it purty?
Improved storage and prettier? Win win!!
I was simultaneously terrified of and sooo excited about putting this color on the wall. I’ve consistently liked rooms featuring this color for some time when I come across them online, and I think the little girl’s new closet was the perfect place to use it: it’s a little too dark and bold for one of our living spaces!!
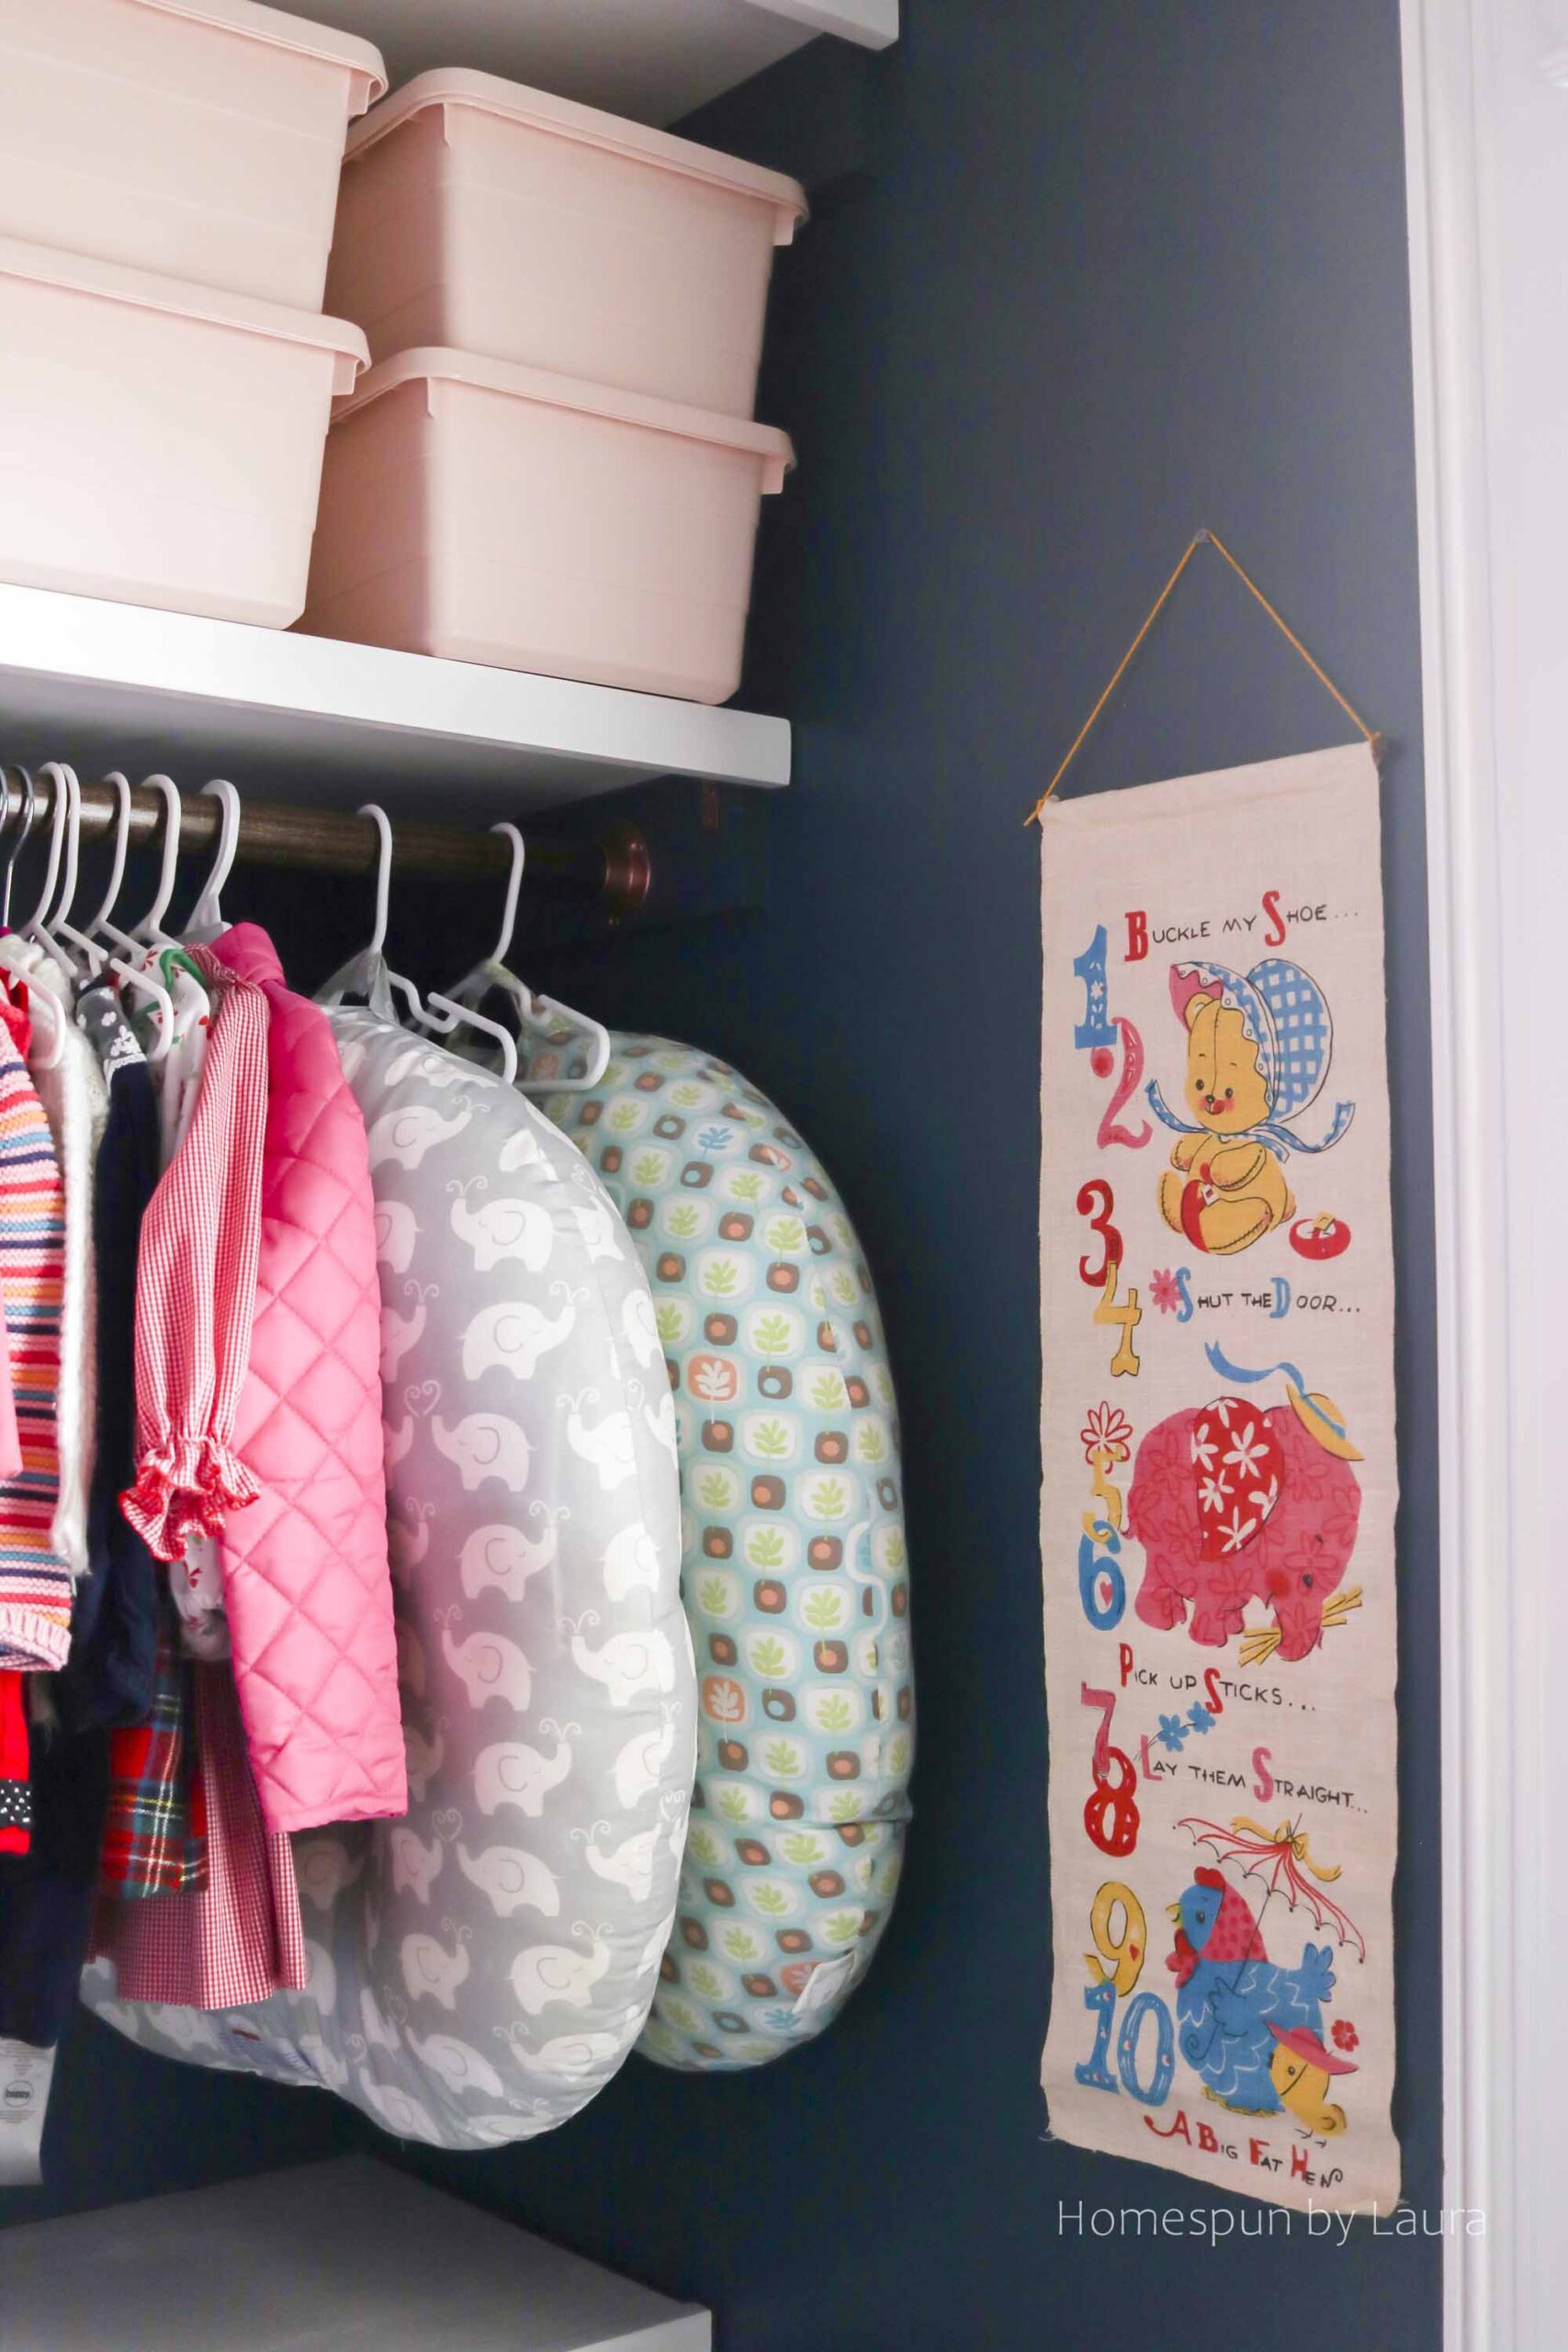
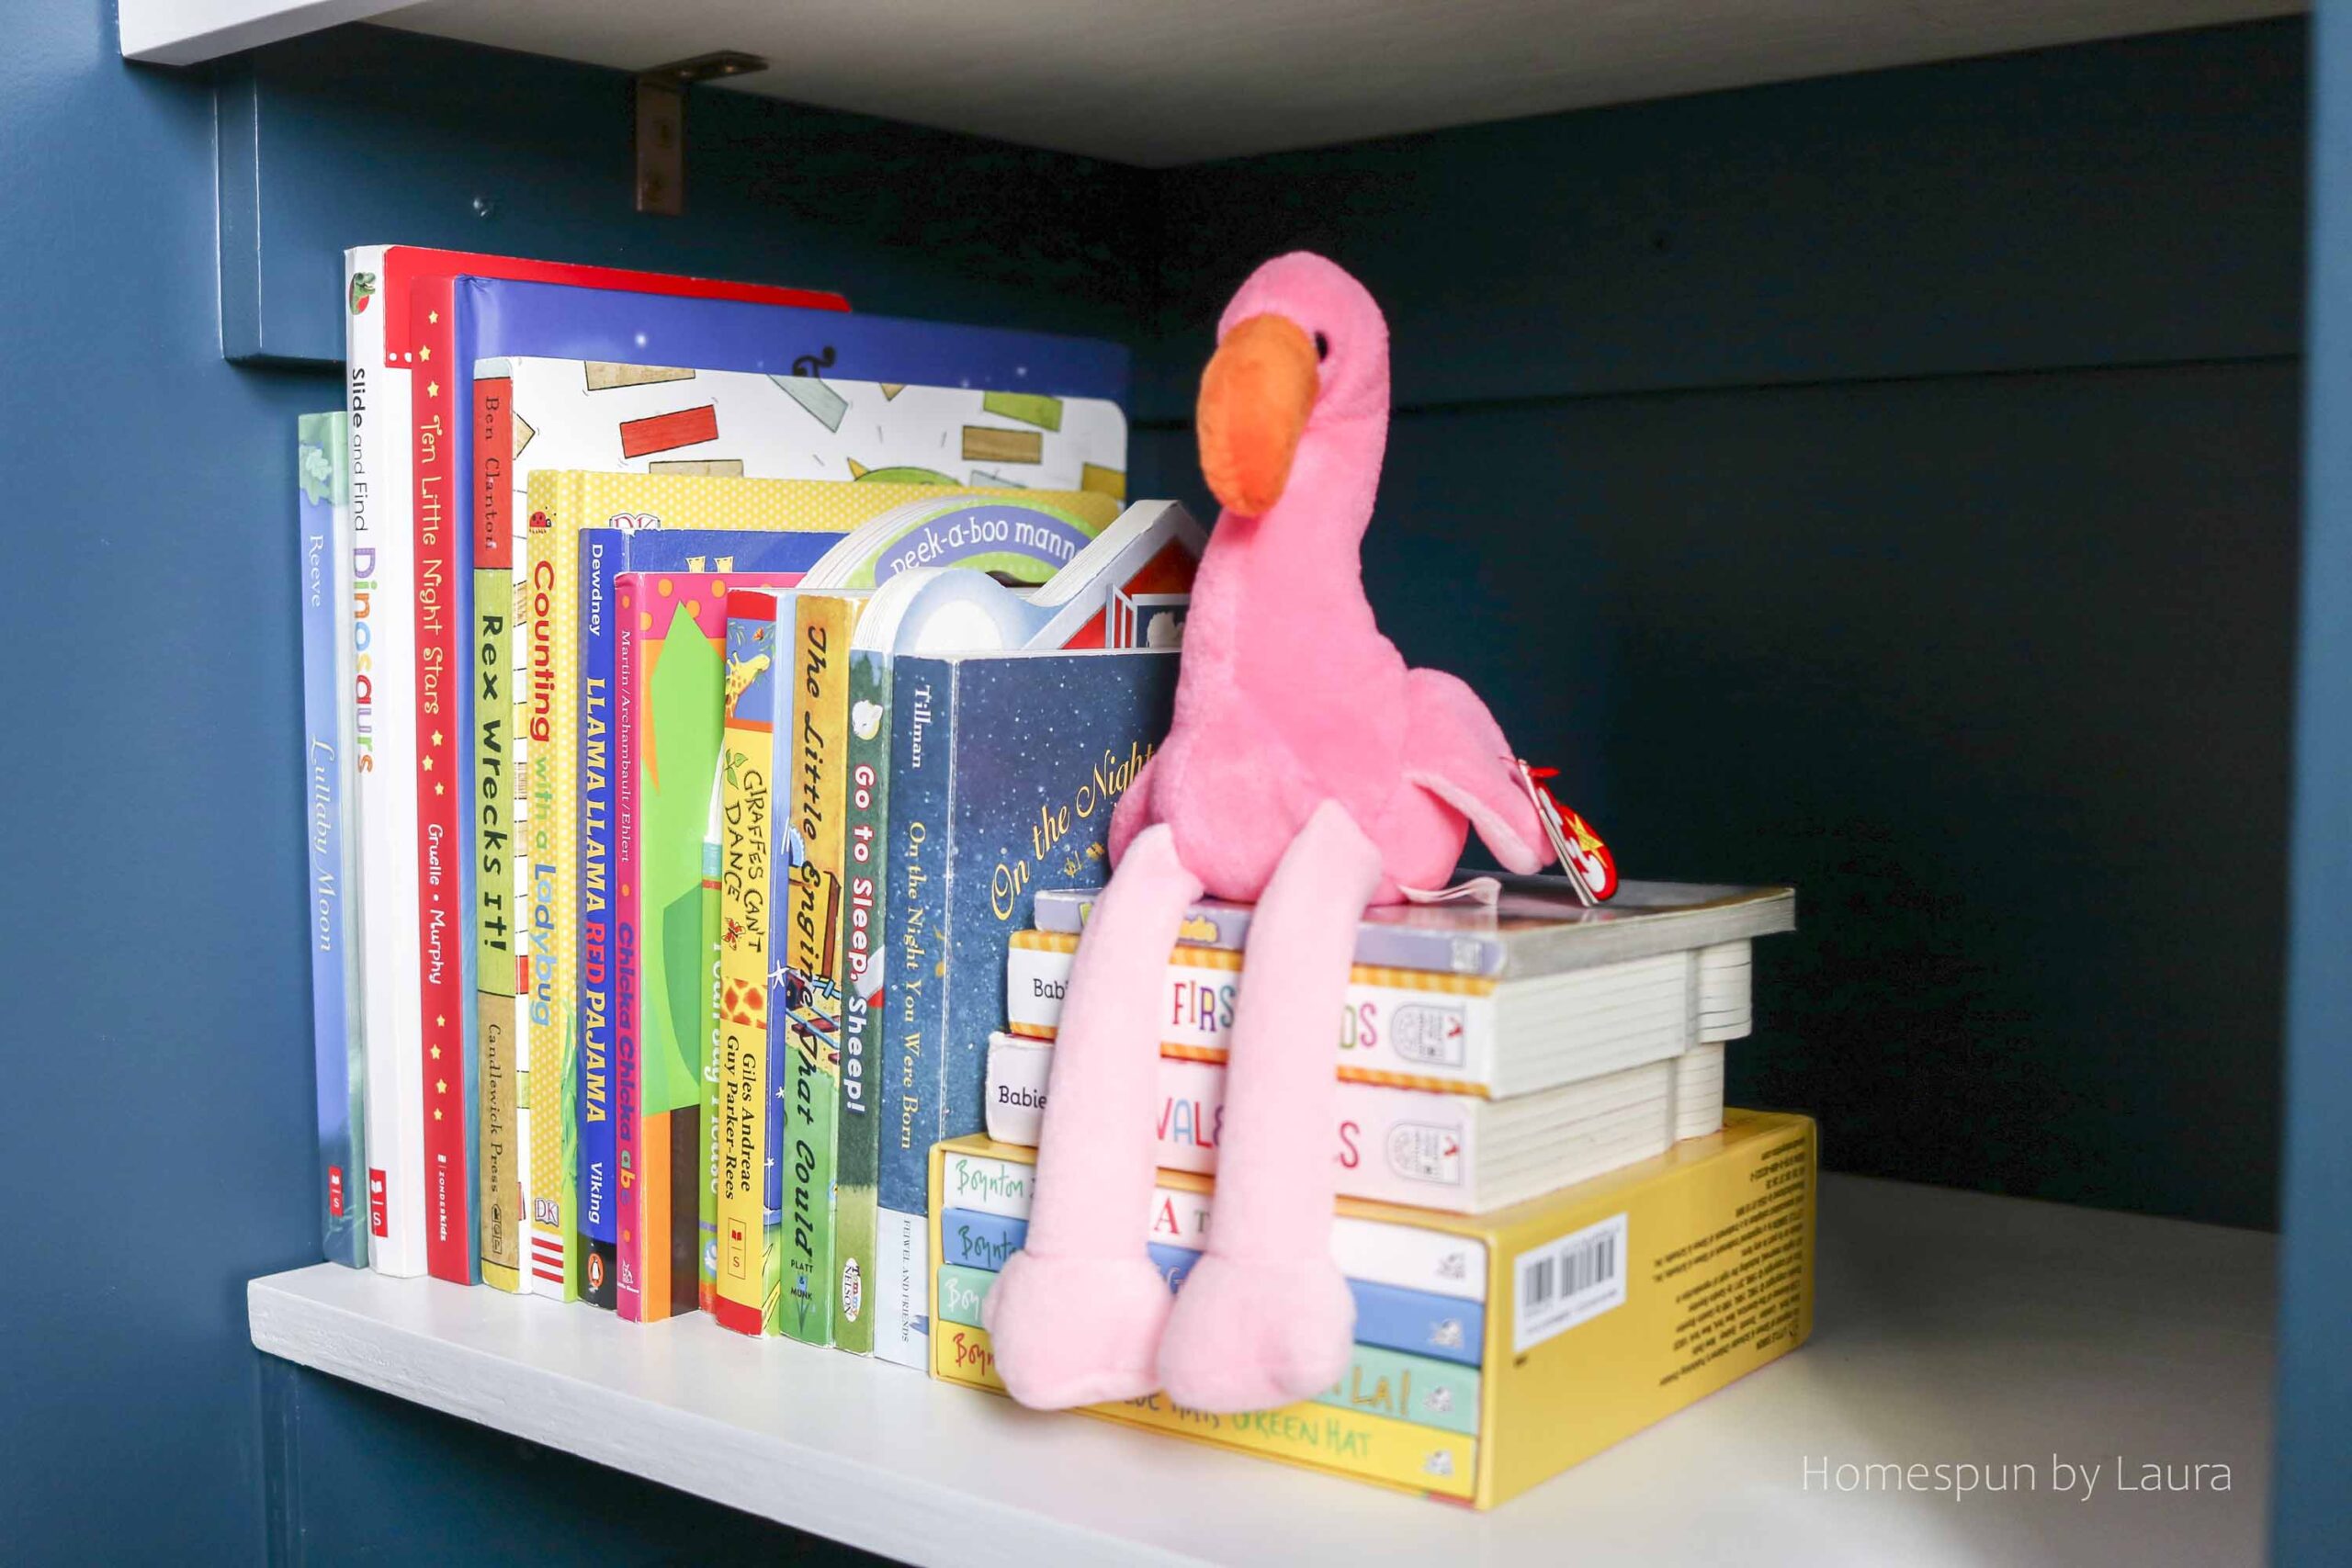
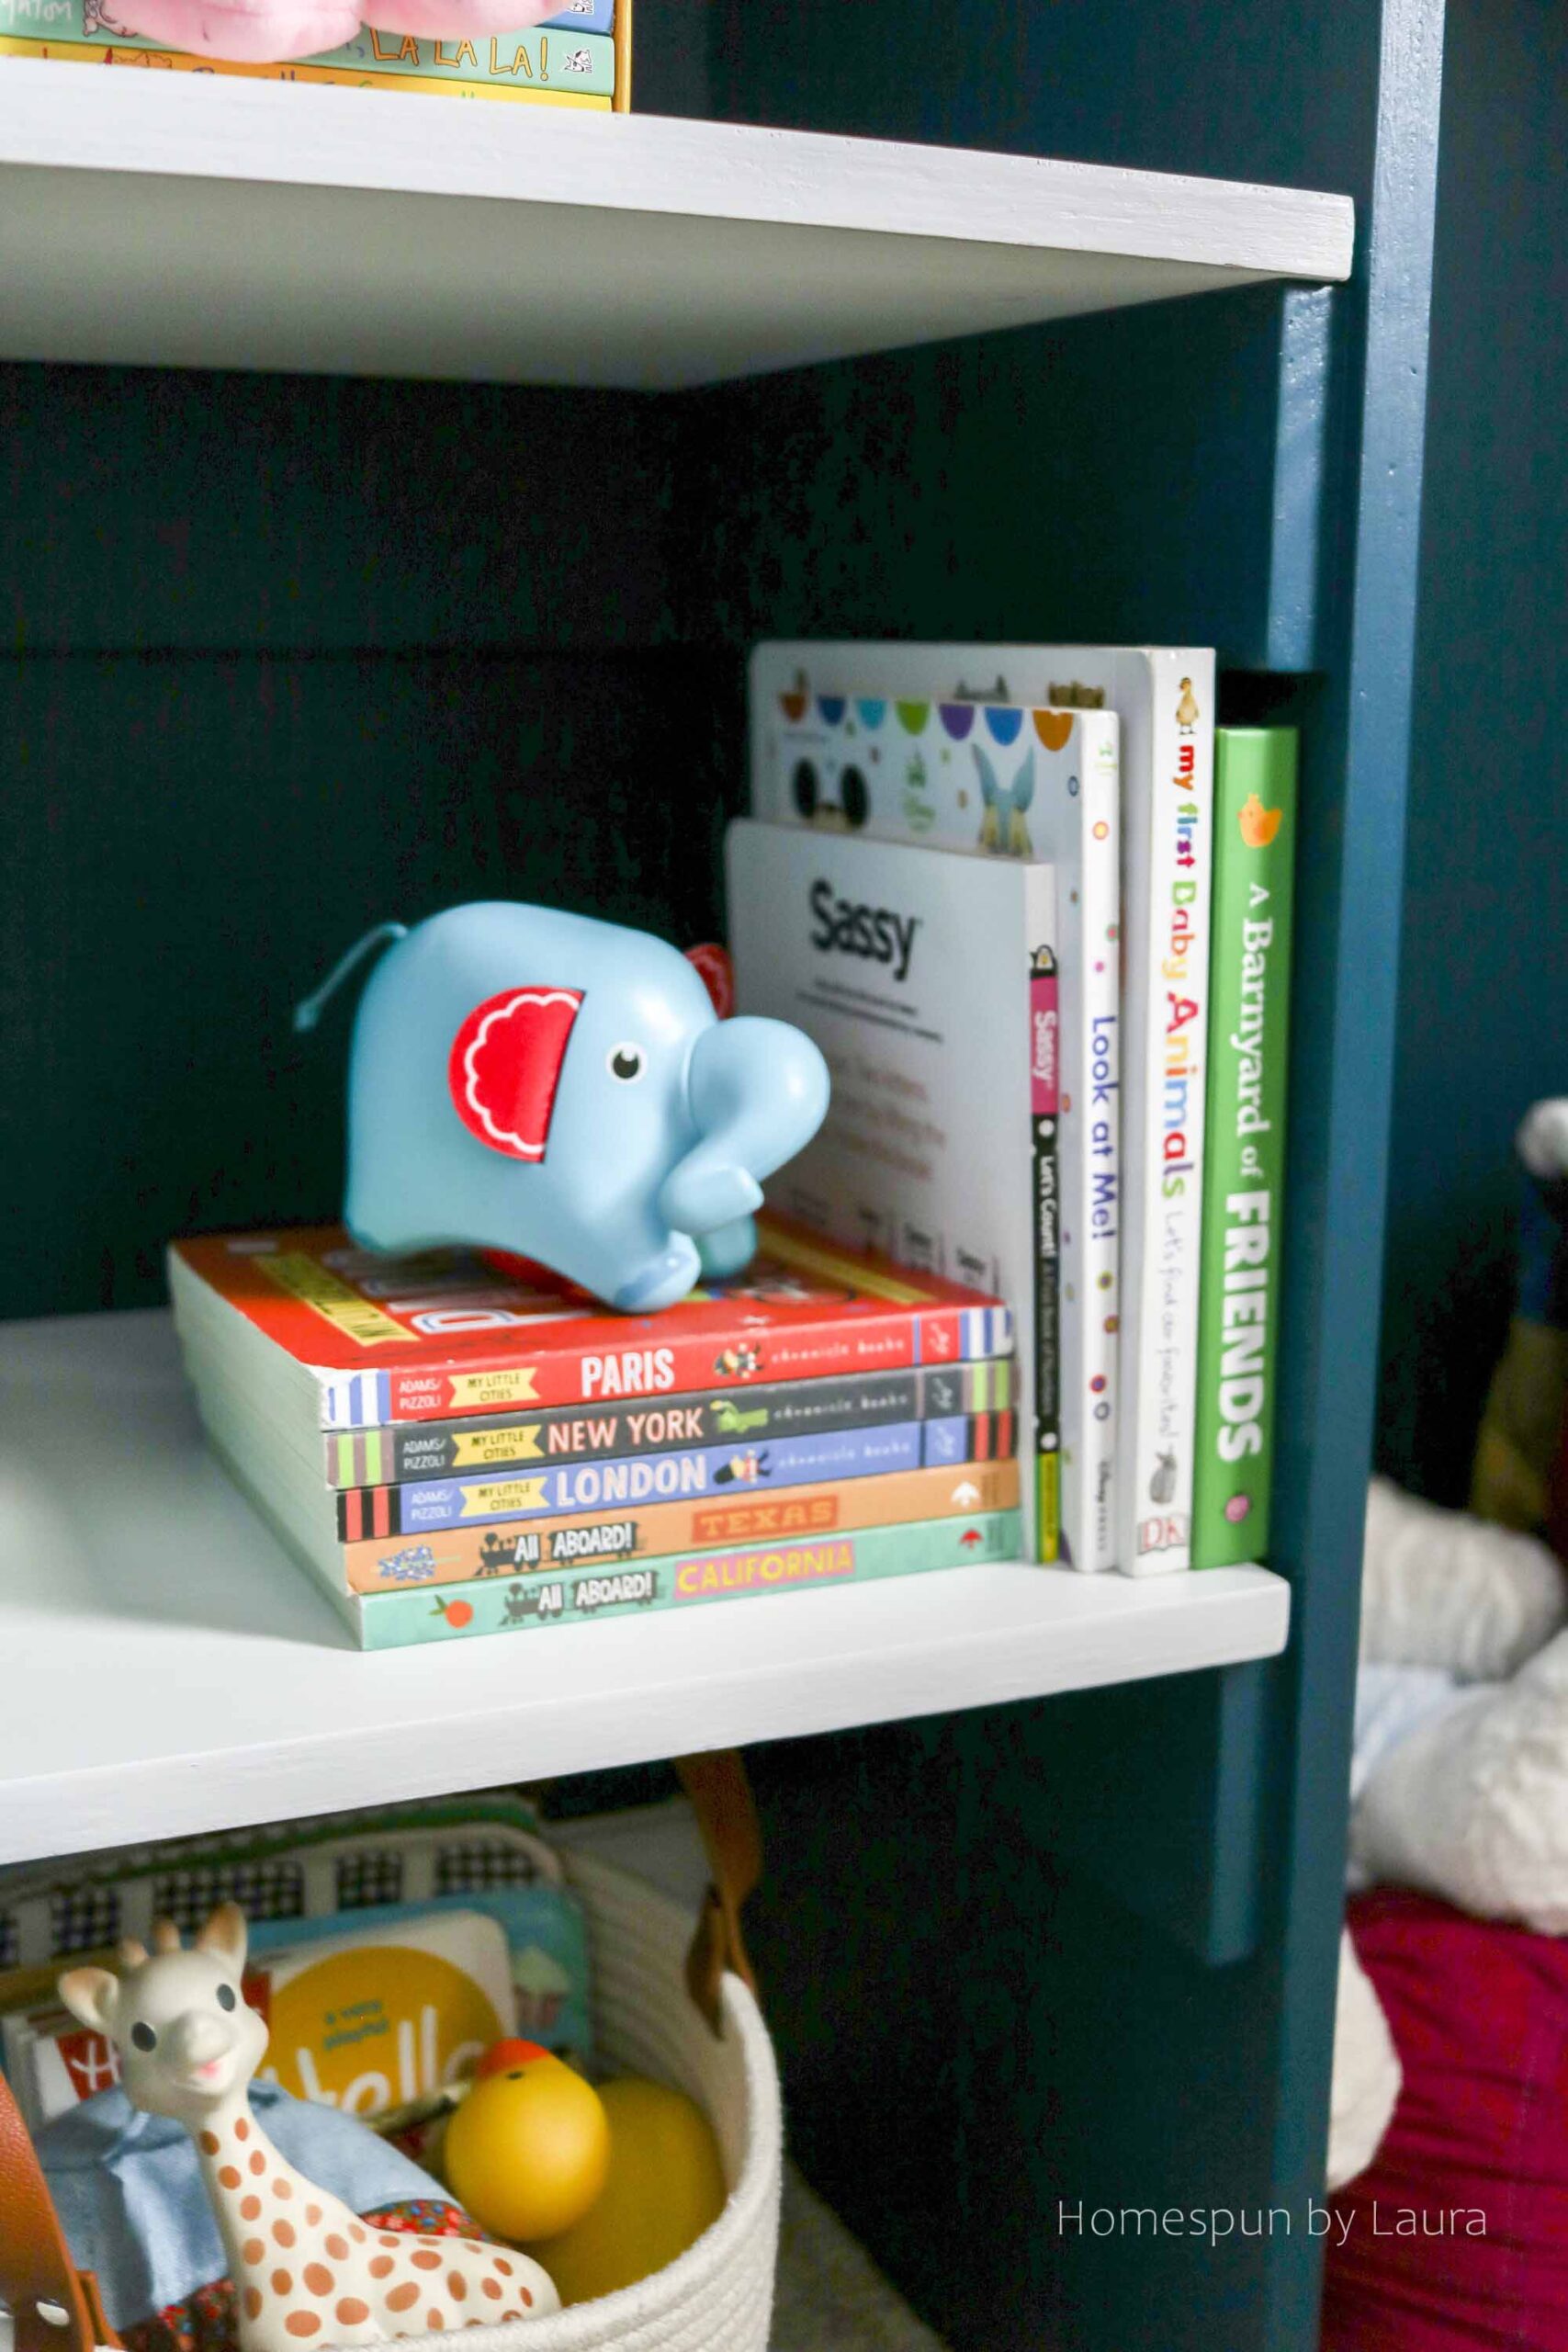
It contrasts well with the pale pink bins (Ikea), white shelving, dark stained rods, and copper hardware. And her colorful little clothes pop against its moody darkness!
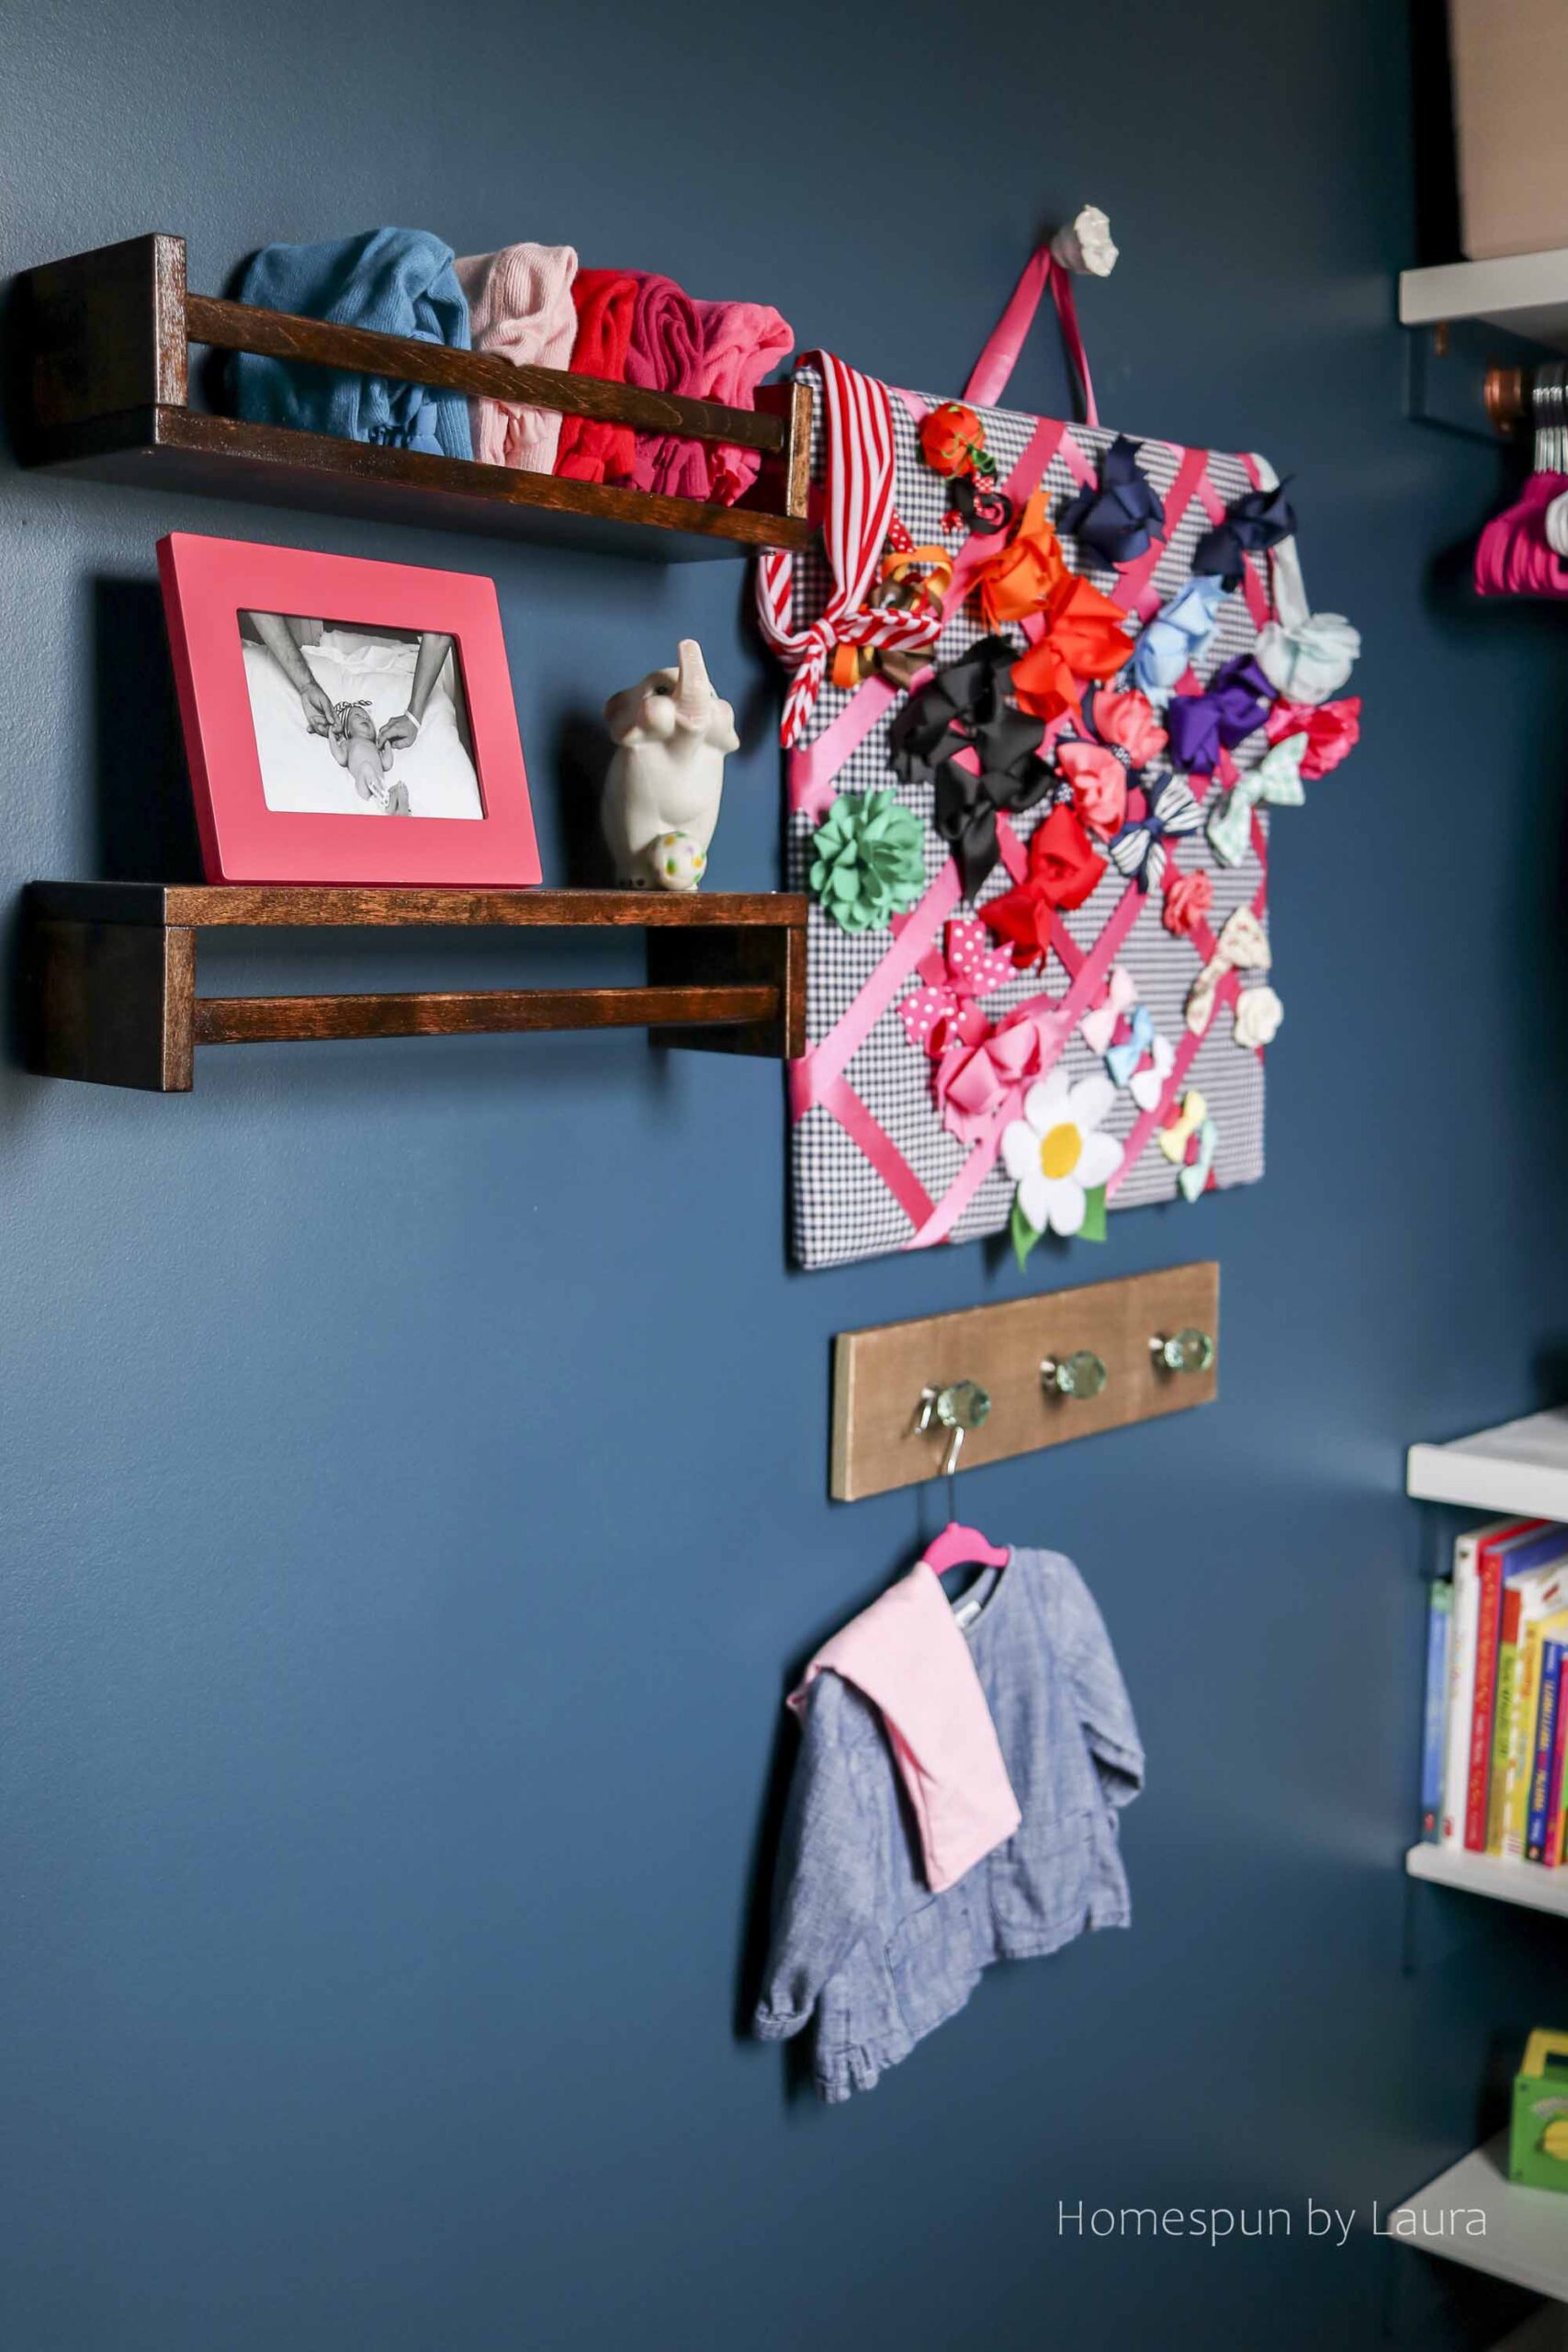
Storage tip: hang infant loungers on a coat hanger to free up shelf space.
Remember that salvaged original wire shelf? It fit perfectly above the door on the opposite wall. It’s out of sight and now it serves a valuable purpose: the pack’n’play, a suitcase, and a big bin full of infant stuff are now out of sight but still easily accessible (if you’re interested in the art over her bed, you can learn how to make your own here!).
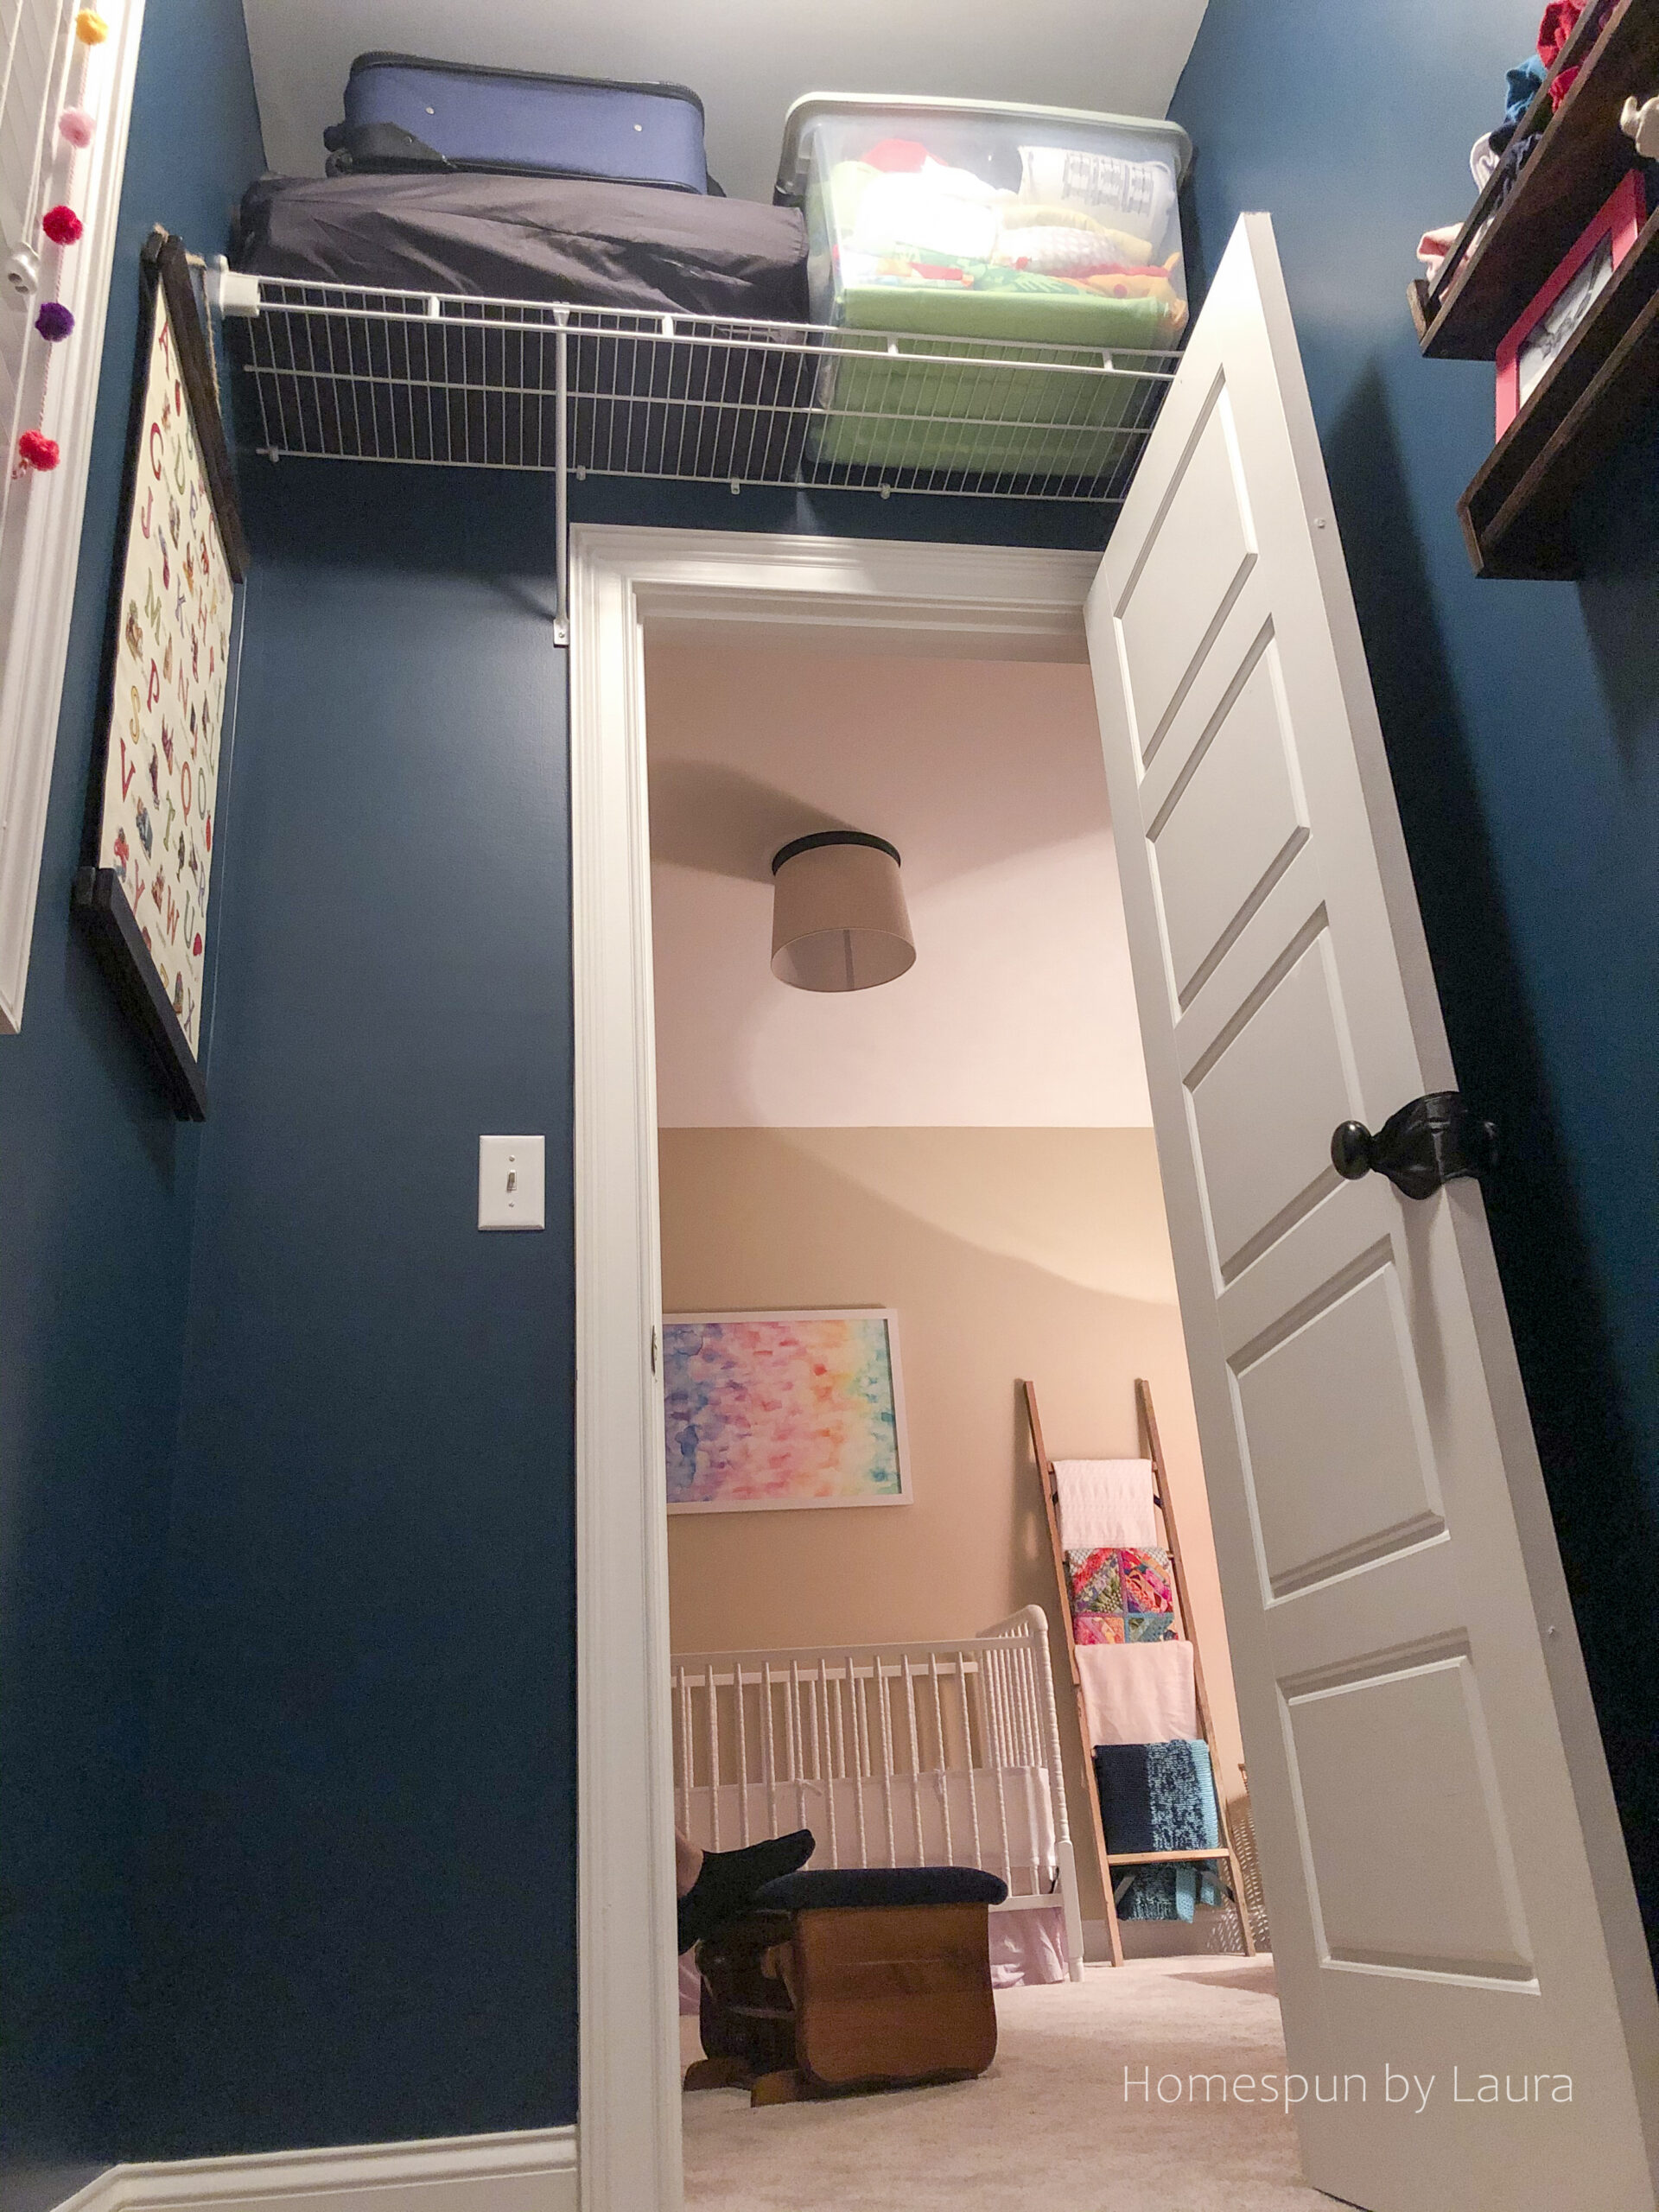
Making use of the empty space over the door.
Now that’s better!
I added some fun color to the window side of the closet with…
A cute vintage wall hanging I got at an antique store in Waco, Texas about 2 weeks after finding out we were expecting…
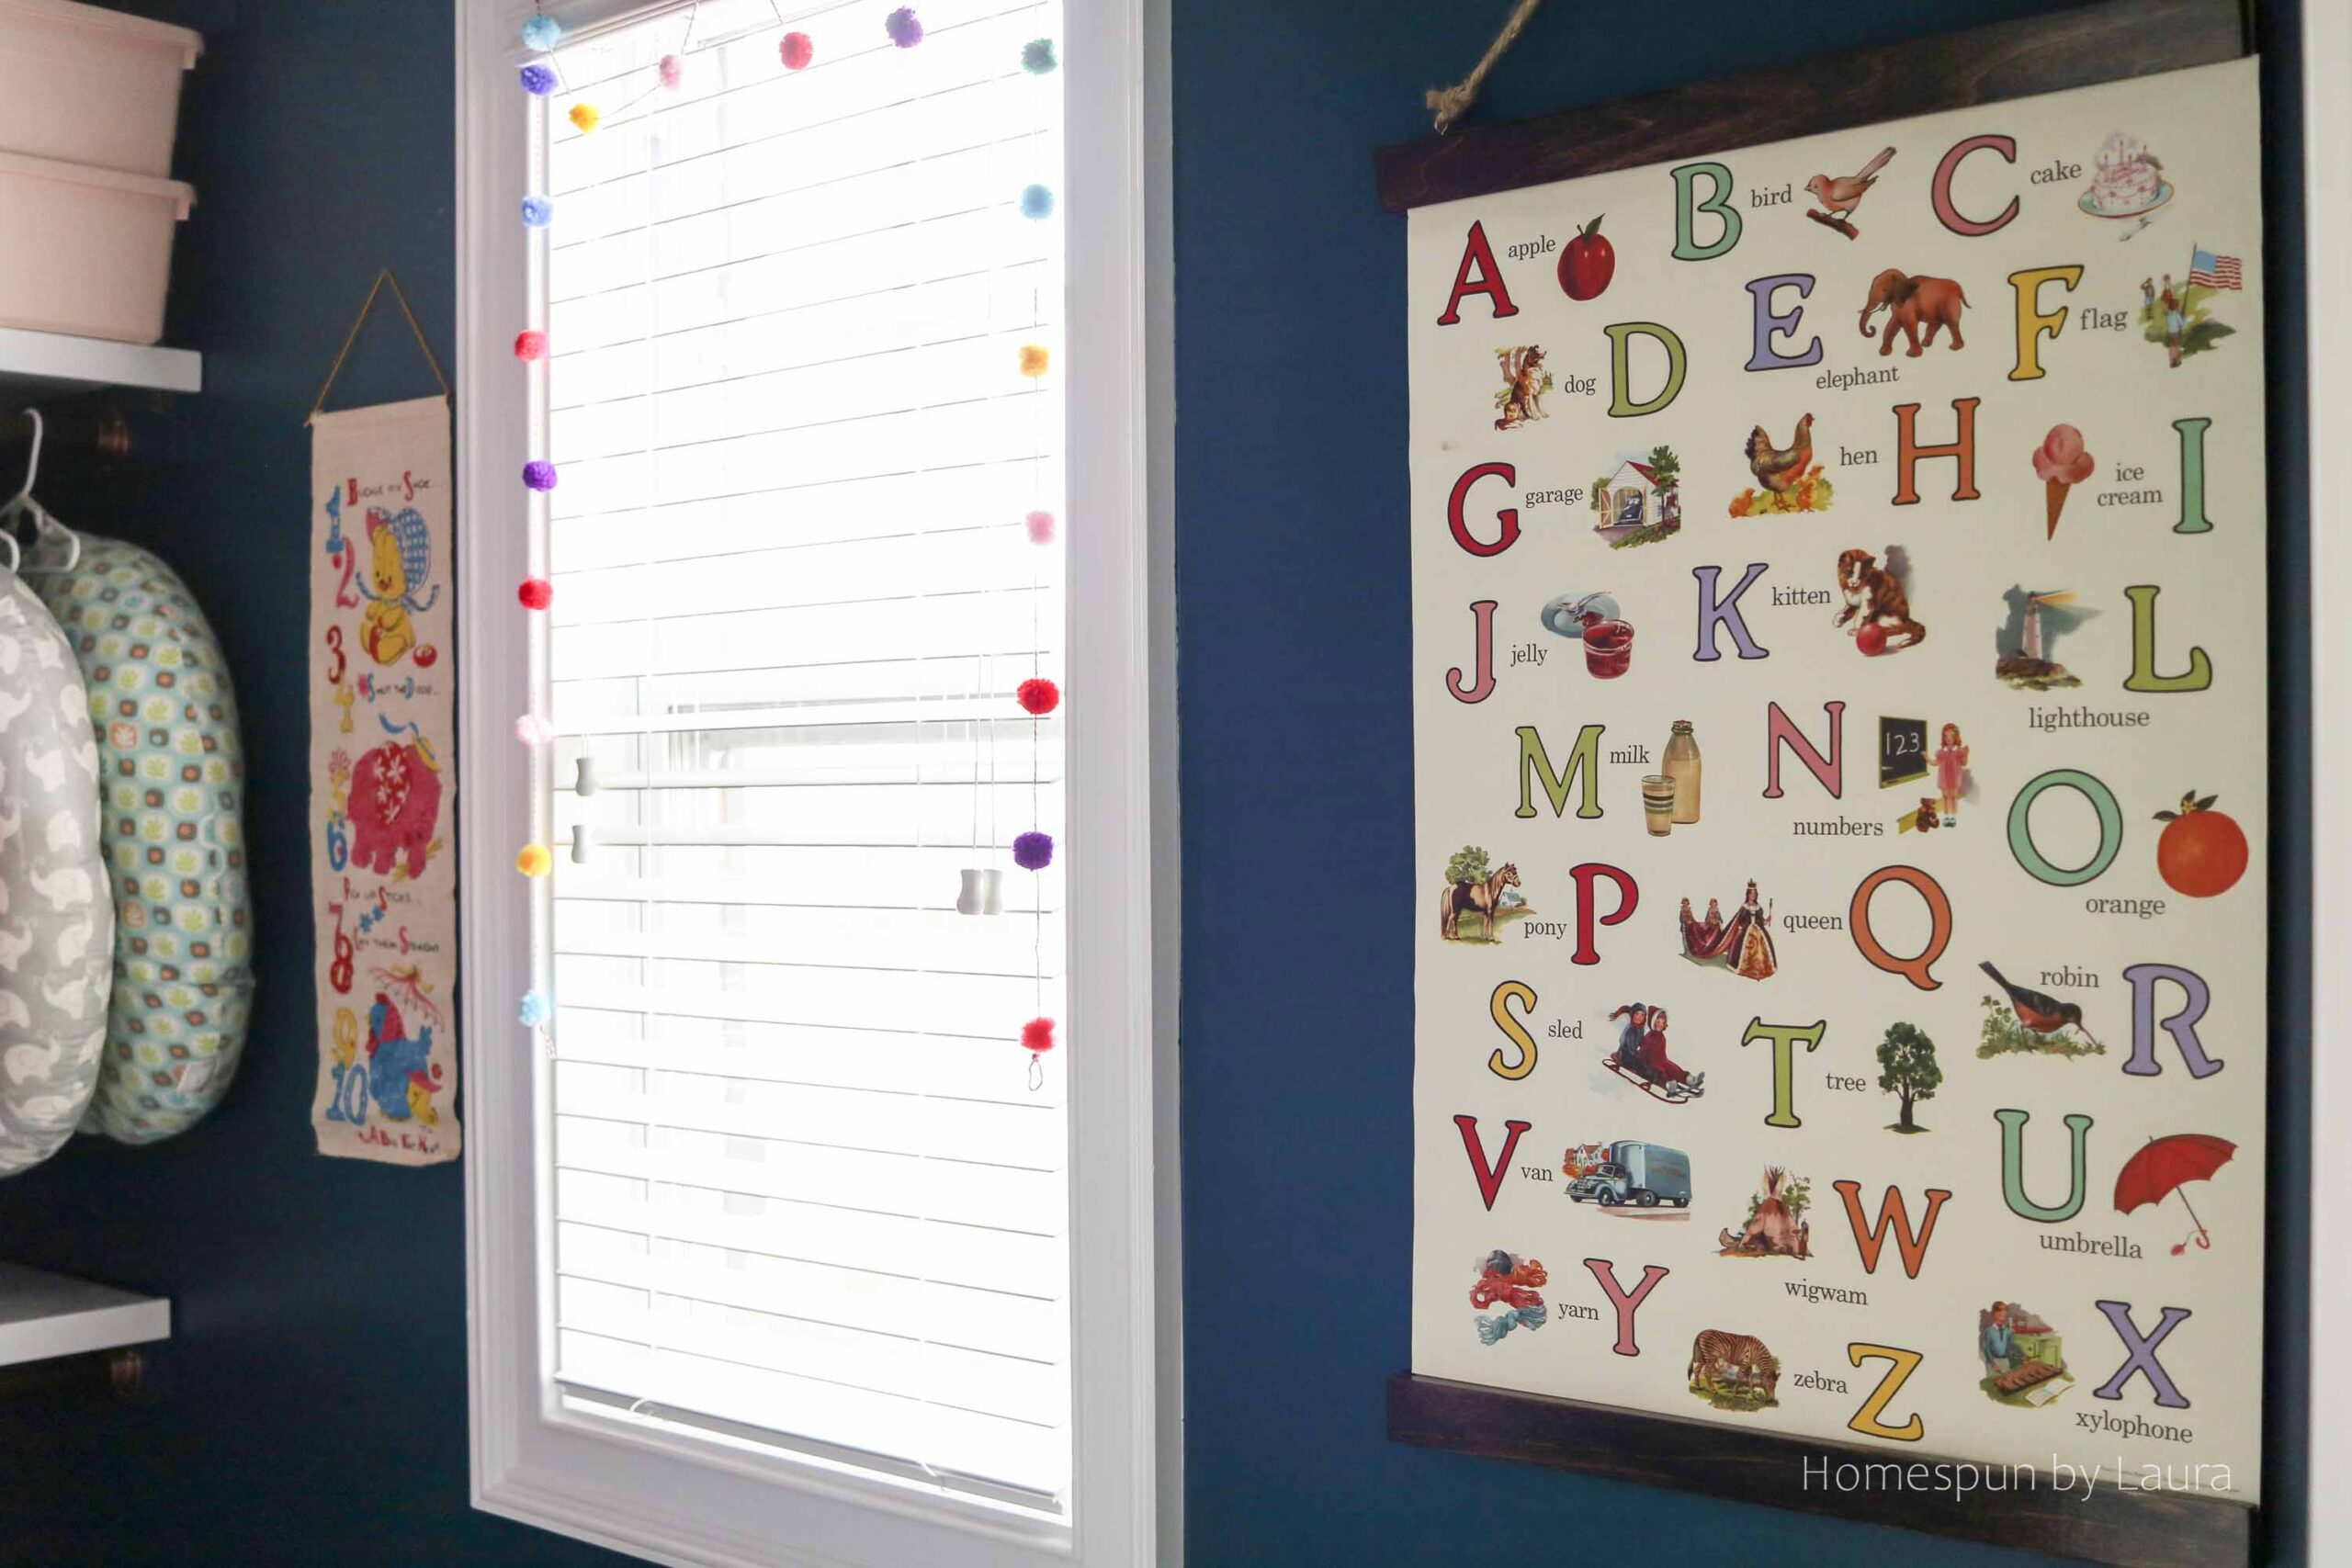
…an alphabet poster I bought on a trip to Canada about four months before her arrival, complete with a DIY hanger…
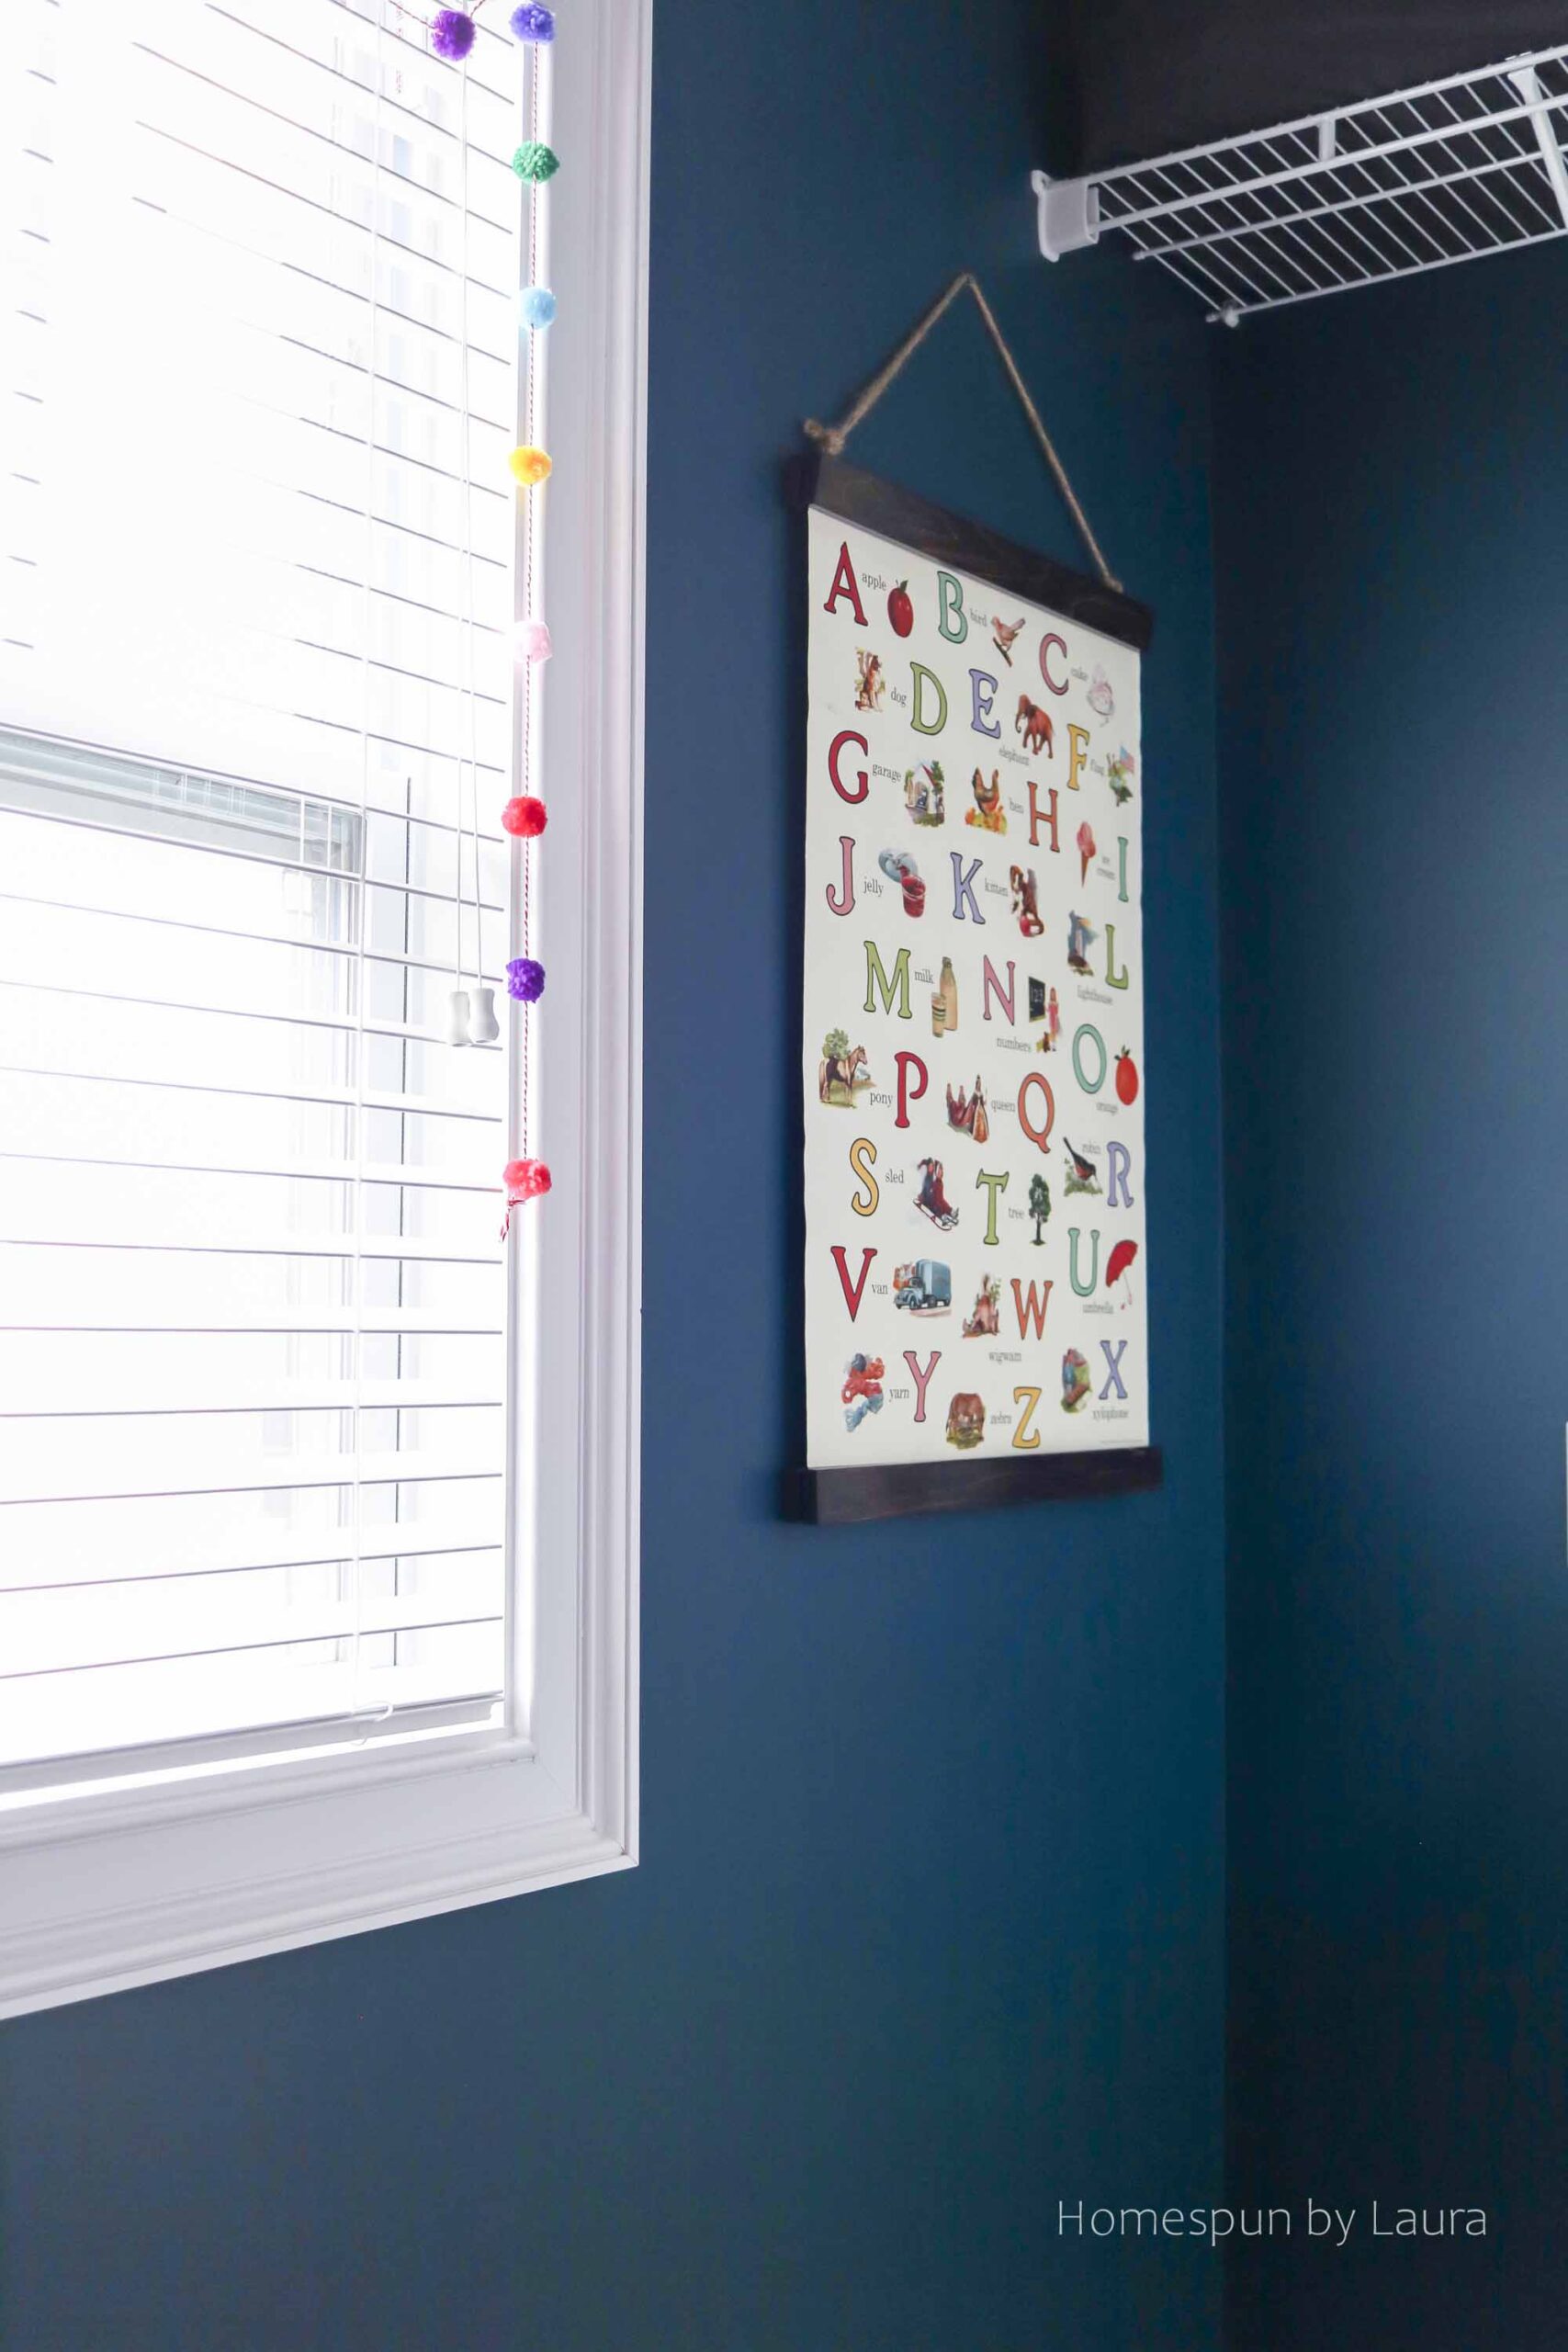
…and used a cute decorative pom pom bunting I got at Target over a year ago as a sort of window treatment.
And there you have it: our DIY closet shelving system. A couple years of doodling plans, all of my Lowe’s giftcards from birthday and Christmas presents last year, about $200 out of pocket, and a few weeks of work yielded this functional and pretty room! See complete supply list and budget breakdown below.
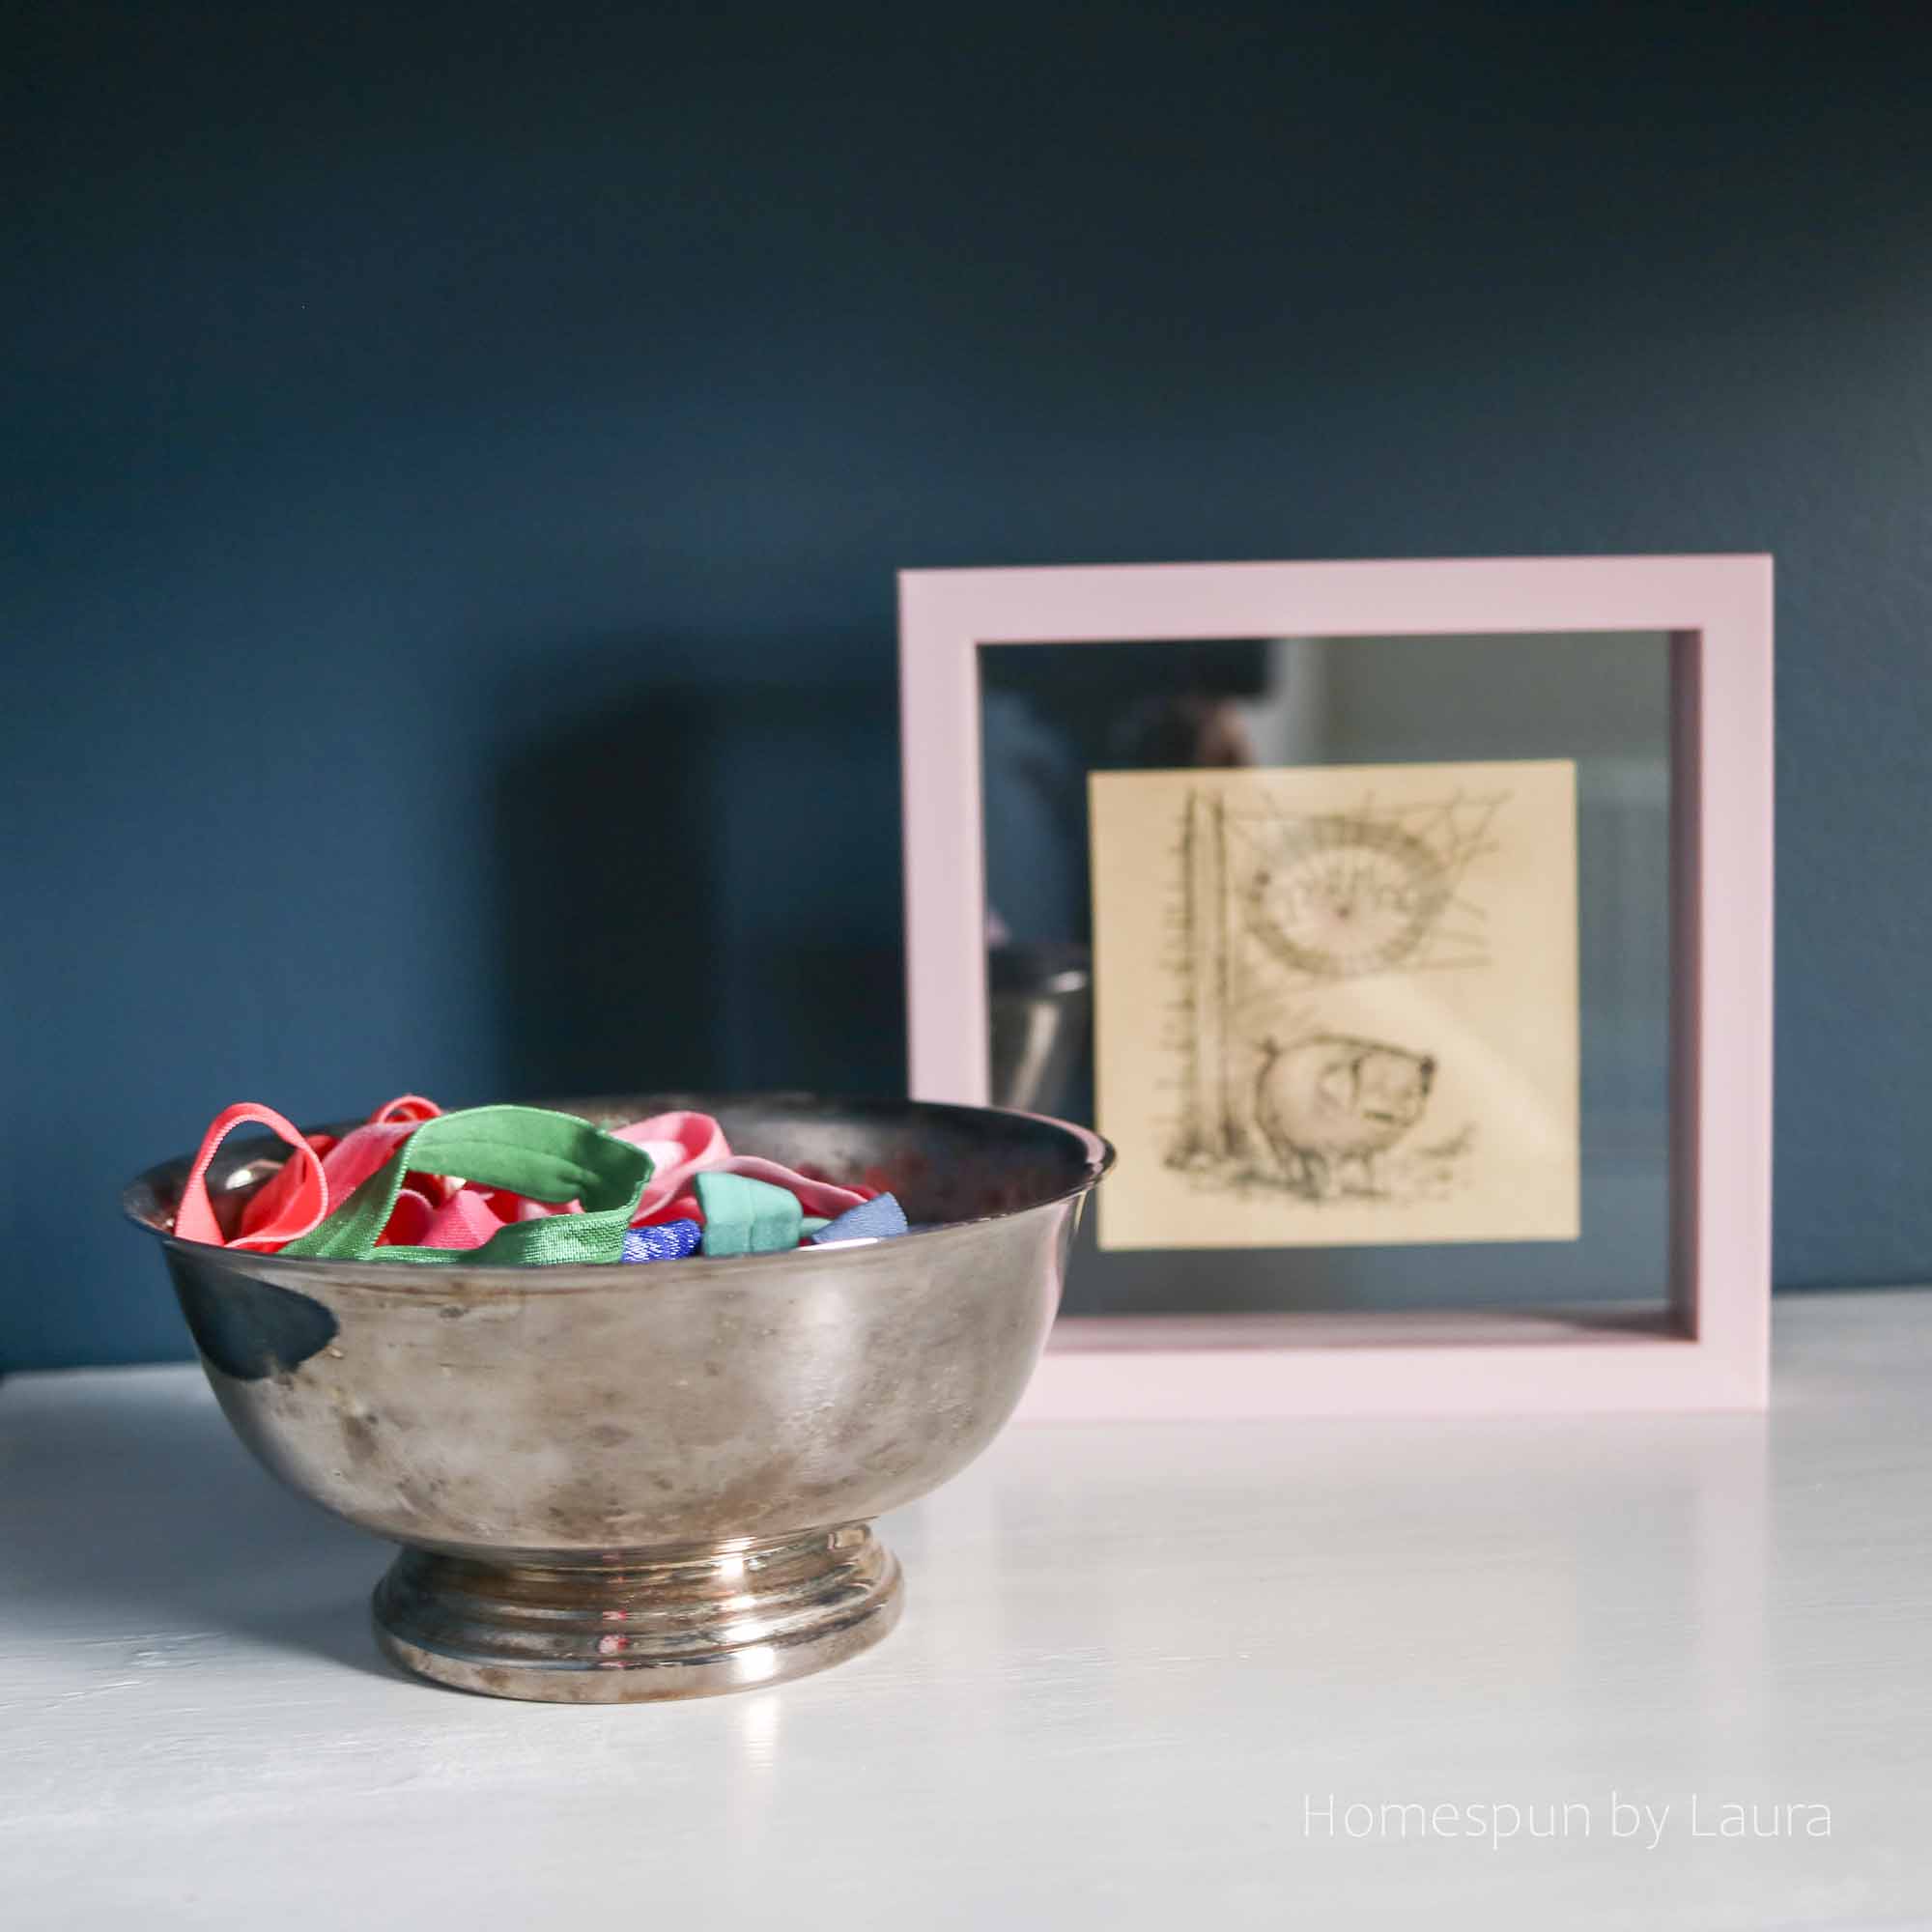
The Revere bowl holds headbands…and definitely needs to be polished!
Of course, the shelves rarely look like this!
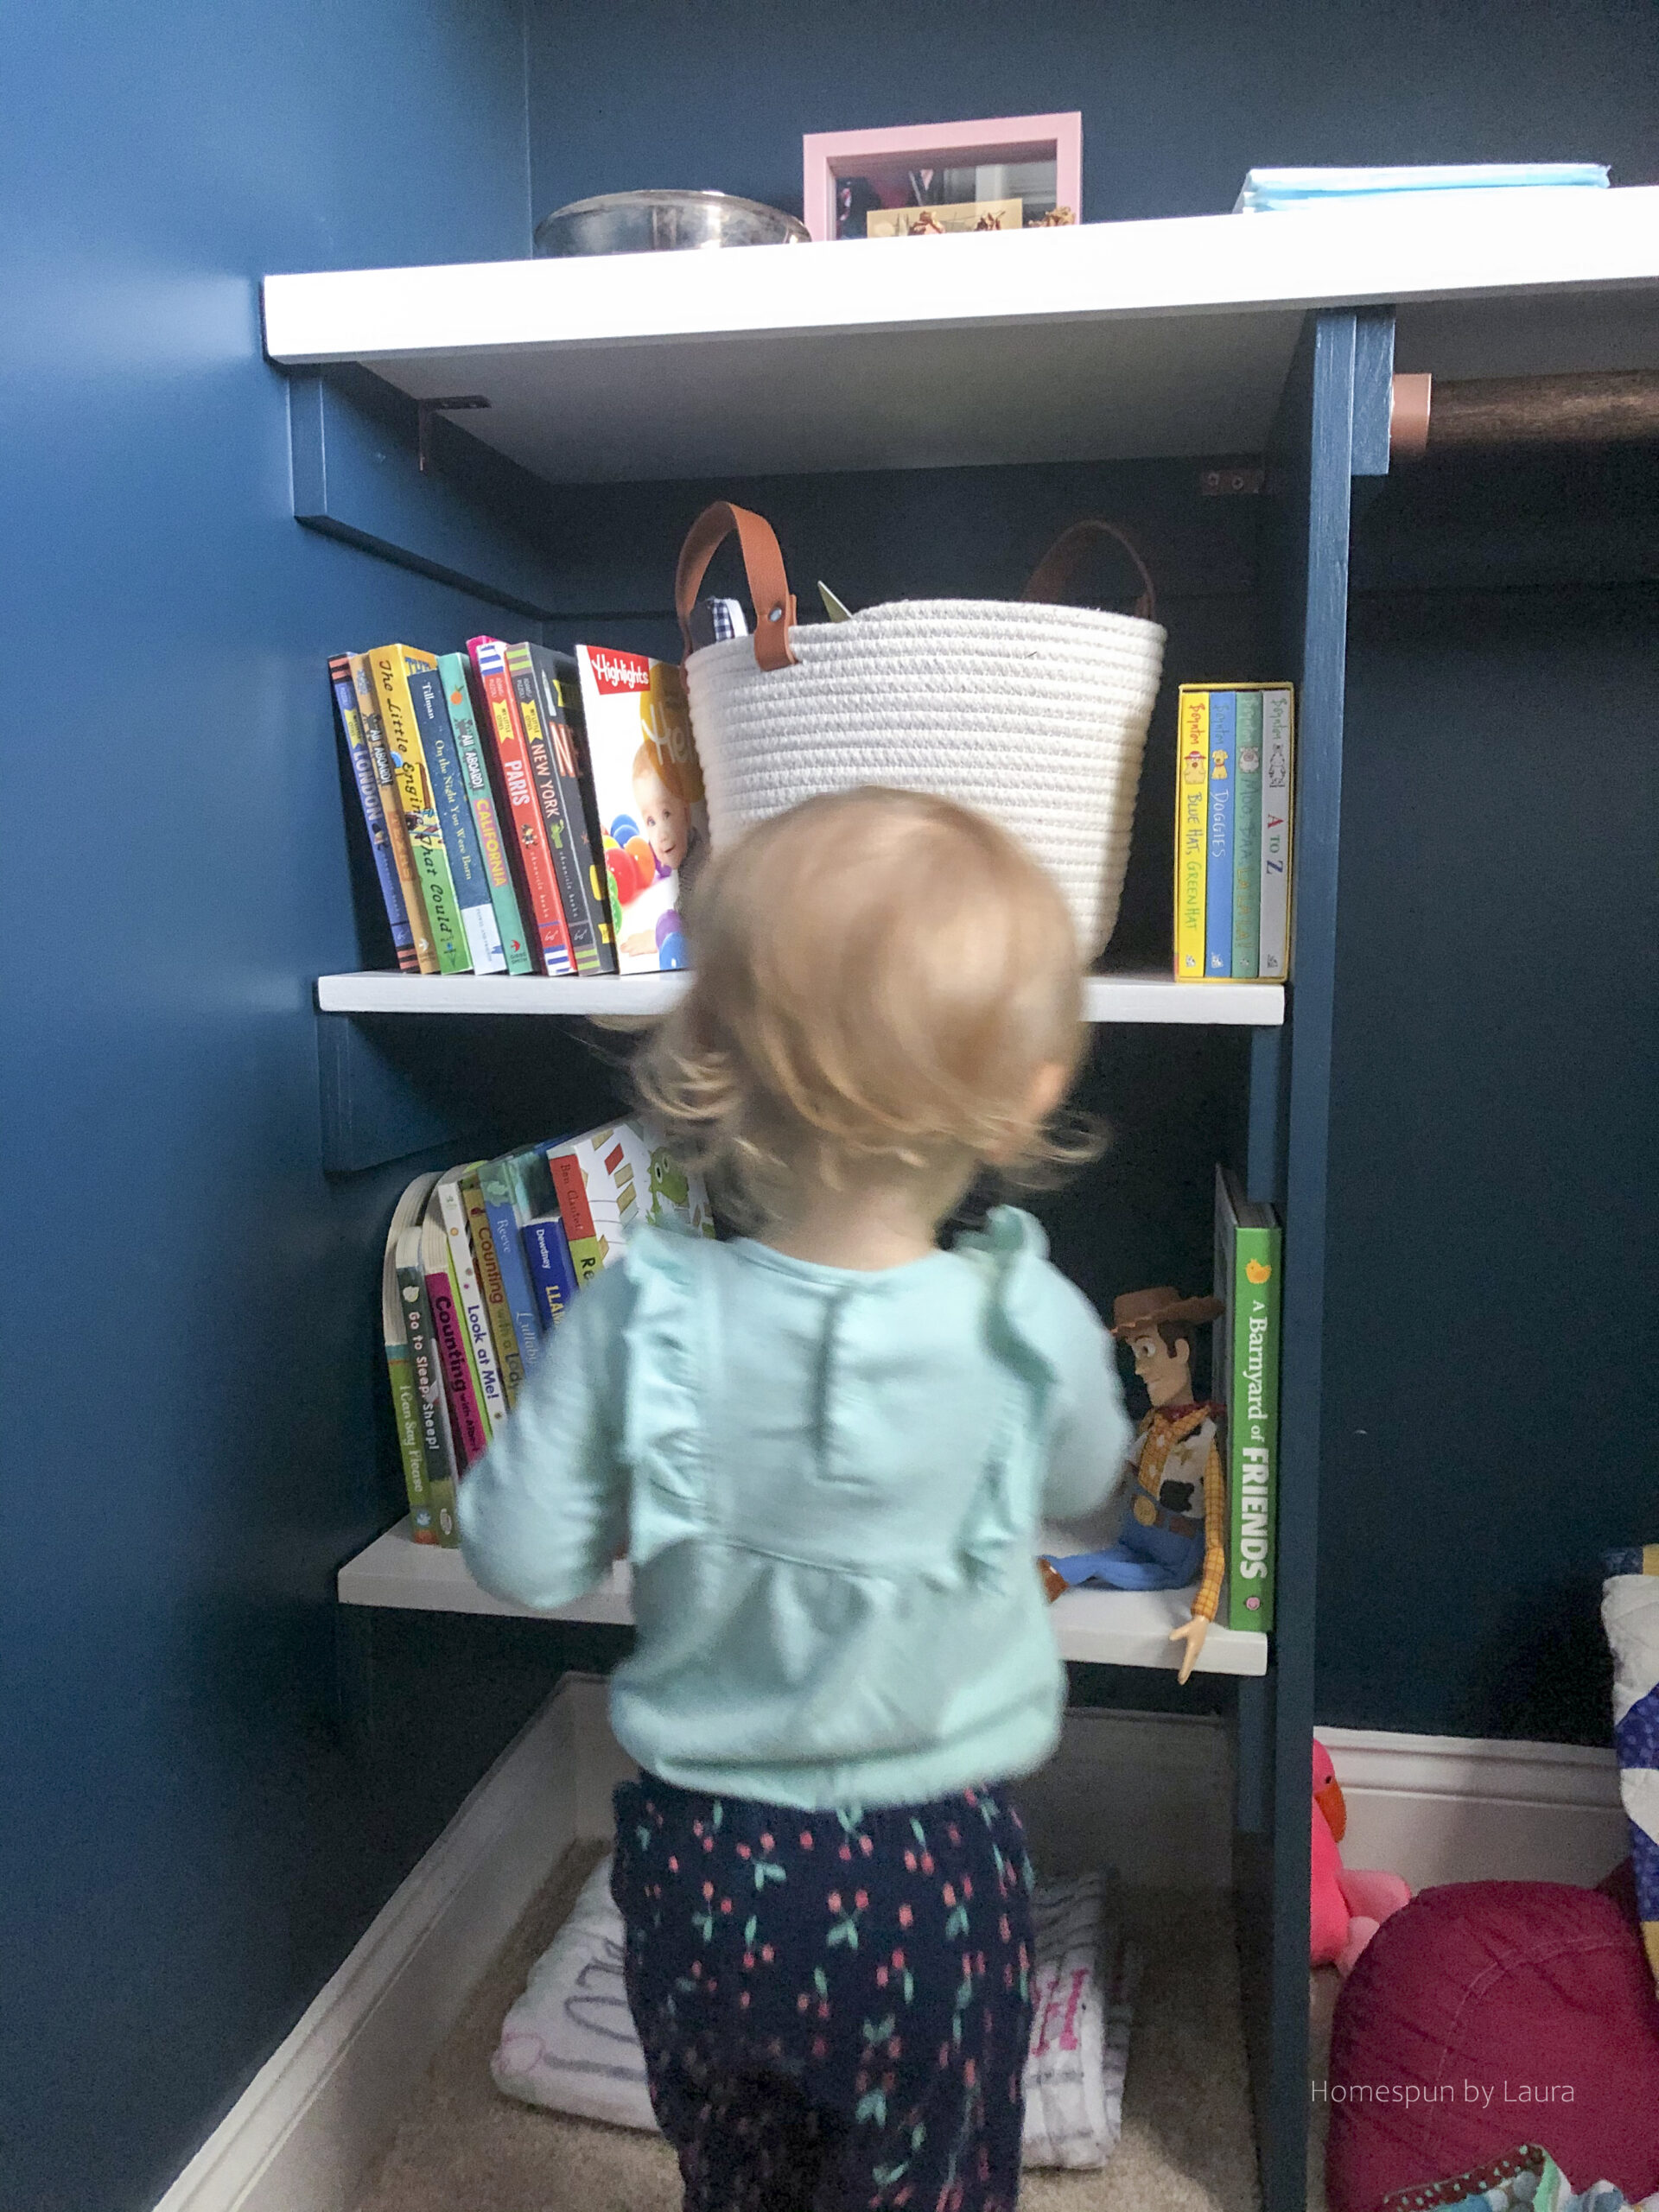
We all love the space. The girl runs in and sits down in the book nook, and we enjoy ending our days there together with a story before bedtime.
The End
This particular project was challenging for me time-wise. Since the closet is in the room where our daughter sleeps, the only times I could work on it were while she was at school or if someone else was here to play with her so I could work (with the exception of the few days she napped in our room while paint dried). I suppose I could have shut myself in during her naps, but that would have presented a new set of challenges (mainly, lack of food and bathroom access!)!
I’ll be honest, though: a few times since I finished, I’ve strongly considered snuggling up in there with a book of my own during her afternoon nap. 🙂
The completion of this project brings me a huge step closer to finally being finished with her bedroom. The two steps that remain are to paint her rocker, which I plan to do this week, and paint the actual room, which has no timeline on it. Hoping to get to that one by the time she turns two…
******************************
Pin the image below to bookmark this page for your own project! Thanks for stopping by.
Here’s a list of materials & supplies we used for the DIY closet shelving system that you can use to plan your own.
DIY Closet Shelving System Supply List
We used wood, paint, stain, and other tools + supplies we already had when possible to keep the cost down. Our total for supplies came to $181.97, but of course if you had to buy everything new, it would bring the cost up a little. I’m including the items I used and what I paid for them; you can adapt the list to work for your space and budget:
Wood
- 8′ Closet Rod, $15.98 @ Lowe’s: We cut it down to fit in our space with a handsaw after all the shelving was installed and had a final measurement.
- 4′ x 8′ blondewood plywood, 3/4″ thick, $49.98 @ Lowe’s: for two overhead shelves, vertical riser, and lower mini shelves, cut down to size by the folks at Lowe’s
- FOUR 4″ x 12′ primed pine boards, $14.38 each @ Lowe’s: The gentleman at Lowe’s cut these down to my measurements for the ‘floating’ shelf support system. See tips below to ensure you’re buying the least amount of wood possible for what you need!
- THREE 2″ x 8′ primed boards, $3.82 each @ Home Depot: For front pieces to beef up full-width shelves
NOTES:
This was the first time I’ve ever been charged for additional cuts at Lowe’s, and the guy was sort of rude about it. He counted every single cut instead of throwing in the first one for each piece free, and he also miscounted because he counted every single piece of wood – news flash: if you have one piece of wood and you cut it once, you wind up with two pieces. This means that the 5 pieces of wood he cut into 35 pieces were actually only 30 cuts…and since the first cut is supposed to be free, he should only have charged me for 25 cuts.
But he did not understand this no matter how many times I explained! The extra $2.50 those 10 cuts cost me was not worth the hassle of trying to get him to understand basic math so I gave up. Ok. Rant over – but the total below does include the $8.75 charge for wood cuts. A pretty cheap and easy way to cut wood, even if you’ve overpaid for it.
The lowest full-length shelf was made from some cheap 1/2 scrap plywood we had in the garage to save $$. It didn’t need to be very strong as I didn’t plan to put as much weight on it as those upper shelves. Those 2″ boards across the front came in handy to hide the fact that this one is obviously cheaper and thinner than those top shelves.
TOTAL COST for WOOD: $120.07
Hardware
- Corner braces (L-shaped brackets): $8.72
- Metal closet rod hardware, $5.98/set @ Lowe’s: For hanging the closet rods (they also have wooden sets and metal sets in other finishes)
- 2″ screws, $6.98 @ Lowe’s: to screw in ‘floating’ shelf support pieces
- 1.5″ wire brads, $1.50 @ Home Depot: for nailing boards to fronts of shelves
TOTAL COST for HARDWARE: $28.16
Paint and Stain
With the exception of the wall paint, I used what we already had on our shelves:
- Wall paint: 1 gallon Moscow Midnight in Cashmere finish, $33.74 @ Sherwin Williams
- Untinted white Valspar paint for white shelves and touching up baseboards
- Kilz primer for shelves & boards
- Red Mahogany + English Chestnut stains by Minwax (I used two coats of each to get my favorite stain color)
- Semi-Gloss Polycrylic
- Copper metallic spray paint by Rustoleum
- Quick drying caulk
- Drywall spackle
TOTAL COAT for PAINT + STAIN: $33.74
Tools
If you don’t already own the tools below, I’ve included links for you to purchase them easily. These are affiliate links, so if you choose to purchase through them, you’ll send a few pennies my way at no extra cost to you:
- Painter’s tool – to use with drywall spackle
- Purdy trim paintbrush – great for cutting in!
- Ratcheting screwdriver – so much easier than a plain screwdriver, and less likely to drill a hole in your wall than an electric one if you’re a little clumsy like me!
Decorative Stuff
The Ikea Sockerbit bins added $60 to the cost. That’s a lot for bins in my book, but I think it was worth it to have a quieter and more cohesive look on those high shelves. We’re already using the bins they replaced to hold other stuff throughout the house, so nothing went to waste!
I was able to use wood we already had for the DIY poster hanger. The rest of the decor was stuff that was either already in use in the closet or was just lying around. You probably have more free pretty stuff lying around your house than you realize!
TOTAL COST for DECORATIVE STUFF: $60
So that brings our grand total in under $250, and gift cards kept our out-of-pocket even lower!
Some tips for wood measurements and cutting:
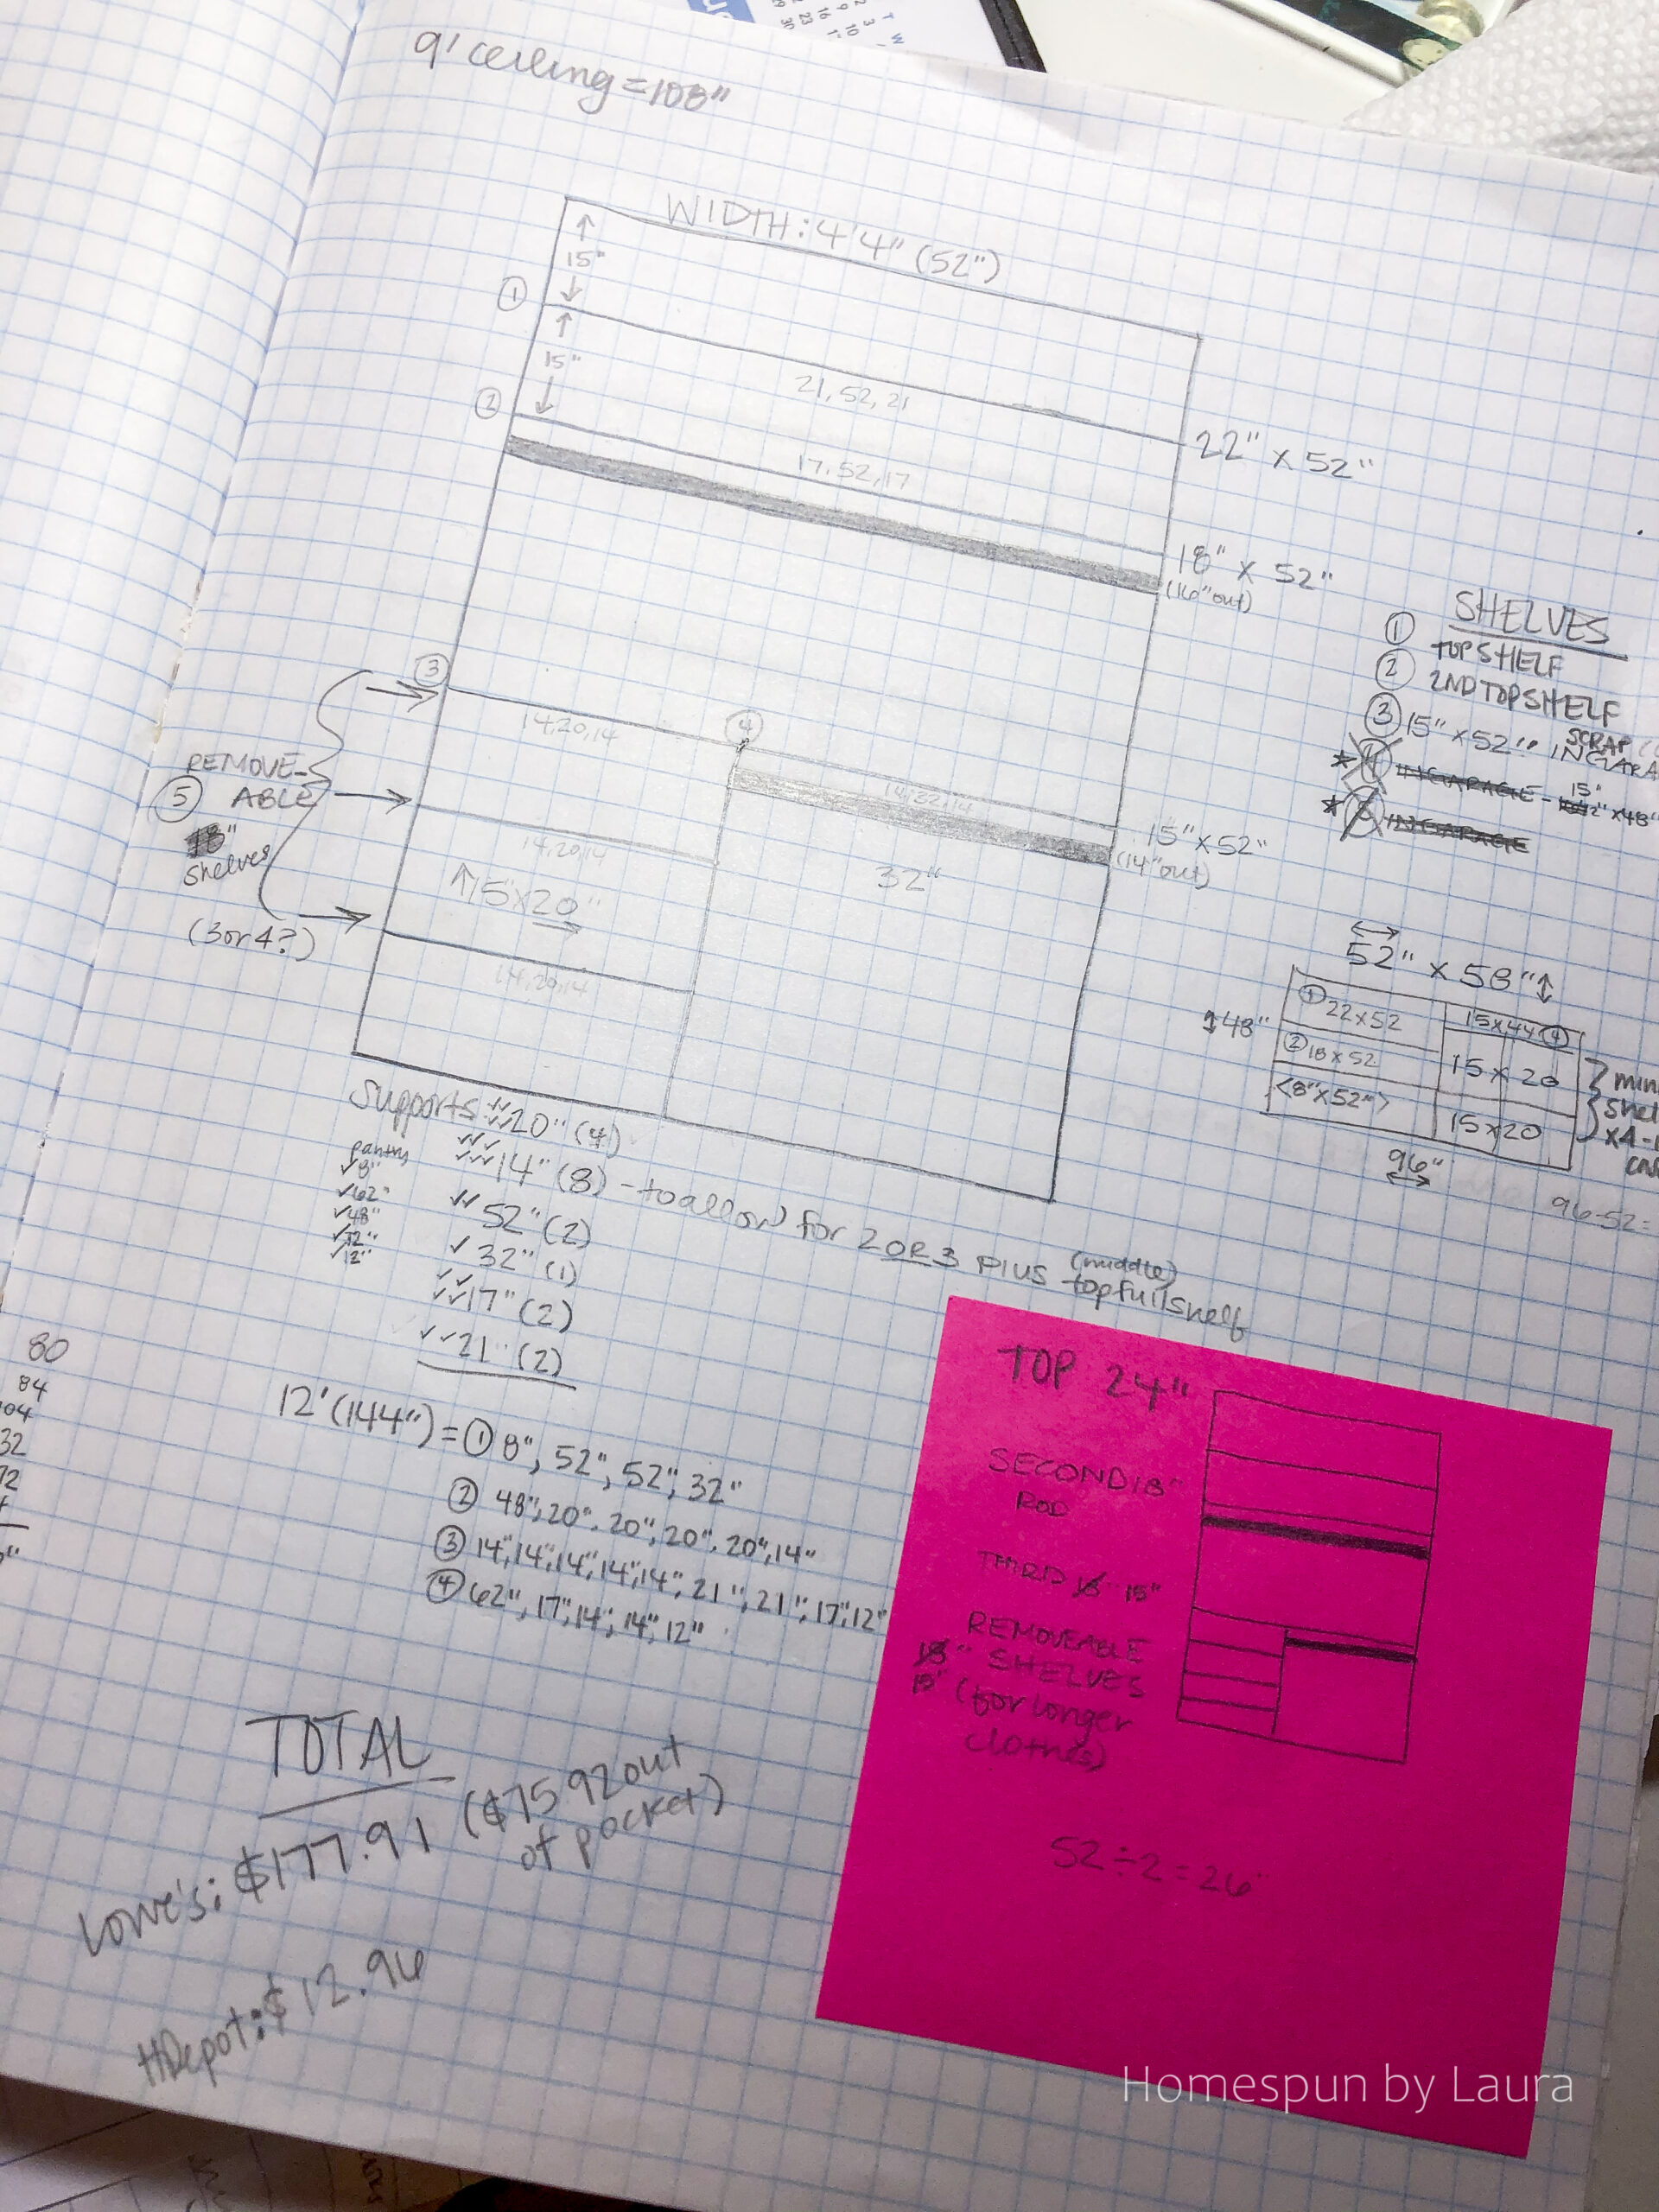
Something I always do to ensure I’m making the best use of each board is to actually sketch out the boards with all my cuts on it. You never want to buy more wood than you need and end up with scraps because you didn’t make a plan!
I start by writing down every single measurement I need and sketch out those measurements on boards until all measurements are accounted for. And then I double check myself. Twice. While these sketches are never to scale, it helps me to check my work and fully use each piece the best I can. This process usually makes my head spin a little, but having a little diagram and list of my cuts keeps me organized when I get to the store!
On the bottom of the page below, you can see where I wrote out all the cuts I needed from the four 12-foot boards I used to create the supports for the ‘floating’ shelf system.

Here’s where I did the work for this project.