Have you ever wanted to create the perfect piece of art to hang in your house – but you lack any artistic skills whatsoever?
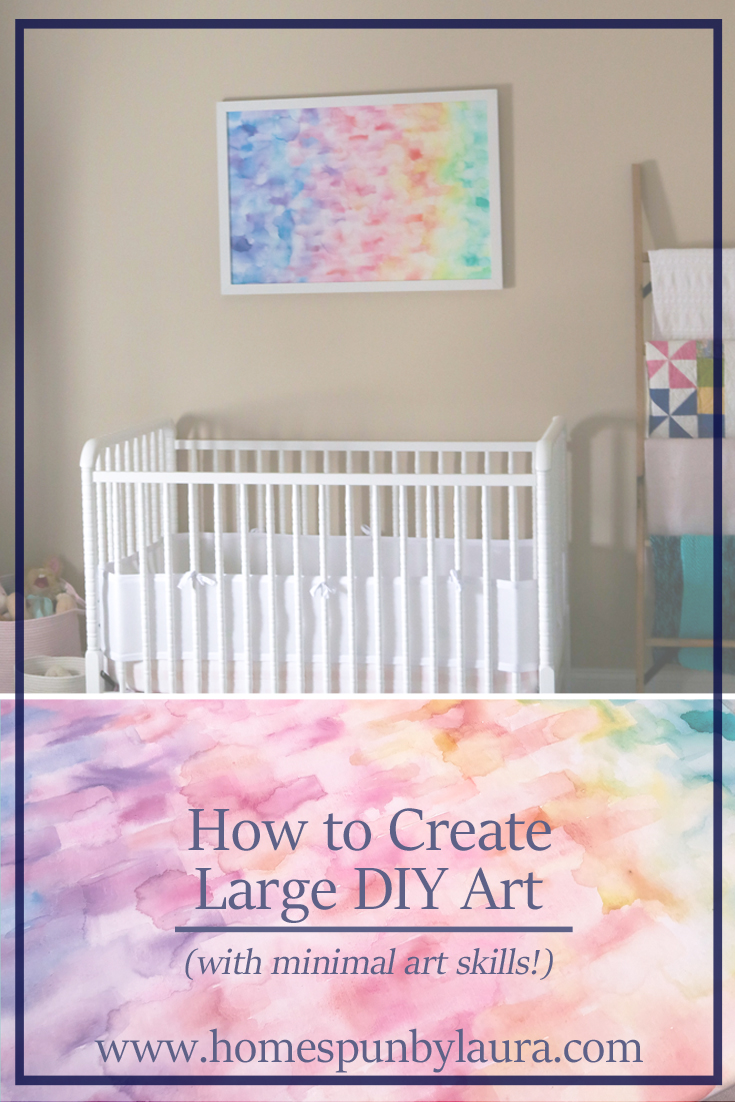
The wall over our daughter’s crib was bare for the first sixteen months of her life, despite my grand plans to create a beautiful piece of oversized art to hang in the space. I finally did something about it recently, and it was so easy and inexpensive I thought I would be doing the world a disservice if I didn’t share how to create large DIY art – even with minimal artistic skill!
Here’s a preview!
I mentioned on Instagram last month that the inability to create the perfect piece of large DIY art to hang over the crib in our daughter’s bedroom basically paralyzed me and prevented me from doing anything at all – for over a year. So we had a big, bare wall over the crib for the first 16 months of the little girl’s life.
There are bigger problems in the world, but it was something that bothered me every time I put her down in her crib – three times per day most days! I was annoyed with myself for not having done it already and half worried that she’d be three before I got around to it.
But – that wall is bare no longer because I finally decided to just do SOMETHING!
The original plan
For months I pictured a large piece of art (created by me, of course!) featuring the words of the girl’s bedtime song handlettered on top of beautiful watercolor flowers, in a large navy blue frame (I planned to spray paint a large poster frame from our old house). The problem: I don’t practice either of these skills regularly. My watercolor flowers usually just look like blurry pink blobs, and my handlettering often looks like a little old lady’s wobbly cursive.
I’ve intended to practice them…but I haven’t. I keep myself too busy to sit down and write or draw regularly enough to improve my skills. But one day last month I sat down one day to do a little doodling to practice those watercolor roses.
A change of plan
Before I began, I scrolled through various images of watercolor flowers online looking for tutorials and options that might work without much practice so I could skip to the final project quicker (Which by the way, doesn’t exist! You must practice these kind of things to be good at them!! There’s not a shortcut!).
During my scroll, I got an idea from an Instagram post by @paintstobrushes. Farrah paints stunning watercolor flowers, stills of rooms, landscapes, and more. What caught my eye was something a little simpler. My inspiration was a photo containing a page of her watercolor paint swatches. Though I don’t think she intended for them to be standalone artwork, they were pretty, colorful, and they looked about my speed.
They were basically just pretty blobs! I could do that! So I started playing with blobs of color. I tried wet on wet and wet on dry; I tried making shapes and just blending the colors together, and after a few tries I landed on an abstract design I liked. I call it ‘watercolor blobs’.
A more realistic plan
Of course something abstract was much more realistic. I have some artistic skills up my sleeve, but they’re so rusty that I likely would have remained paralyzed for another 16 months if I’d stuck with my original plan.
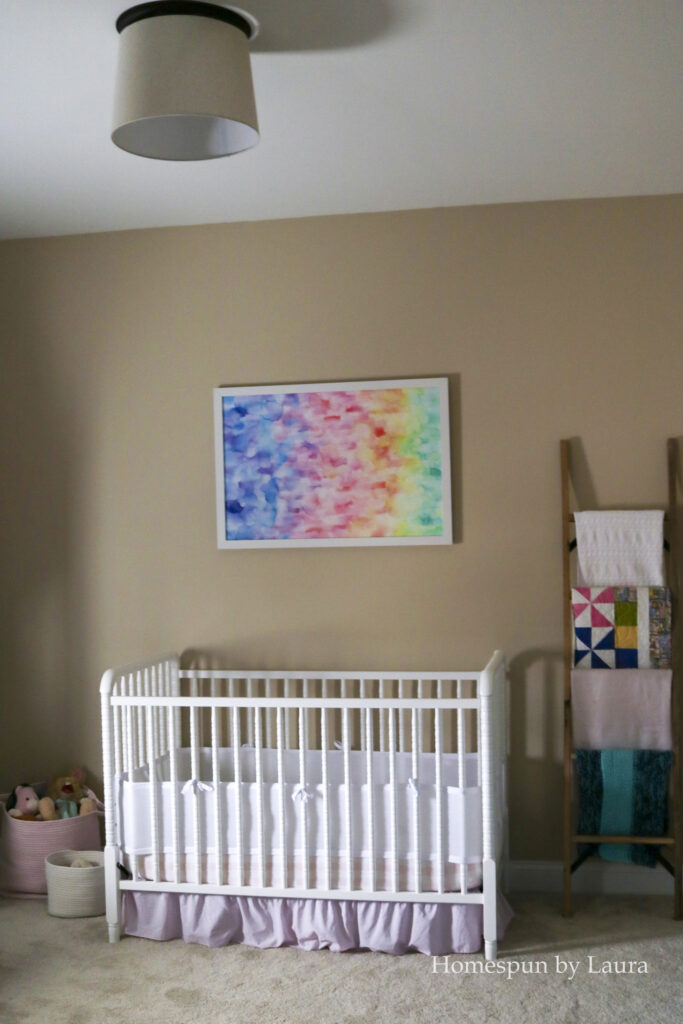
To create our large DIY art, I used a 24″ x 36″ watercolor canvas (Which I bought back in April! The girl was only 7 months old then!), the largest watercolor brush I had, and a simple watercolor paint kit from my stash. I dug out a large, white poster frame we used in our old house, attached the canvas to the frame using offset canvas brackets, and added hanging hardware from a kit we already had.
The entire project cost about $20 because all I had to buy was the canvas ($12.50 on sale at Hobby Lobby) and the offset brackets ($8 for 20 – and that’s an affiliate link, so if you buy through it I make a few pennies to help ‘keep the lights on’ at no cost to you!).
As simple as that, I have a piece of art I love, that I created myself, that will grow with our girl. If one day when she’s older she decides she doesn’t like it, I’ll happily keep it ?.
Want to create some oversized abstract art for your own house? Here’s how I did it.
How to create large DIY art
Supplies needed:
- Large canvas (I bought mine at Hobby Lobby when canvases were half off)
- Large frame in corresponding size (mine was a poster frame from Michaels years ago)
- Paint and brushes (I used boxed watercolors I already had)
- Hanging hardware (screw eyes, wire, drywall anchor, and a screw)
- Offset brackets
Step 1: Paint!
Create your art. If, like me, you’re not the very best at painting/drawing, pick an easy abstract-type design. That way, if you mess up it’s harder to tell! Pick a type of paint you’re comfortable with.
- Watercolor was perfect for me because I had to be quick with it since it dries pretty quickly. I needed to get this art done, already!
- Acrylics are forgiving because you can just paint over dry paint if you mess up…but resist the urge to keep adding layers on top of layers to get it just perfect!
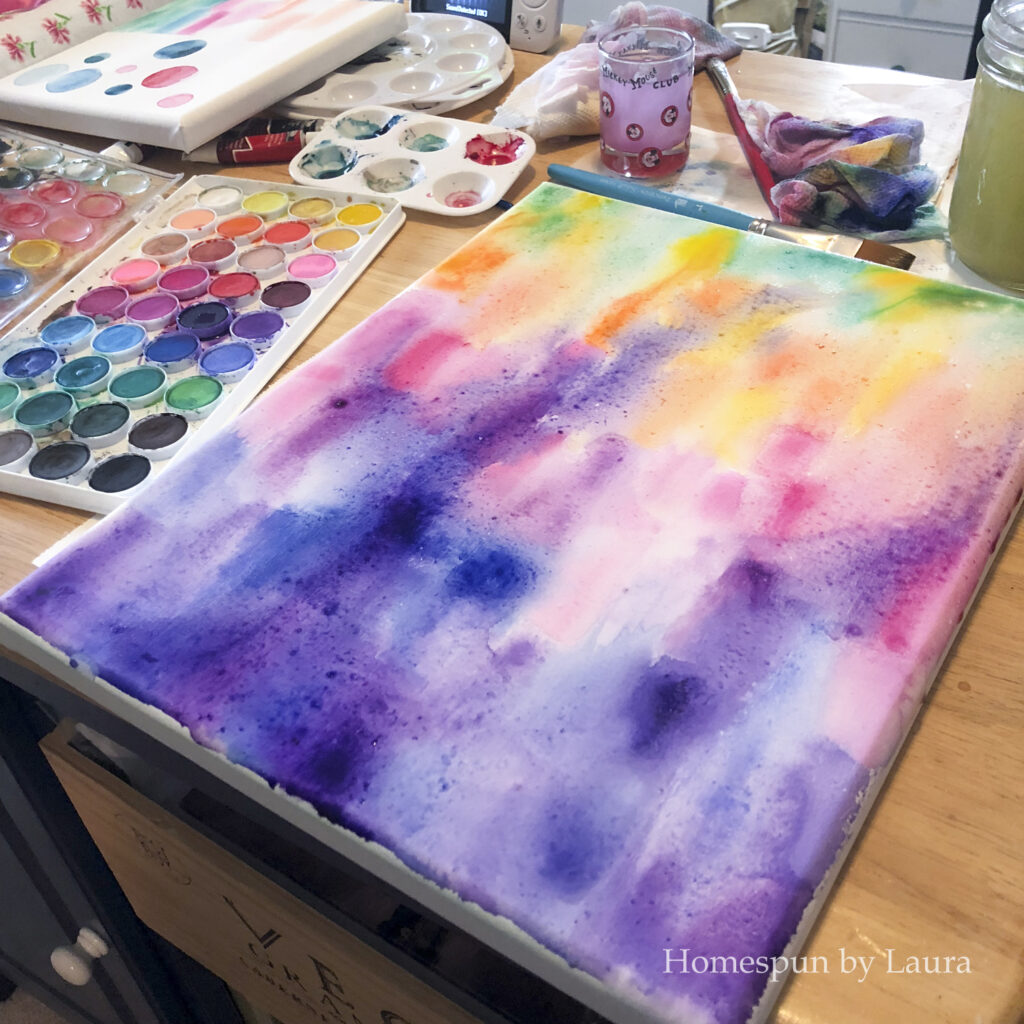
I first doodled on a smaller canvas (top left corner), because I’d never used a watercolor canvas before and wanted to get a feel for it before moving on to the larger ones. The larger canvas you see here was my practice once I had determined to do ‘watercolor blobs’!
I painted a sort of rainbow gradient using watercolors by first wetting sections of the canvas with my paintbrush. I then added color to the brush and painted small rectangles.
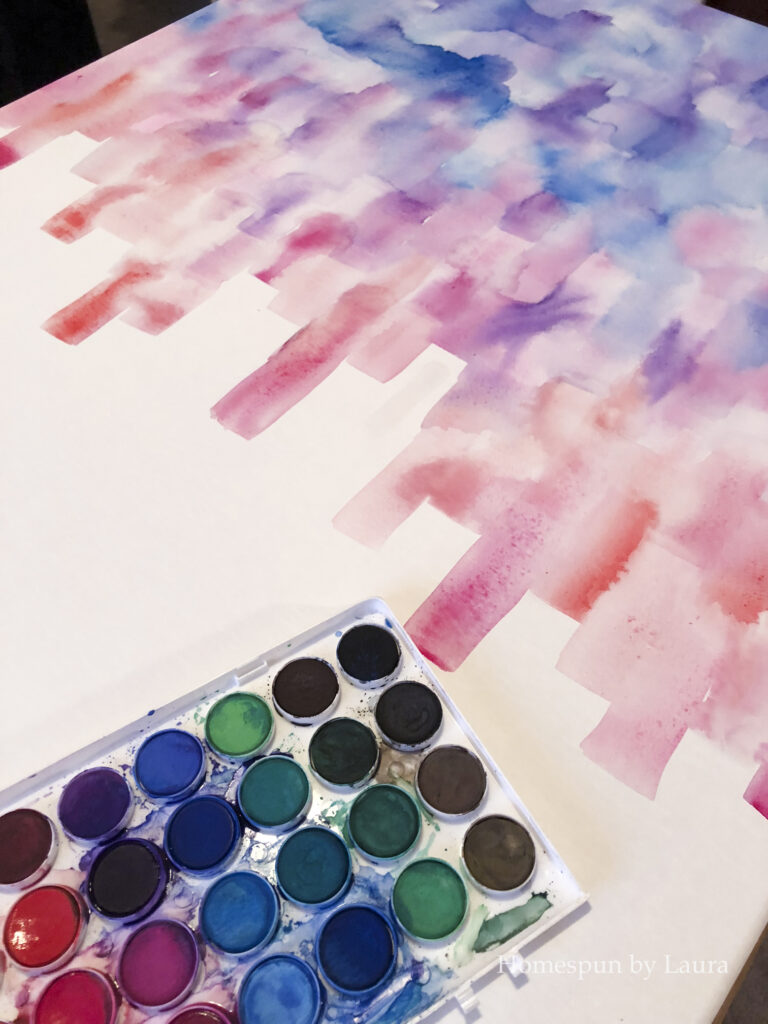
Sometimes I let the rectangles touch (which results in more blur between the rectangles), and other times I waited until one was nearly or fully dry before I added another rectangle next to it (which results in a more defined rectangle shape). The best part is, you really can’t mess this up because it’s just a bunch of watery blobs.
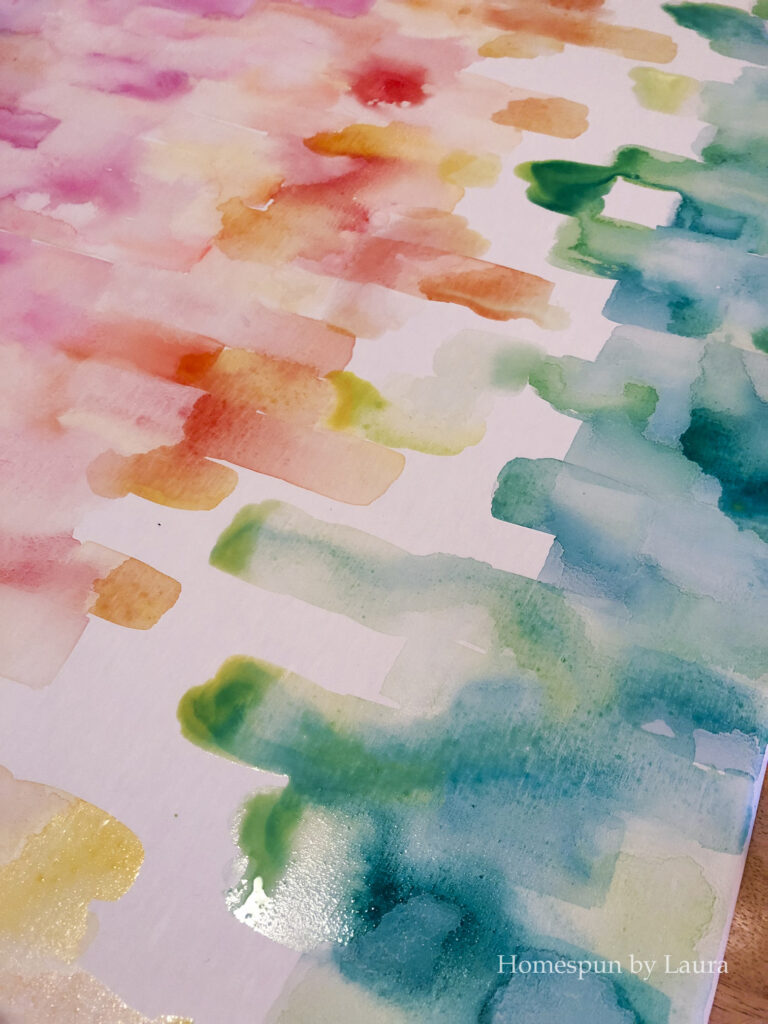
When I got to the end, I let the orange and green/blue sections dry mostly before I added too much yellow. On my practice canvas, the orange and green mixed in one section to make brown, which I wanted to avoid on the finished piece.
Step 2: Frame it
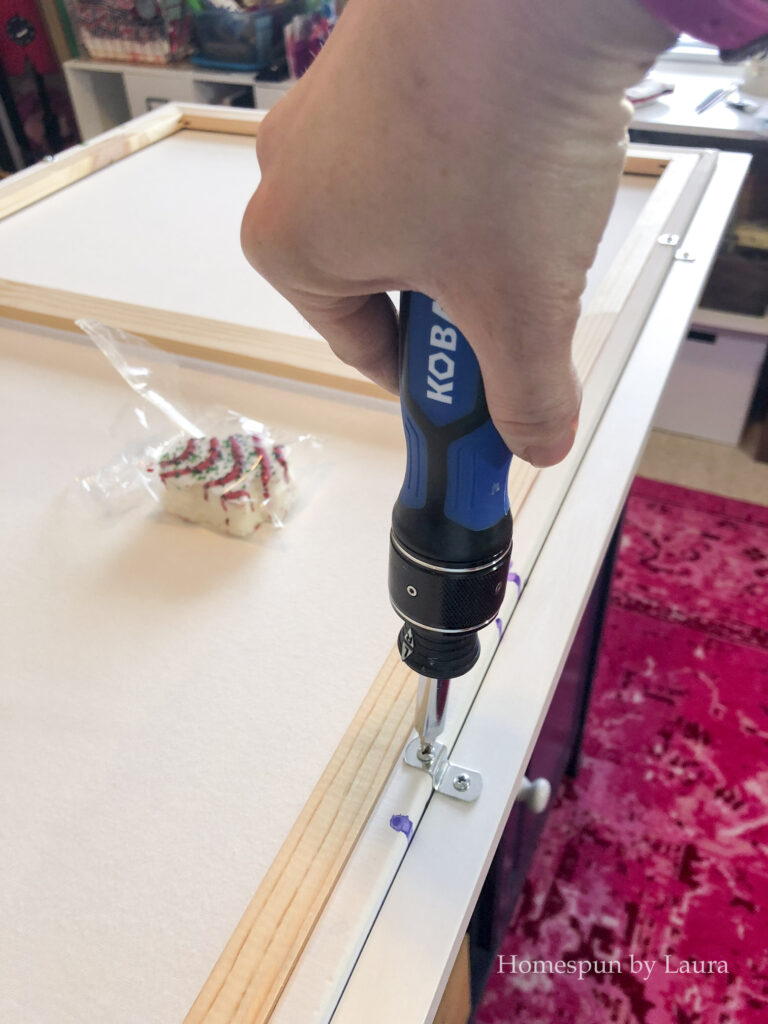
After your art has completely dried, frame the canvas using your offset brackets. I used a hammer and small nail to create little pilot holes in both the wooden frame of the canvas and the questionable material (plastic?) of the picture frame before screwing in all the little screws. I used two brackets on the longer sides and one on the shorter sides, and it seems pretty secure!

Before you order your offset brackets, insert your canvas into your frame. Measure the difference from the frame to the canvas – this is the size bracket you need (basically the height of the bracket). Mine were 3/8″.
(My supply of Christmas tree cakes is sadly about to run out…)
Step 3: Add hanging hardware
I used screw eyes and wire from our picture hanging kit, screwing the hooks into the insides of the wooden canvas frame (facing toward the center of the canvas) so it could sit flush on the wall (instead of sticking out of the back of the wooden frame toward the wall).
Step 4: Hang it!
Make sure to use a drywall screw if there isn’t a stud where you need to hang. If you’re hanging over a bed or crib, make sure your little one can’t reach up and pull it down, even if it winds up looking like it’s a tad too high (like mine)!
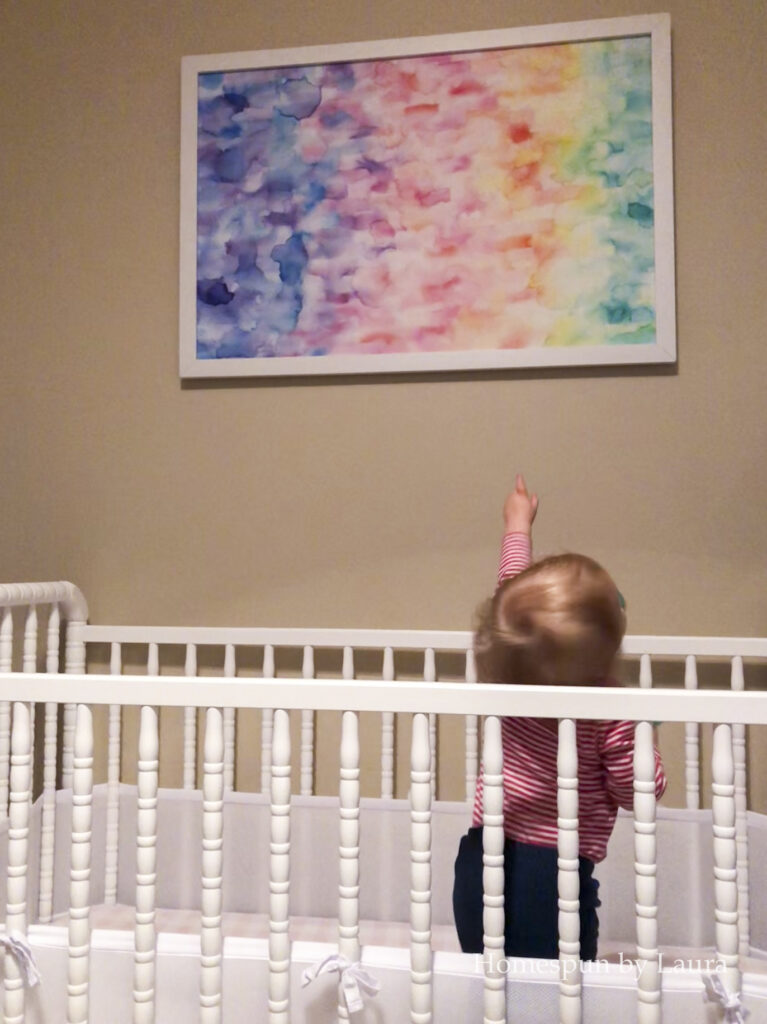
I intentionally didn’t put any glass in the frame, and the frame itself is pretty lightweight, so injuries should be minimal if it ever comes down. I doubt she’ll ever reach it to pull it down, though.
Step 5: Enjoy your beautiful new large DIY art!
I feel a huge sense of accomplishment for finally creating some art I love for the little girl’s room! It’s fun and colorful and a perfect way to complete the space.
The completion of the nursery art also means that the task of decorating the bedroom is one step closer to being complete! I began when the baby was about 7 weeks old during the Fall 2018 One Room Challenge. At the end of that One Room Challenge I had made great progress, but multiple incomplete areas remained.
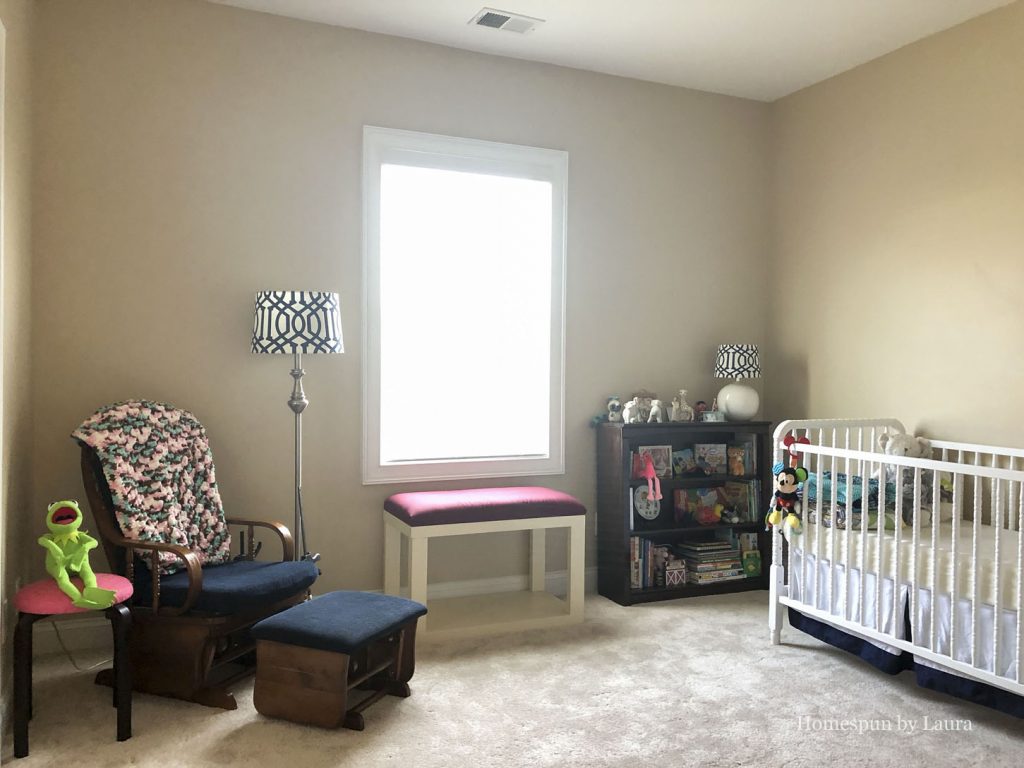
Before – actually taken the day before her surprise arrival!
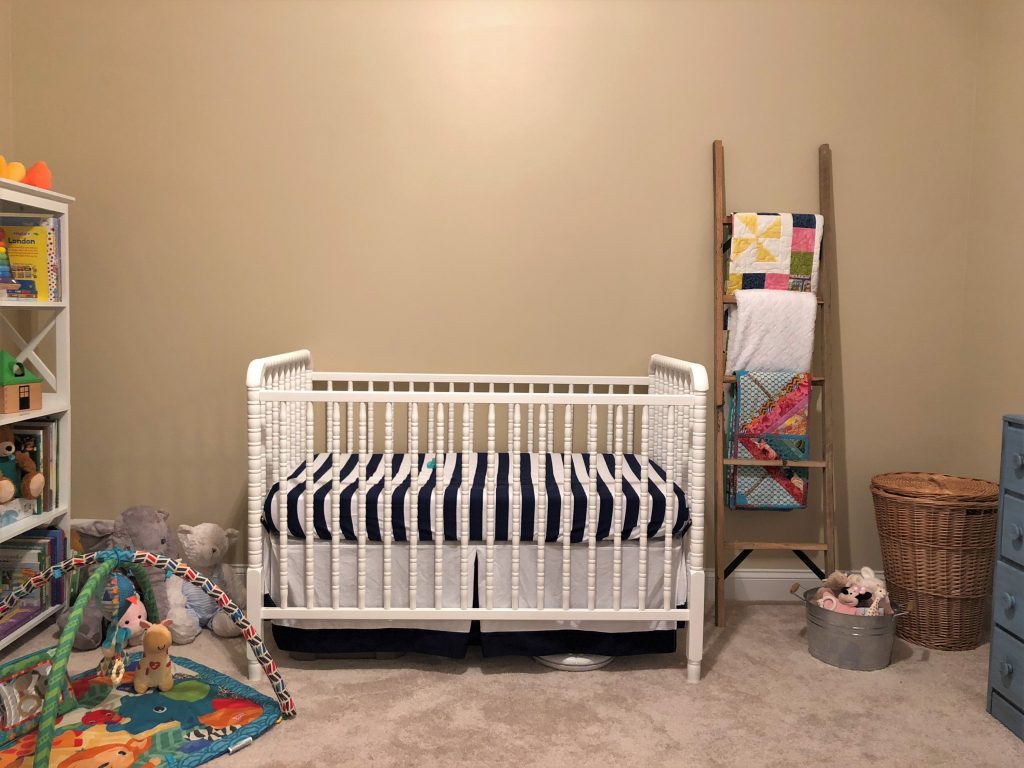 Here are two ‘After’ photos – but you’ll see they’re missing the curtains, the art, the light fixture (actually, you can’t see this!), and more.
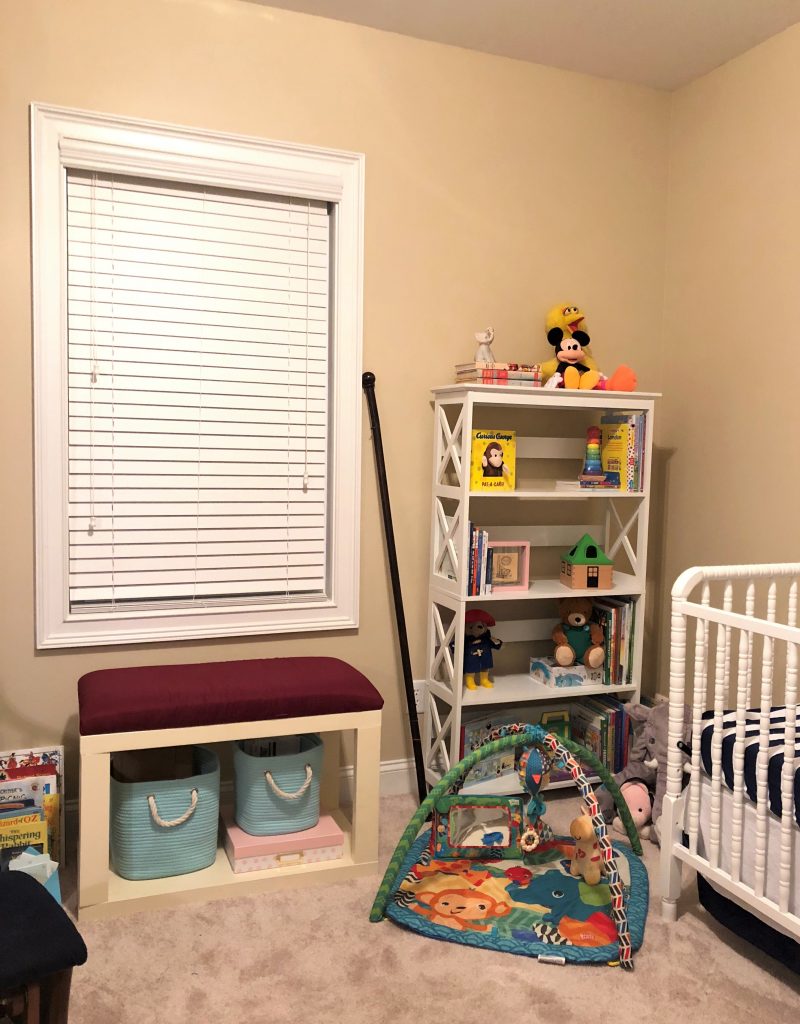
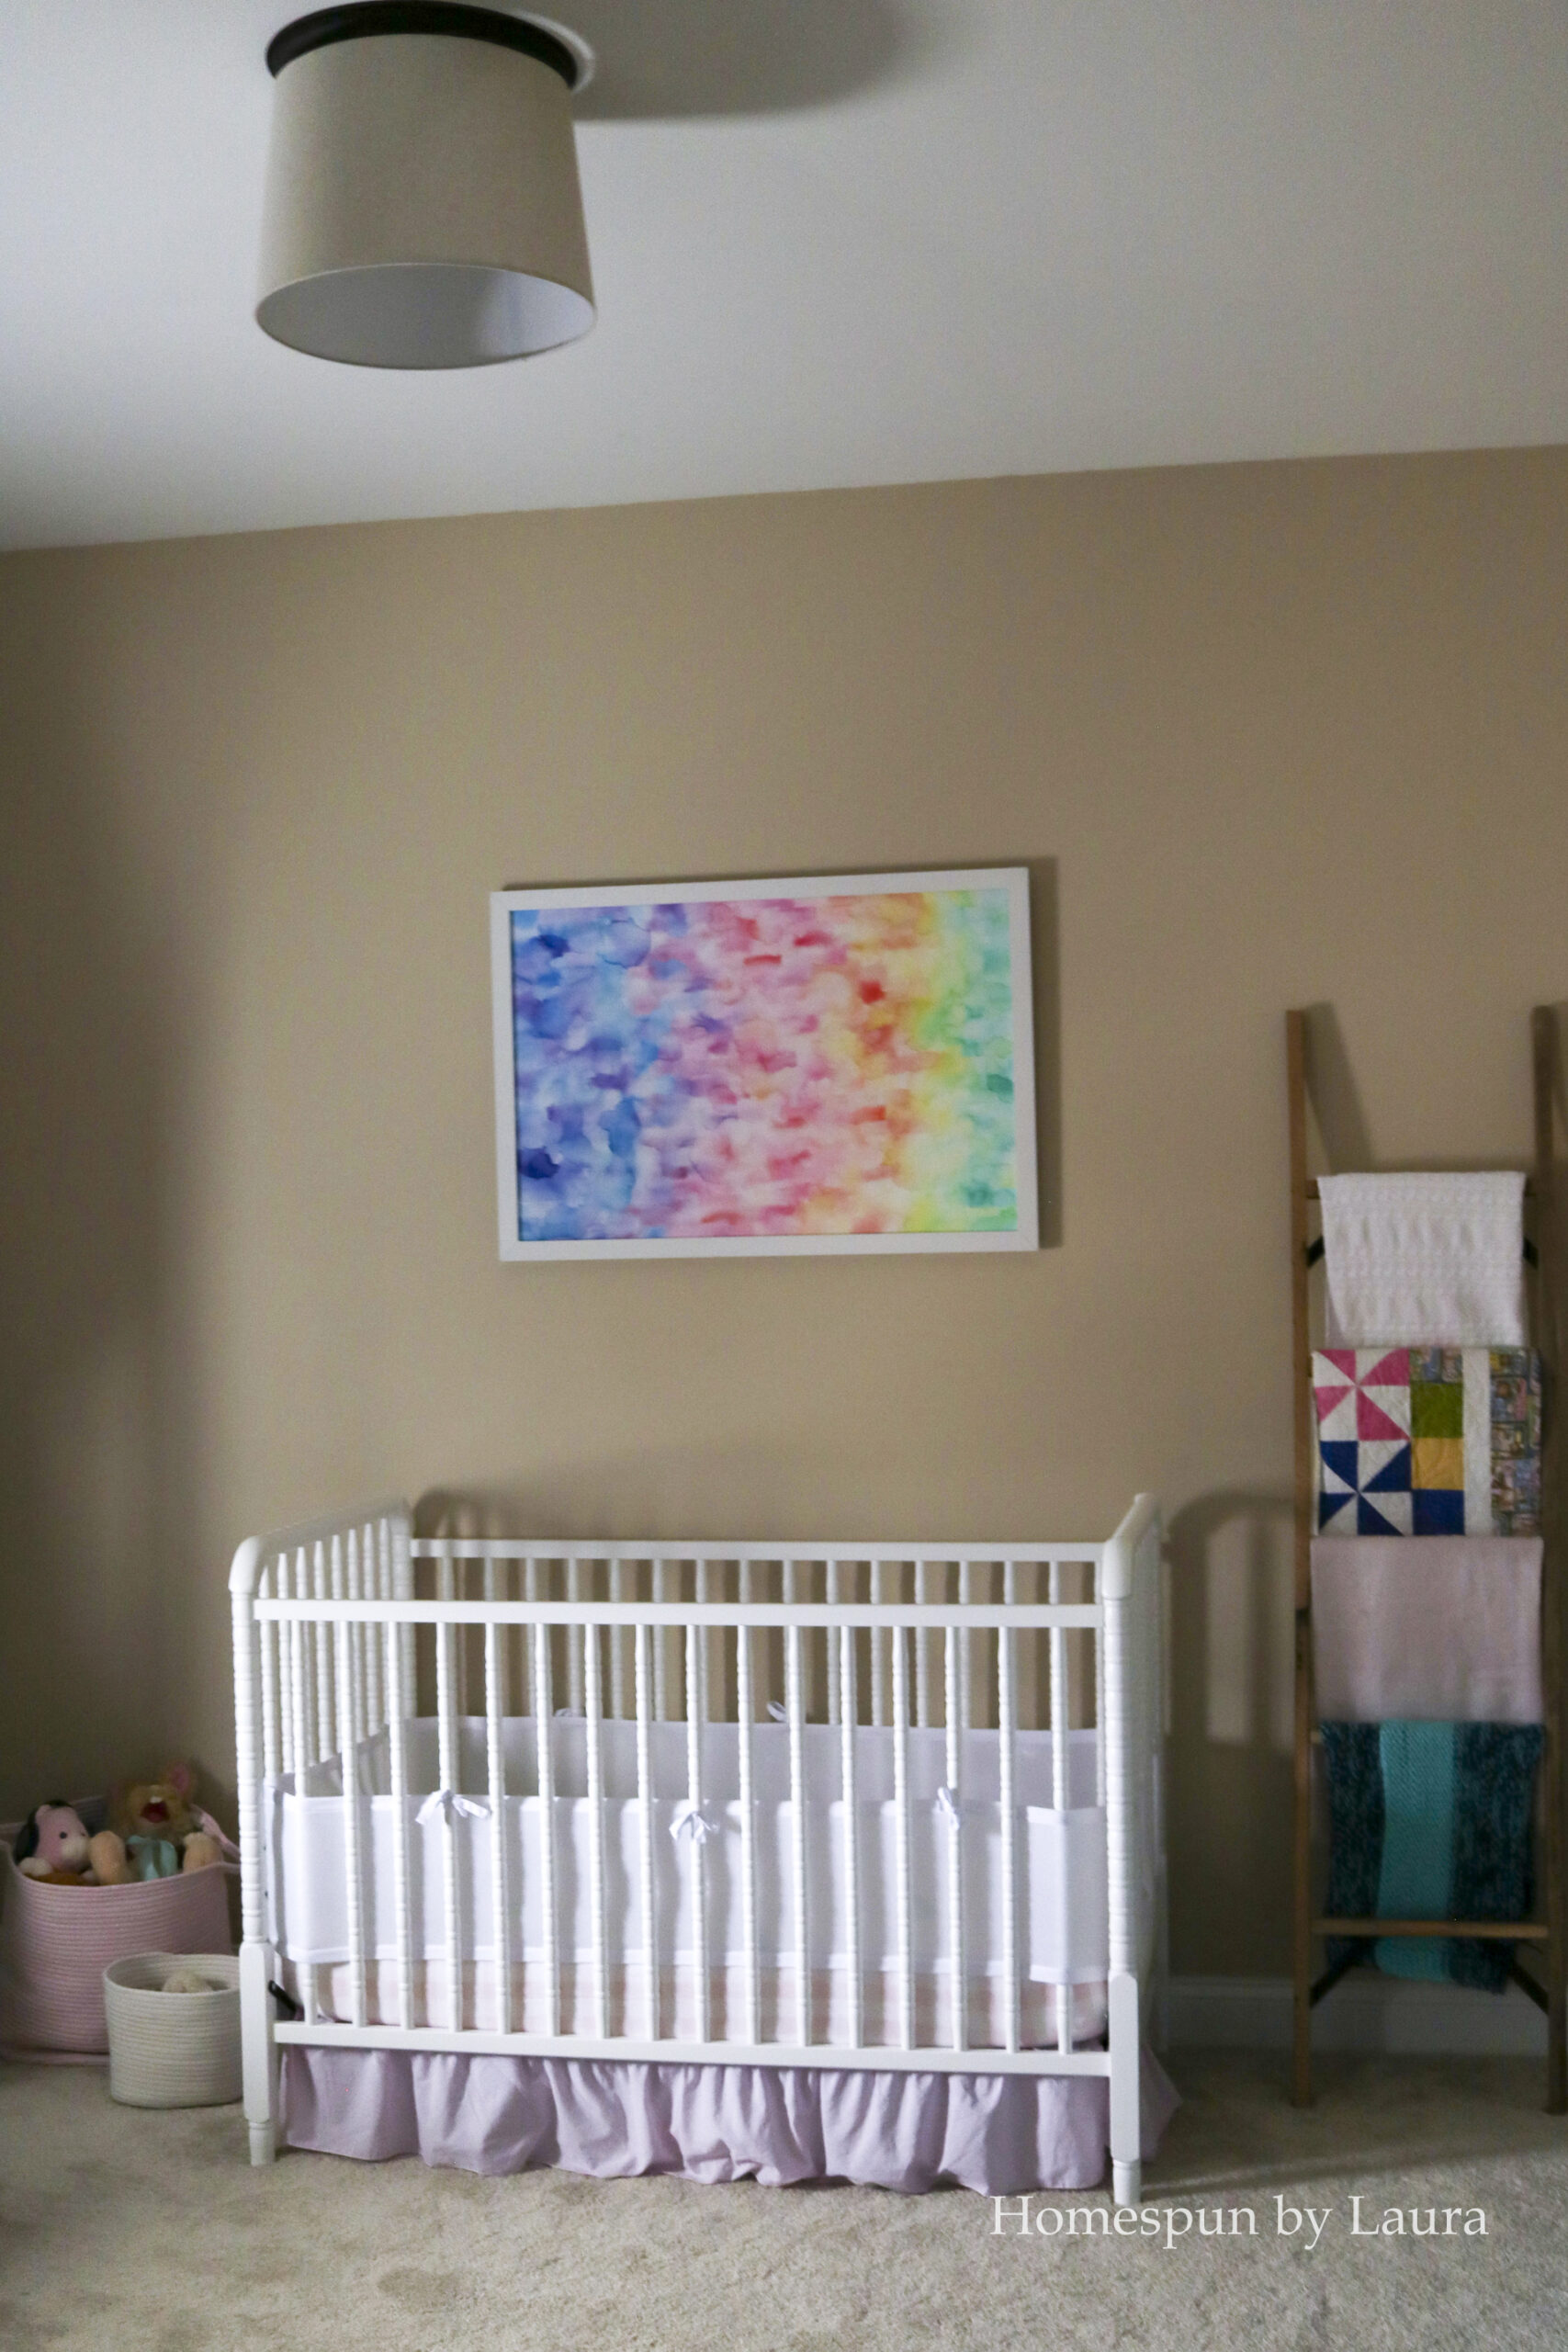
The room itself is still not 100% complete- but thanks to my new large DIY art, it sure looks more put together than it did before!
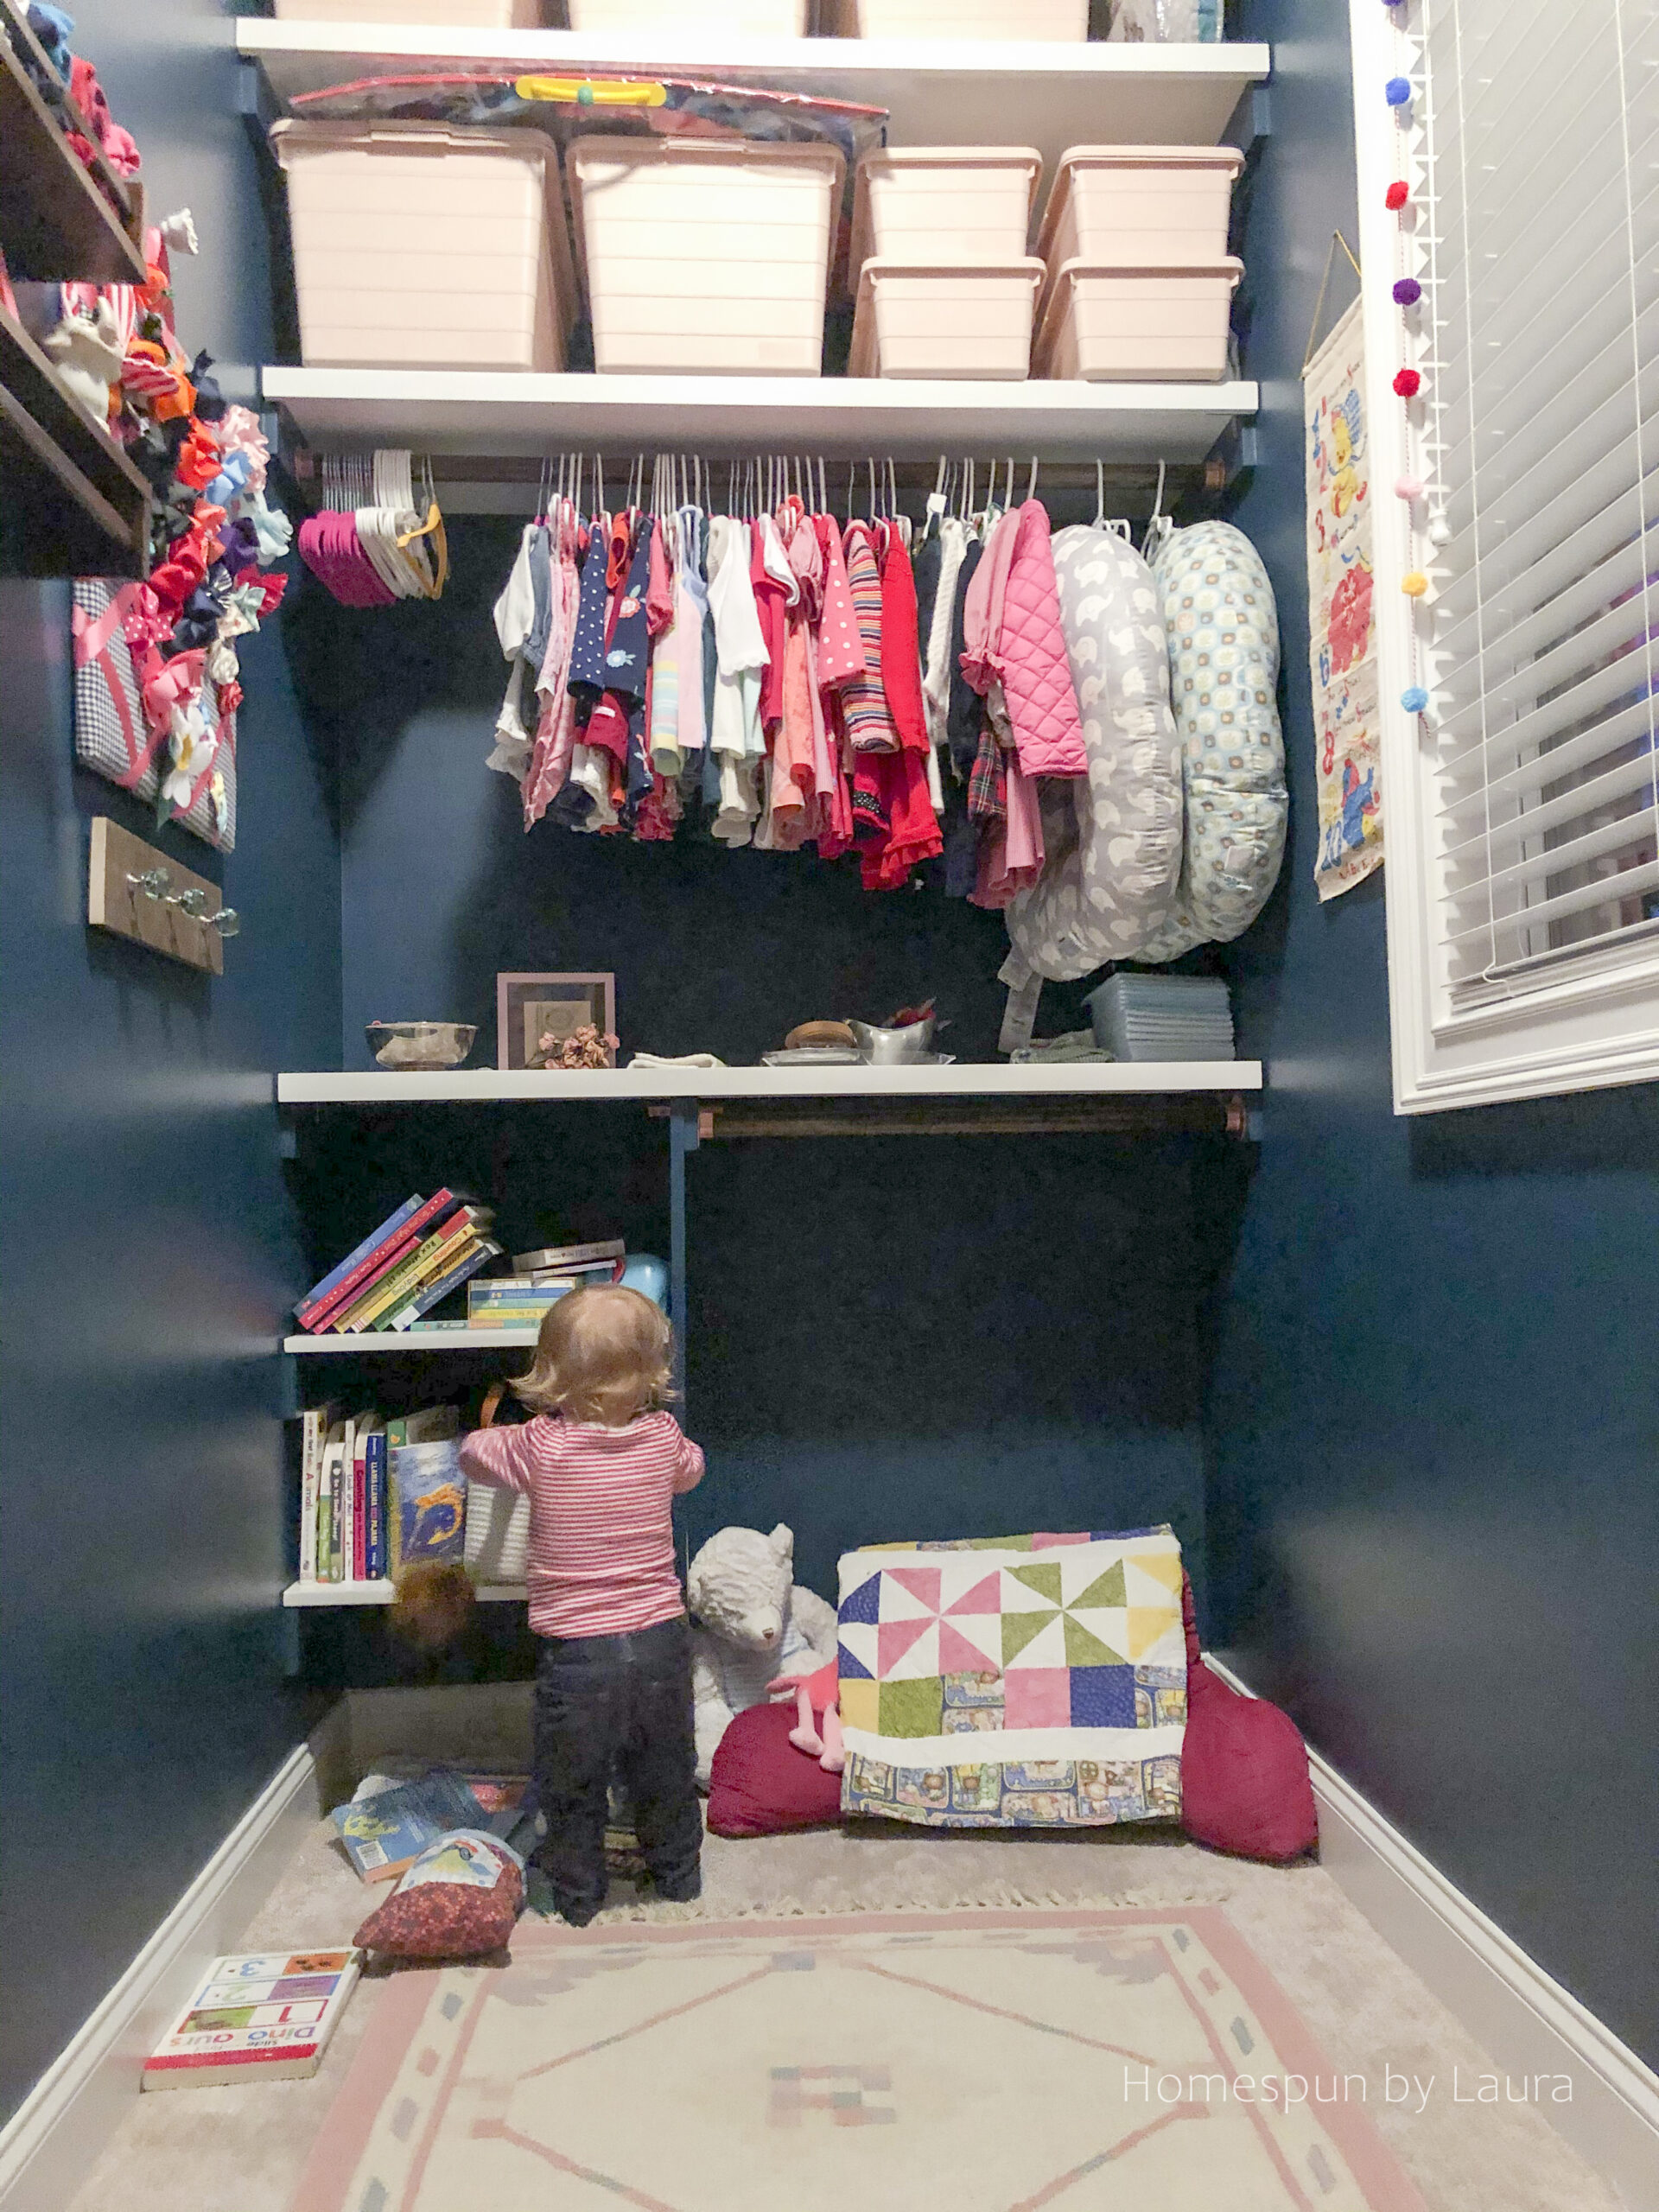
I’m currently wrapping up two projects that have also made the space look a little more intentionally put together: we replaced the single wire shelf in the closet to improve the storage (and I painted to make it pretty!)… Read more about the completed DIY closet shelving system we created here!
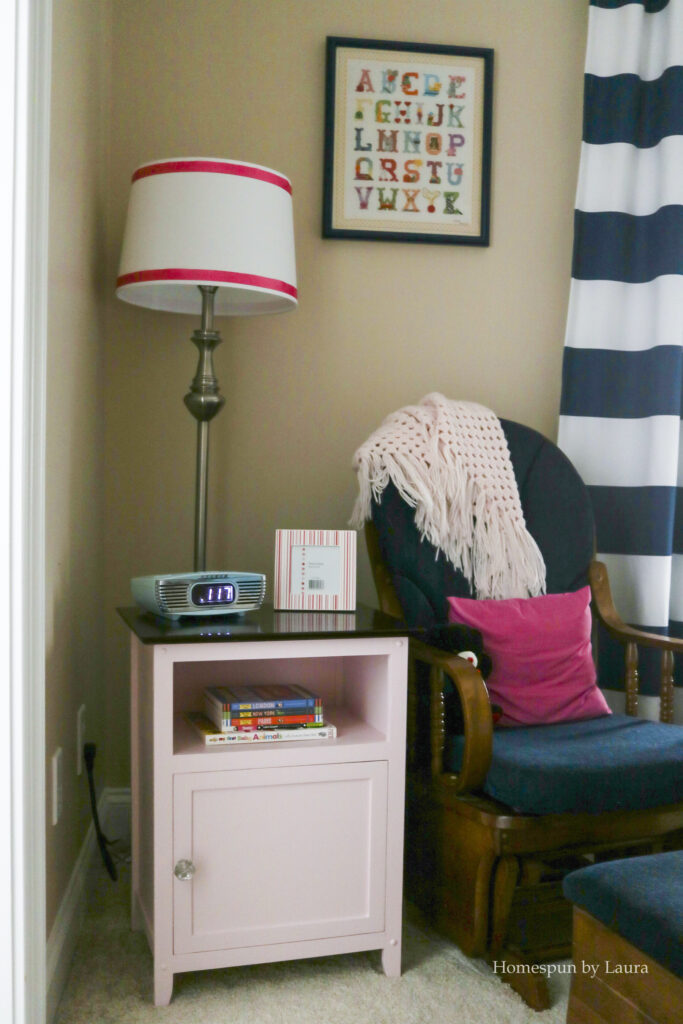
…and I stained + painted a small nightstand to put next to the rocker.
There are a few remaining wish list items: I would like to paint the walls a different color (plus the rest of the house!), and I plan to paint the wooden rocker white this spring – and that’ll be that!
Pin the image below to bookmark this page for your own project! Thanks for stopping by.