Our first house started out looking like two recent college graduates had combined all their stuff, plus some furniture handed down by family members, into one space. And that’s what it was!
Over a period of nine years, we taught ourselves valuable DIY skills through trial and error. We completed small updates that took our house out of the early 1990s, where it had been stuck since we were small children! As time went by, our confidence and skill levels improved and by the time we left it, it was a place we were proud of.
 |
| They never put a SOLD sign up, so I made one out of posterboard for this photo. |
 |
| At my parents’ house, moving my belongings into the back of a U-Haul truck on a rainy spring day in 2009. |
In the Beginning
In addition to the furniture we brought with us from the apartment we lived in for the first eight months of our married life, we inherited a good bit of furniture from my grandmother and brought some with us from our childhood homes. This combination filled a shocking amount of space, so there wasn’t a need to buy much, which was good, because we didn’t have a whole lot to spend!
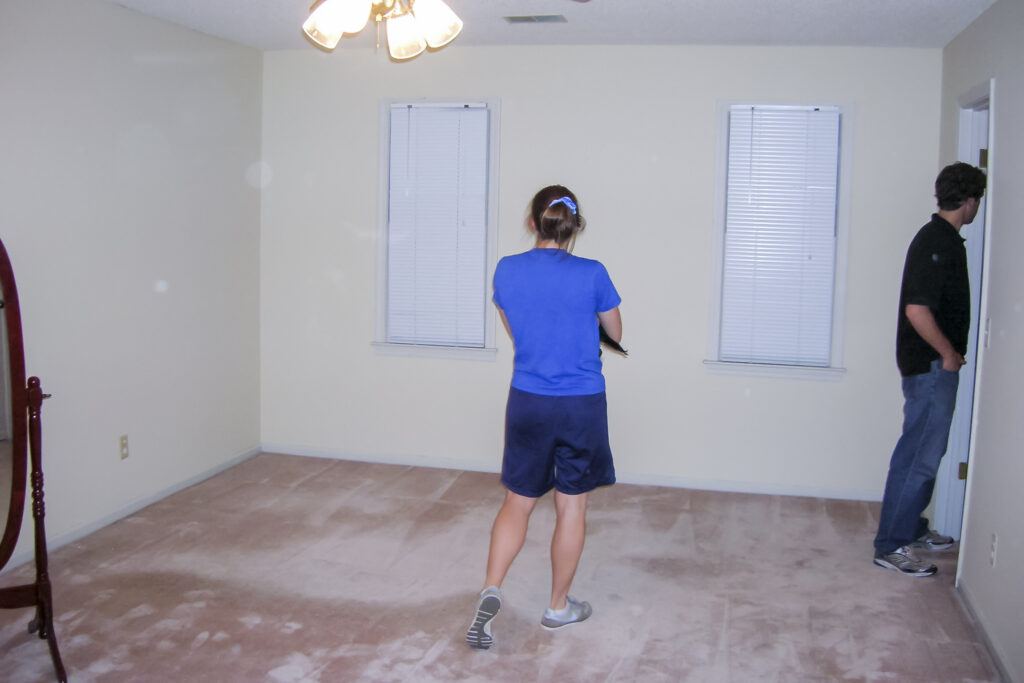
Exploring our new bedroom before adding furniture
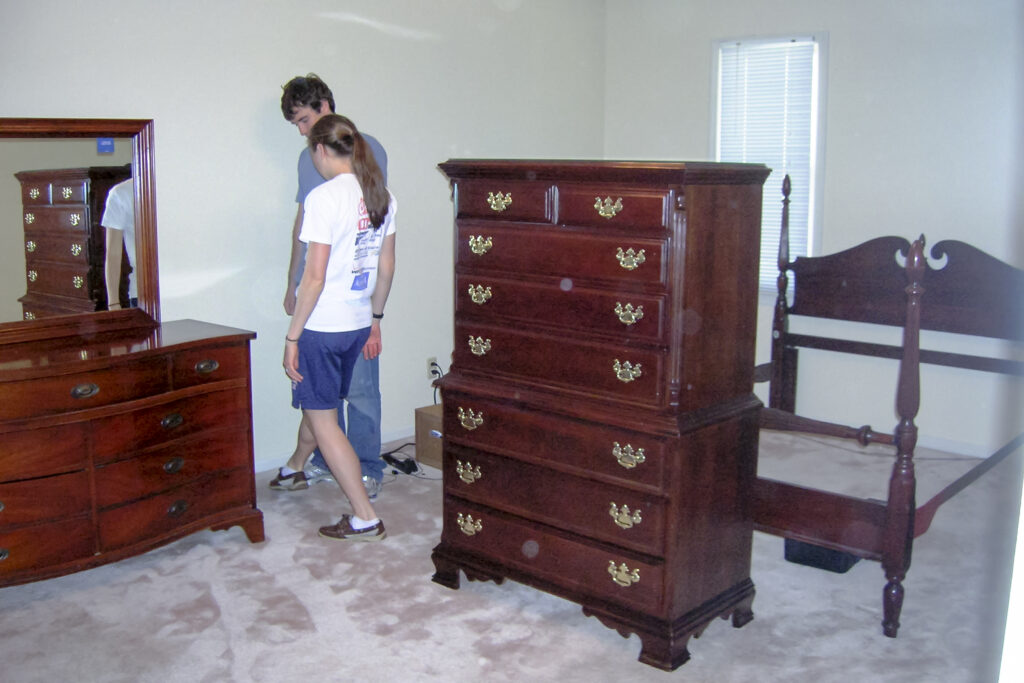
Discussing where to put the furniture.
Neither one of us wants a house that looks like it belongs in a magazine. We don’t think it’s necessary to pour a lot of money into expensive furniture or renovations. But of course we wanted to make our first house feel like our home, so for the next couple of years, we arranged and rearranged; we bought a small amount of additional furniture, all from Craigslist or thrift/consignment stores. In fact, the only furniture we’ve ever bought new is our couch and mattresses!
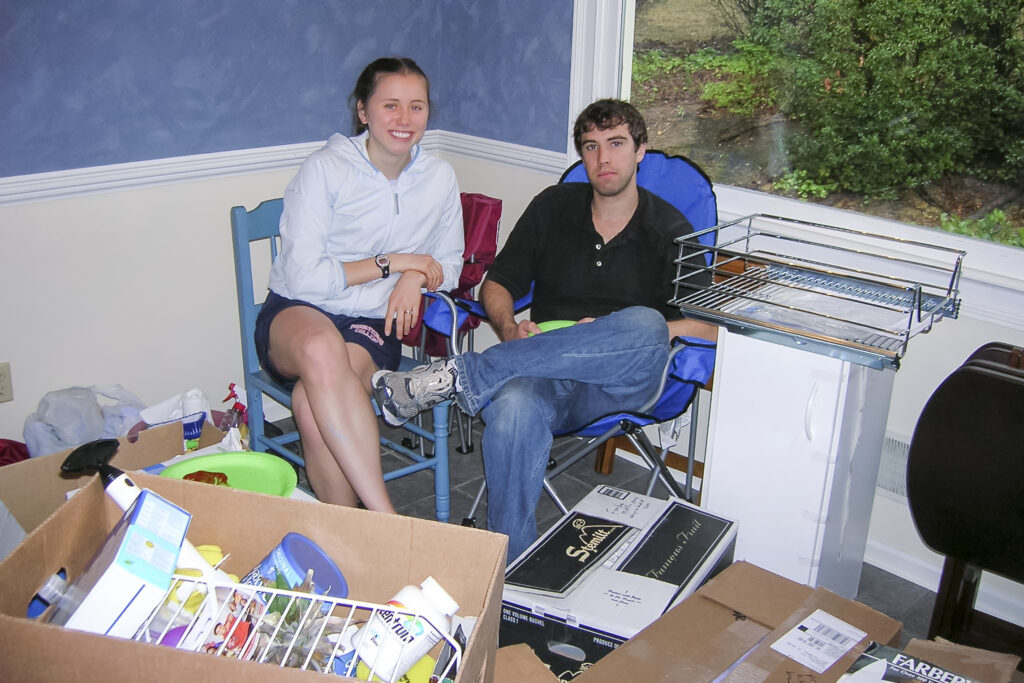
In the kitchen after our first meal in the new house, a delicious pizza to share with our friends and family who were helping us with the move.
I did spend my early and mid- twenties buying lots of stuff. Little trinkets and things I thought I needed in order to create a homey space. In the later years in this house, I had started to shift my thinking. There were a lot of little junky things that we got rid of over time, but I’d be lying if I said I was completely successful in conquering all the stuff before we packed up and brought it with us to the Homespun House 2.0 (after a brief stop at the Homespun Townhouse Rental).
DIY-ing our first house into a home
Naturally, my interest in decorating led to a LOT of do-it-yourself projects based on pictures I saw in magazines or ideas that swirled around in my head until they burst out into a project of their own.
Then Pinterest was invented, and I went crazy.
I’ll start by sharing what our first house looked like the day we bought it and share the changes that we made over the following nine years.
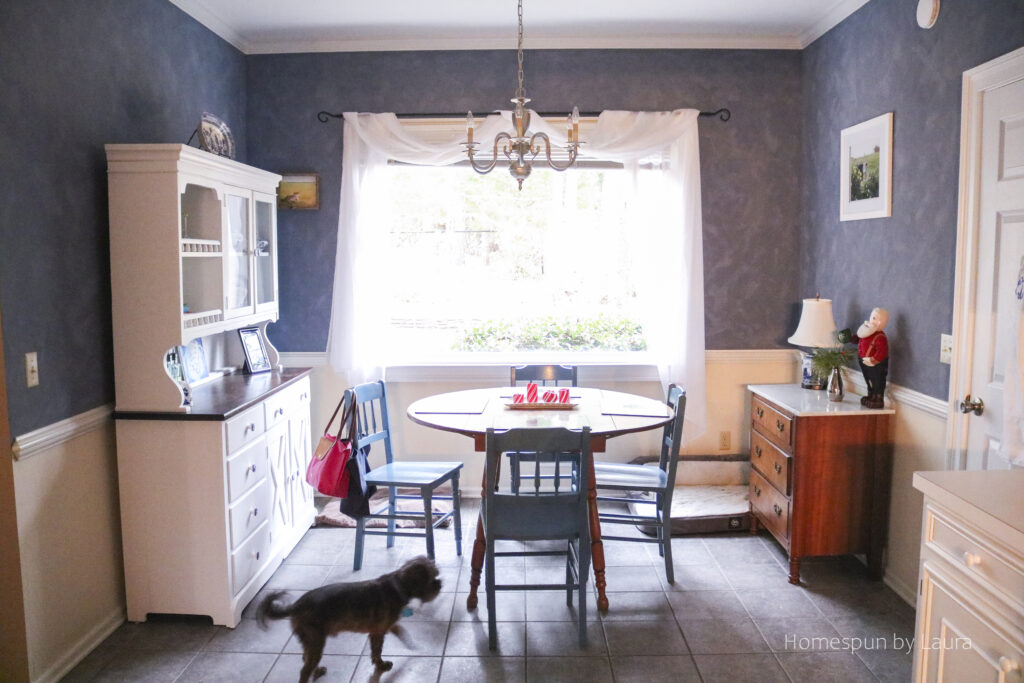
The Kitchen
Let’s start in the kitchen. It wasn’t necessarily the nicest kitchen in all of the seven houses we toured before making a decision, but I loved it because of the big window, white cabinets, pretty blue walls, and island, which we just assumed was included with the house since it had been vacant for a year. Looking back, we probably should have written it into the offer to be sure, but it all worked out in the end. It had older appliances, which we replaced with shiny new stainless steel versions over the next two years.
 |
| Making notes on the day we toured the house. I’m not sure why the previous owners left a dying plant in the sink on a day people were coming in to tour. |
Just look at that big window! The kitchen was still a pretty dark room, even with so much light from the window. The trees were tall and blocked a lot of light. Painting the chandelier a brighter brushed nickel and removing the dark shades helped a lot – both for improving the amount of light it gave off and for no longer looking like it belonged in the haunted mansion.
 |
| The giant window and ugly chandelier are in the eat-in area. |
I scoured my photos but couldn’t find a true ‘after’ photo of the chandelier, but you can see it here just a few weeks before we moved out.
During our time here, I made two major changes to the kitchen. The first was to paint the island. It’s awesome now and I love it.
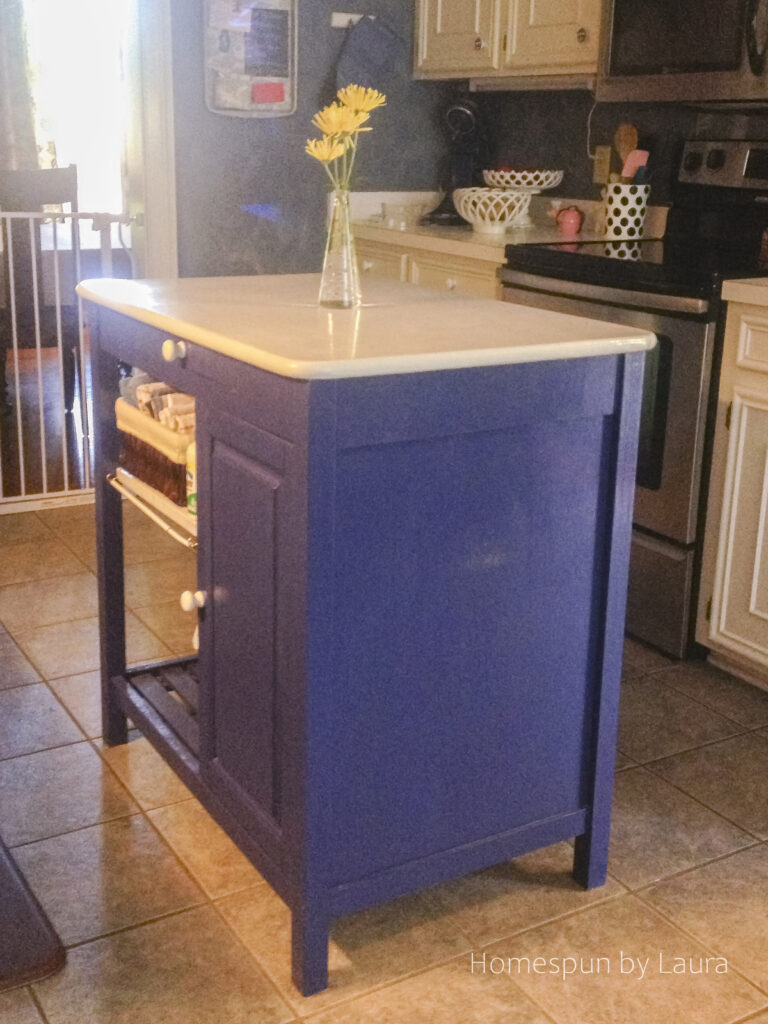
At the time, my self-taught DIY skills far surpassed by self-taught photography skills.
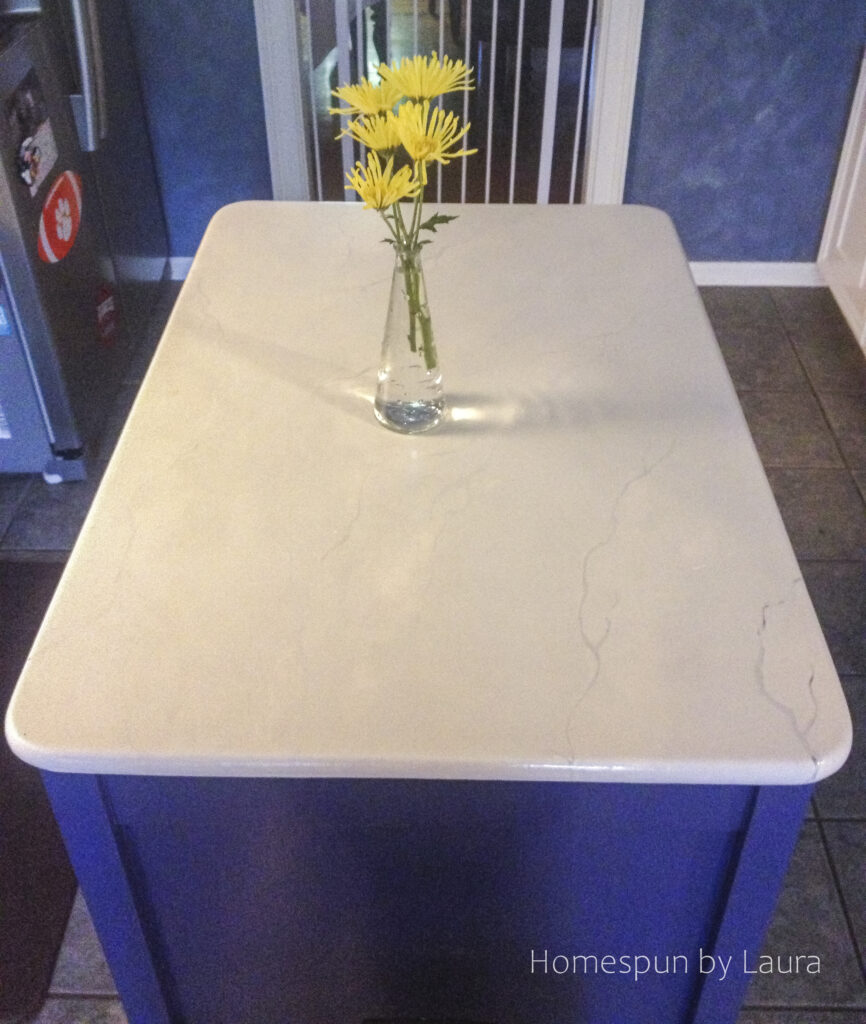
The faux marble top I painted held up well, but after four years of heavy use, it needed some attention. I could have just put on a new coat of polycrylic but instead I stripped it back to the original butcher block, which also looks great with the navy paint.
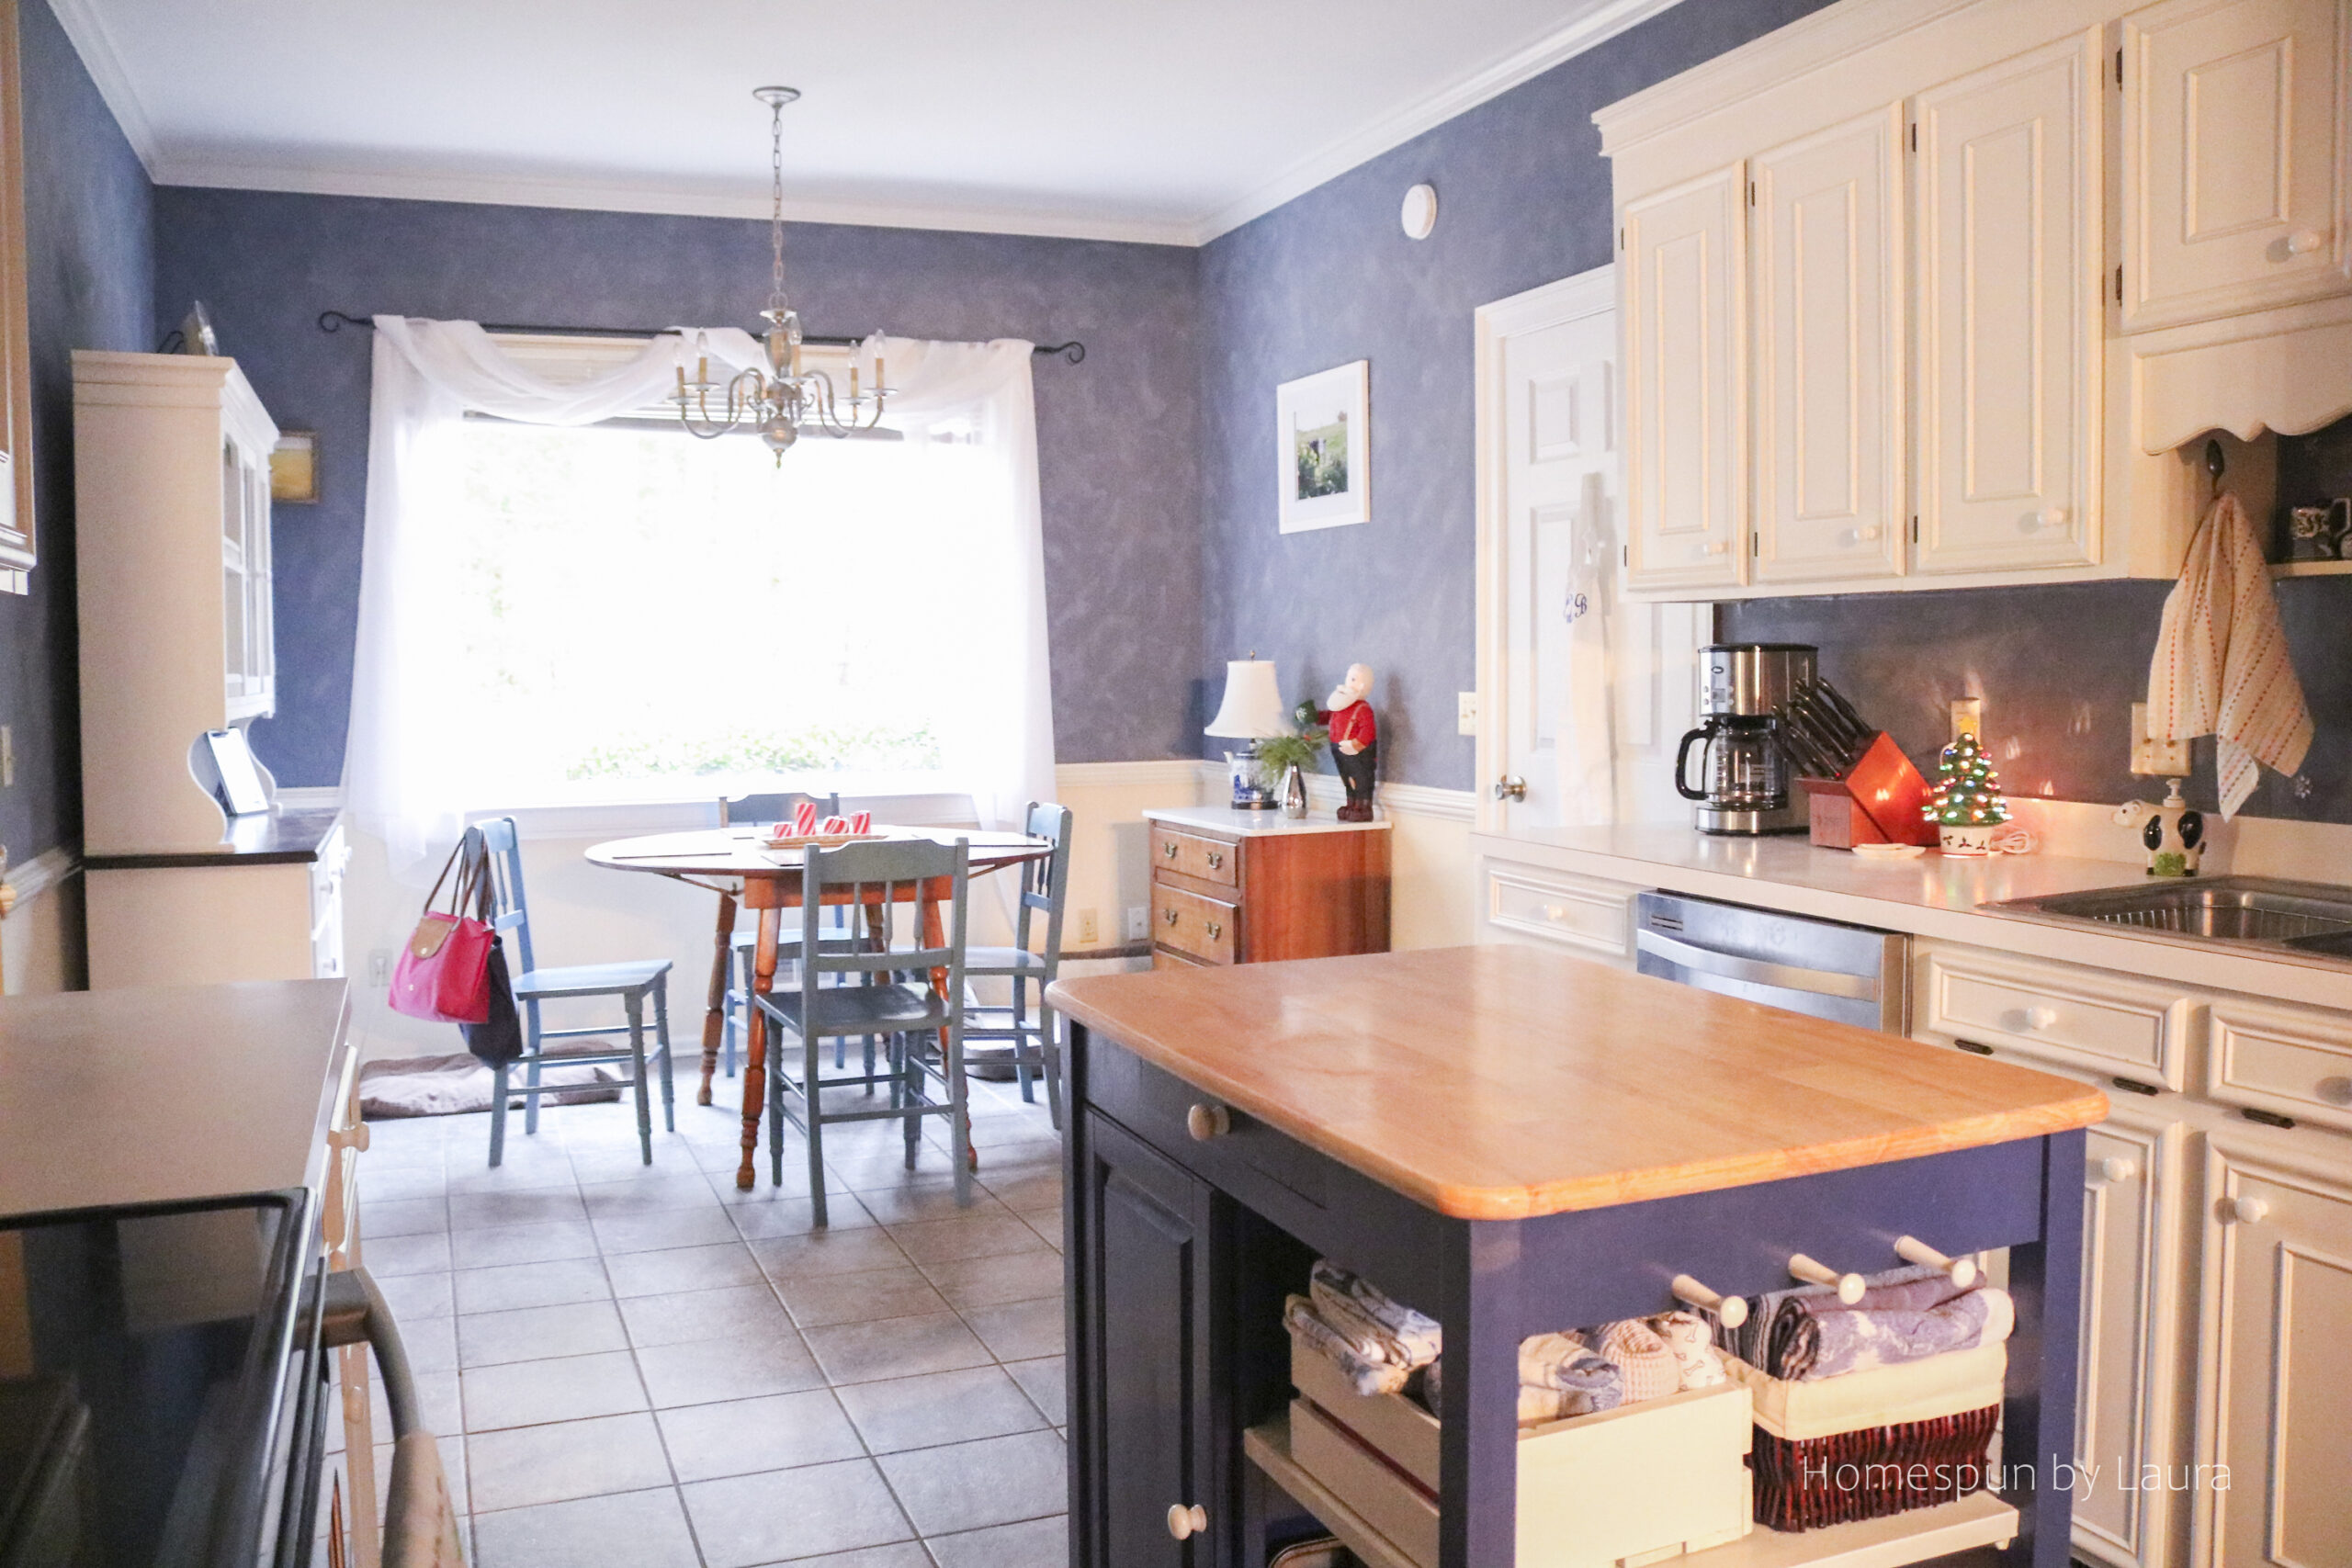
The wood brings some warmth to the kitchen side of the room.
The second was to add a hutch to the eat-in side of the kitchen. I searched for the right piece to paint and make my own for ages. My patience paid off with this beauty, which I snagged for $100 (but it didn’t look so good when I found it!).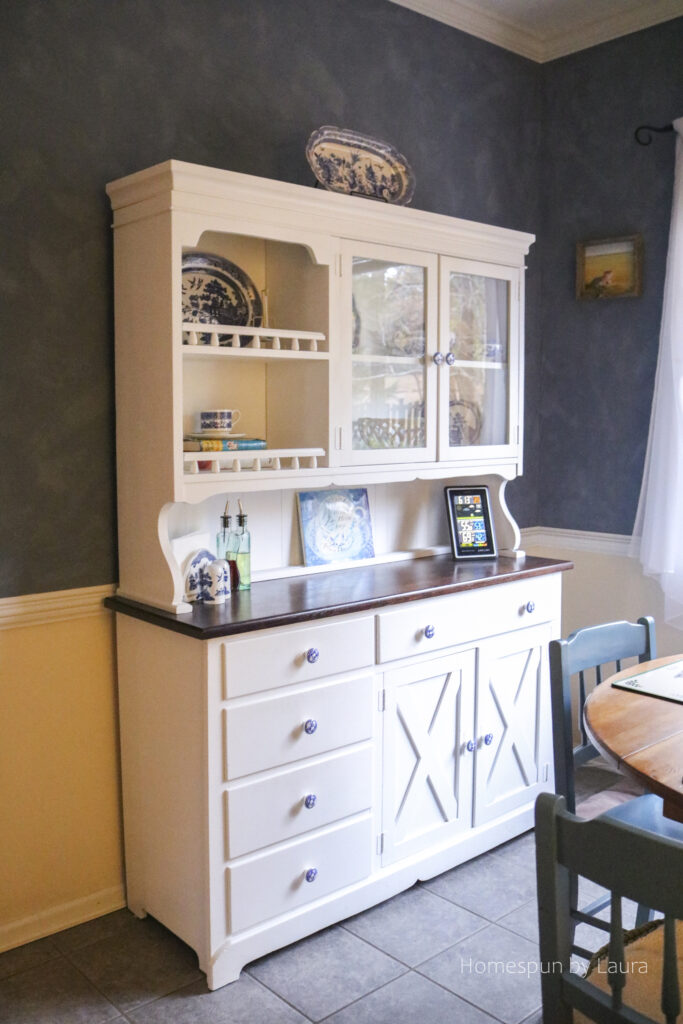
 I always wanted to replace the laminate countertops with butcher block (or marble or soapstone, in my dreams!) and put in a subway tile backsplash, but we didn’t get around to it.
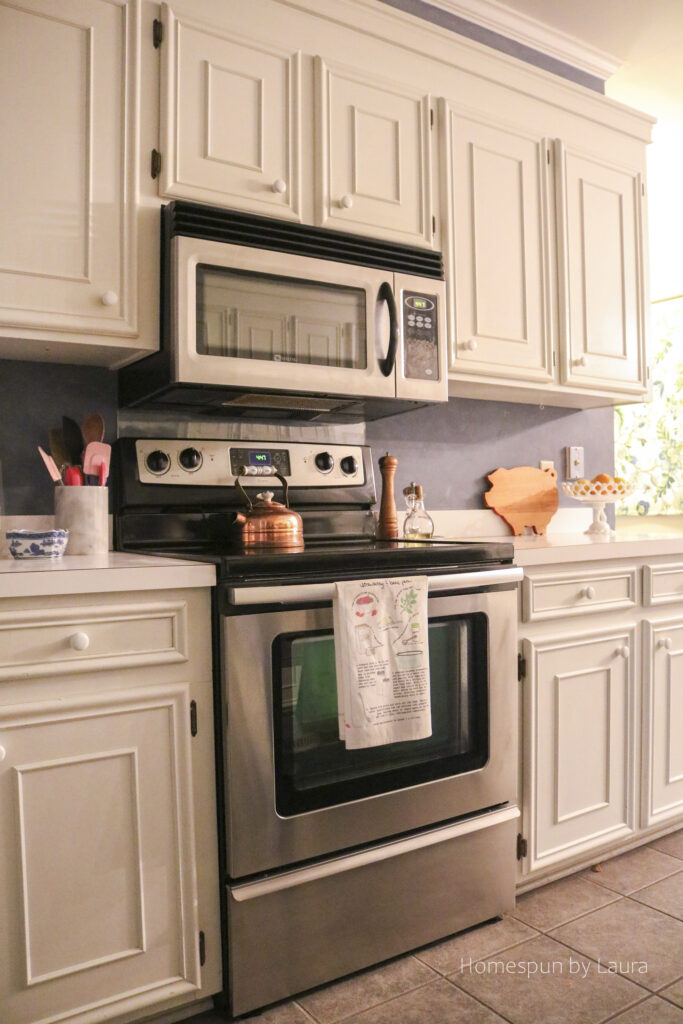 It was just an ordinary kitchen, but little tweaks we made over time made it a little more pleasing to look at. None of them cost very much, but they all made the kitchen a little more fun to cook in.
The Pretty Painted Powder Room (and pantry)
The powder room/downstairs bathroom in this house remains one of my favorite projects of all time. It was very inexpensive, as far as DIY renovations go, coming in at a whopping $76. You read that right: seventy-six dollars. Most of it went toward paint.
And let me tell you: it was horrendous. It was the worst of the early 90s, all in one tiny little room. Don’t believe me? I have photographic evidence:
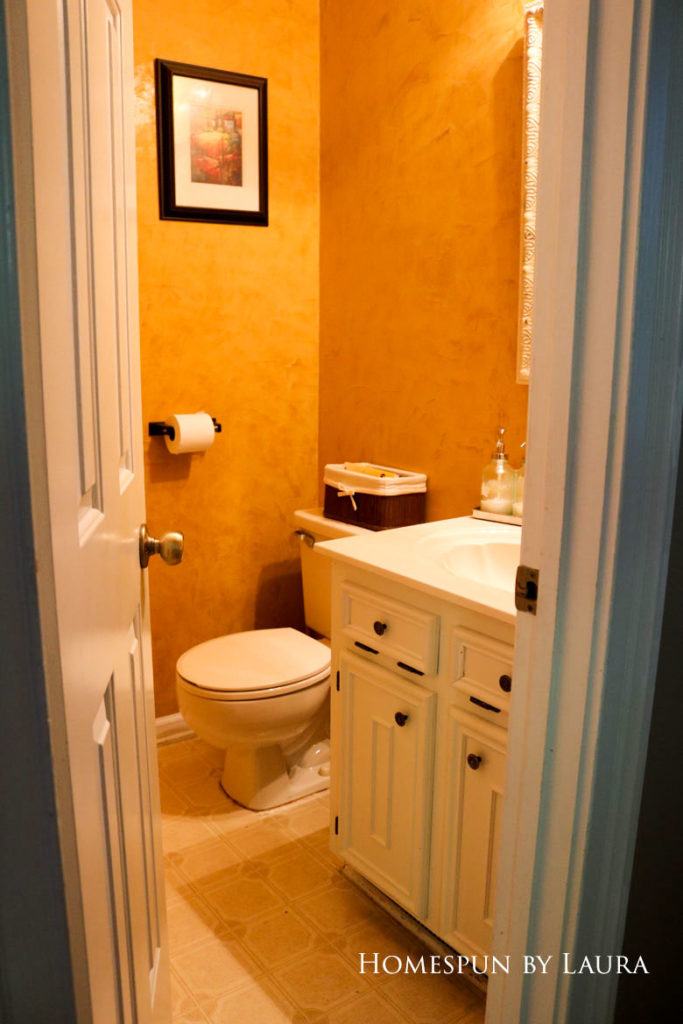
Welcome to our yellow bathroom.
Yep! That’s a seashell sink right there! I didn’t touch it, but all the other changes made it seem like less of a big deal.
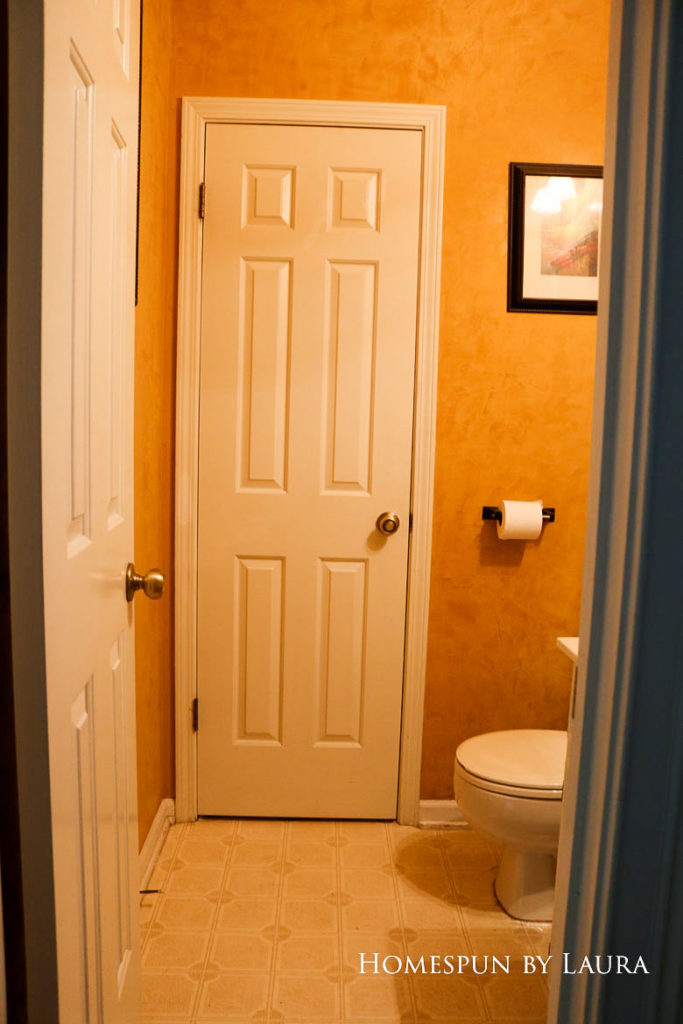
What’s behind Door #2? The pantry…
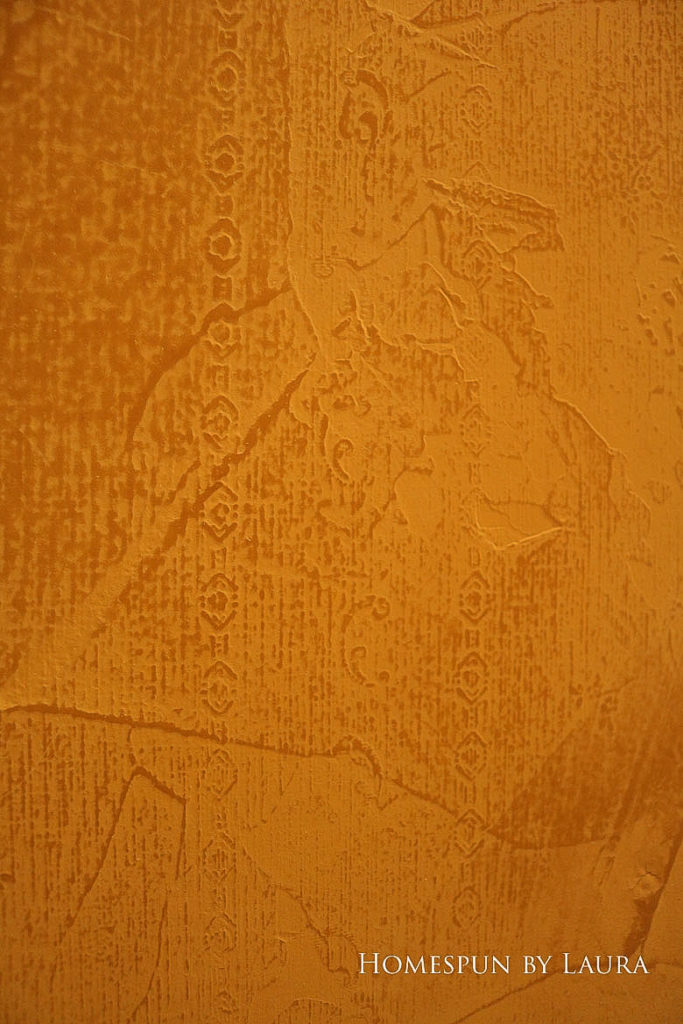
Yes, it’s definitely a good idea to add faux venetian plaster over a patterned 1980s wallpaper. It will definitely be better!
I told you it was bad!
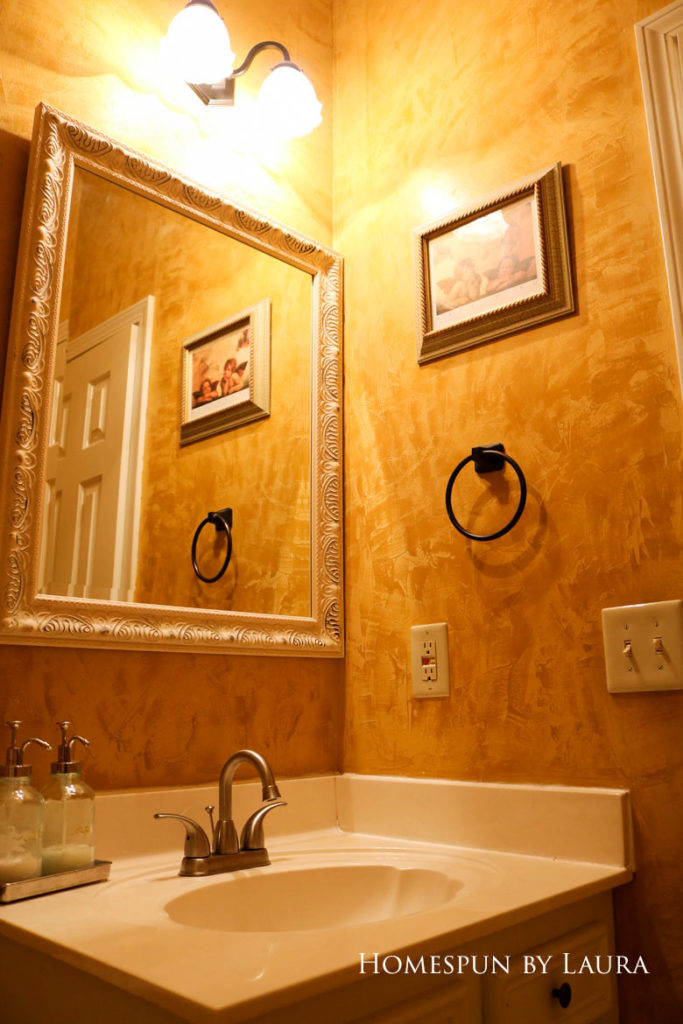
It was primarily the use of paint that transformed this space. No surface went unpainted – except the toilet and countertop featuring the seashell sink. The walls, ceiling, vanity, floor, towel ring, toilet paper holder, and cabinet knobs all got a few coats of paint. So did the doors, trim, and doorknobs.
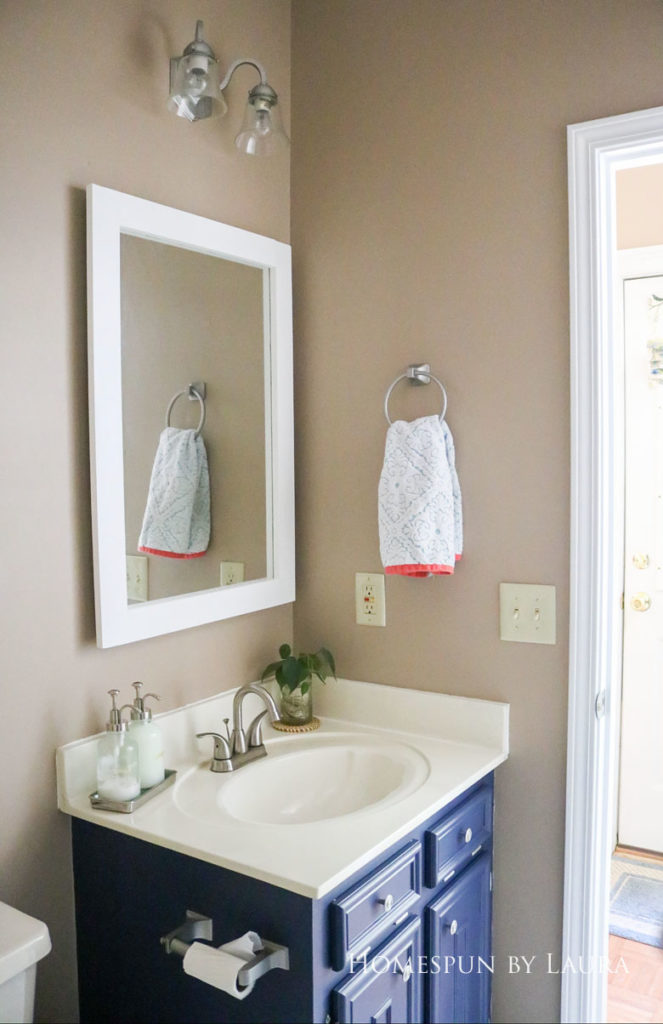
I also DIY-ed a new mirror frame and stole some decorative items from other parts of the house when my budget ran out.
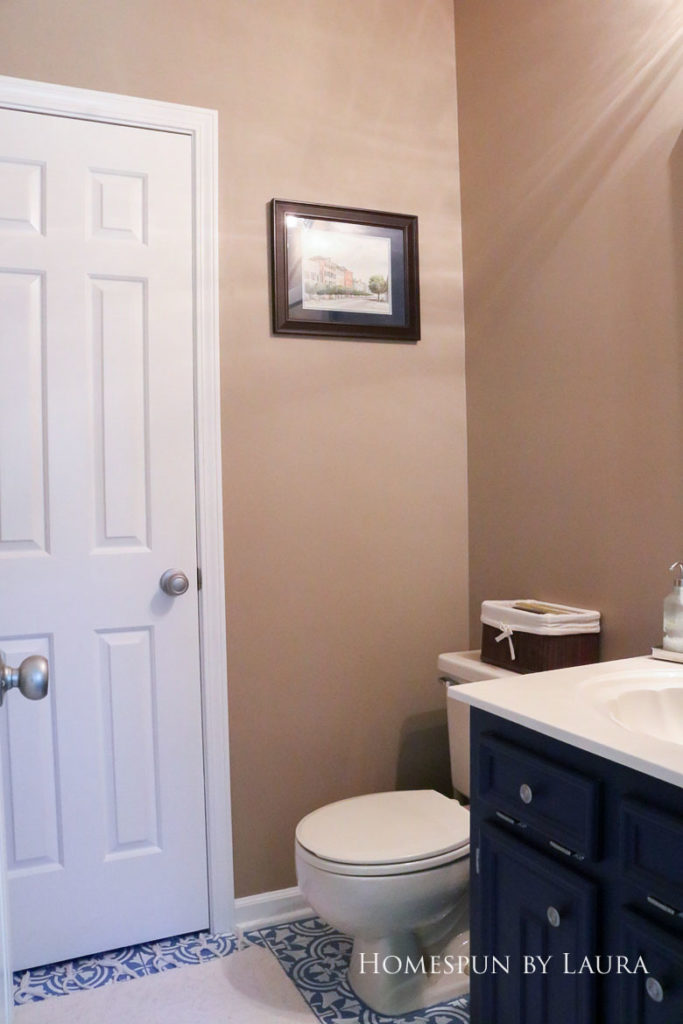
What a relief, after 8.5 years of yelling yellow walls!
The floors were tedious to paint, but I was so pleased with the result. Since I made these changes so close to the sale of this house, I unfortunately can’t say how they’re holding up now after a few years of wear. They still looked perfect after a few months, though.
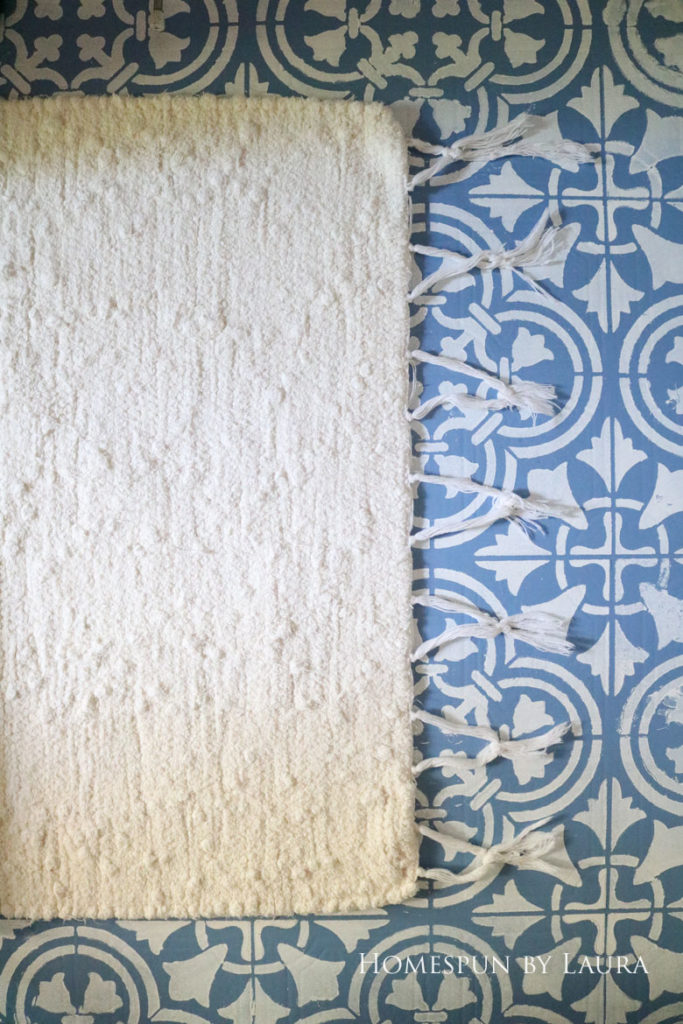
Painting the floors finally gave this rug we already had a comfortable place to live.
Since the little closet inside of the bathroom (totally weird!) was the only pantry space, this makeover also included a little pantry cleanup. I didn’t do anything drastic in the pantry; I mainly focused on making changes that improved the function of the small space.
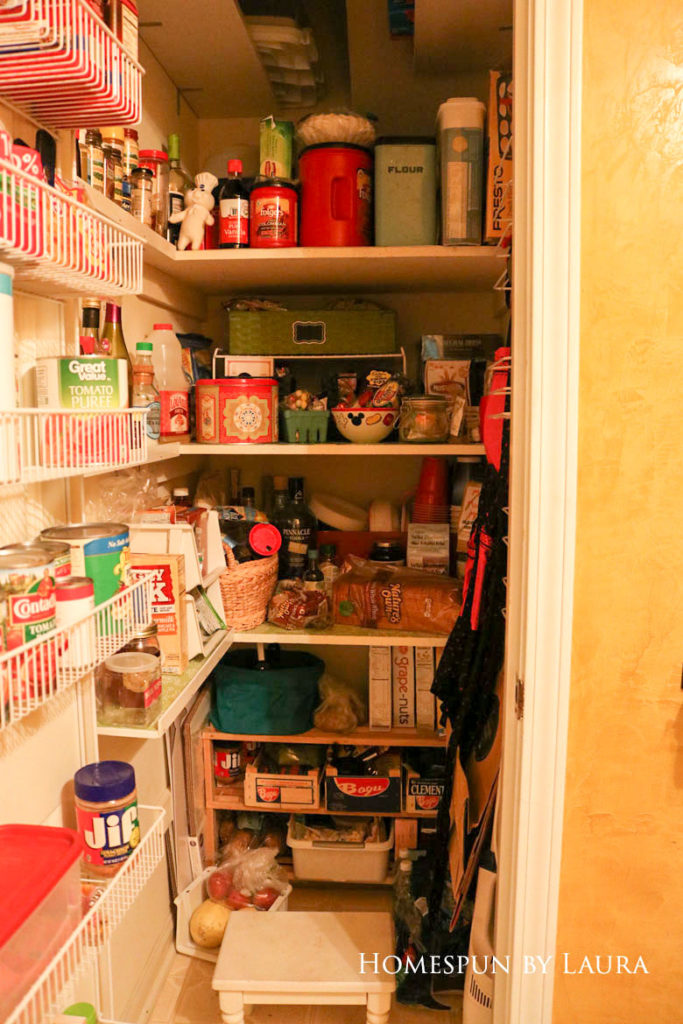
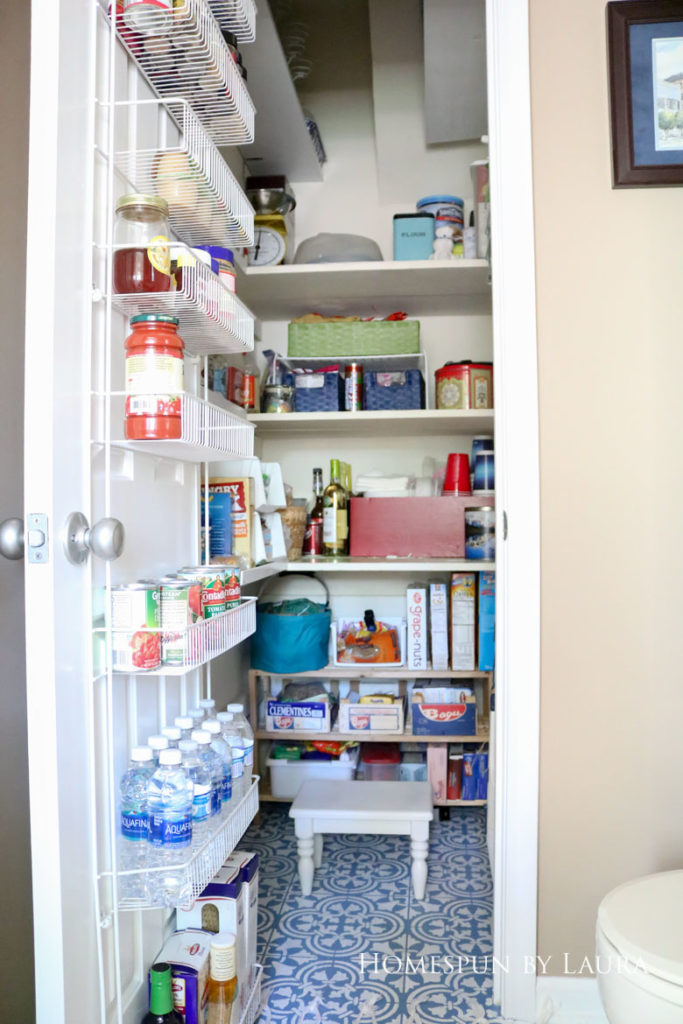
No major changes or expensive containers required. I just used things we already had, tossed out old items, made a list of meals to use ingredients we had too much of, and organized the rest.
You can read all about the powder room makeover process here!
The Dining Room
Next is the dining room. We filled it with family pieces, mostly antiques from my grandmother. The focal point is the antique French dining table, which came back to the US with my dad’s family after his father was stationed in France with the Army in the fifties. I was not a fan of the wallpaper and strongly disliked the funny valances (not pictured) that the previous owners so kindly left for us, but it stayed like this for four and a half years until I finally made new curtains and painted it in 2013.
 |
| The dining room Before |
 |
| A peek of the dining room in 2013. I loved the deep wall color, but the room was too dark for it. |
About a year before we moved, I painted it the same color as most of the rest of the house, Faint Maple by Valspar.
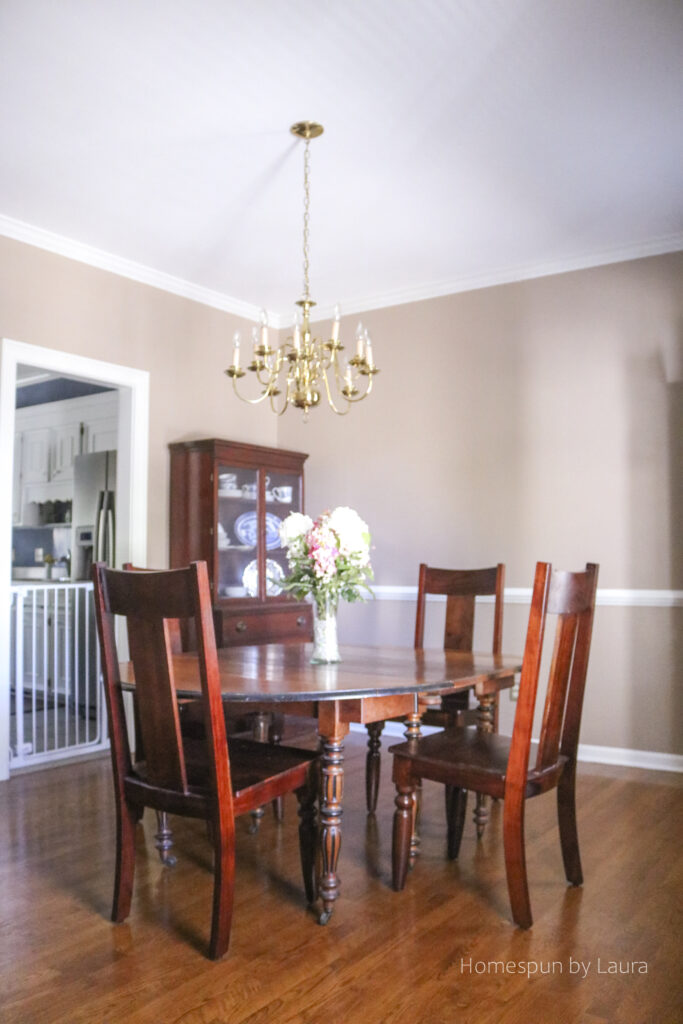
Our neighbor entrusted us with his mother’s china cabinet when he moved. The antique French dining table belonged to my dad’s family. The chairs were a Craigslist purchase soon after we bought our house and have since been sold.
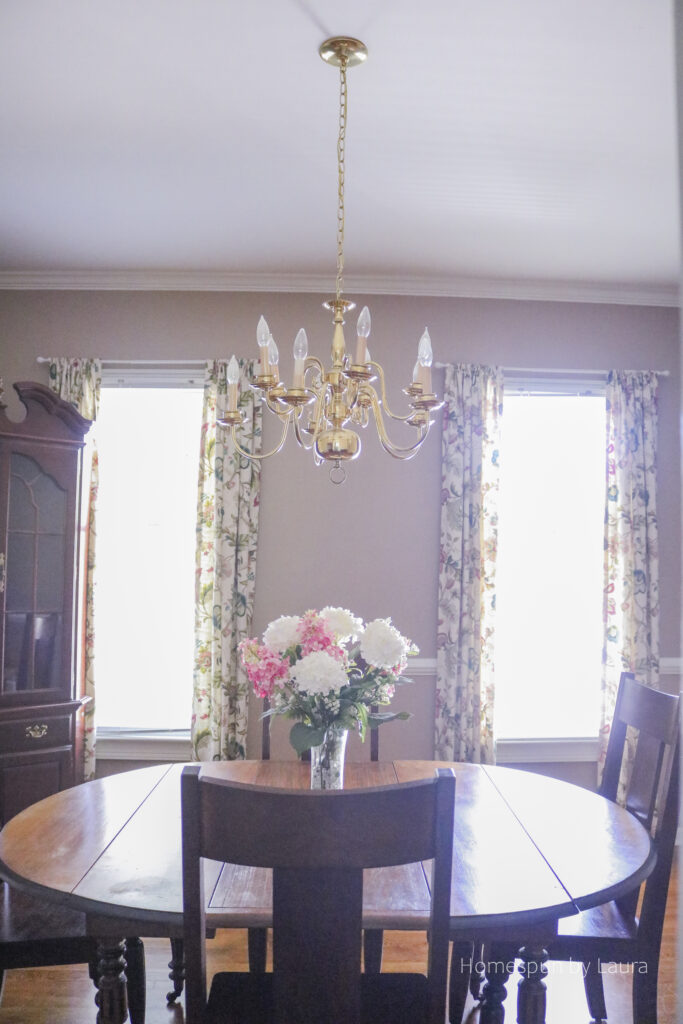
I still love the colorful floral fabric and traditional chandelier. (fabric is Brissac Jewel by P Kaufmann)
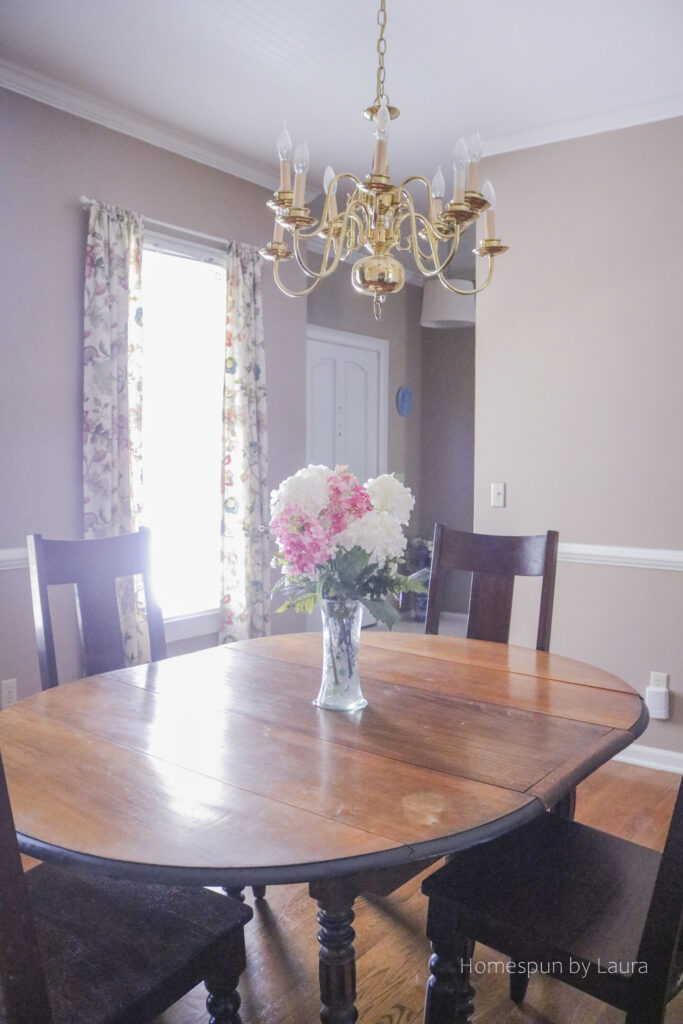
The stain on the table happened when a bottle of bleach leaked while I was clearing out and reorganizing the laundry room cabinets. 🙁
The Den/Living Room
Next up is our den. It was long and narrow and had closet smack in the middle of the wall across from the fireplace, making it difficult to figure out the best way to arrange furniture. It took us six years to come up with a layout that really worked in this room.
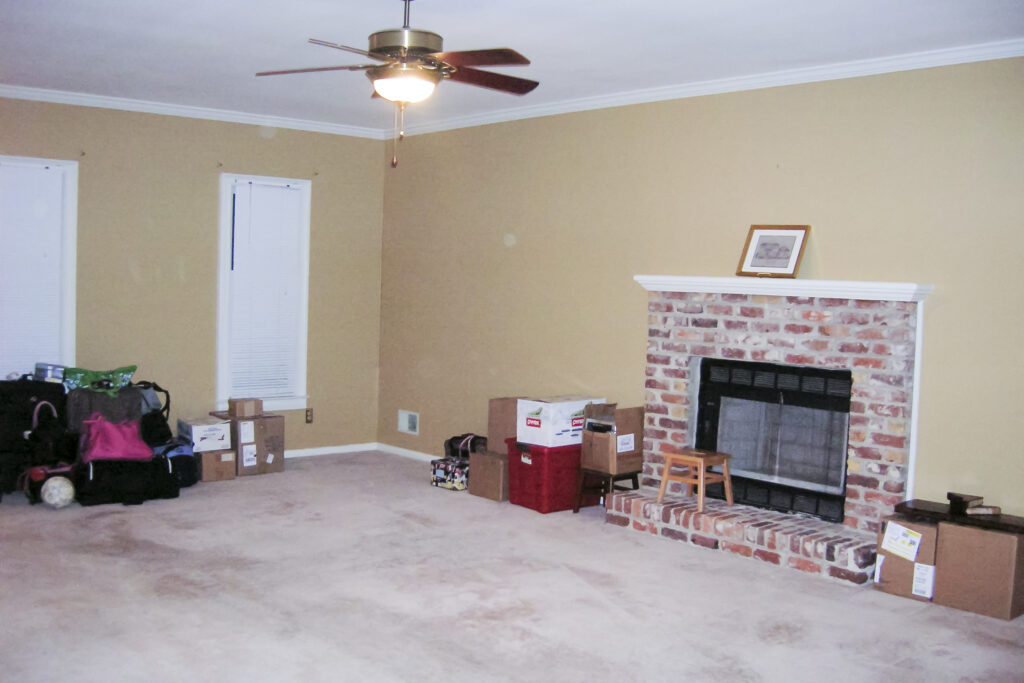
This was just the beginning…for about the first six months this room was just a holding area while we got settled.
The updates began in about 2010 with new paint – and then took a five-year hiatus. But in 2015, we bought a new couch, I FINALLY made matching curtains for all four windows, painted and refinished our stair railing, and reupholstered the big armchair we bought soon after moving in.
Those dogs loved wasting the day away in that chair, with a view out to the street to watch the world go by (and bark noisily at it!).
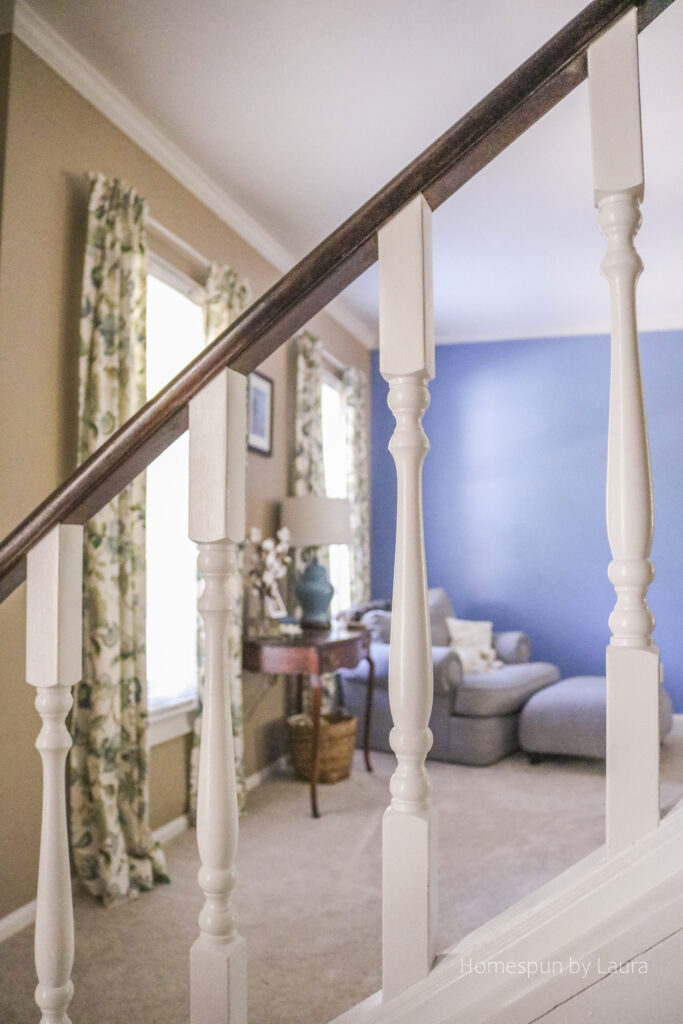
Refinishing the banisters was a labor of love that made a huuuge impact. I hated leaving them behind. I can still feel that smooth finish under my fingertips!

Read all about the changes in the den here.

Just a few months before we moved, we’d reached a happy stopping place.
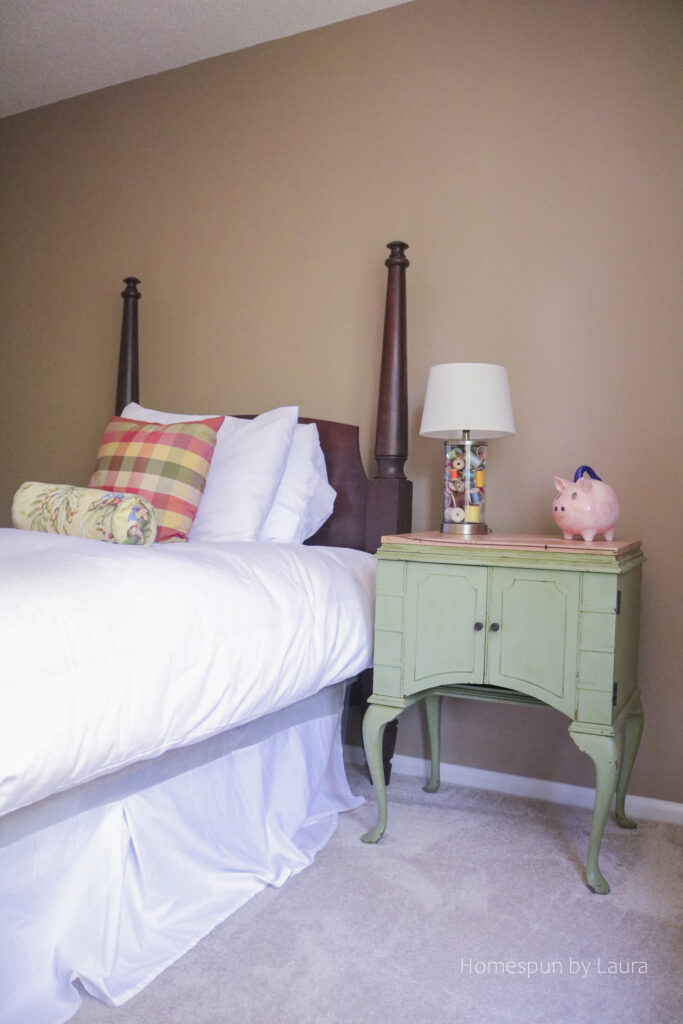
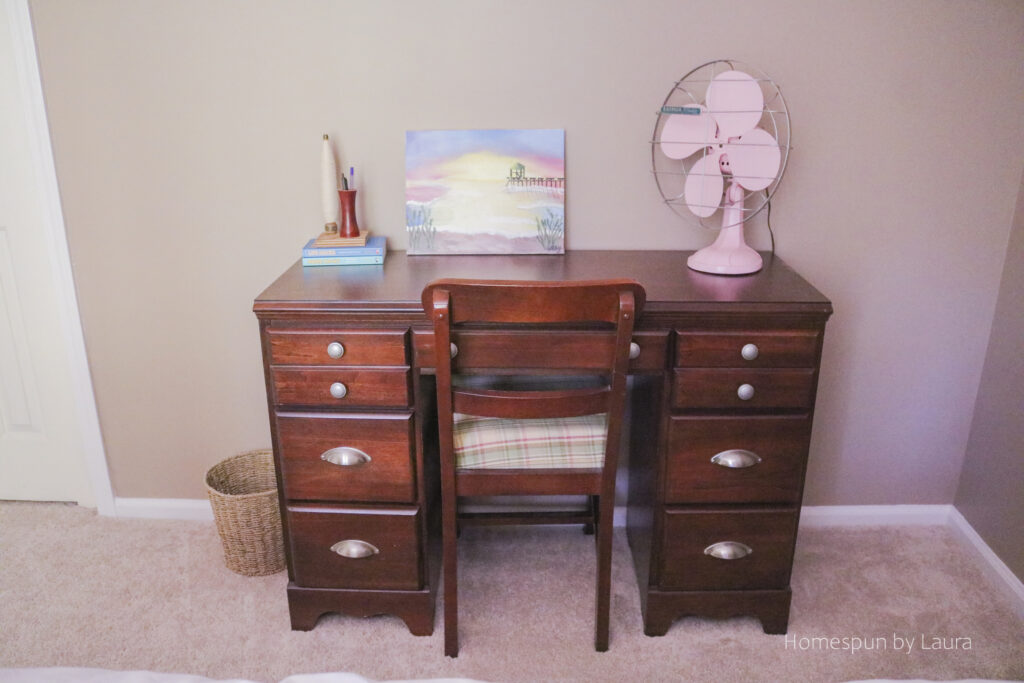
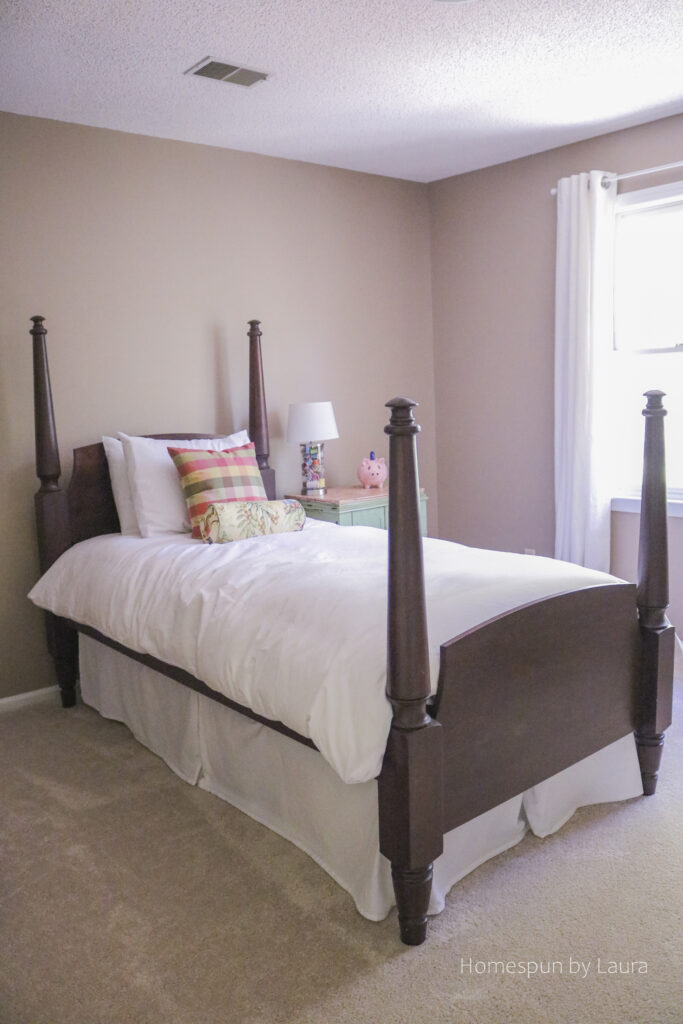
The Main Guest Room
This was only ever an extra bedroom for us. It began with my old daybed, but eventually we moved our mini four-poster antique bed in when we decided to use the door as a headboard.
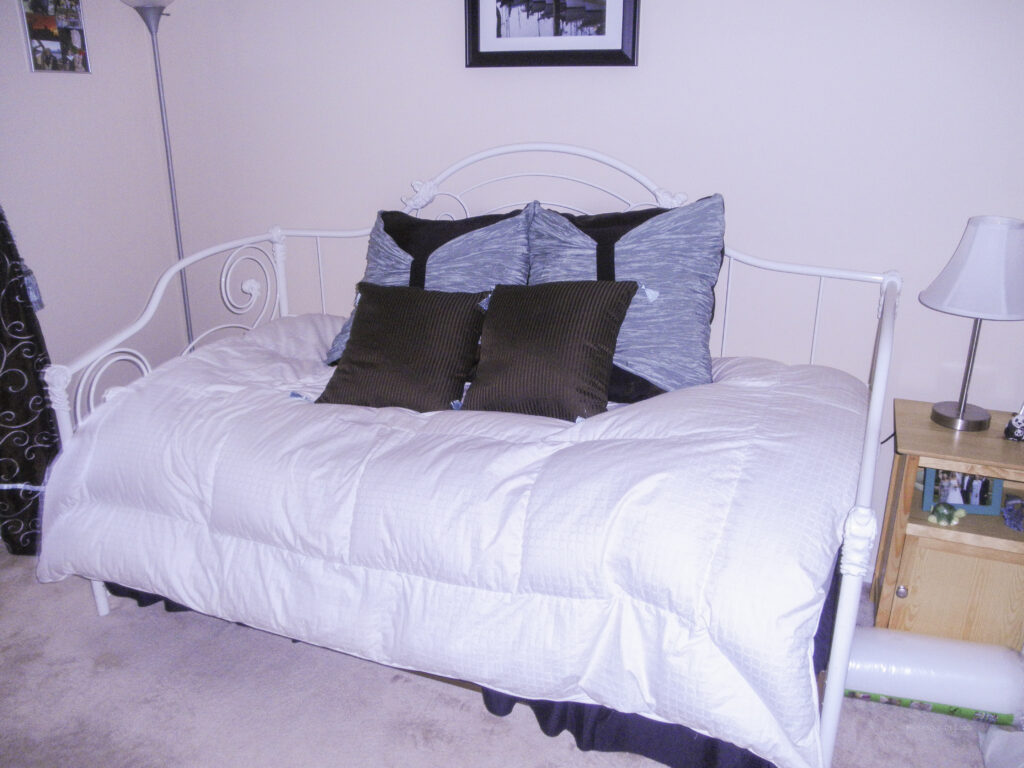
For some reason, I really seemed to like brown for a while there. I made all the curtains and the pillows for this room very early on after taking a sewing class at our local technical college.
If you look very closely, you can see those stickers on the fan blades.
When we moved in, the fan had pale wood grain blades and horrible 90s glass shades. I eventually replaced the shades with pretty seeded glass ones from Lowes, which was an inexpensive change that made a huge difference. We turned the blades over to reveal their darker side (did you know that most fan blades are reversible?) and hide the stickers. I’m a little embarrassed to say that this change only happened about a year before we moved – meaning we lived with the stickers for 8 years.
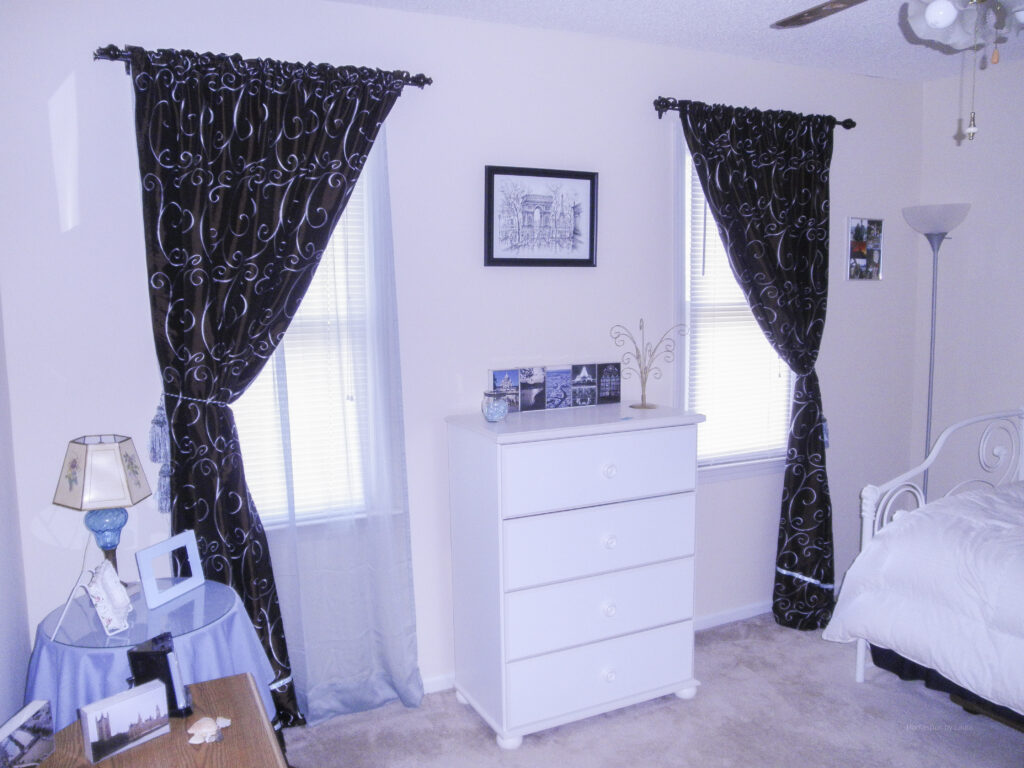
The room grew up a little bit after a few years. We relocated the daybed and donated the cheap furniture in favor of the antique bed and a different dresser. A few coats of our go-to paint for this house, Faint Maple, and re-positioned curtains brightened the space.
The bed frame and its matching nightstands and dressers was one of the first things we ever bought together. We found the set at an antique store soon after we got married.
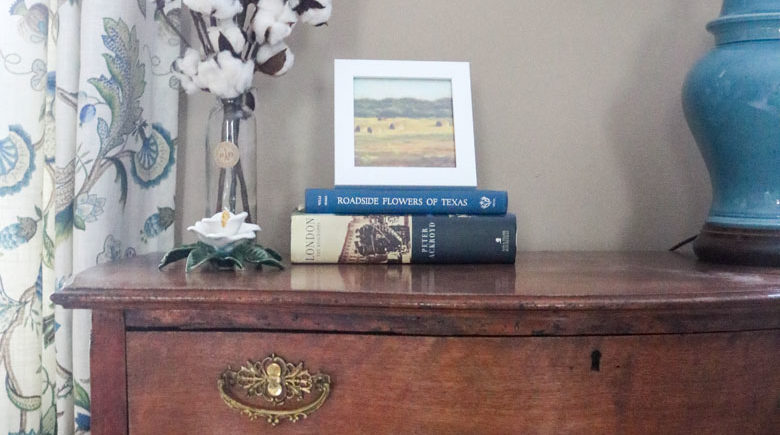
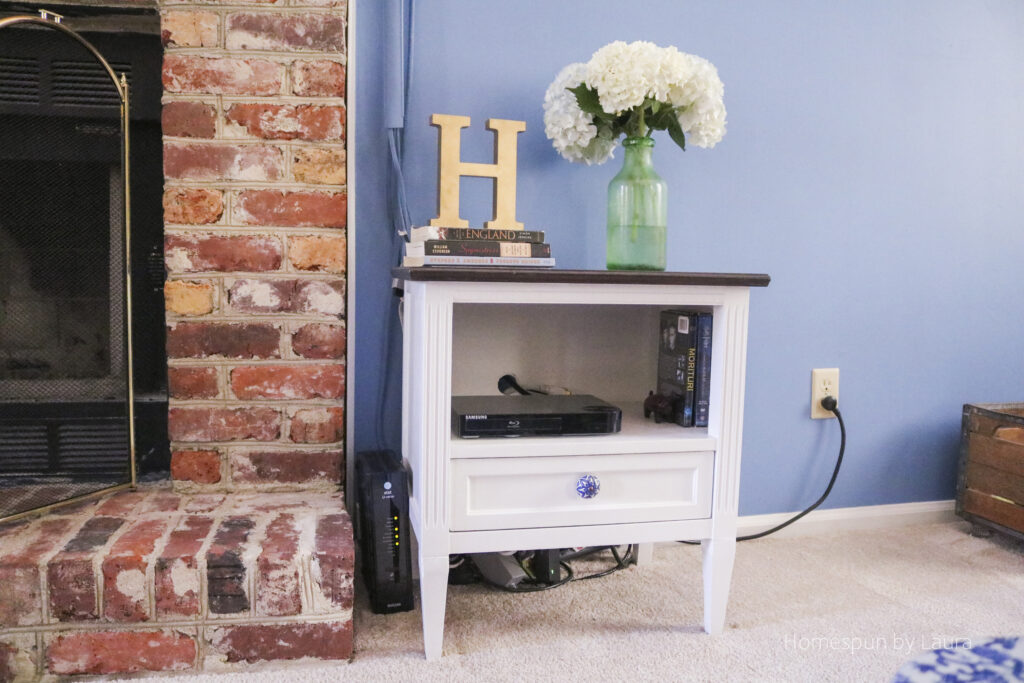
This blue dresser now lives in our daughter’s room at our new house.
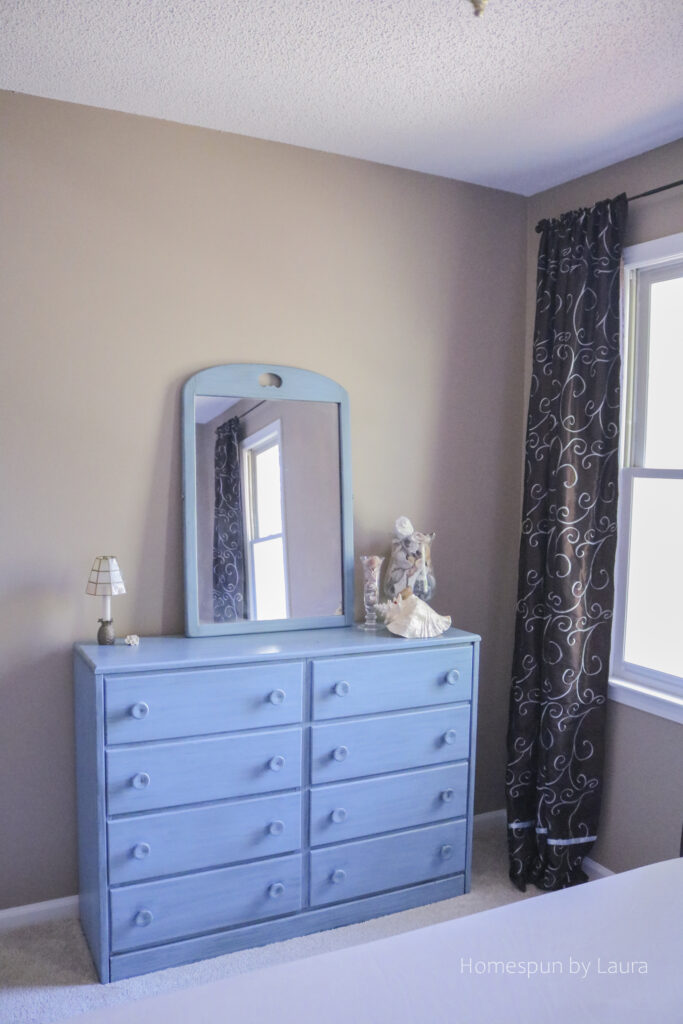
We received the blue dresser from my grandmother when she had to move out of her house. The little pineapple lamp and big shell belonged to her, too.
The ‘Yellow’ Room
So named because it was yellow when we moved in, this room was originally my sewing/craft space. It became nicer over time, and I worked with the yellow color because when I was younger the idea of painting really scared me.
Eventually, we moved all my sewing things into the room over our garage, moved my old twin bed in, and started using it as a single guest room. At the time, we weren’t planning to move anytime soon and I figured it would one day be a bedroom for a child.
I used the decor and some furniture from my old sewing space to furnish the room and reflect its former use.
This is the first chair I ever reupholstered – and the project that inspired me to start a blog back in 2012.
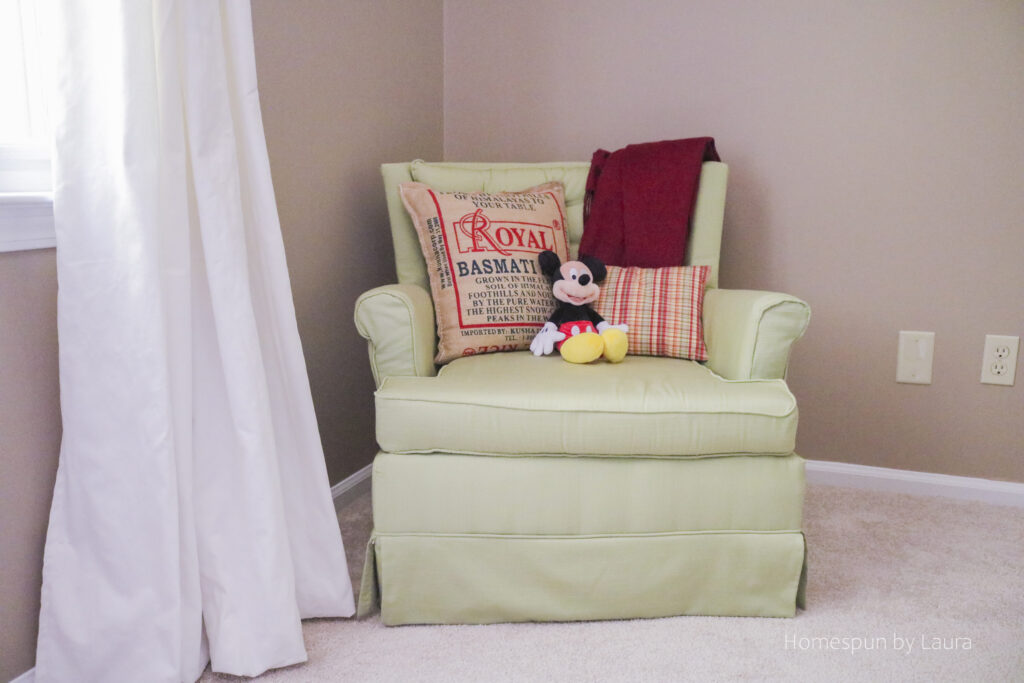
I found the burlap rice bag at a thrift store for a dollar and stuffed a pillow form I had lying around into it. It already had a zipper on it, so it was an easy no-sew nearly free project! Mickey was a gift after I finished the Disney World Marathon.
Here’s a quiet corner to write a note about all the fun you’re having during your stay with us.
Ikea curtains replaced the more dominating checkered ones, but the color remains in the pillows.
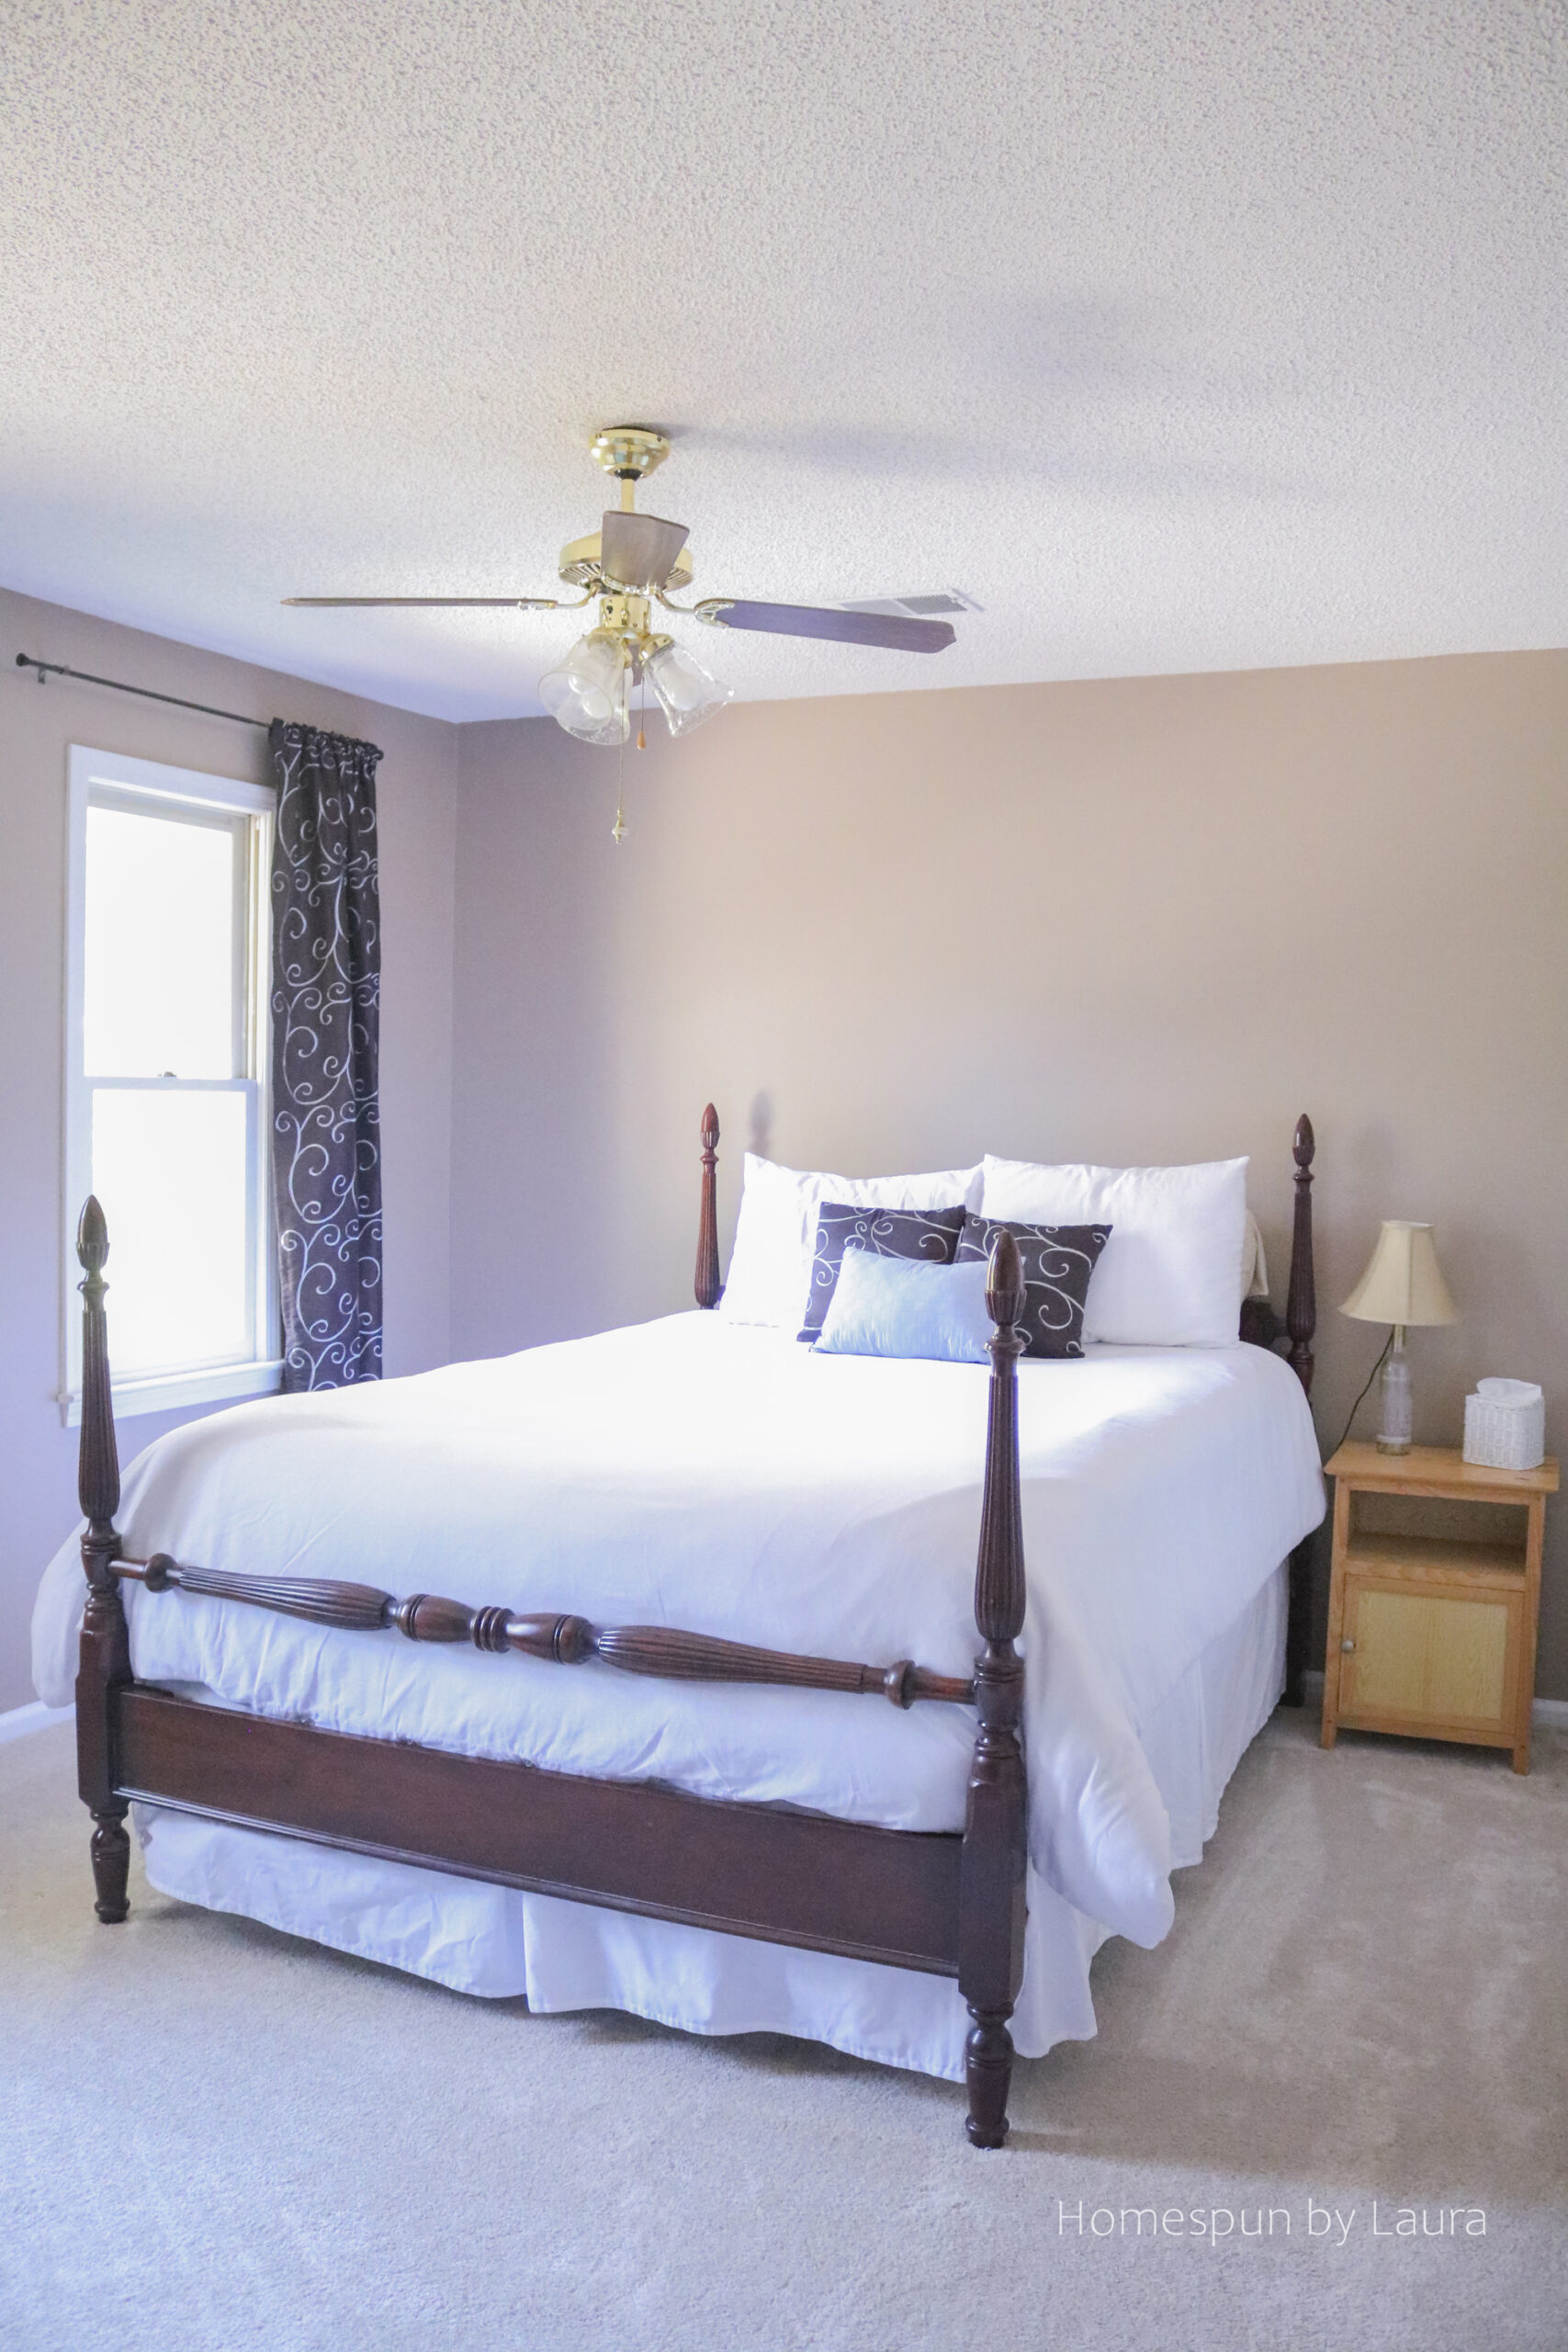
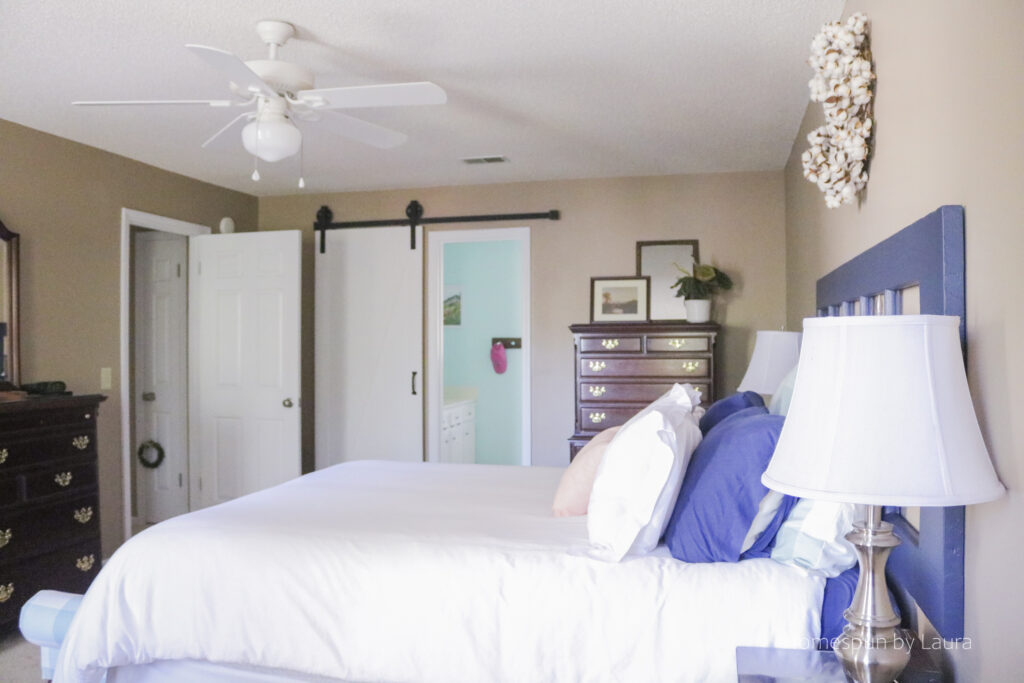
The Master Bedroom
Our master bedroom wasn’t very masterful for the majority of the time in our house. There was even a phase where I painted one of the walls green. Eventually it found its identity and we sure did enjoy it for those last few months. The good news was that that identity translated well both to our temporary rental and our current house, so it wasn’t all for nothing.
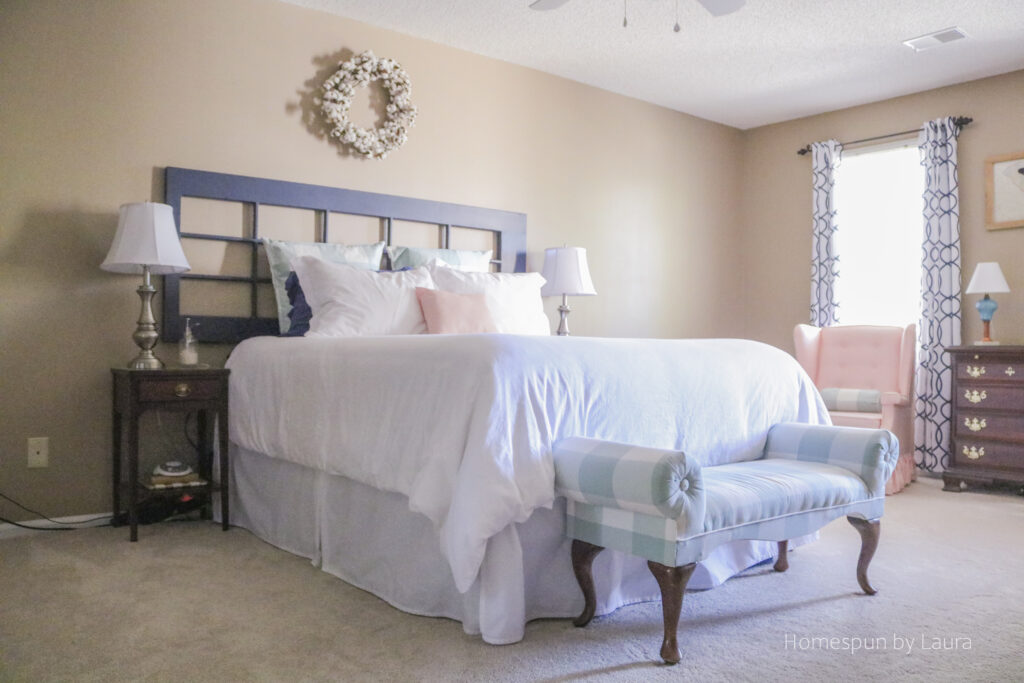
Raise your hand if a bedskirt is an absolute necessity due to the amount of things you store under your bed! Ours is mostly our collection of suitcases in varying sizes.
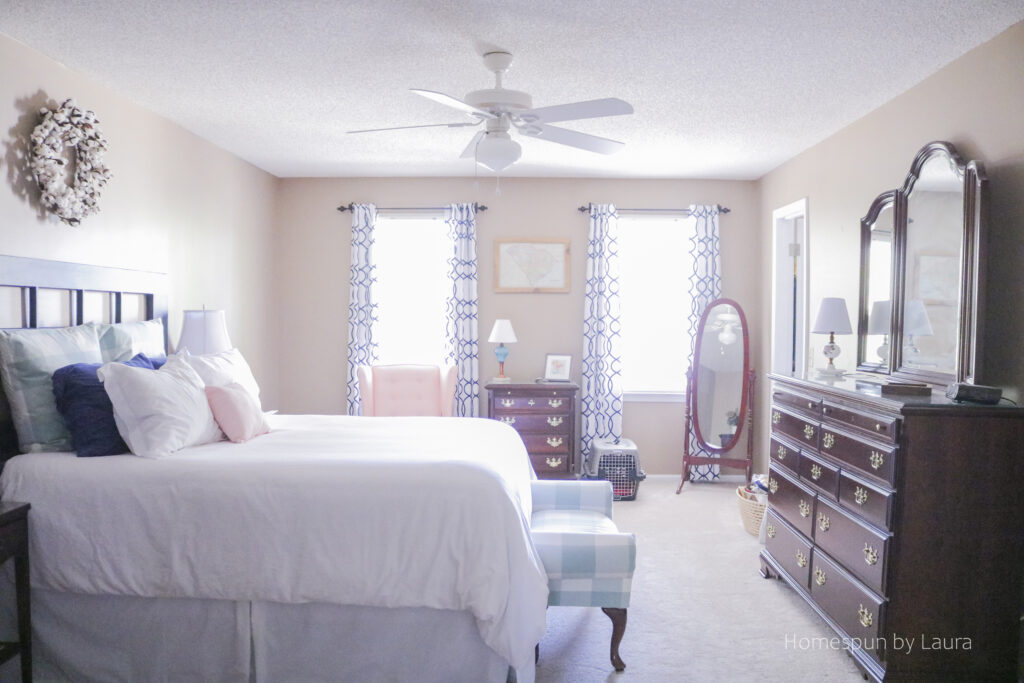
For a long time, we had a TV in our room but finally removed it. That change was really the beginning of finding the right layout. The new white ceiling fan was an instant update.
The Master Bathroom
The barn door was my favorite thing about this room. You might question having a barn door on a master bathroom, but it was absolutely the right type of door. The bathroom was tiny, and when we moved in (and for about 8 years after that…) it had a folding door. A folding door. For a master bathroom!
It made me sad to disassemble this room after we finally got it right!
Instead of buying an all-in-one kit (which run around $400-$500), we combined a rail + wheels and cast-iron handle from Amazon (affiliate links help pay the blog bills!) with a door from Menard’s and spent somewhere in the neighborhood of $225.
You can read all about the DIY master bathroom update here. You’ll see the scary before and find out how I did it for under $200 (excluding the barn door)!
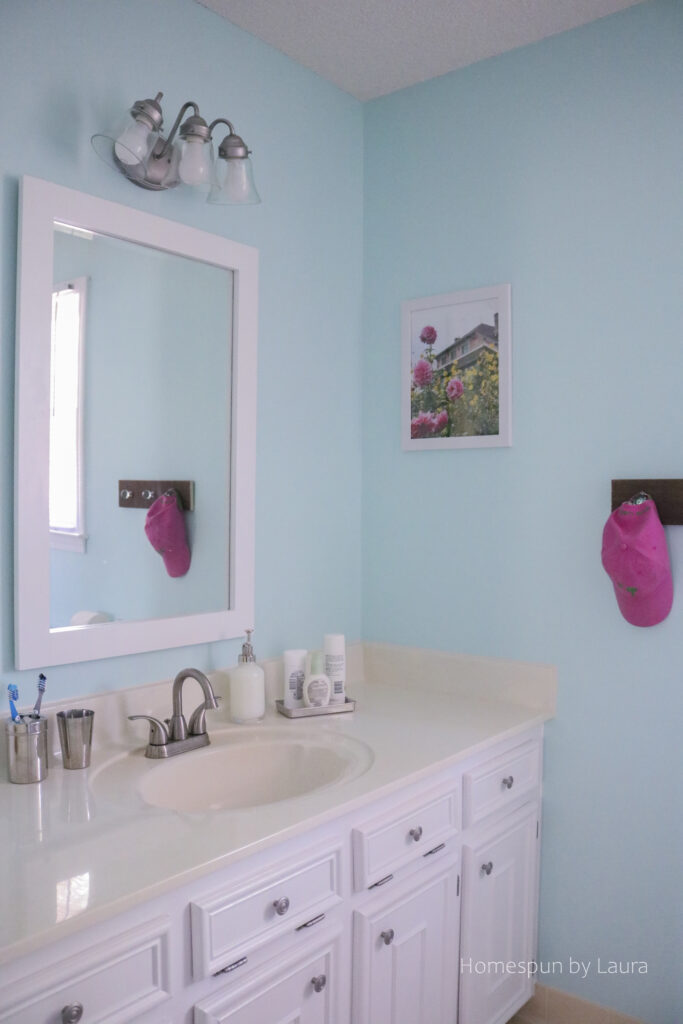
Just because it’s small doesn’t mean it can’t be cute!
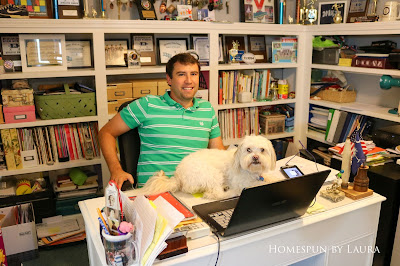
The Shared Office/Craft Room
The award for the Longest Makeover Ever goes our home office/sewing and craft room. It had become the room where we tossed stuff we didn’t want to get rid of but didn’t need or know what to do with. It took me over two years to really finish this room.
 |
| It was pretty bad before… |
I participated in my first One Room Challenge in the Fall of 2015 – and made more changes over the course of six weeks than I ever could have made during that short a time had it not been for the ORC. While many changes happened during the course of the ORC, the room still wasn’t complete by week 6, but it had become a functional office and craft space for me.

Look how much bigger and brighter the room looks!
A change in the Mister’s job about a year later meant that he needed a work-from-home space, too. So when the ORC rolled around again in the Spring of 2017, I joined in for motivation to finish this space once and for all. Read all about the two-year office makeover process here.
And the Mister got his own desk (rather, he stole my old one so I made a new one).

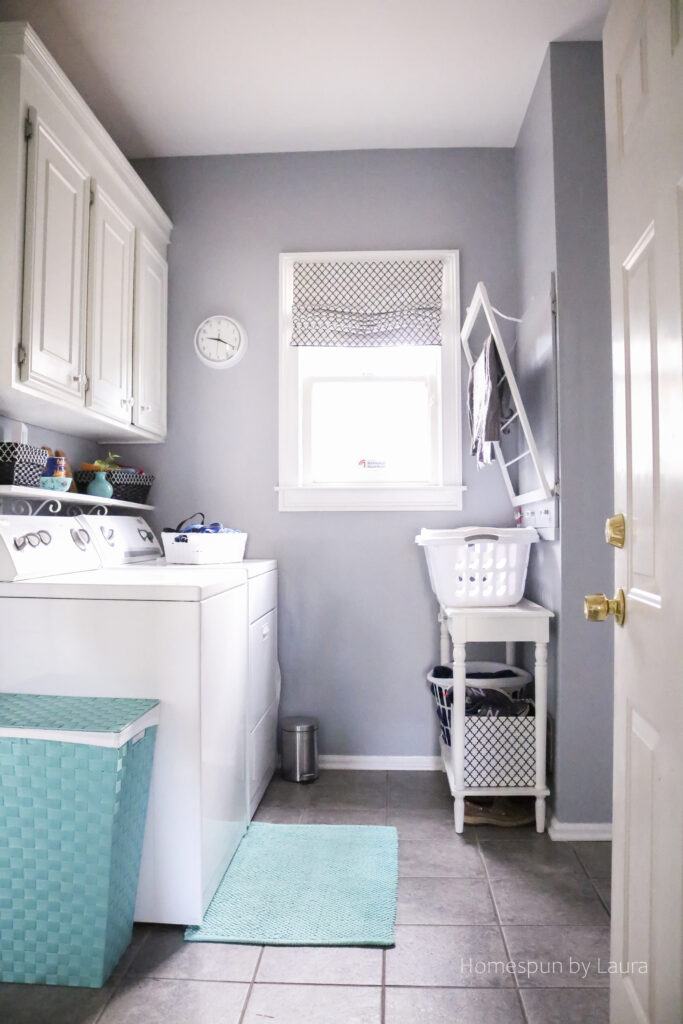
The Laundry/Mud Room
And last, for now, anyway, is the laundry room. It was BRIGHT RED and it had a weird garden-themed wallpaper border around it with a valance over the window that didn’t match the border or the wall, which didn’t match each other to begin with.
 |
| I have no words for this room. |
At the time, I wasn’t up for any painting projects, so I looked around for an option to cover the garden-themed border and found a cute chef-themed border. I loved the chefs and they looked great with the wall, so I decided to make them work, even though it’s a little strange for a laundry room to be decorated with chefs. I found a cute chef clock and a few other chef decorations and called it a day. The ugly valance stayed for a few more years before I made a pretty roman shade to replace it in 2014.
 |
| The chefs fold the laundry for me. Ha! |
This is one of those projects that you look back on and think, “That was a weird choice.” They were a great band-aid while I worked in other areas and pondered a better option for the laundry room, and I kept some of the fun chef decor to use somewhere else.
In 2016 (only about a year and a half before we moved), I finally got a laundry/mud room plan together, and the change was wonderful. It was a much more peaceful room to come home to for the almost 12 months that remained before our move.

The Tour Ends Here…For Now
There’s more to share, but this is it for now!
While you can’t always have the house you want, you can make the house you have into a home one small project at a time. What I learned during our first nine years as homeowners is that making a home is a process that doesn’t need to be rushed or involve huge construction projects.
I’m going to quote myself (this is a first!) here. Back when I shared our $200 DIY Master Bathroom Update, I concluded with this statement:
DON’T WAIT FOR YEARS TO MAKE YOUR HOUSE WHAT YOU
WANT IT TO BE.
Small changes can add up to make a major difference, and it doesn’t take a huge amount of money to make many of them. Don’t have the time or budget to make all the changes you want to make? Pick two or three small changes to start with, then add others over time. Good things come to those who wait – and to those who work hard. You can make it happen!
Unless you have a job contract keeping you in a particular location for a specific amount of time, you likely don’t know how long you’ll live in your current house. When we bought ours we figured we’d be there for three or four years, but we wound up living there for NINE YEARS! And we waited to make the majority of the changes we loved until the last year we lived there.

On our front steps a few weeks after we moved out.
Obviously, you have to live within your means, but if you can make small changes here and there that you will enjoy, you should absolutely do it. A year is a long time; even if you’re only going to live somewhere for 365 days, making it a place you enjoy can do wonders for you!
I hope you enjoyed this installment of the ‘Homespun House’. To see all posts related to our first house, click here.
Budget DIY Tips from Our First House
- Paint can make a huge impact in a room for relatively little cost. Watch out for rebates around national holidays (Labor Day, Veteran’s Day, etc.) at big-box retailers like Lowe’s and sign up for Sherwin Williams’ email list as they frequently send out 30% off coupons.
- Spray paint costs less than $5 per can, and if you live in an outdated house it’s your new best friend. Light fixtures, doorknobs, hinges, air vents, and other hardware can undergo massive changes with one can of paint. Taking time to use good spraying technique is worth it; a bad spray job can look worse than outdated fixtures.
- For vanity lights, chandeliers, and ceiling fans, either removing or replacing shades is a quick and easy fix – and considerably less expensive than buying a new fixture.
- Think about function, too. Are there small, easy changes you can make to improve the function of a room or space? Maybe you’re saving up for a bathroom renovation, but in the meantime are there small things you can do to improve the function and enjoy your tiny, outdated bathroom while you save?
- Little changes add up. Don’t have a lot of spare time on the weekends for an endless list of projects? Pick one or two small projects each week, or even each month: by the end of the year you’ll be surprised at what you’ve accomplished!