Spring is the time to be outside when you live in the south. Before the mosquitoes come out in force and the temperature and humidity climb to 100, you better enjoy the outdoors. When summer comes, it’s time to retreat back inside!
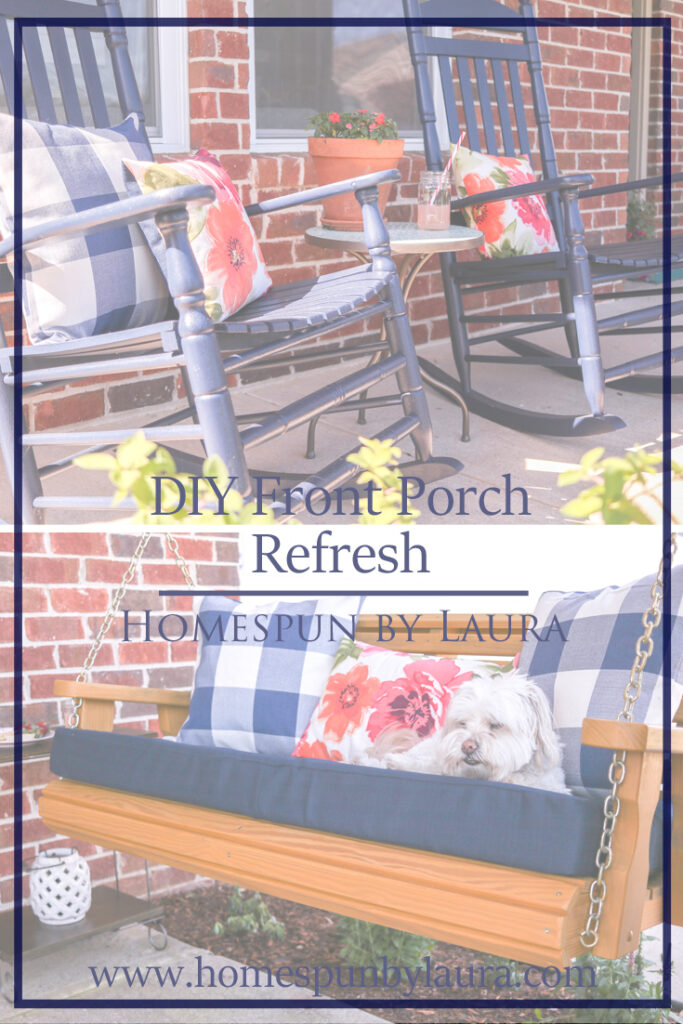
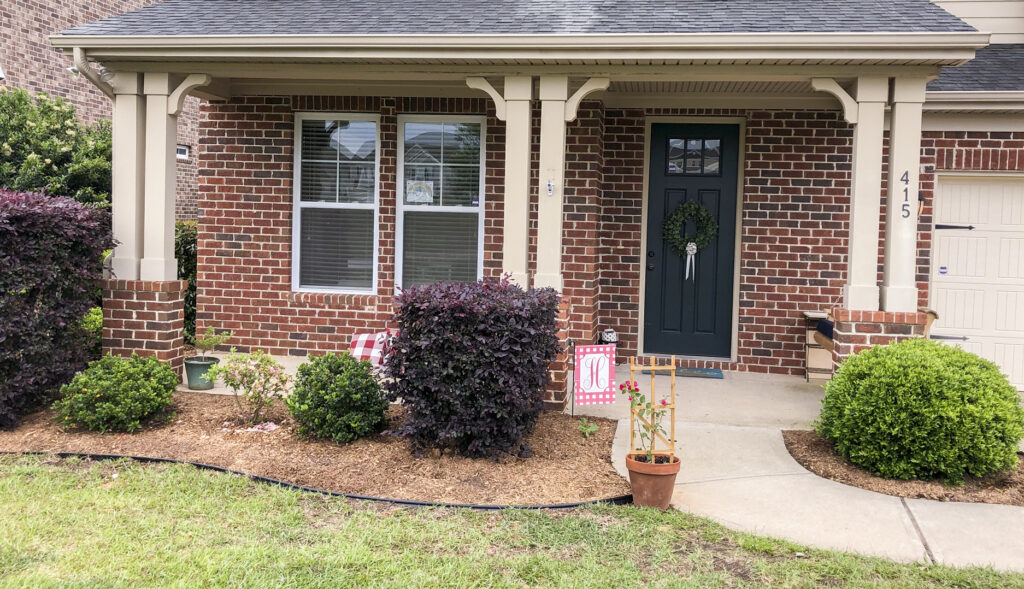
Our front porch, though…it wasn’t exactly screaming, “Come hang out here!” So I decided to take advantage of our time at home during this self-quarantine and do a little DIY front porch refresh.
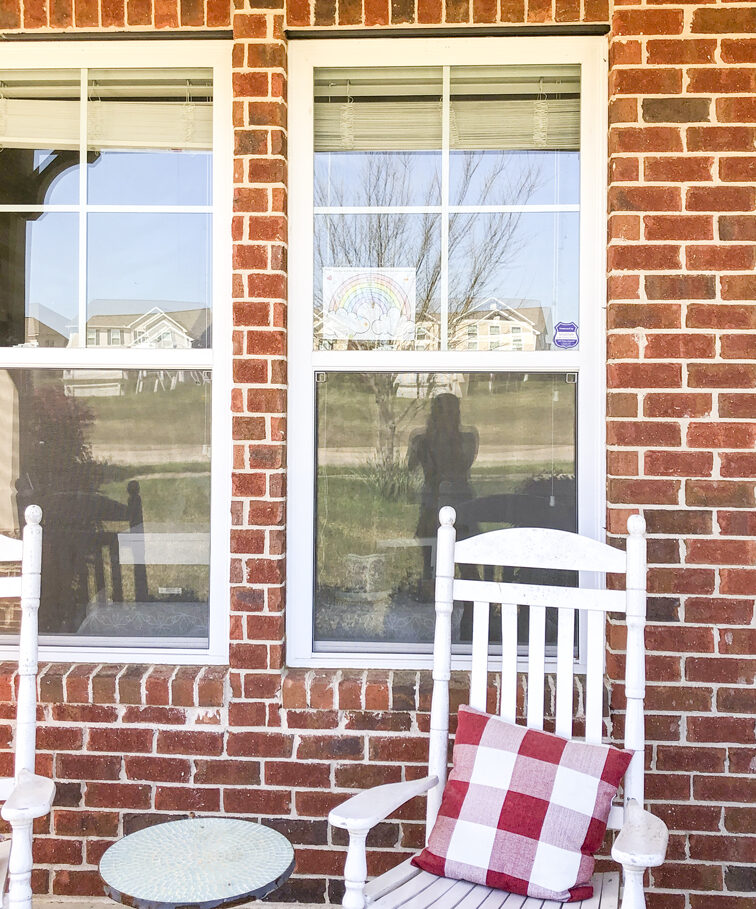
I somehow forgot to take a “before” photo. This photo I took of the little rainbow coloring page in the window near the beginning of quarantine is the best one I have.
Here is another one I took while the paint was drying on the rockers, which is why they are absent from the photo.
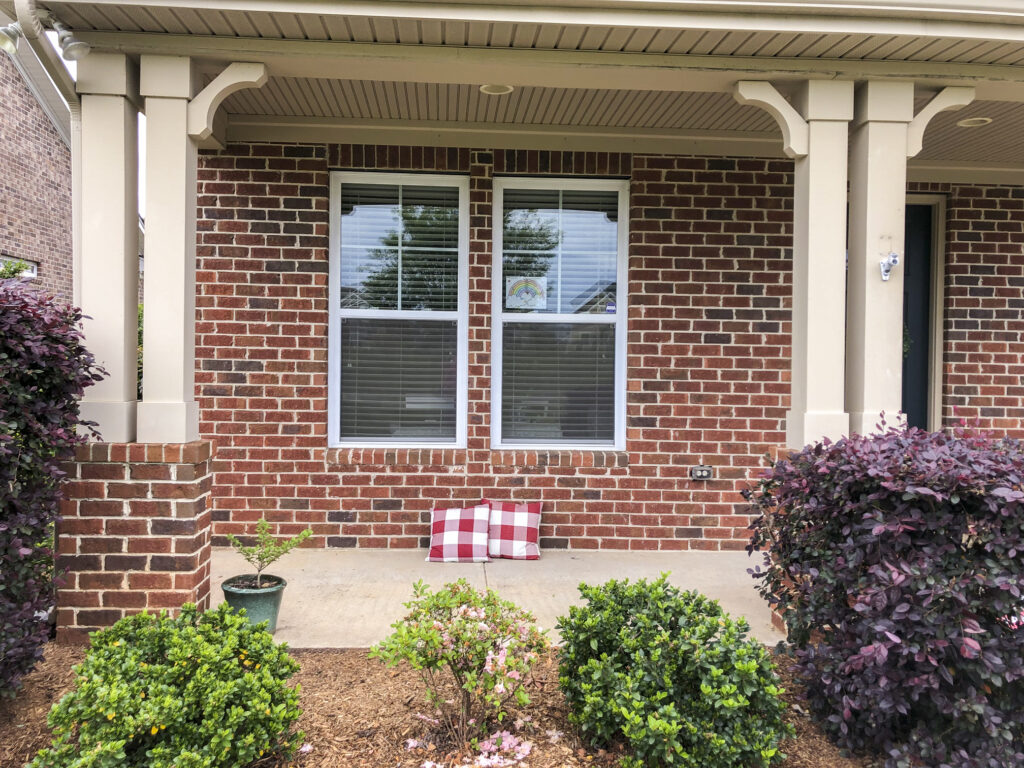
Not very inviting, even without the mildewed chairs.
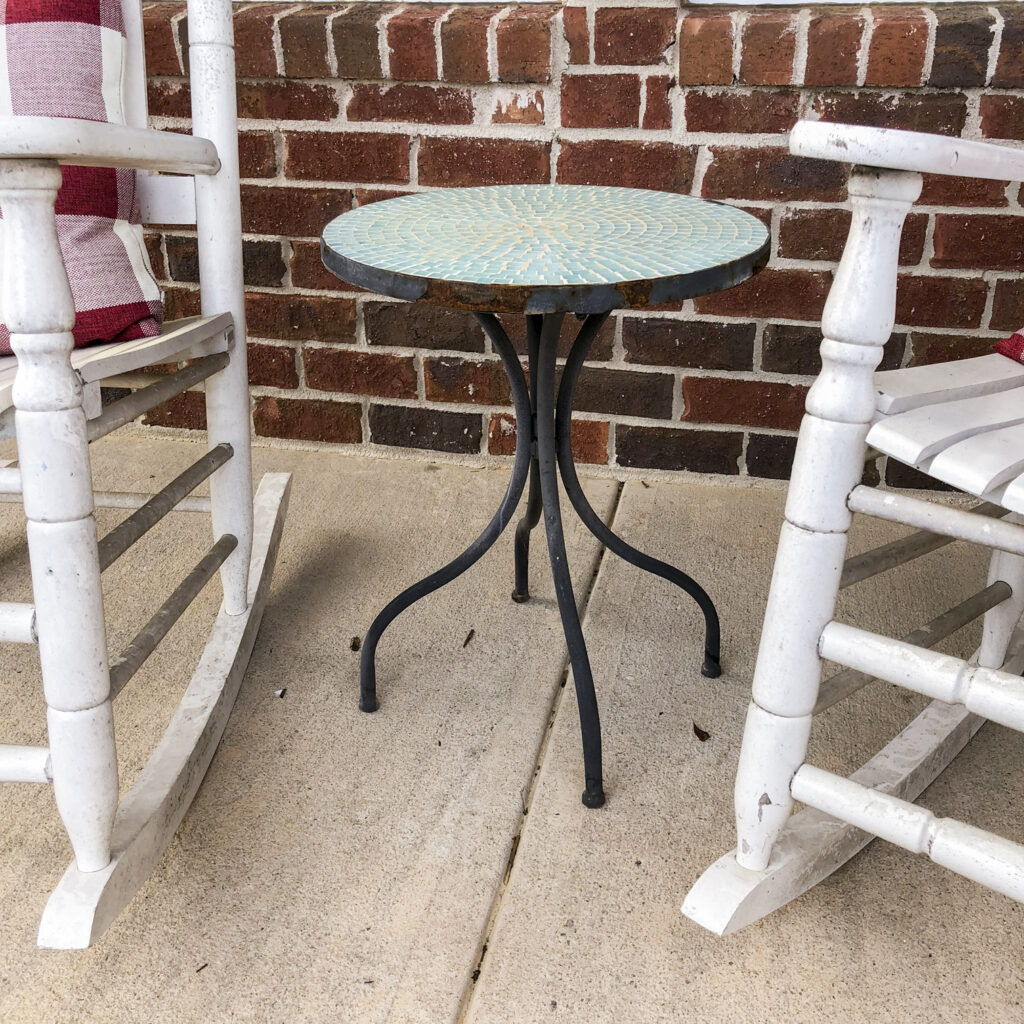
Here it was a full year ago, the day I found the table next to the neighbor”s garbage can on trash pickup day. The chairs and tabletop got grosser in the meantime!
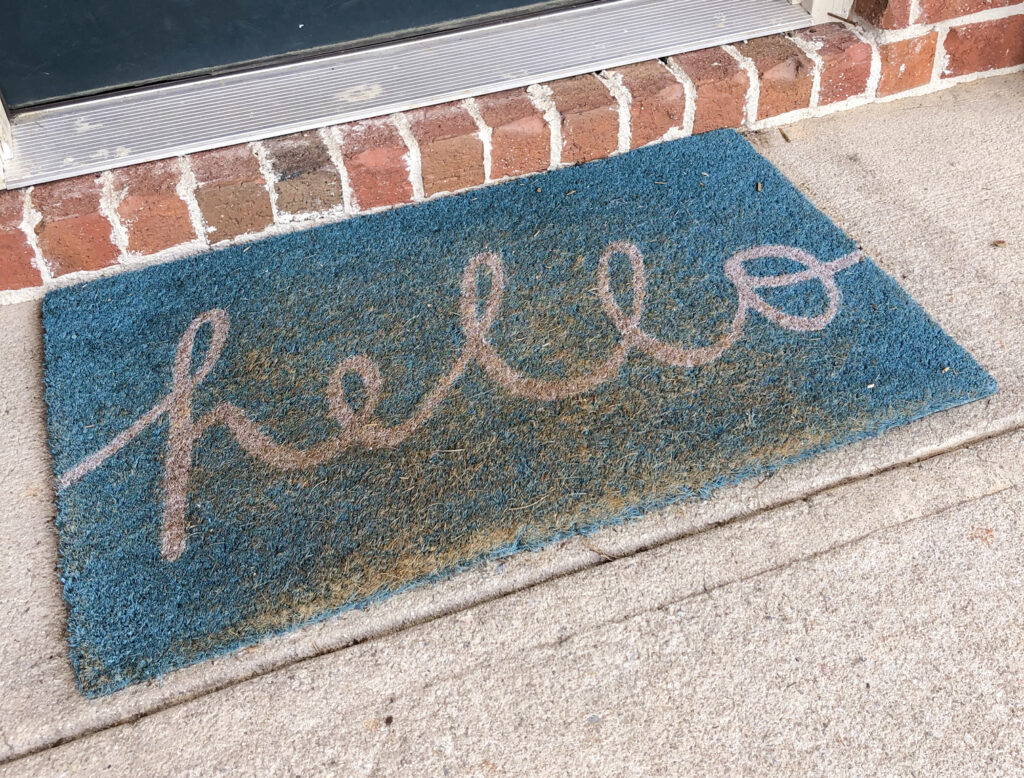
And last, the worn doormat that might as well say, “Go Away!”.
This post contains affiliate links. If you make a purchase through an affiliate link, I make a small commission at no extra cost to you.
Thank you for your support!
DIY Front Porch Refresh Budget
My goal with just about any project is to use supplies and tools I already have whenever possible, and I did that with the DIY front porch refresh, too. I used wood, paint, stain, fabric, and cleaning supplies we already had on hand. Purchases included a few new pillows, stain for the swing, a new garden flag, and flowers. The entire project came in at just over $110, with over half of that going toward new flowers.
Read on to get some free and nearly free ideas for your own DIY front porch refresh!
This furry little mop has since had a haircut 🙂
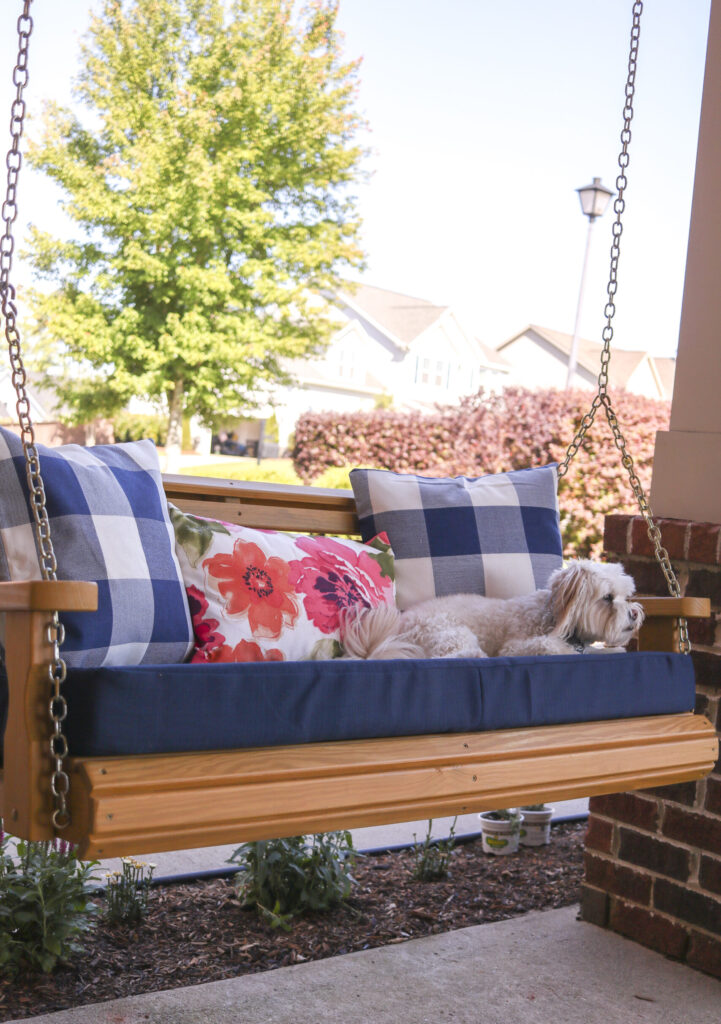
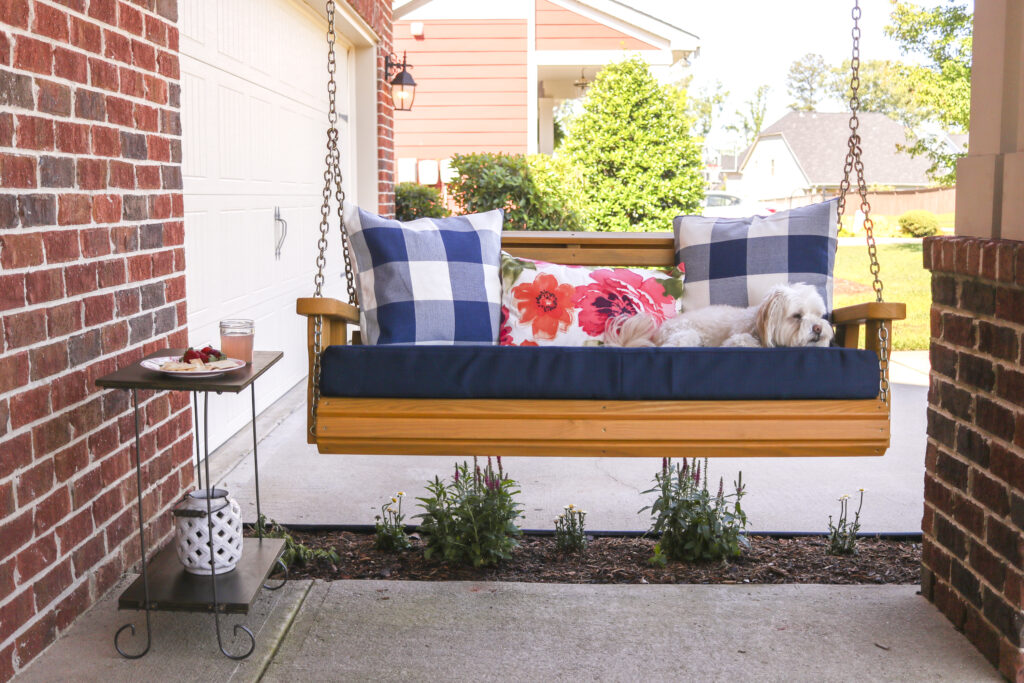
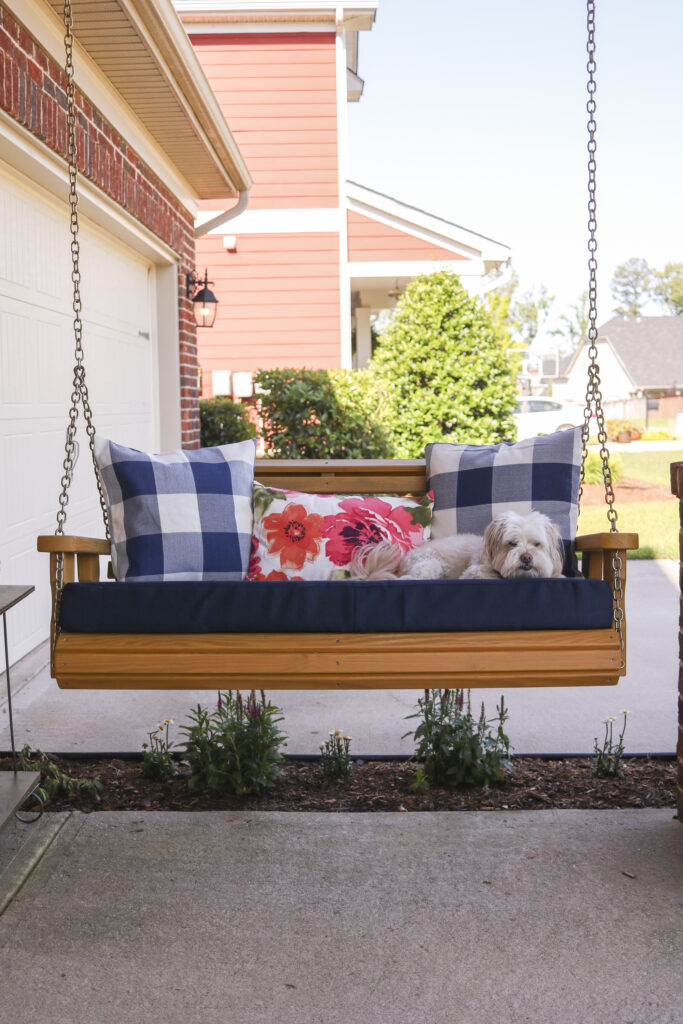
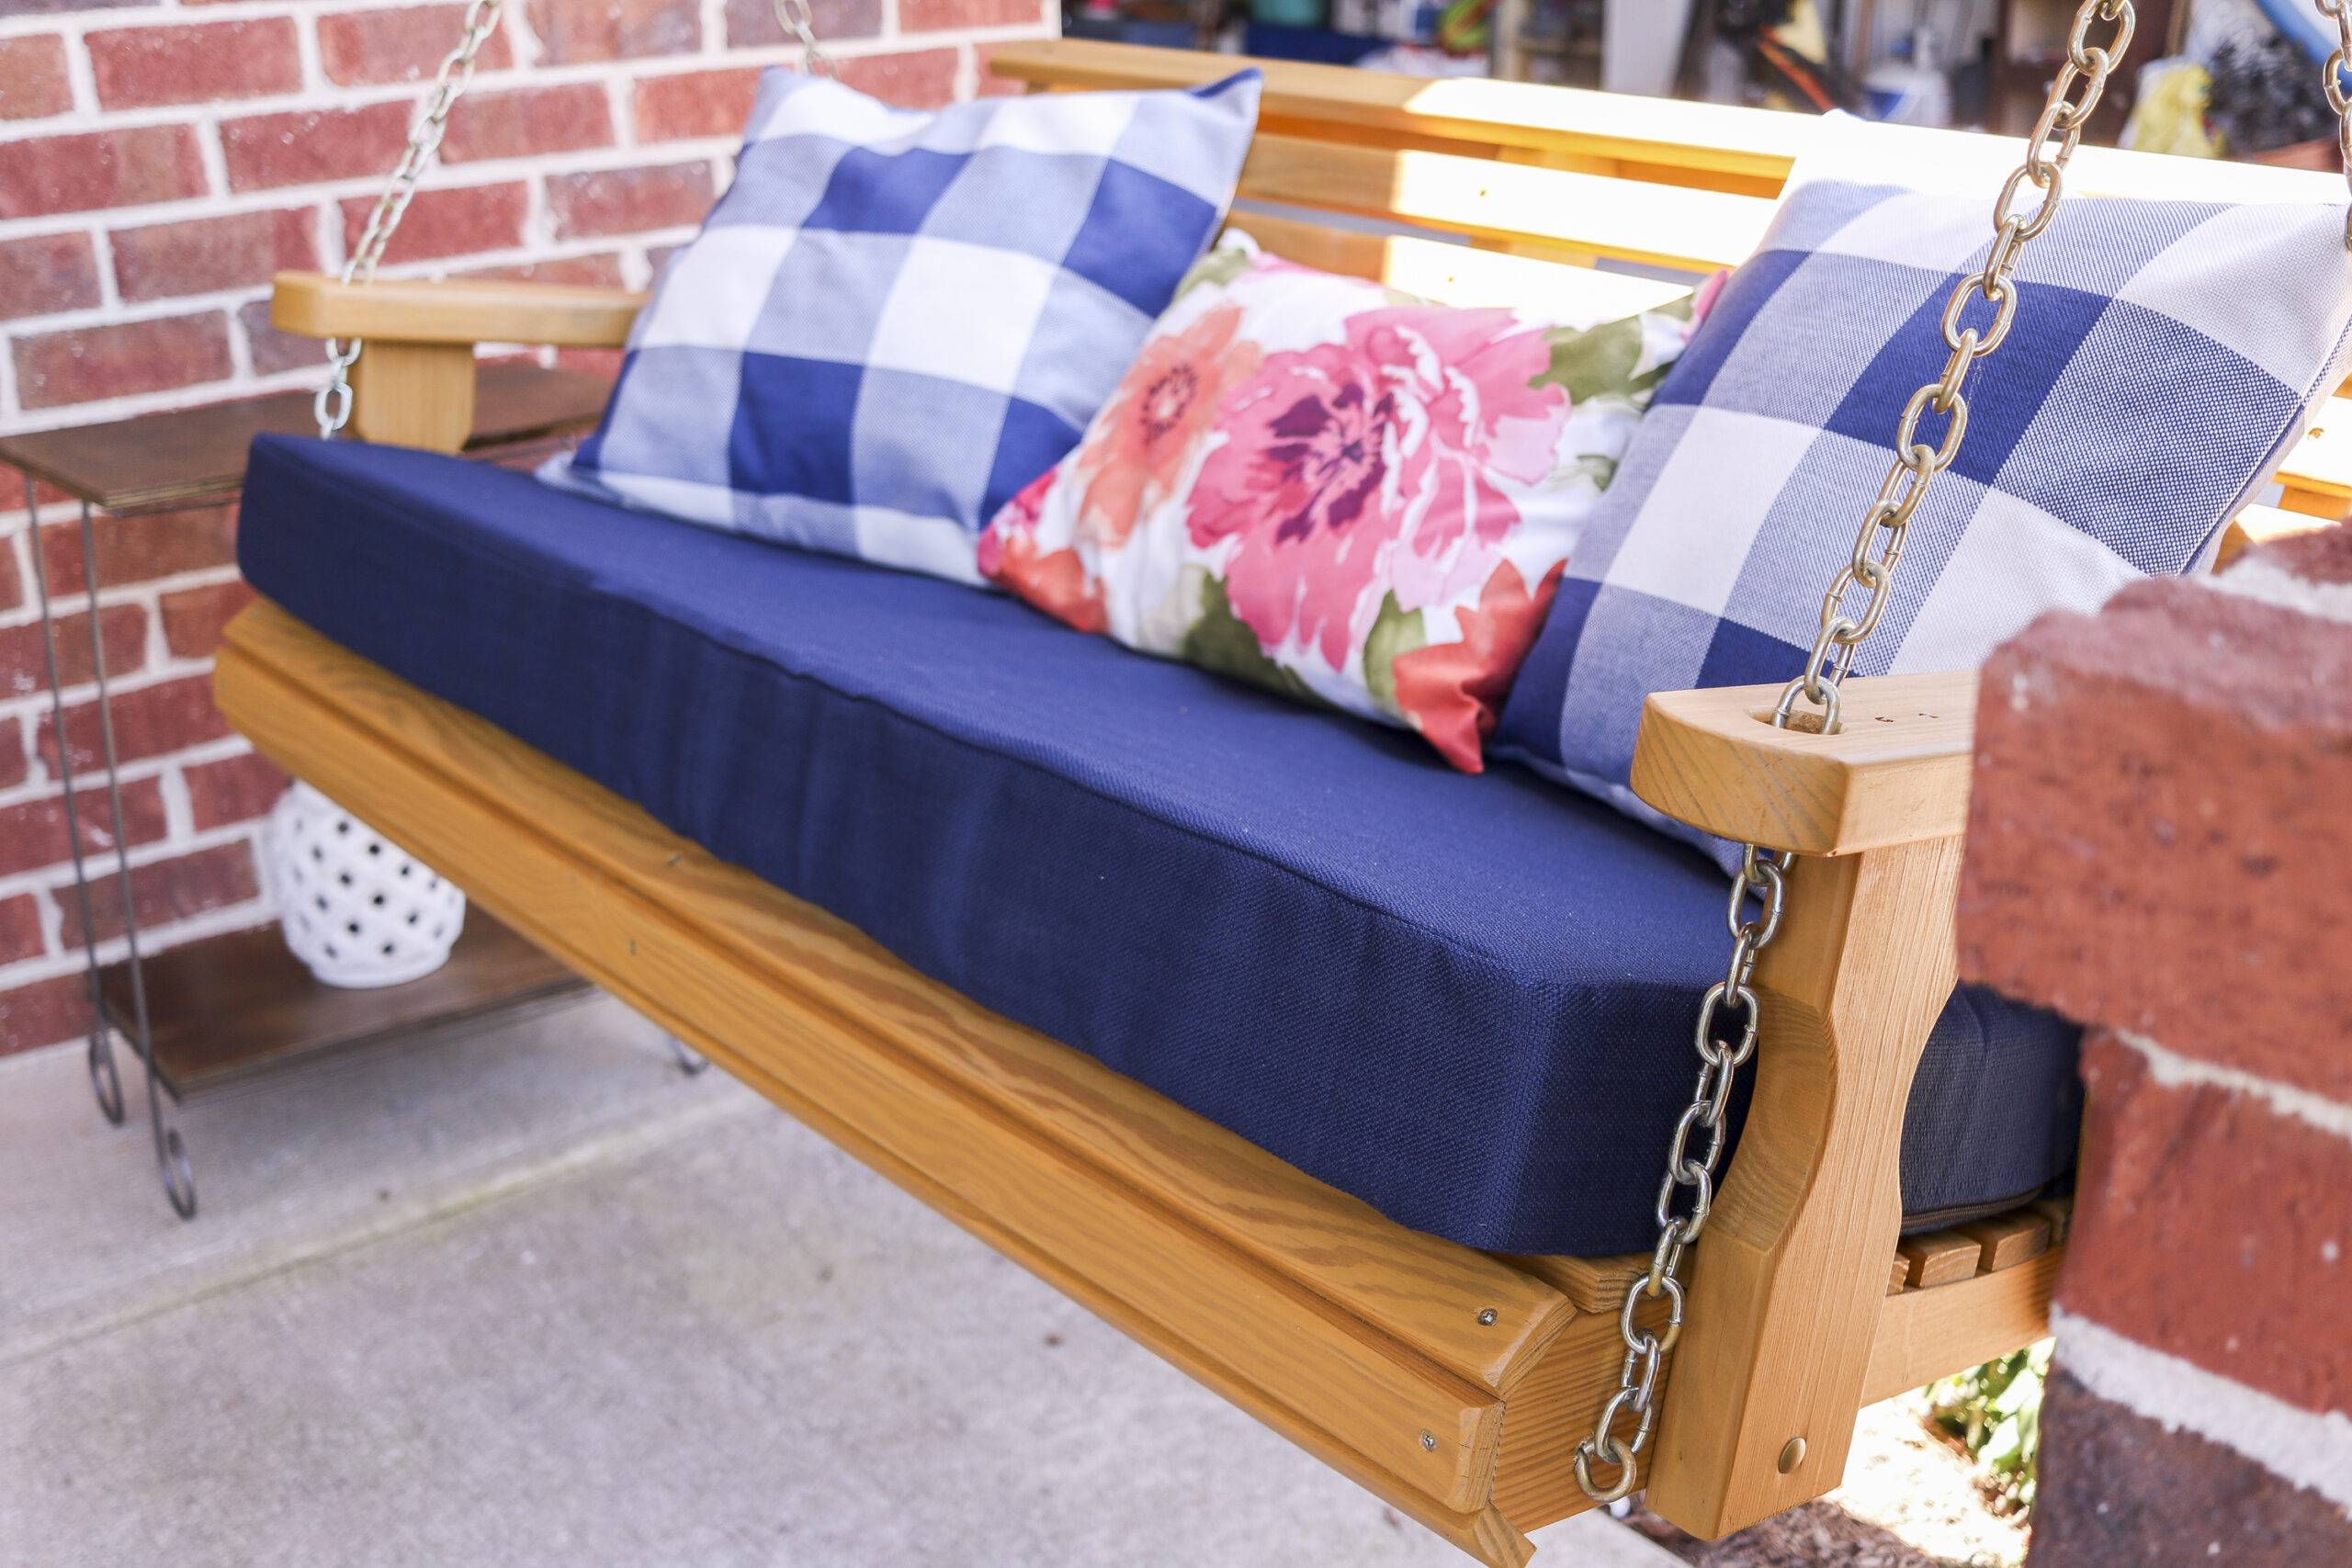
New Swing Cushion and Pillows
Sew New Porch Swing Cushion
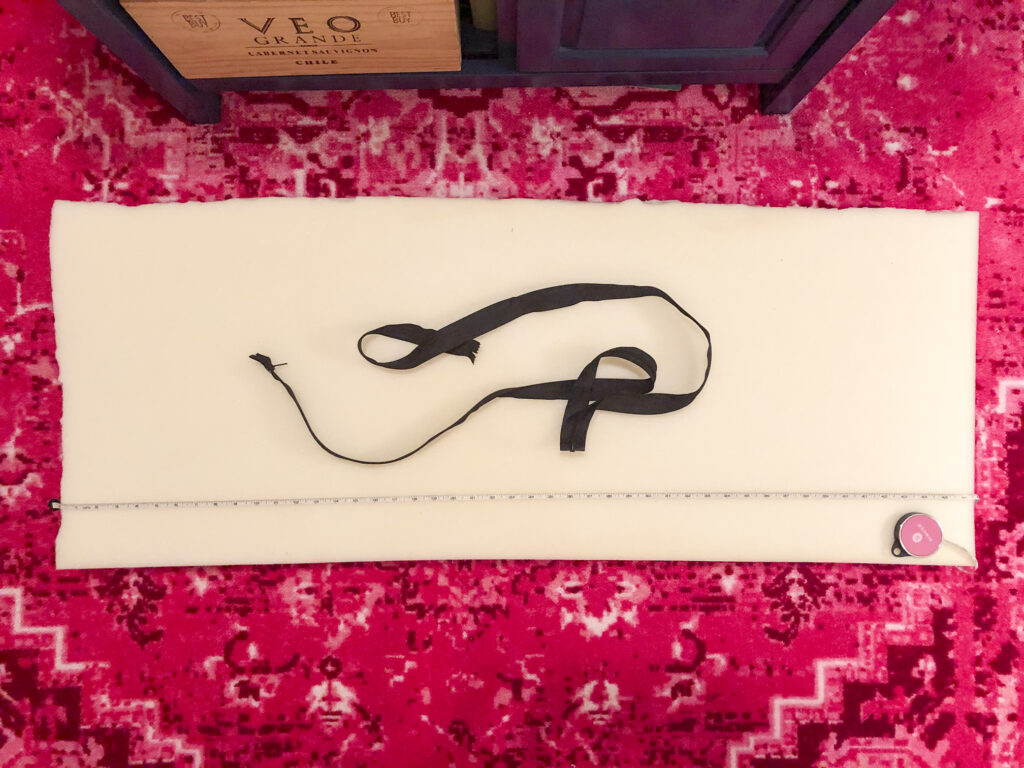
The porch swing was our gift to each other last year for our first Mother’s Day/Father’s day. We hung it late in the summer and enjoyed it through the fall and now for most of the spring, but it was a little bare. It needed to be stained so it would last longer, and a cushion would make it more comfortable. So I bought the fabric and foam to make a new cushion in September… and they sat around in the bag for over 8 months.
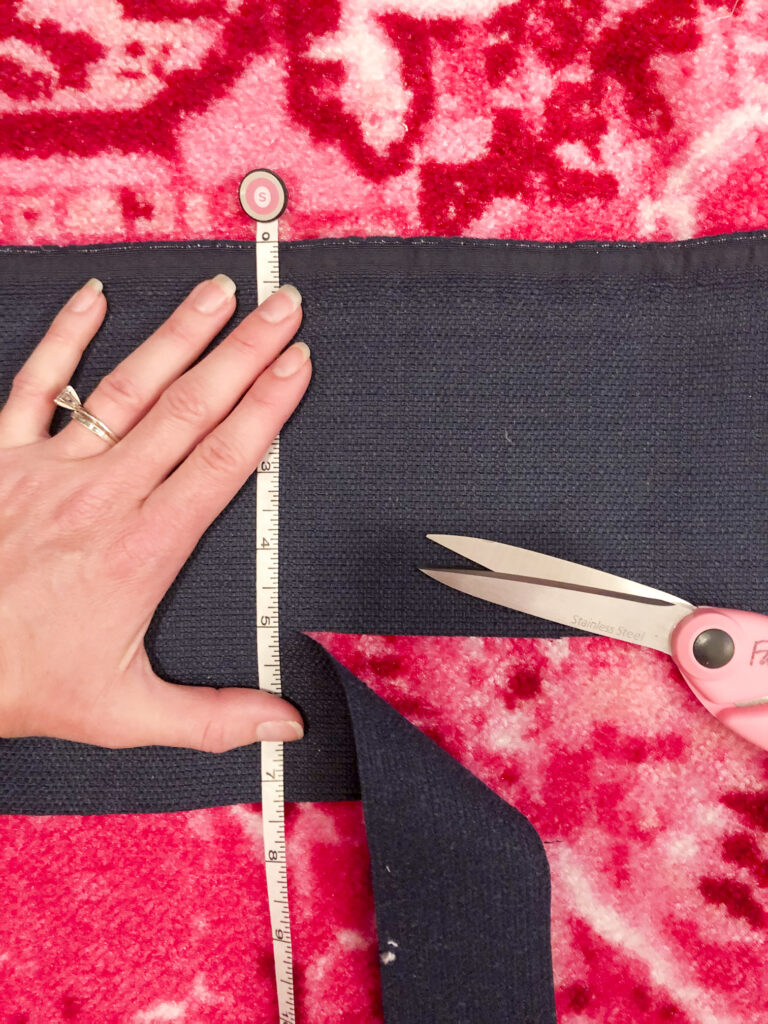
Cutting out the gusset piece for the cushion.
But I finally got them both out of the sewing stash when I stitched up the new cover a couple of weeks ago. There were two small hiccups, but I solved them with a little bit of patience. I’d forgotten to buy a long non-metal upholstery zipper to use on the cushion so had to wait for it to arrive before I could begin.
There was also no dark outdoor thread in my stash, so I used a bright turquoise outdoor thread from a previous project. It was a quick, free change and you can’t tell from the outside.

No evidence of the turquoise thread from here!
I would have loved to add piping to the seams to make it look a little fancier, but I was concerned about making the task too daunting. And I’d already procrastinated it for 8 months, so I kept it simple. And I’m happy with the result! It’s certainly much more comfortable to sit on now, and it looks prettier, too.
$7.19 for 72-inch nylon zipper
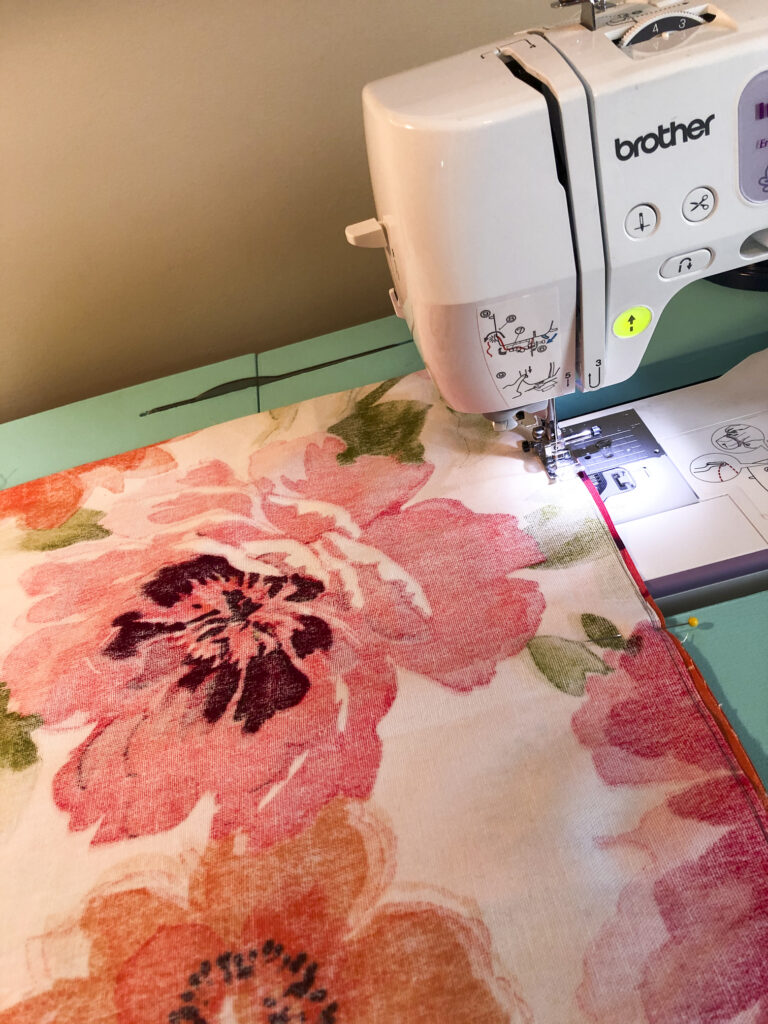
Sew and Order New Pillows
As part of the DIY front porch refresh, I knew I wanted to use some floral fabric I bought years ago to make new pillows. I don’t think it’s outdoor fabric, but I found an article on how to turn regular fabric into outdoor fabric, and I might give it a try. If not, I bought the fabric for less than $3 over six years ago, so it won’t be a big loss if it only lasts for a season or two – though it’s colorful and pretty and I hope to keep it going for seasons to come!
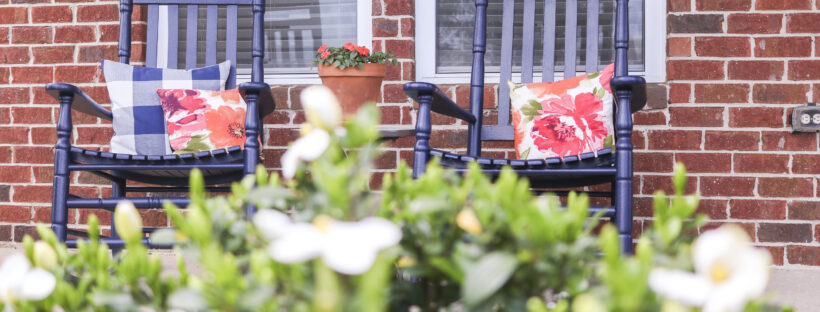
Several neighbors have oversize gingham print pillows on their porches, and I love the look. Two falls ago, I ordered some dark red pillow covers (as seen in the ‘Before’ pictures at the beginning) and they’ve held up well for two falls and two winters. I wanted to use gingham again on the spring/summer porch, so I reordered the same product in a different color. Since I couldn’t decide between navy and black, I ordered a set of both. If the navy was too bright it wouldn’t have worked well with the chairs, but it’s just dark enough so I chose to use it. The black pillow covers are in the closet to pull out for an easy change in the fall.
I used pillow forms we already had (I have no idea how my collection of pillow forms got so big…), so the only cost here was for the six very inexpensive zippered pillow covers.
$25 for 6 new pillow covers (four navy, two black)
Stain the Swing
The original plan for the swing was to use our dark brown fence stain (same as the DIY drinks table that’s coming up next ) since it would be a free update. But my parents’ new deck has a finish that’s just a little brighter than the color of natural wood, and I really like it. So I debated back and forth and finally decided on a product that I found through an unlikely source.
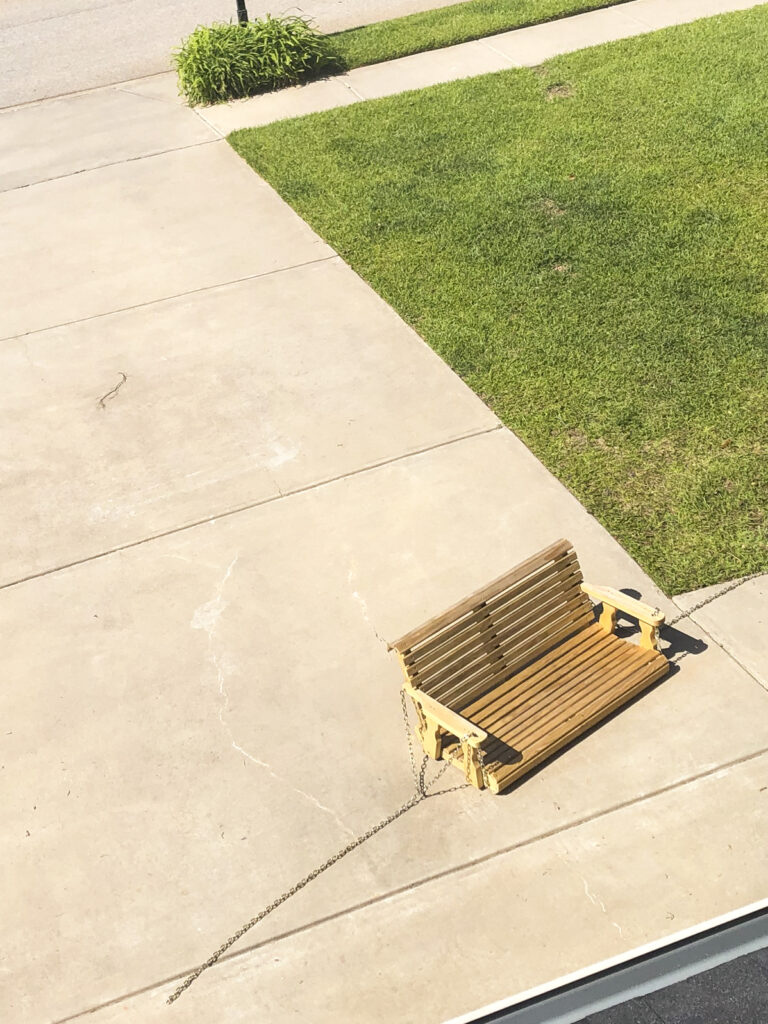
This seems to be the only Before picture I have (where a lounging person or two doesn’t obscure the ssing)…from above while I sewed up the cover and the swing was waiting in the driveway to be pressure washed prior to staining.
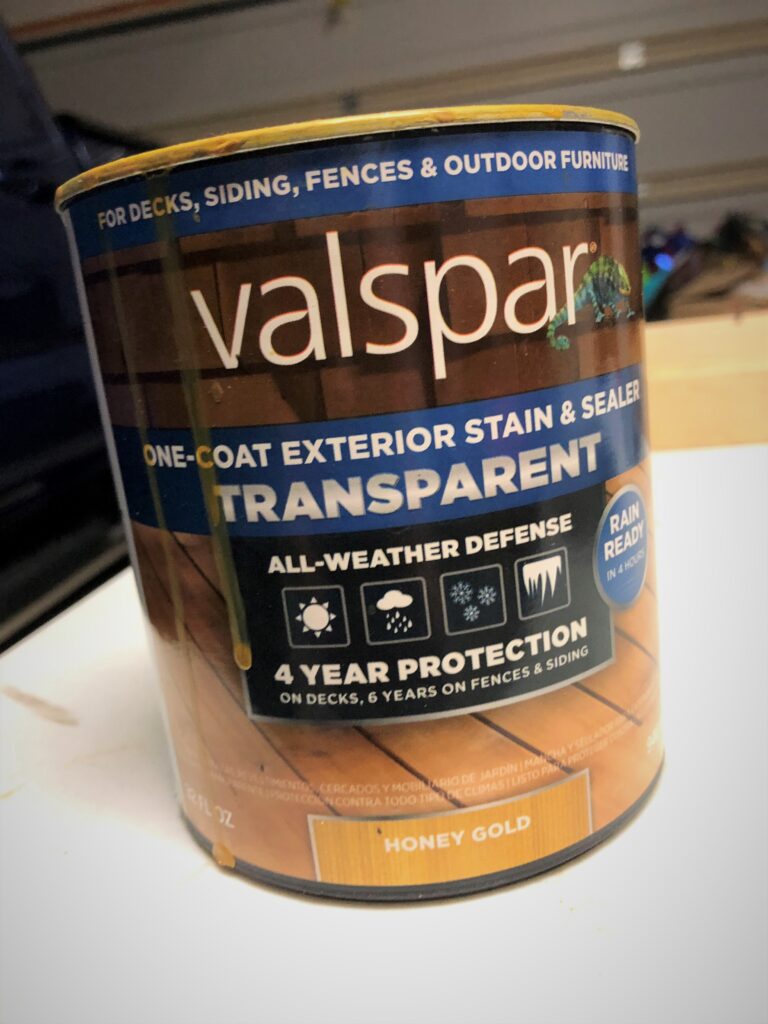
The Refashionista, like me, is not ashamed to pick up a free roadside treasure and put the work in to save it. She’s a local Columbia blogger who typically shares sewing refashions, hence the name. But recently saved a friend’s old patio table and wrote about it. She used Valspar One-Coat Exterior Stain + Sealer on her table, and it looked fantastic!
No one is paying me to share this product with you. In fact, it’s quite the opposite; I paid them!
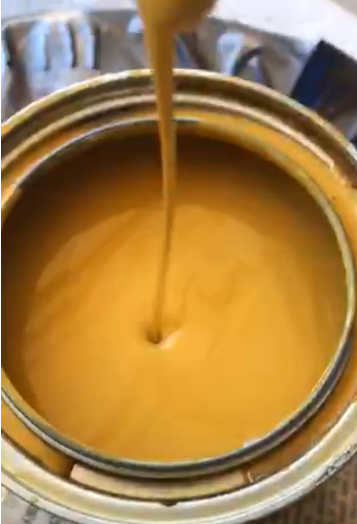
The sealer looks sort of like thin yellow paint, both in the can and on the swing. Overall I like it, but in a few places where it went on a little thick, it does kind of look like thin yellow paint.
So I researched the product and decided we’d drop $16 on a quart of its Honey Gold color instead of using our dark deck stain.
Valspar Stain, $16
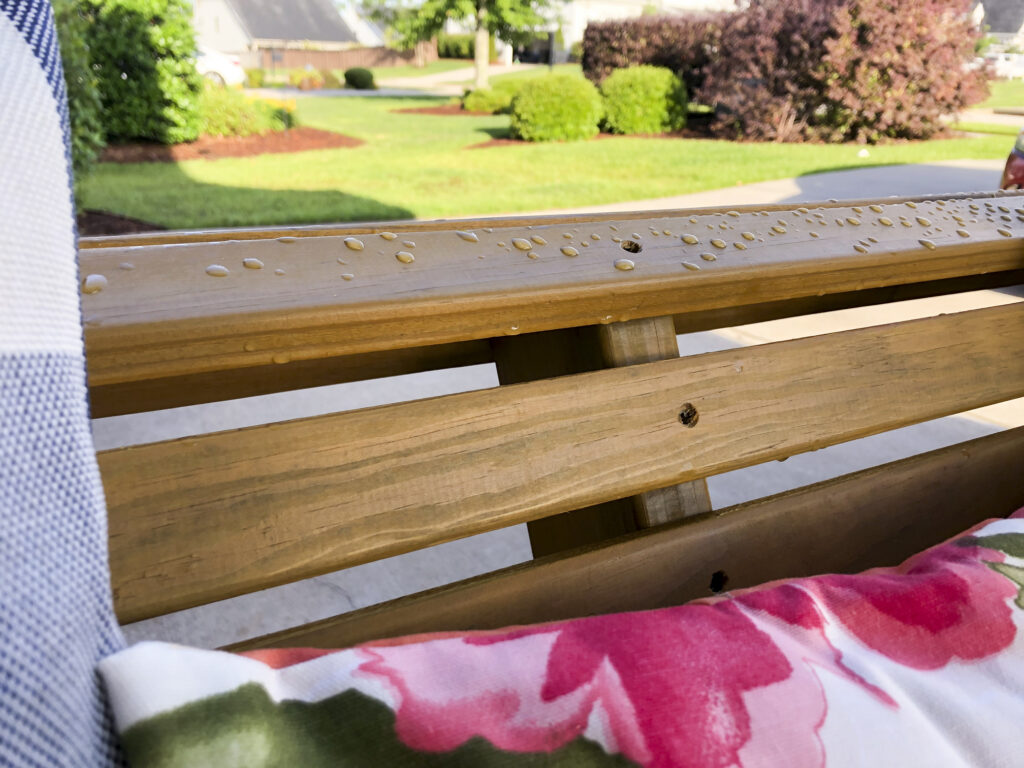
It rained overnight after we hung the swing back up, and the sealer did its job well!
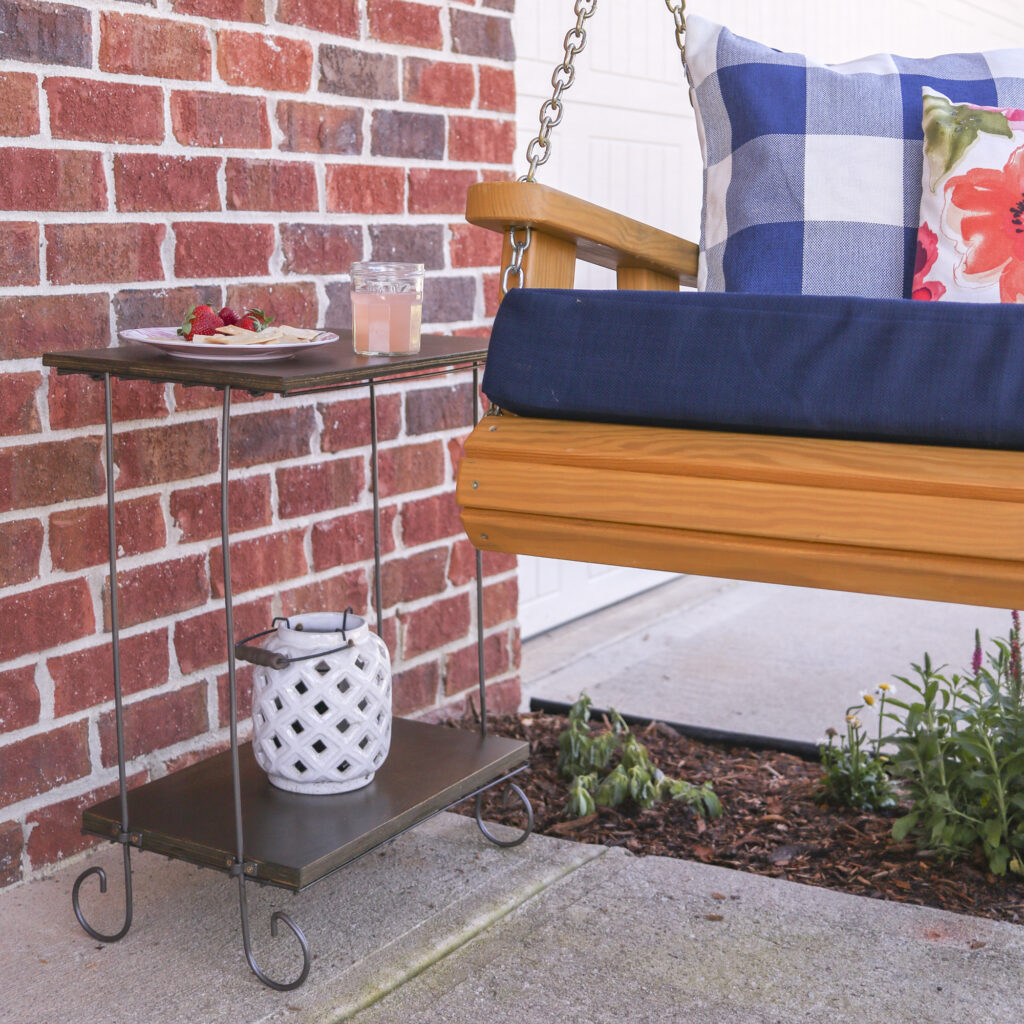
DIY Drinks Table from Old Plant Stand
A wobbly old plant stand landed next to the porch swing when we hung it up nearly a year ago, but it doesn’t serve its new purpose very well. I use it as a place to perch my drink/book/phone/computer/whatever while swinging. Since it just has a wire top, I have to be very precise about how I place down a drink as I’m swinging back and forth to ensure it doesn’t tip over.
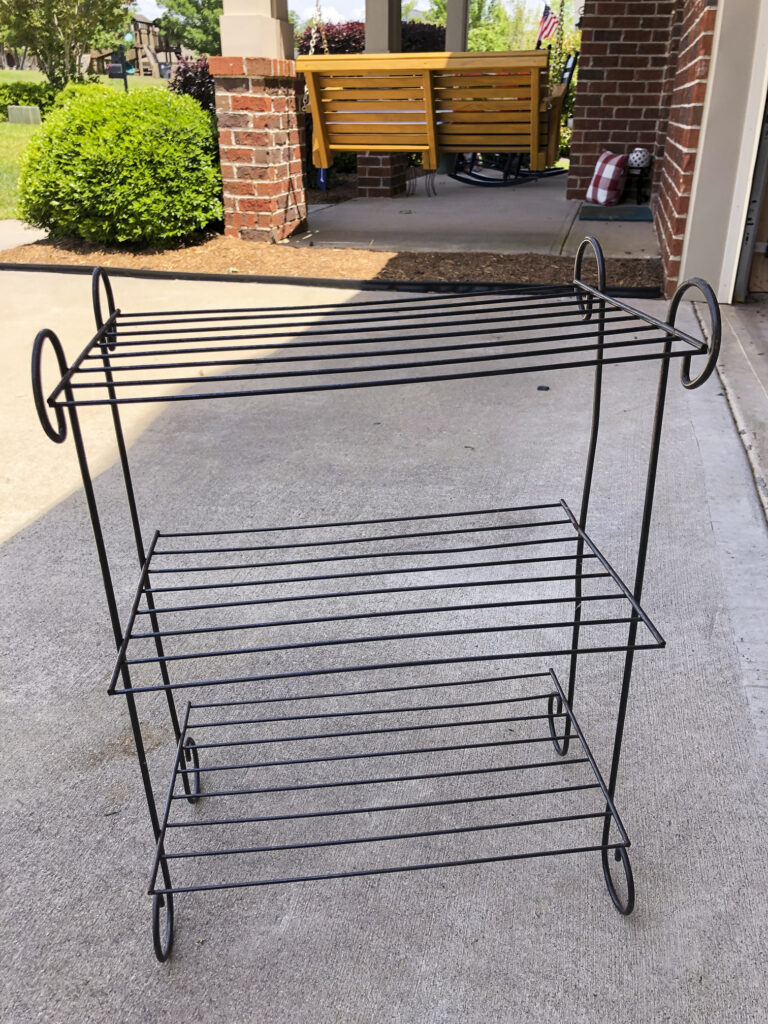
Free to me little plant stand
A new wooden top from scrap wood solves the problem. (Though it potentially creates another problem, because the scrap I used is not outdoor treated wood, but I did use outdoor stain on it. We’ll see how it holds up. If it falls apart after a year, I’ll go by an inexpensive cedar fence picket, trim it down, and replace the original wood.) The new ‘table’ was a free project, it cleared out a little bit of scrap wood in our stash, and I got to practice using a jigsaw to trim down that scrap wood. So something good will have come out of it, even if it doesn’t stand the test of time as it is.
How to Build a Porch Swing End Table from an Old Plant Stand
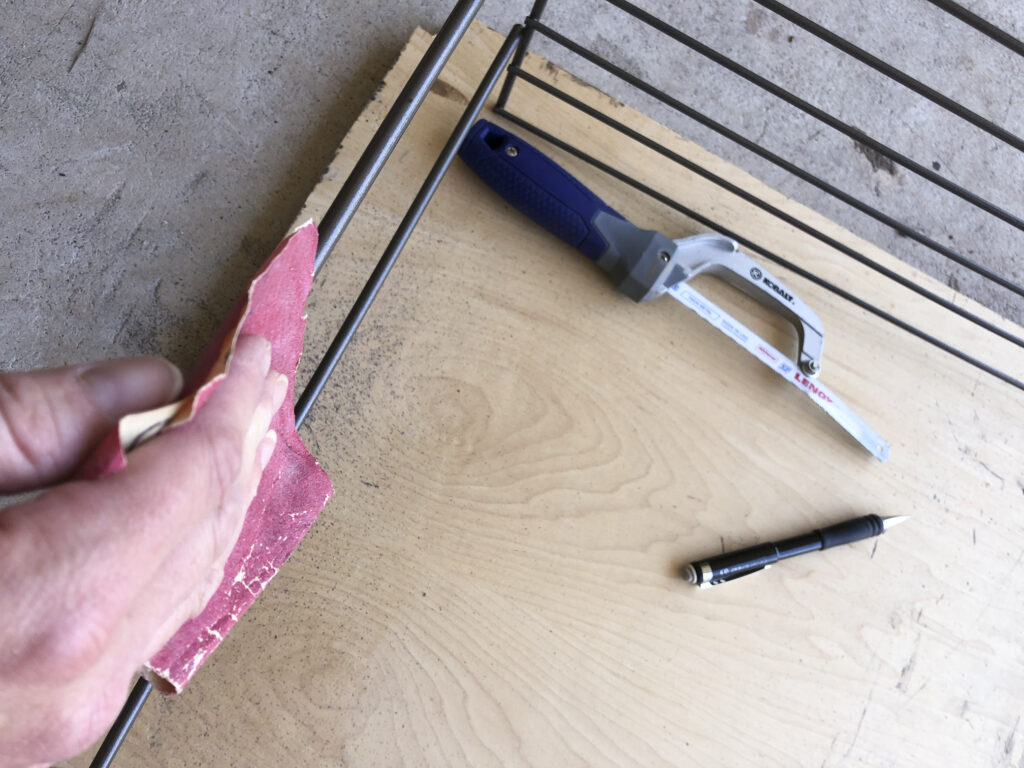
I began by sawing off four of the little curlicues to create a flat surface for the new wood top.
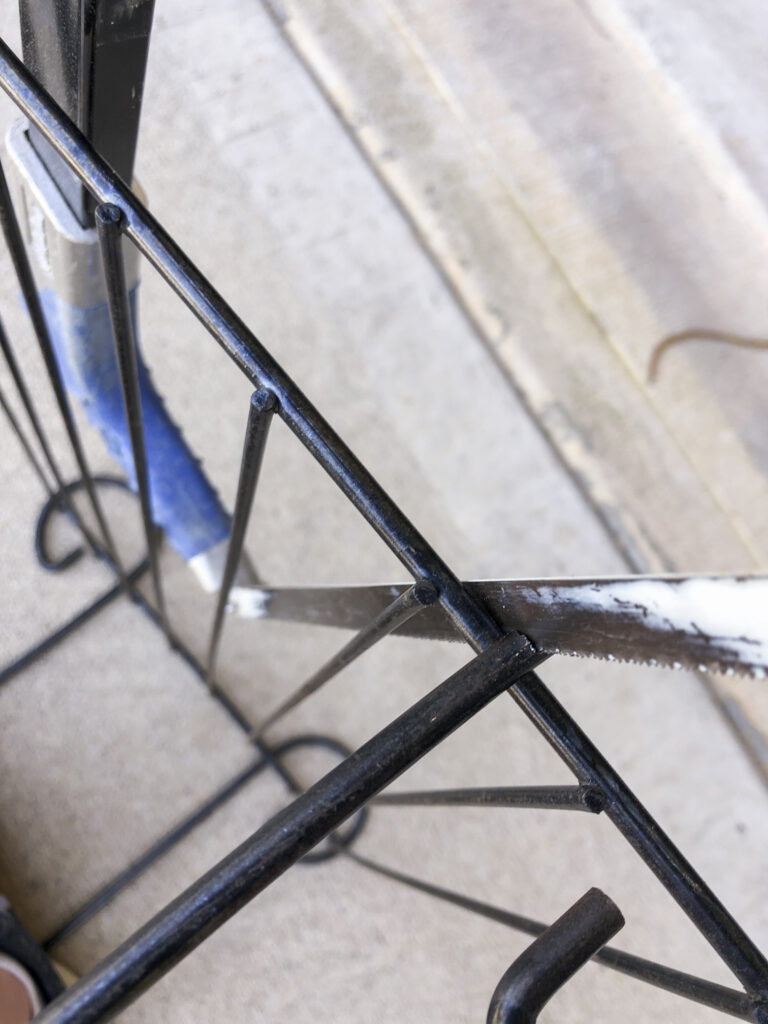
The curlicues came off pretty easily with a hacksaw.
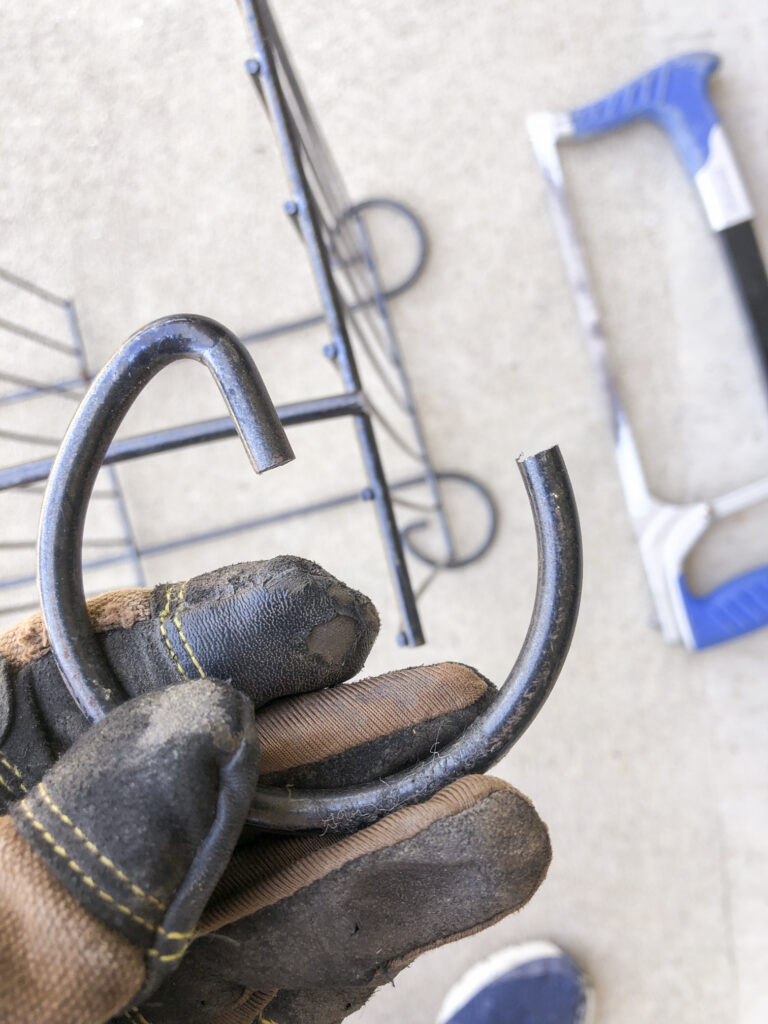
My gloves were upstairs so I commandeered the Mister’s for this task.
Sanding and cleaning the wire frame were next. After I spray painted it with some Rustoleum hammered metal paint we already had, I decided I wanted to remove the middle wire shelf. It took about 30 minutes of sawing with a little hacksaw to loosen it enough that when I leaned down a little too hard on it – it just fell off!
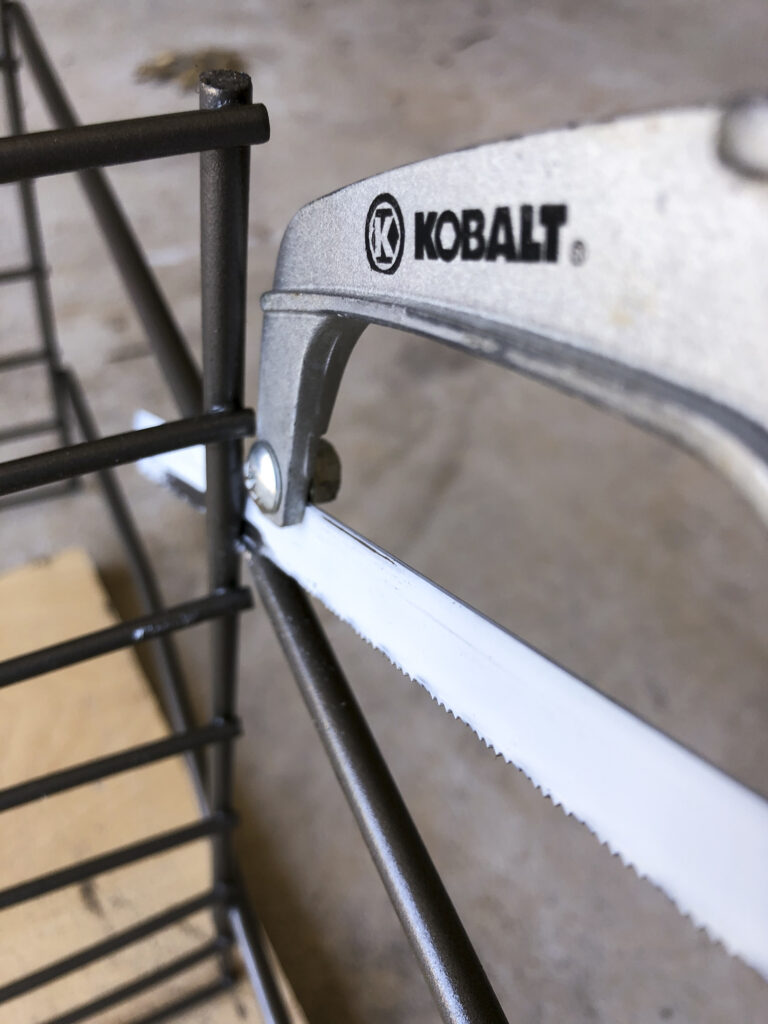
This part was not as easy.

So I sanded the rough parts where the shelf had been, then sprayed it again to fix the scratches I’d made in the new finish.
We then used our jigsaw to trim down two scraps of wood from previous projects, and I sanded them down. I used exterior stain from the fence at our old house, but its directions do specify that it should be used on pressure-treated wood. This table is just on the edge of our covered front porch, so it’s sheltered from a light rain, but in a downpour it will get wet, plus it’s very humid here in the summer. I don’t know how it will hold up but I’ll keep an eye on it!
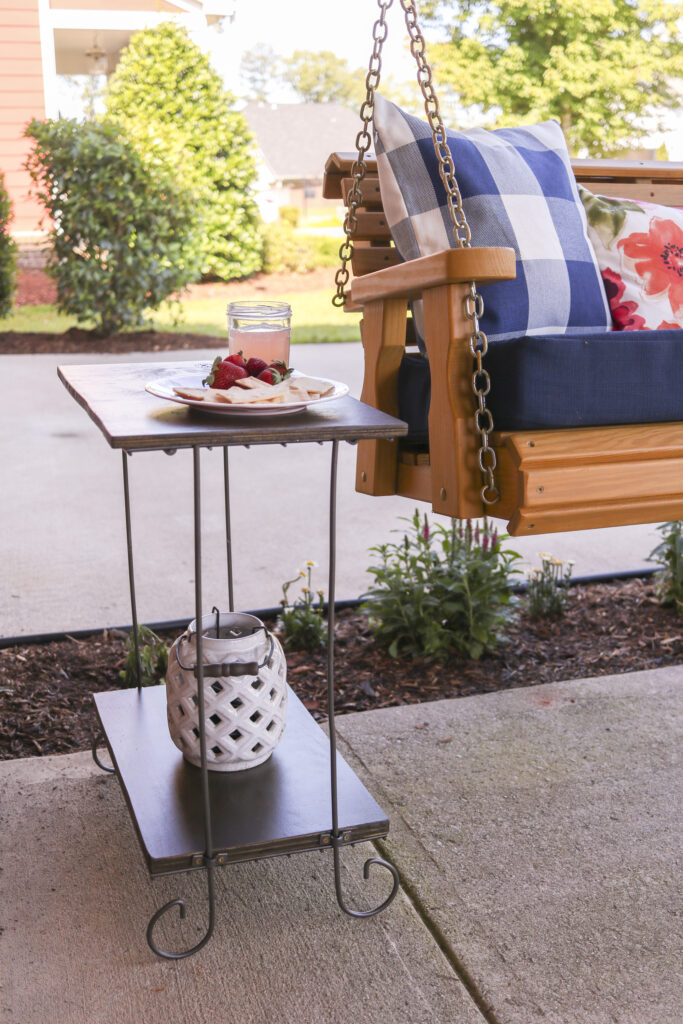
The lantern on the bottom shelf holds dog potty bags instead of a candle. It’s a very practical place to keep them so they’re easy to grab when needed.
Little brackets for wire closet shelving system are just the right size to fit around the wire supports of the table to hold the wood securely on. (I got the idea to use them for this project when we disassembled and redesigned our daughter’s closet earlier this year. An extra bracket wound up in my tool bag; I gave it a try, and it worked!)
I spray painted the white closet brackets to match the frame but left the brass finish on the screws.
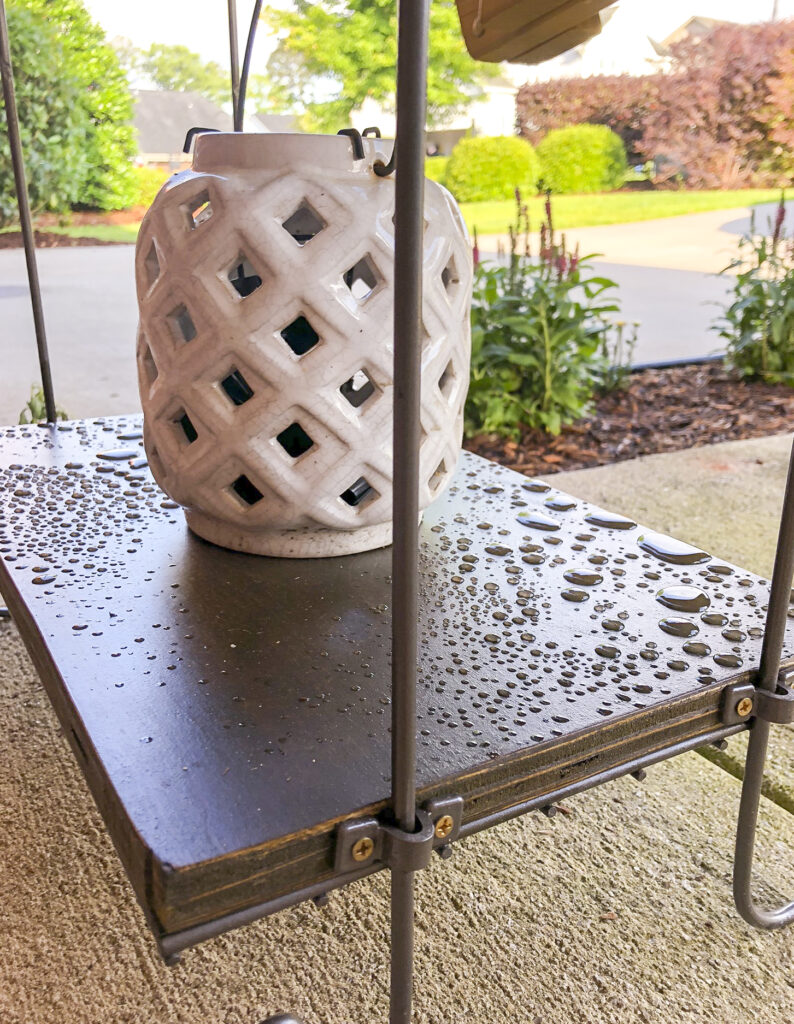
There was a downpour the night before I took this photo. Looks like the stain did its job.
Since the plant stand was free to me when my grandmother moved out of her house a couple of years ago (and I used scrap wood + spray paint we already had), the only cost related to this table was the brackets!
$2.96 for closet brackets

Clean and Paint the FREE Mosaic Tile Table
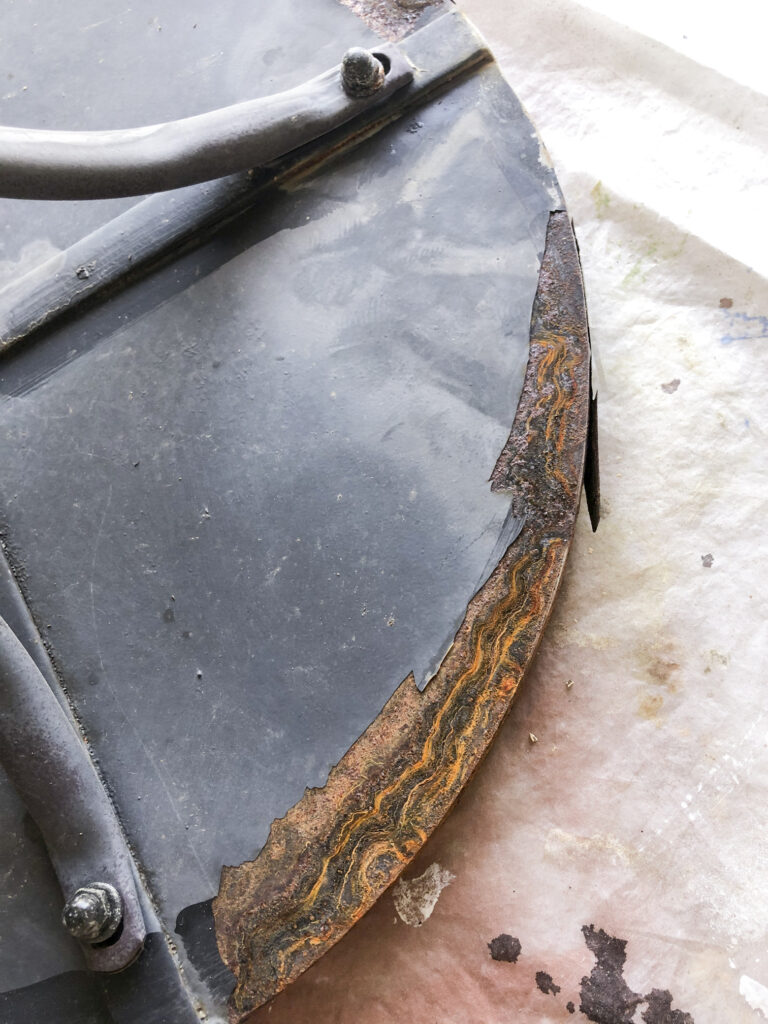
The tile table was the first piece I tackled for the DIY front porch refresh. It was free from a neighbor’s curb about a year ago on trash day.
A little rusty and kind of dirty. But not garbage!
While it was definitely in need of some attention, it was certainly not in any condition to send to a landfill. So I stopped my early morning run, picked it up, and walked it about 1/4 mile back to our house. It might have taken me a year to get around to it, but now it looks just as good as new.
How to Clean a Mosaic Tile Outdoor Table
I started by scraping and sanding the rust on the legs before moving on to the grout on the table top.
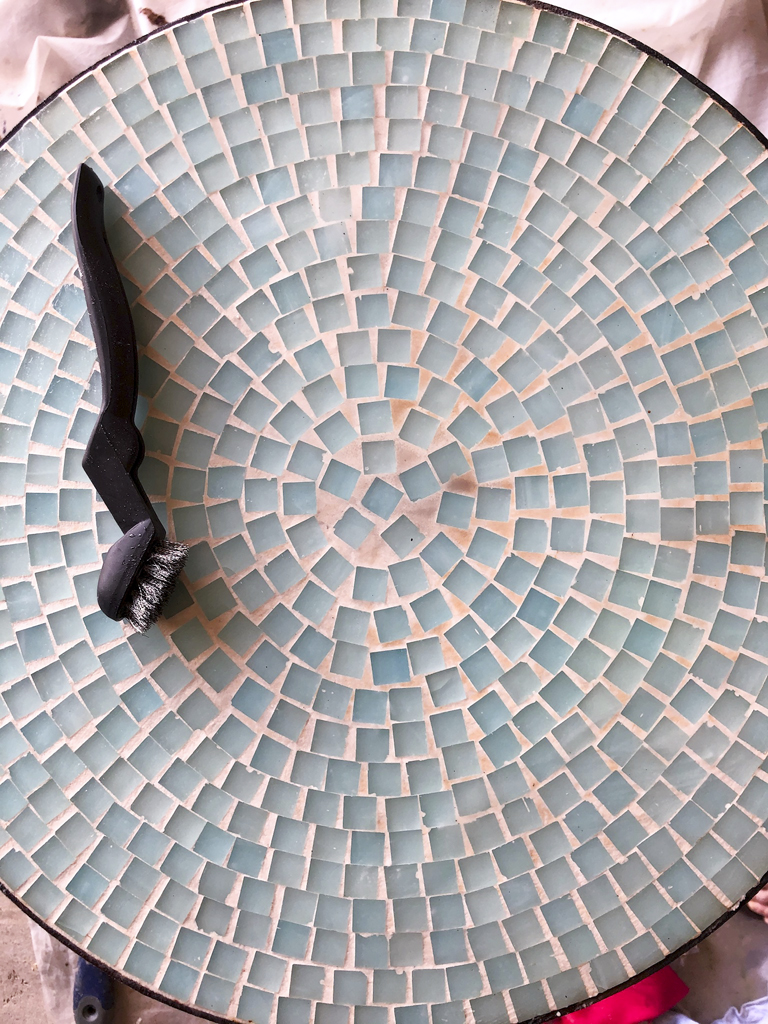
Using several different methods (including baking soda & vinegar, plus baking soda & bleach, along with a stiff nylon brush), I cleaned the grimy grout next, and you’d never guess how bad it once looked.
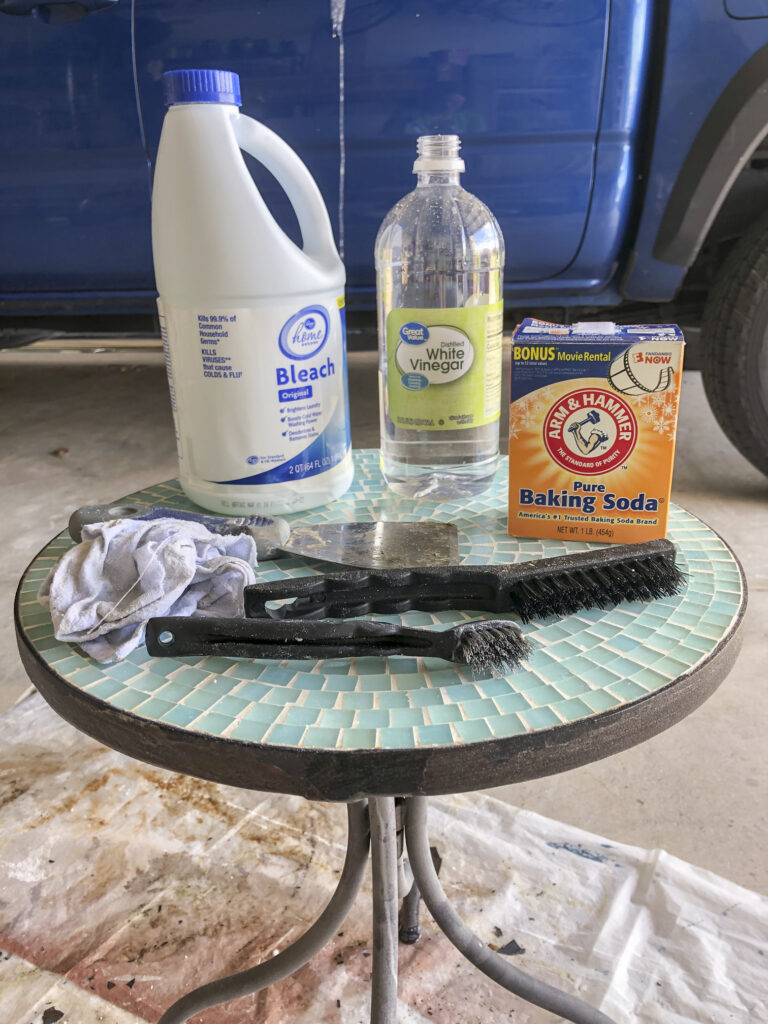

I started with a sort of paste of baking soda and bleach
It took a small steel wool brush plus vinegar and baking soda to get the toughest grime off.
Looks (almost) brand new…and it was completely free.

I initially used a regular black spray paint on the legs and tabletop base, but after a couple of weeks, the rust started to show through, even though no rain can actually touch the table on the covered porch. So I re-taped it and used the same Rustoleum hammered metal spray paint as on the drinks table, and it seems to have sealed in the rust well better. And as it turns out, the black always looked a little too harsh to me, and I like the slightly softer color better.
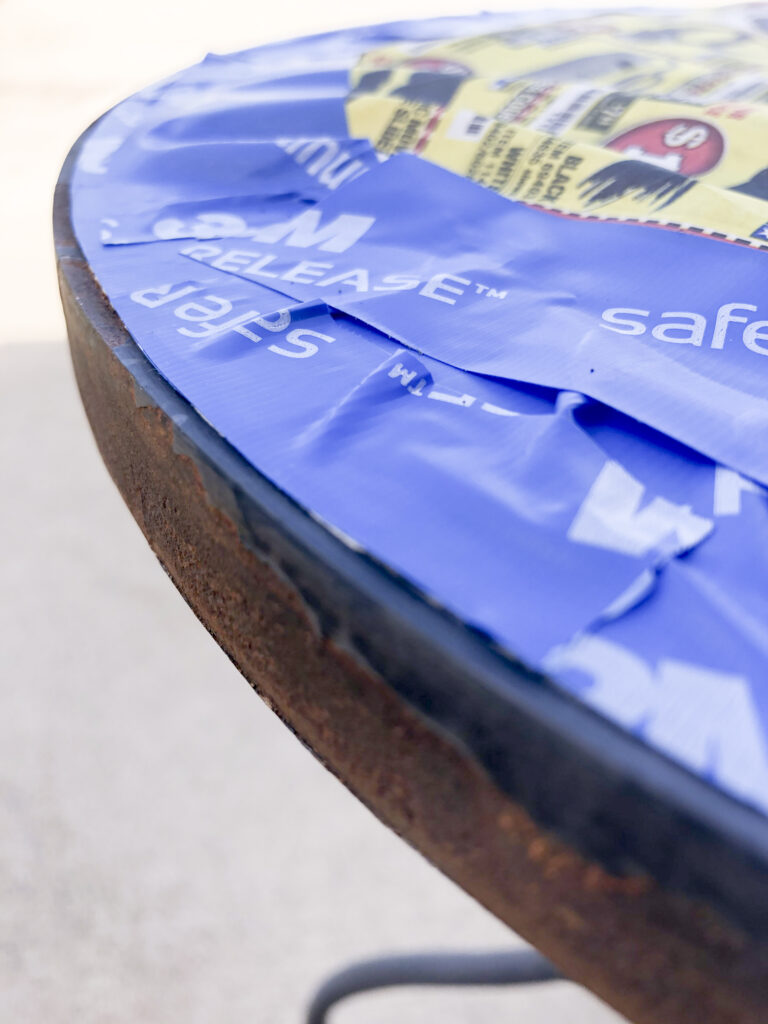
This was prior to spraying the first time.
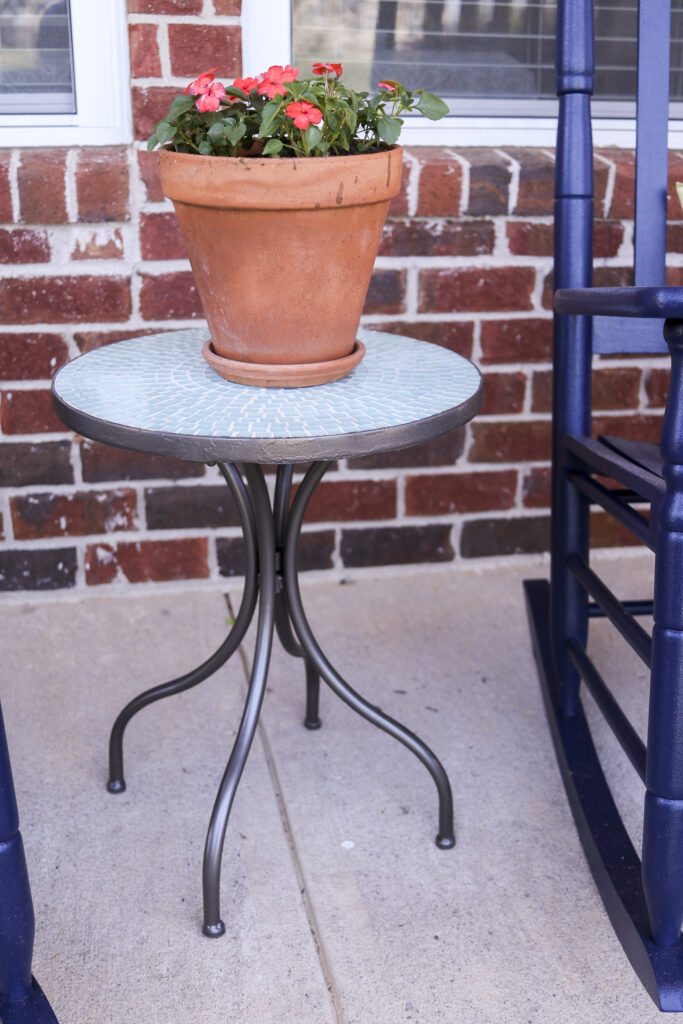
And here’s the finished FREE table!!
This was literally a completely free project that took maybe an hour and a half total, including finding various supplies around the house to bring outside to clean it up. Next time you have a piece of furniture you want to send to the curb, think about whether it’s something you could invest a little time into to save. If you’re not the DIY type, give to a friend who’s willing to do the work, or sell/donate it and someone else will! One man’s trash can be another’s thrift store score (or roadside treasure).
Free update!
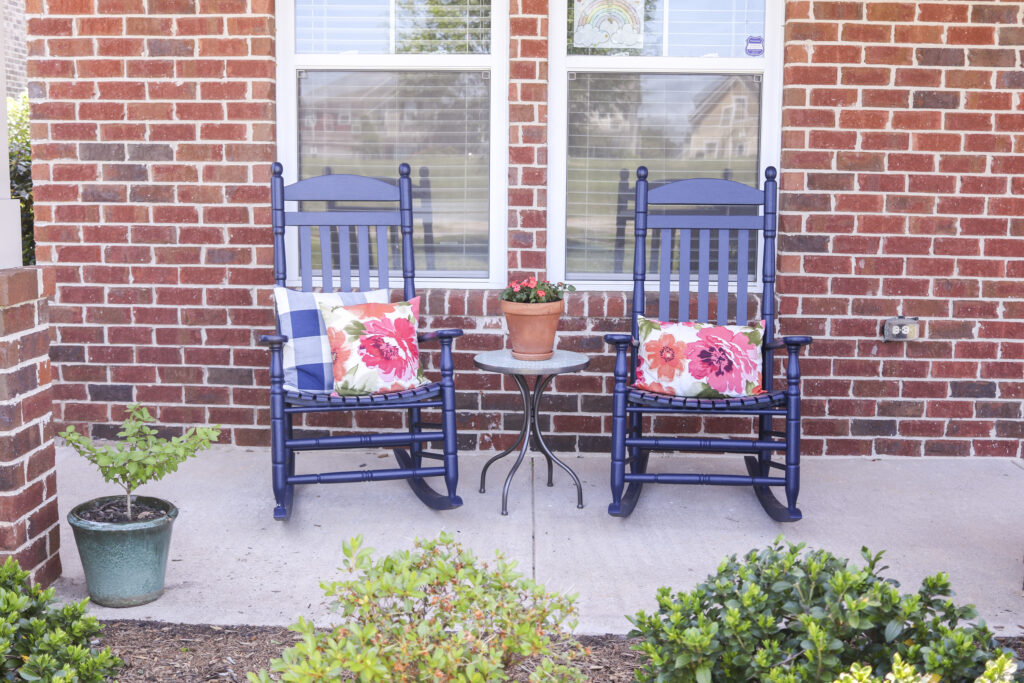
Clean and Paint the Rocking Chairs
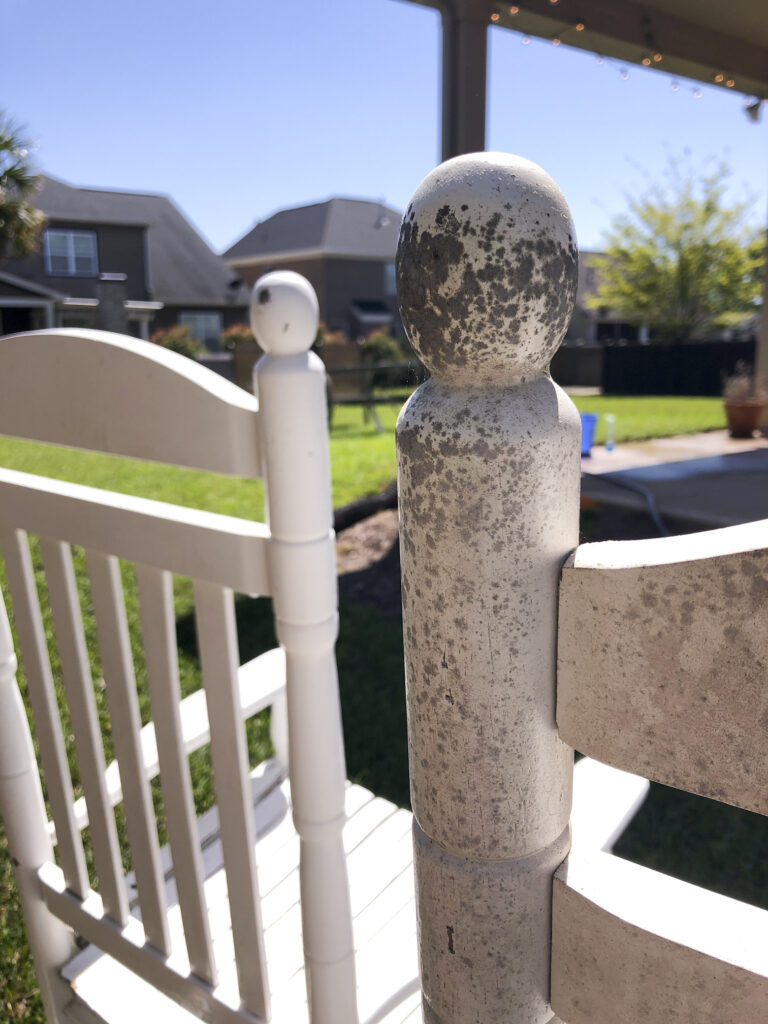
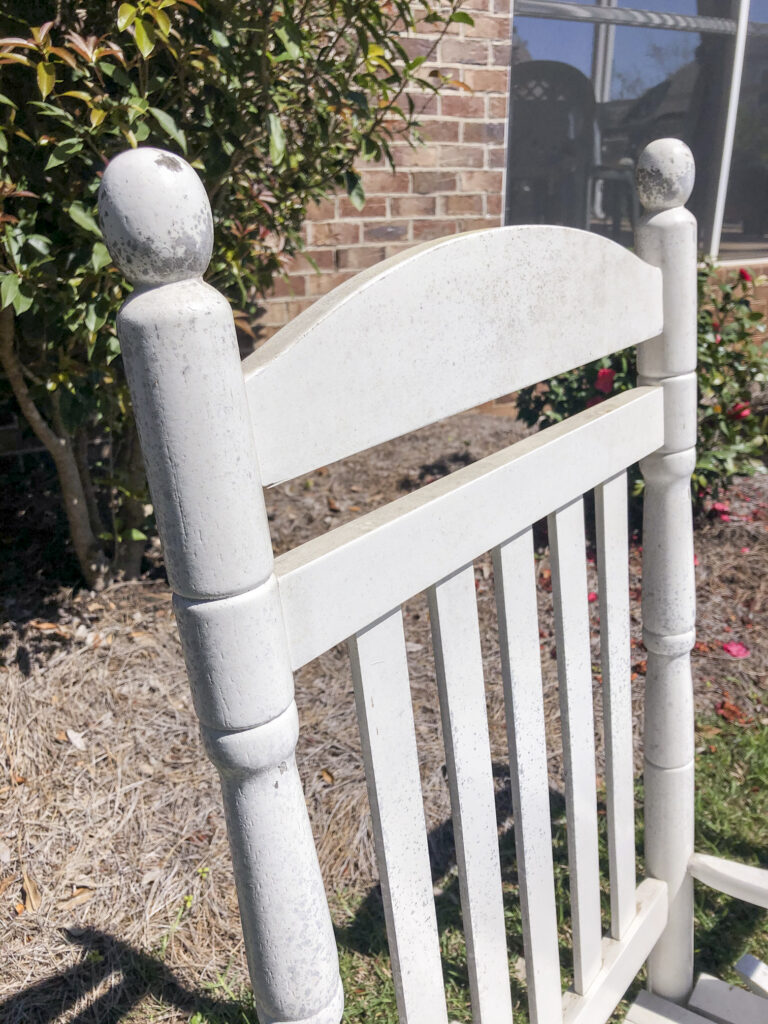
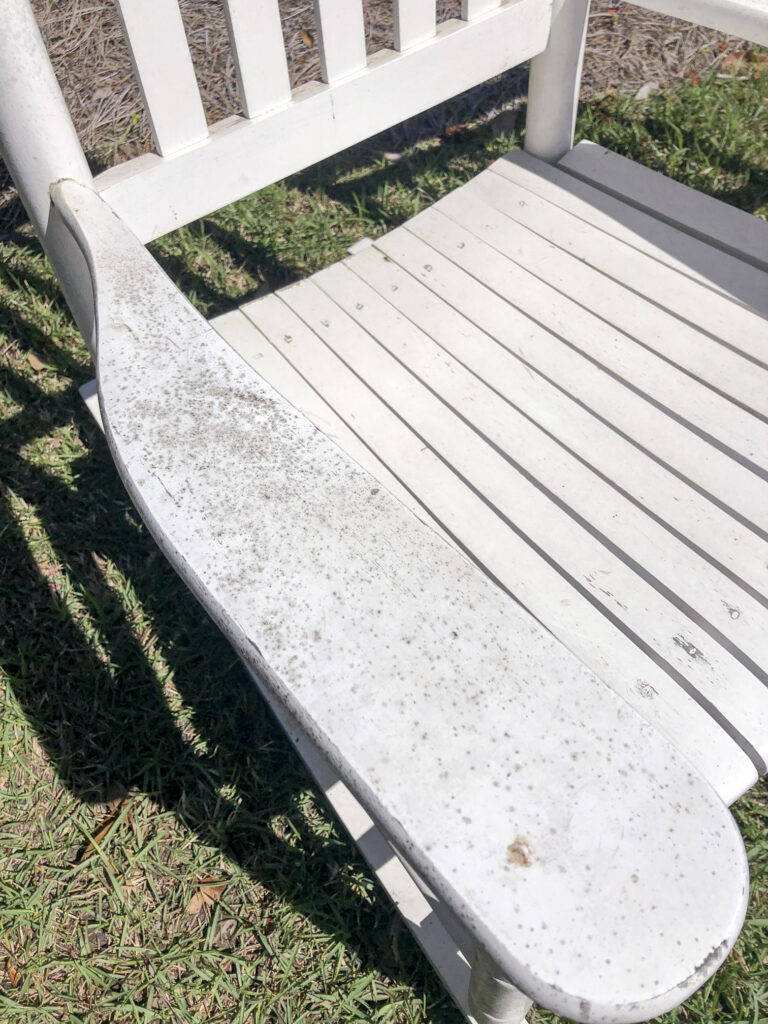
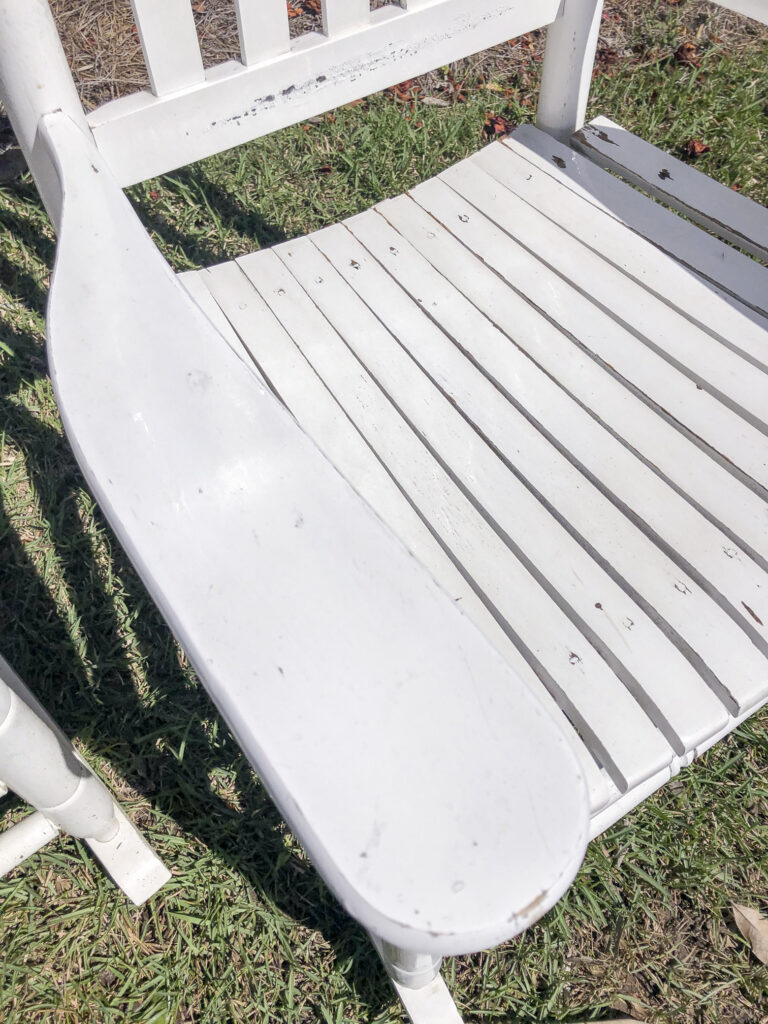
Our rocking chairs were my Christmas gift from the Mister back in 2009 soon after we bought our first house. They’ve always been on a covered porch, but they were still exposed to the elements for over 10 years, and it showed. They were covered in mildew and their factory coat was chipped in a few places.
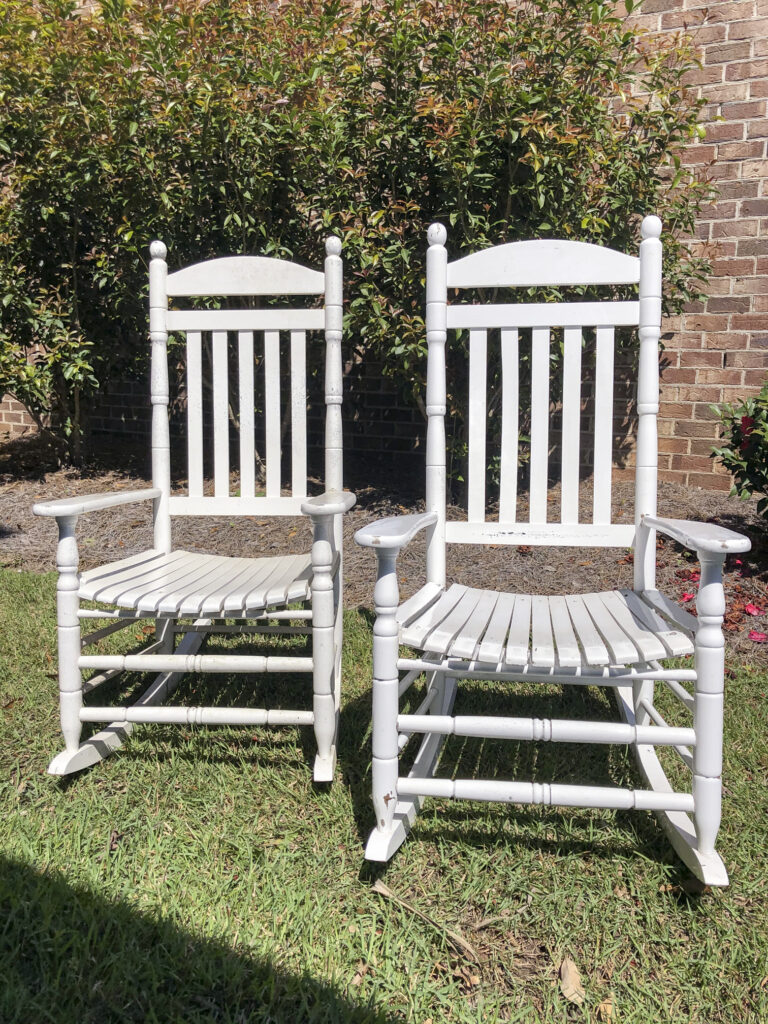
The chair on the right is clean (but chipped). The chair on the left is dirty (but the bright sunlight sure helps).
See it now? DIRTY on the right; clean on the left!
One sunny afternoon, I put on my rain boots and headed outside with some dish soap, a big bucket, a car washing sponge, and an old toothbrush (I’d strongly recommend bringing your own toothbrush if you ever visit us. Or if you forget, don’t ask if we have an extra one!).
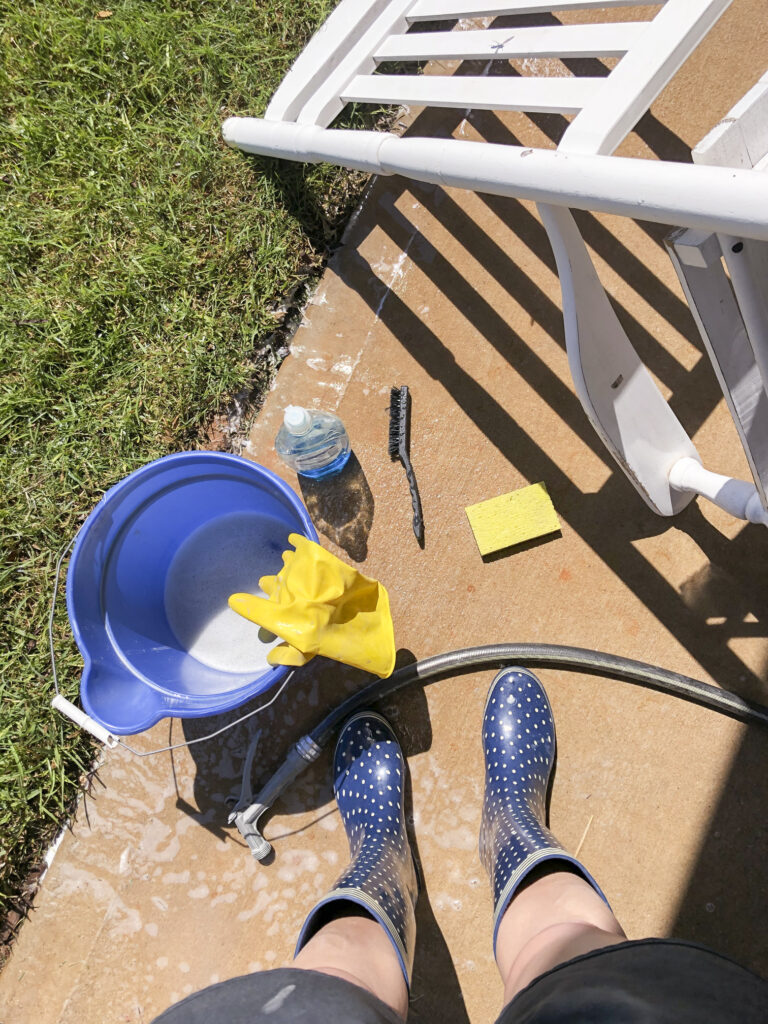
After about an hour’s work per chair (and another hour or so during which I also cleaned all of our back patio furniture), they were bright white.
Ew. You want me to sit on that?
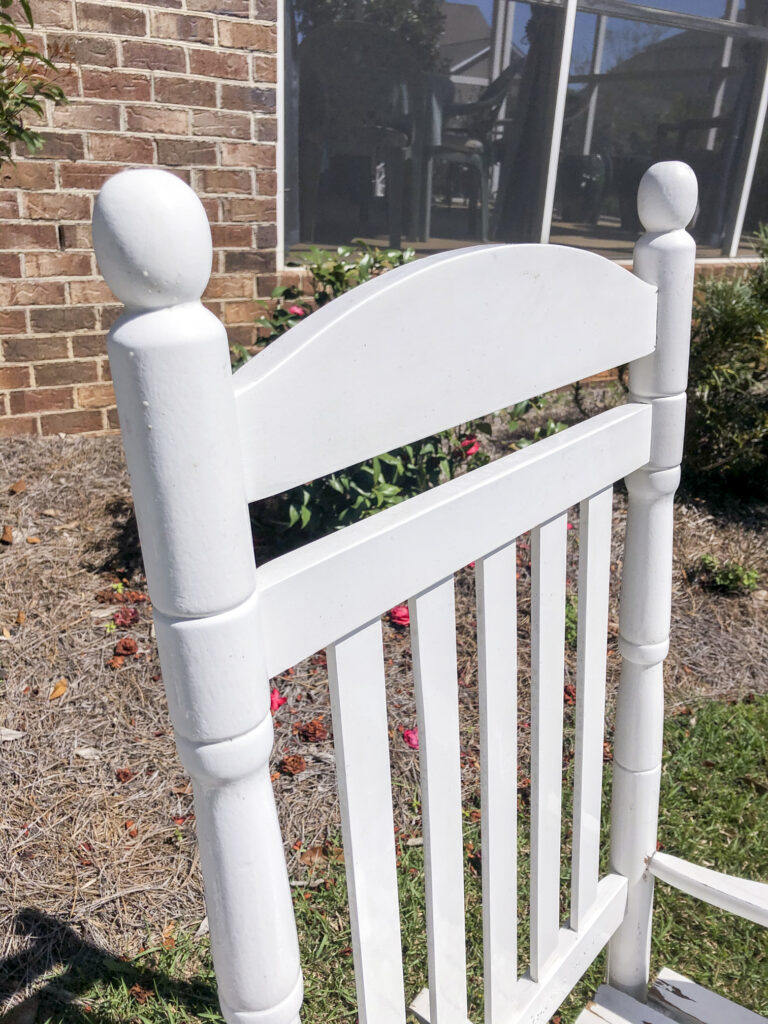
Well, that’s better.
Not very inviting.
Not quite so gross!
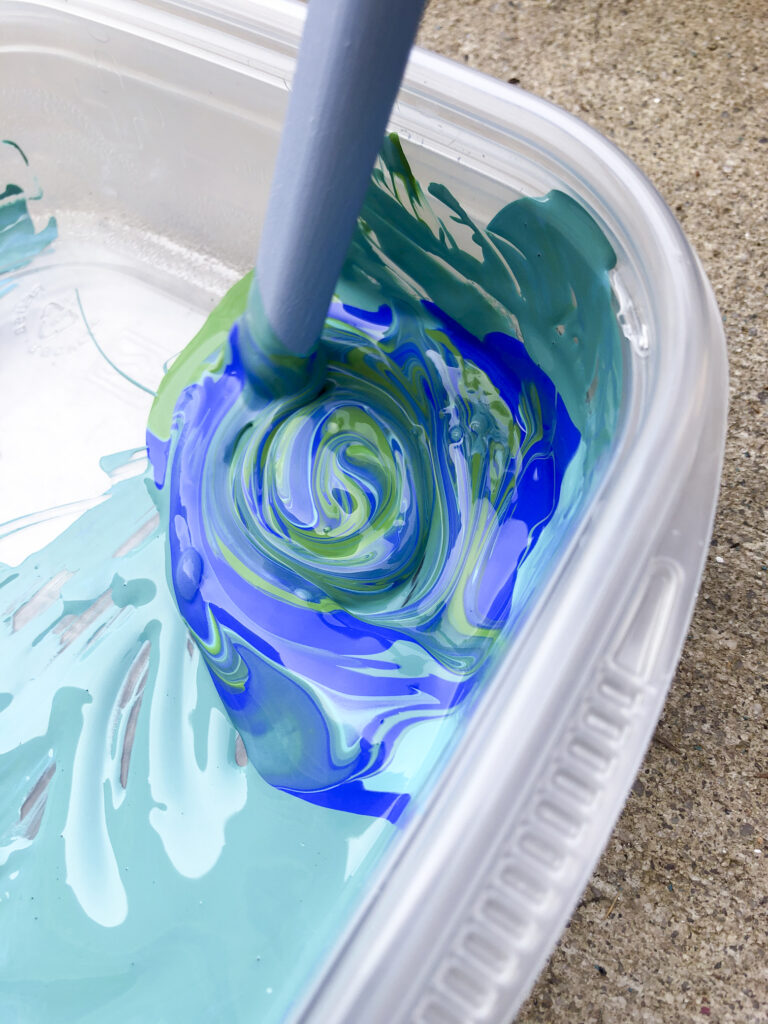
Since the finish was still chipped, I decided to go ahead and paint them. The only exterior paint we had enough of was Sherwin Williams Anchors Aweigh (a dark navy), so that’s what I used.
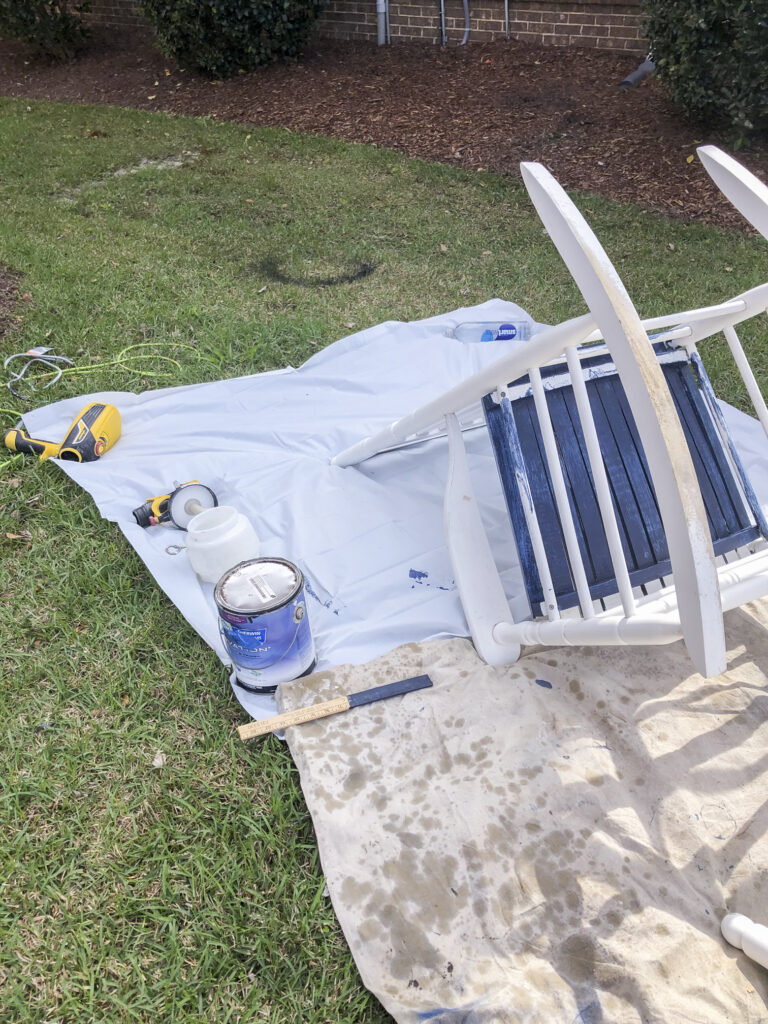
When it became apparent that painting with a brush would take a year, I pulled out our paint sprayer. It helped a lot but got a little gloopy so I still had to paint another coat with the brush.
A combination of the paint sprayer and brush painting got the job done, and I think they’ll last at least a few more years now!
Free update!
Repaint the Doormat
I love our cheery little ‘Hello’ doormat (from Target last September), but months of use have worn the design down, especially in the center. We’ve had it less than a year, so I decided to repaint it instead of buying a new one.
More like, “Goodbye!” OR – we are so popular that our doormat wore out after only six months! 😀
While nearly every blog post I read about painting coir doormats specified using outdoor acrylic craft paint, all I have in my collection is just regular craft paint. But our door is under a covered porch, so the mat is fairly well protected from elements like sun and rain. So I figured, what the heck? I’ll give it a try with my regular craft paint and the worst that should come out of it is that it’ll quickly wear off. If it lasts through the summer, I’ll have gotten a full year’s use out of a $9 doormat. I’ll take that!
How to Repaint a Faded Coir Doormat
I picked a few blues and greens and mixed them up. As a happy accident, the color I mixed was a pretty close match to the original dark turquoise (I was actually going for something slightly different).
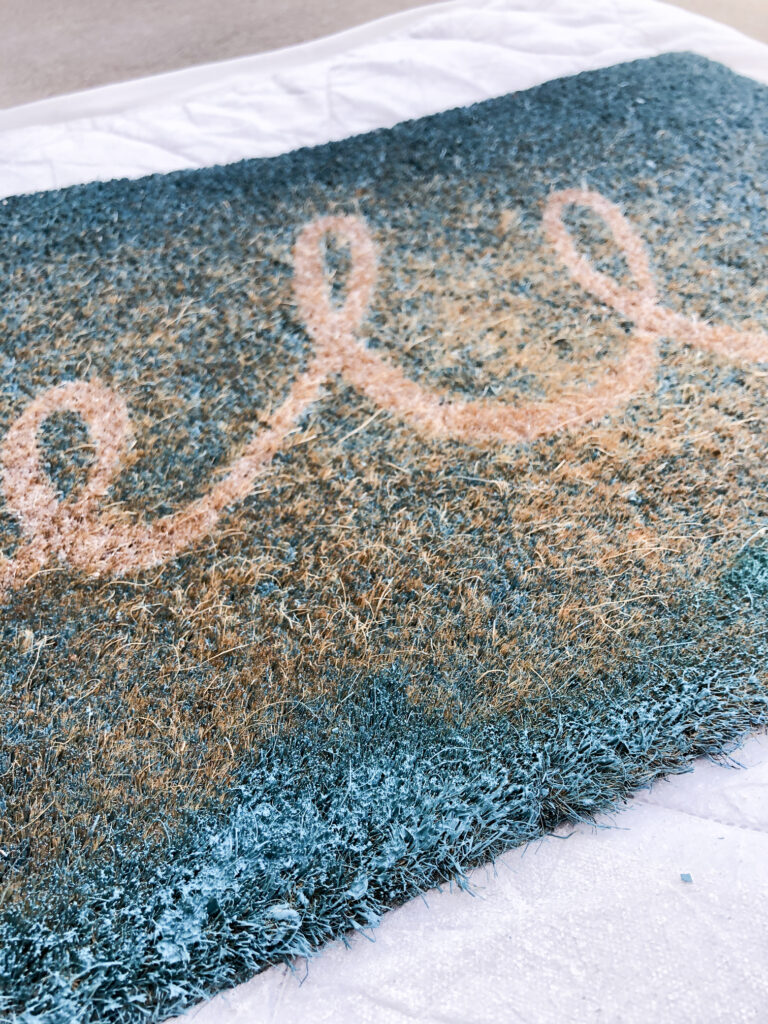
So I was able to just touch up the faded areas instead of painting over the entire mat with my almost-exact match. Accurately retracing the ‘hello’ script with white required a little bit of effort, but the sunshine and a podcast helped to pass the time.
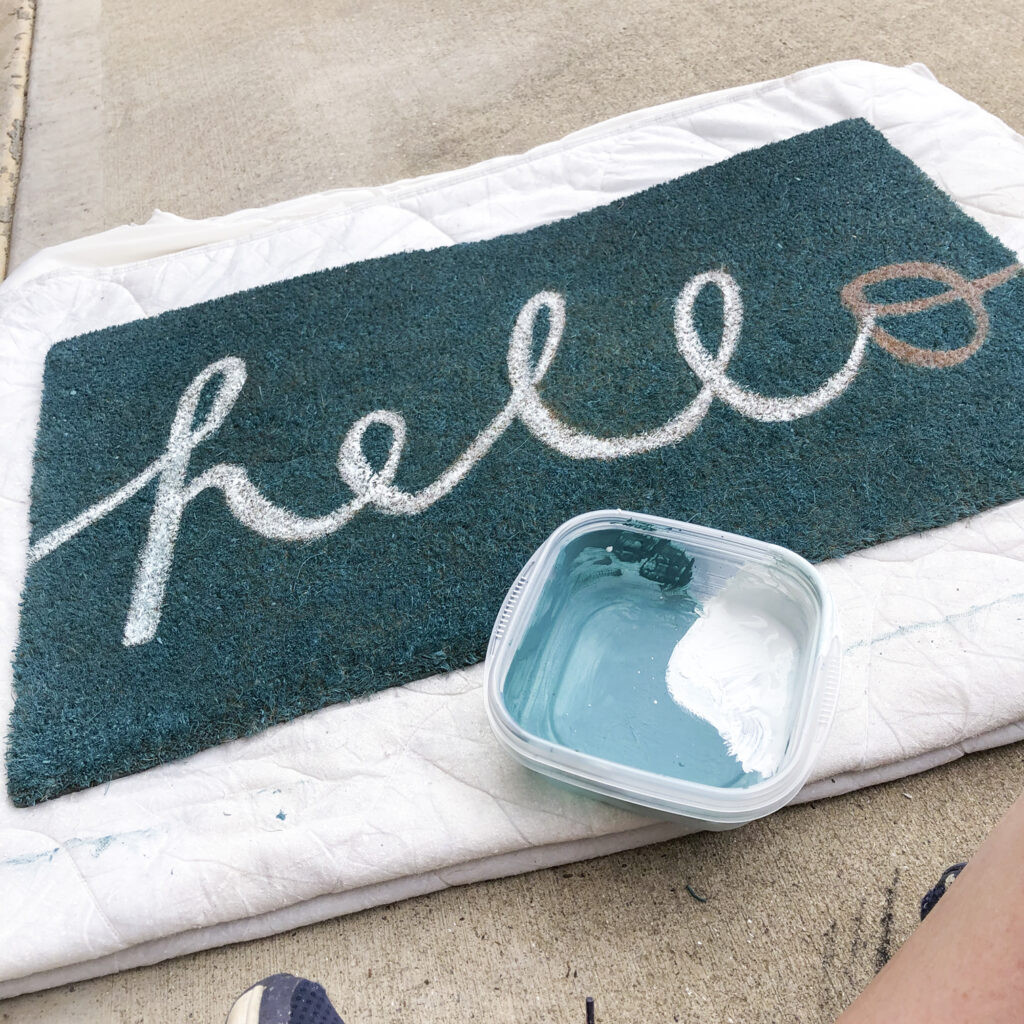
In all, painting the doormat took about an hour, and I’m interested to see how it holds up this summer.
Free update!
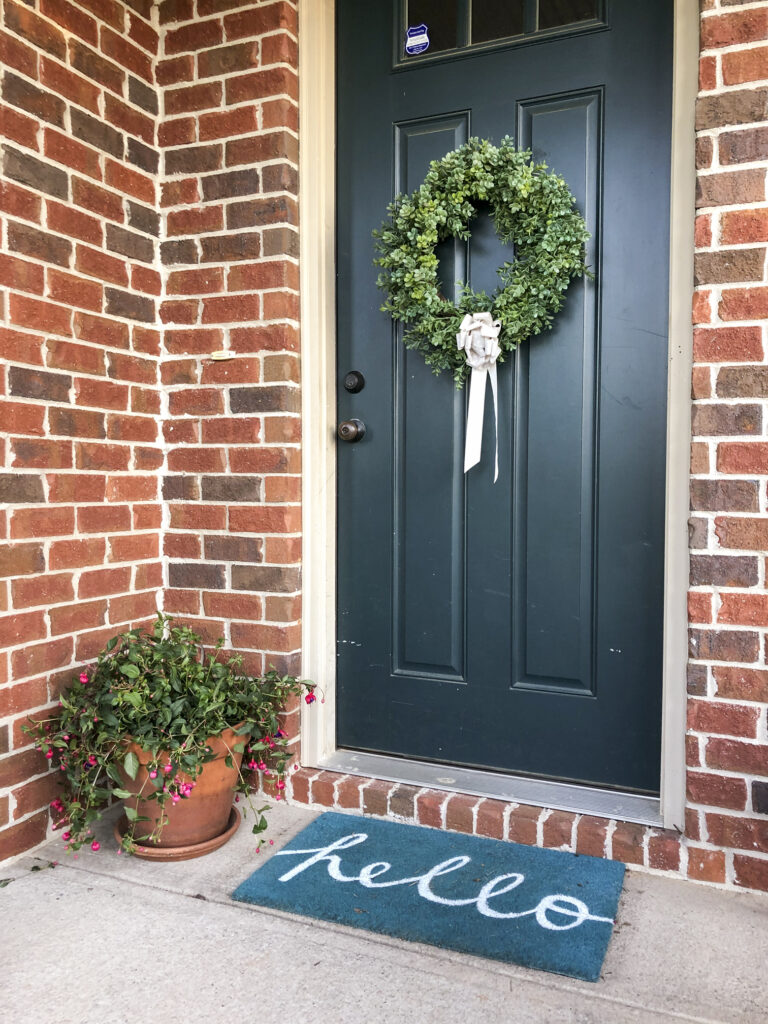
Looks like new. It also makes the fact that the front door needs a new coat of paint much more apparent.
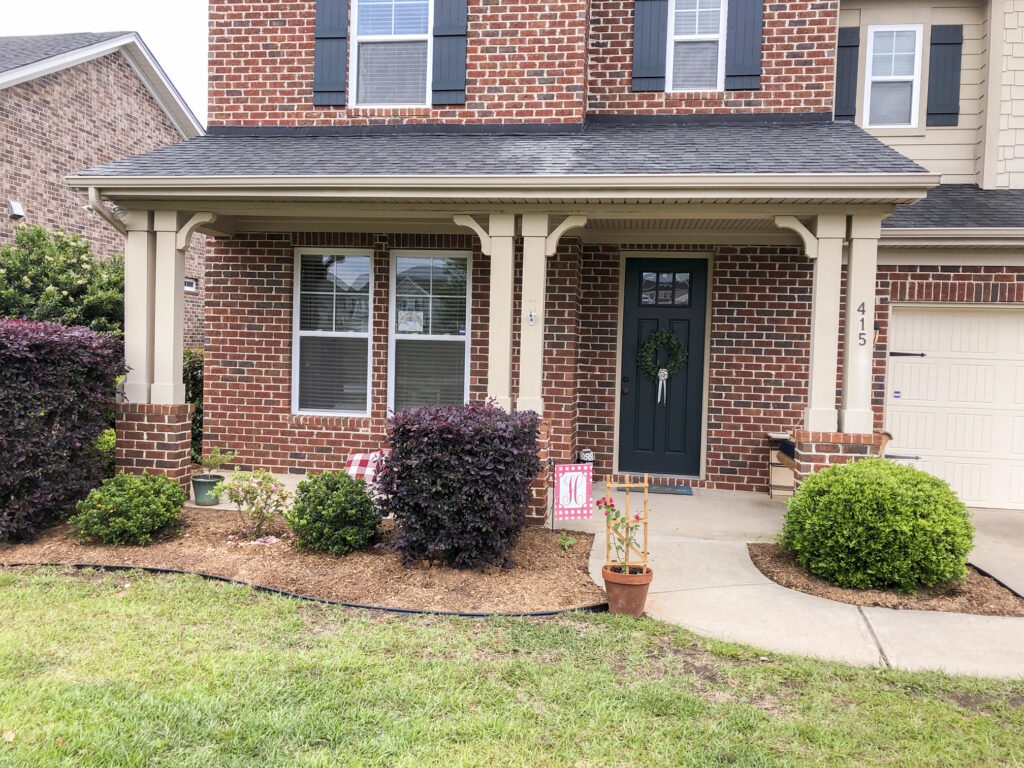
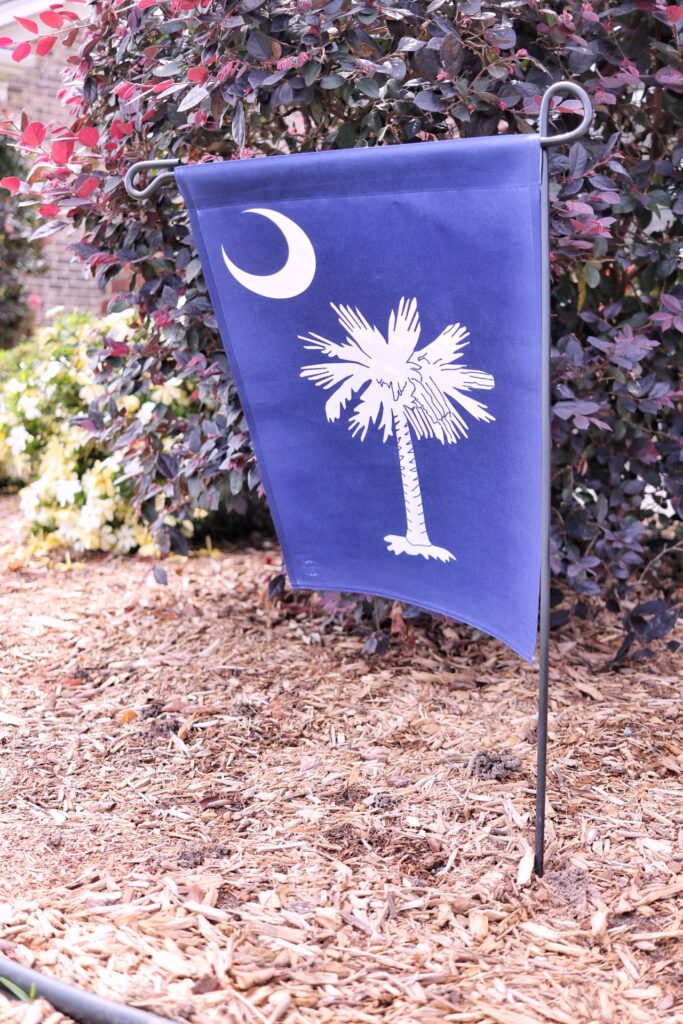
Replace the Garden Flag
Probably the quickest and easiest fix was to choose a new garden flag. We have plenty of good options for fall and winter, but not a great summertime/year-round flag.
The ‘H’ flag has been on display for about a year and a half now and is very faded.
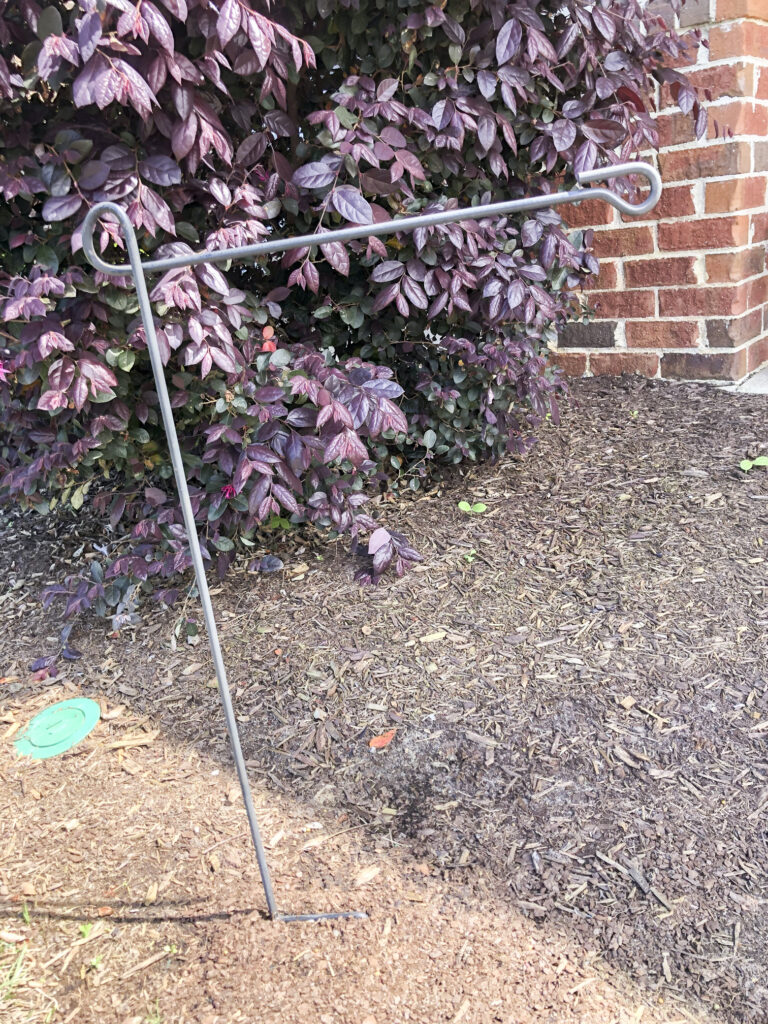
The faded little flag holder got a quick update with shiny black spray paint while I waited for the new flag to arrive.
A South Carolina flag seemed like a good choice!
Clean the Cement
One to-do list item for the DIY front porch refresh that I decided not to complete was power washing our cement. It looks a little gross, particularly under the porch swing, and it could use a good cleaning.
Another time!
But our power washer is pretty old and cheap, and cleaning a space this size with it would take a considerable amount of time. So instead, I swept it off to take my photos (and by swept it off…I mean I kicked the larger pieces of mulch away and hoped the rest didn’t look too bad!) and we’ll power wash it one day with a new power washer when the one we have dies.
I also considered painting a little border with the porch and floor paint I used to stencil the linoleum floor in our old powder room, but as I chose not to pressure wash it, this didn’t seem like a wise choice.
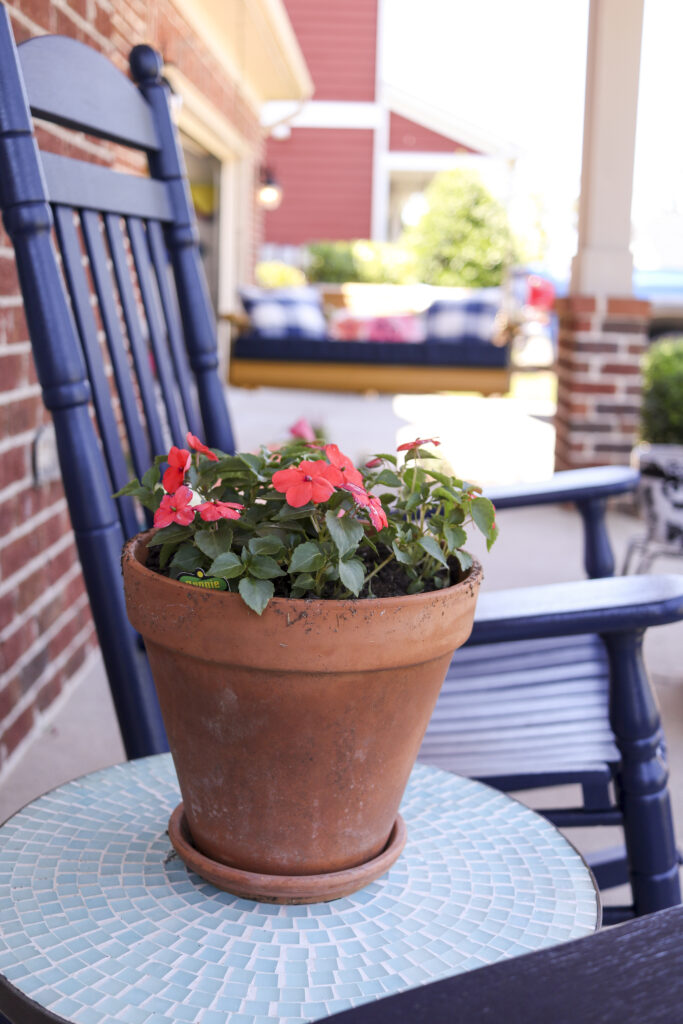
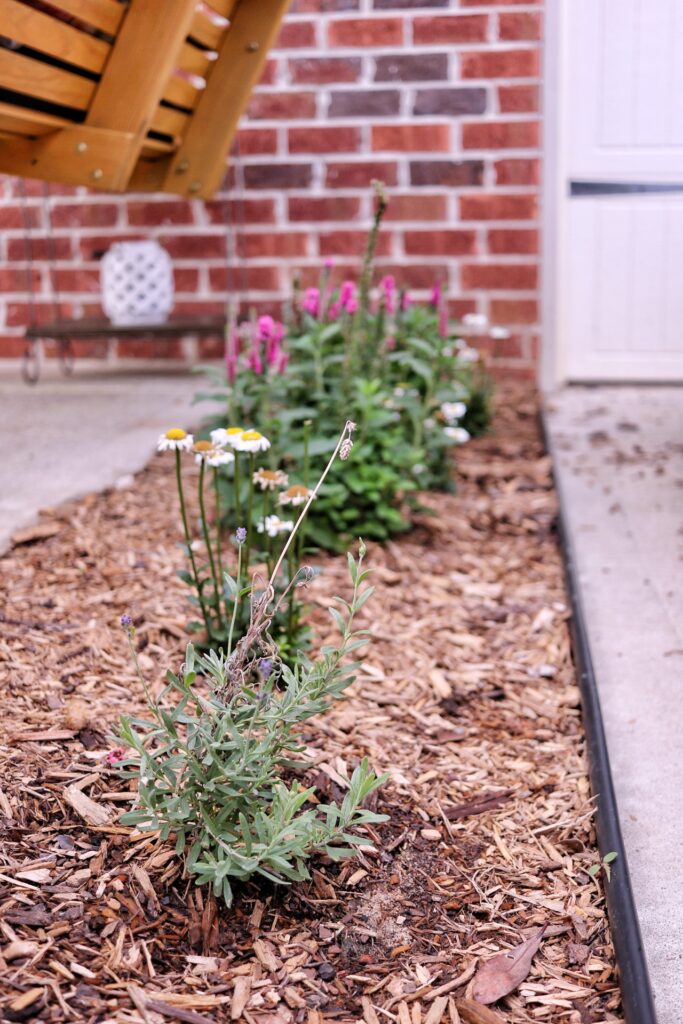
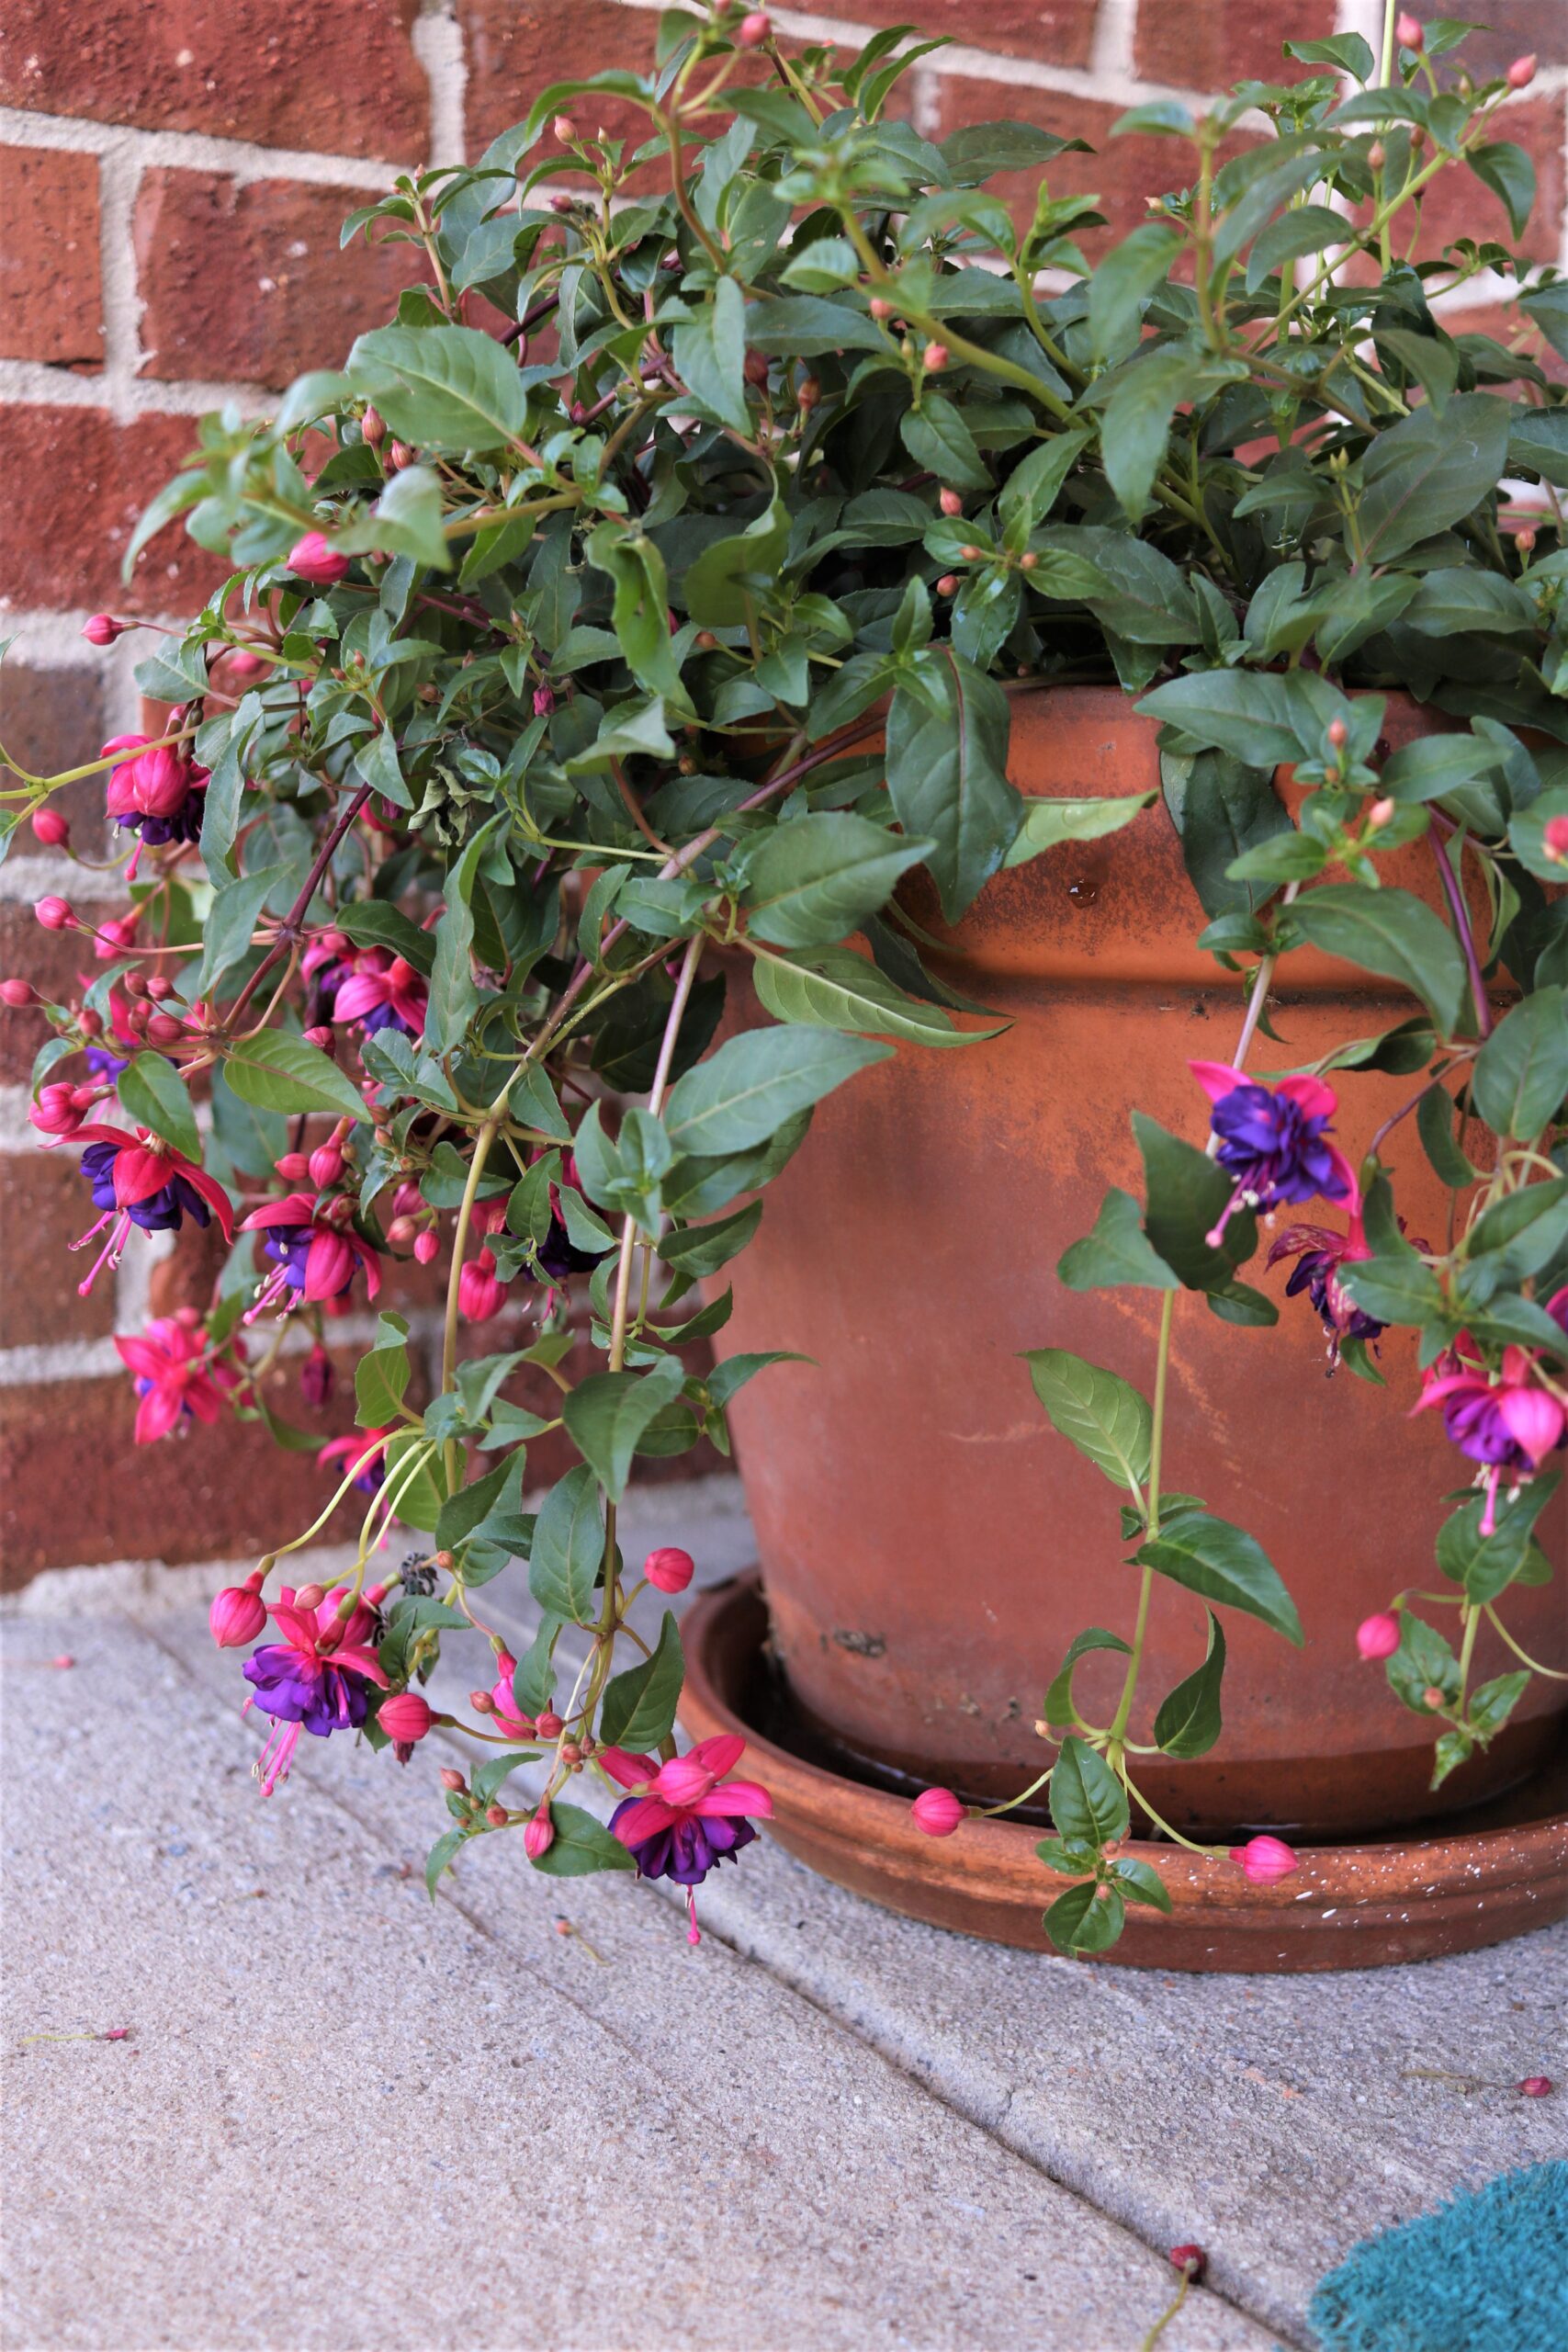
Pretty New Flowers
What’s a DIY front porch refresh without some flowers? With the exception of a couple mostly shade plants for the pots on the porch, I purchased primarily perennials for the garden area behind the swing since they’ll come back year after year.
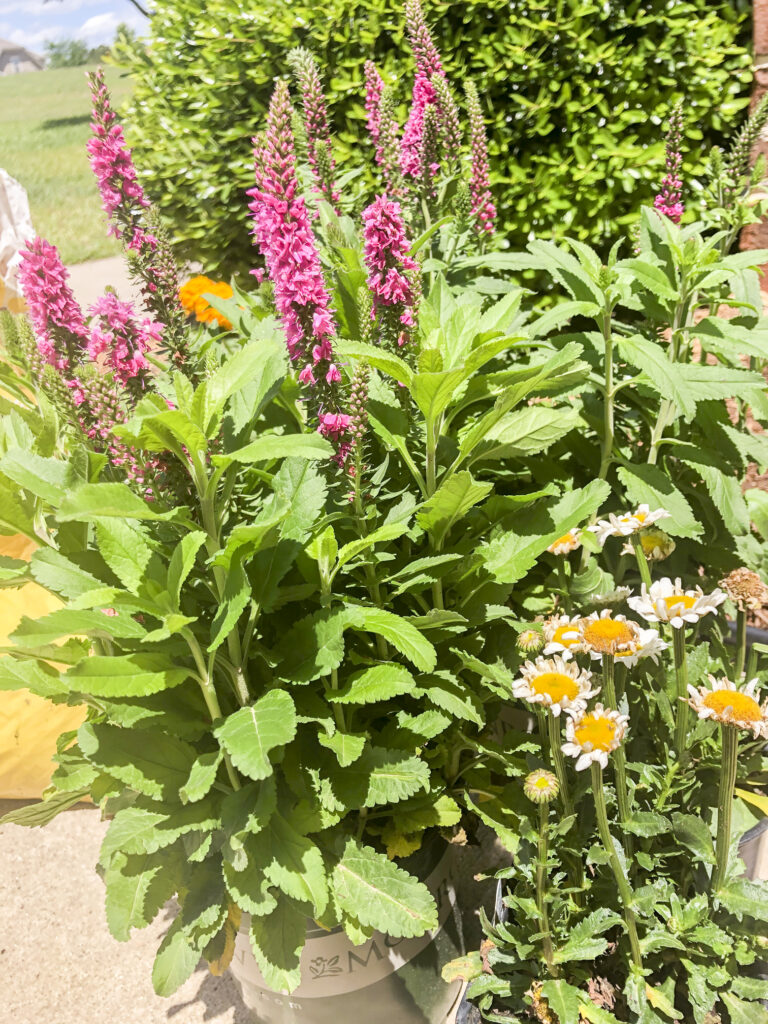
But the lighting here is tricky. The left side of the little garden gets 6 or so hours of direct harsh afternoon sun in the spring/summer. The right side gets about 4 hours of direct harsh afternoon sun in the spring/summer.
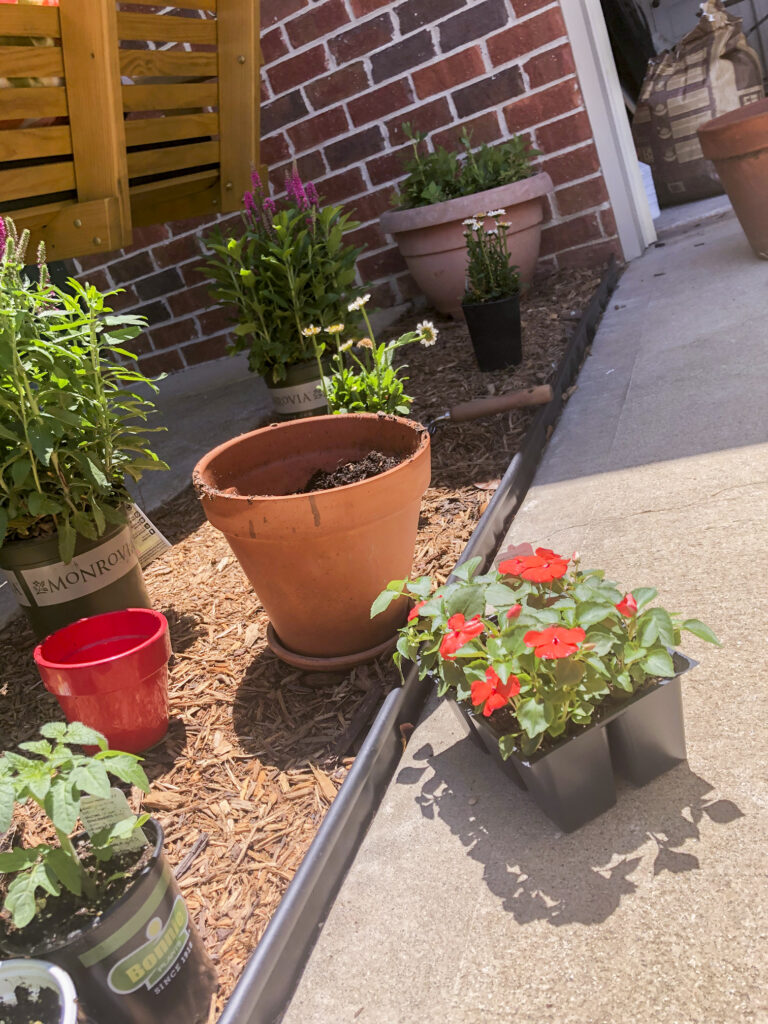
But in the winter, the entire area gets no sun at all. I’m not sure what that will do for these full-sun flowers, but we’ll make adjustments if necessary.
English Lavender
I have a very poor track record with lavender…but I’m hopeful this plant will fare better than previous ones based on its success during the first few weeks in my care.
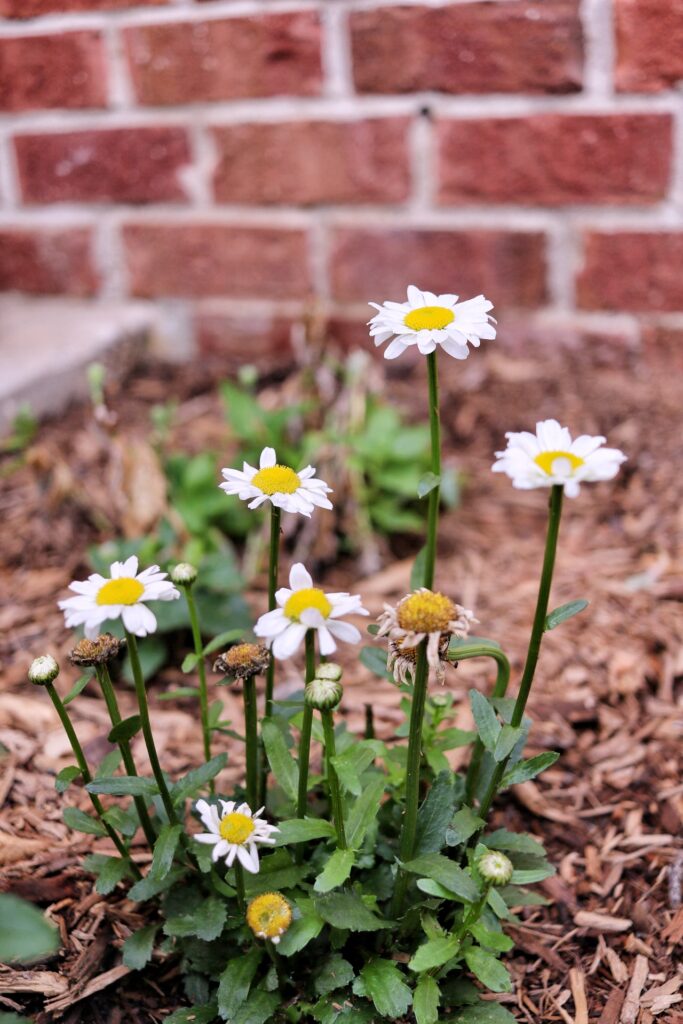
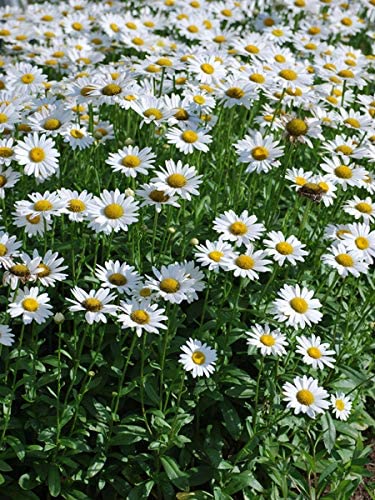
Shasta Daisies
The new flowers were by far the most expensive part of this DIY front porch refresh, but there’s not a very easy way to DIY flowers, is there?
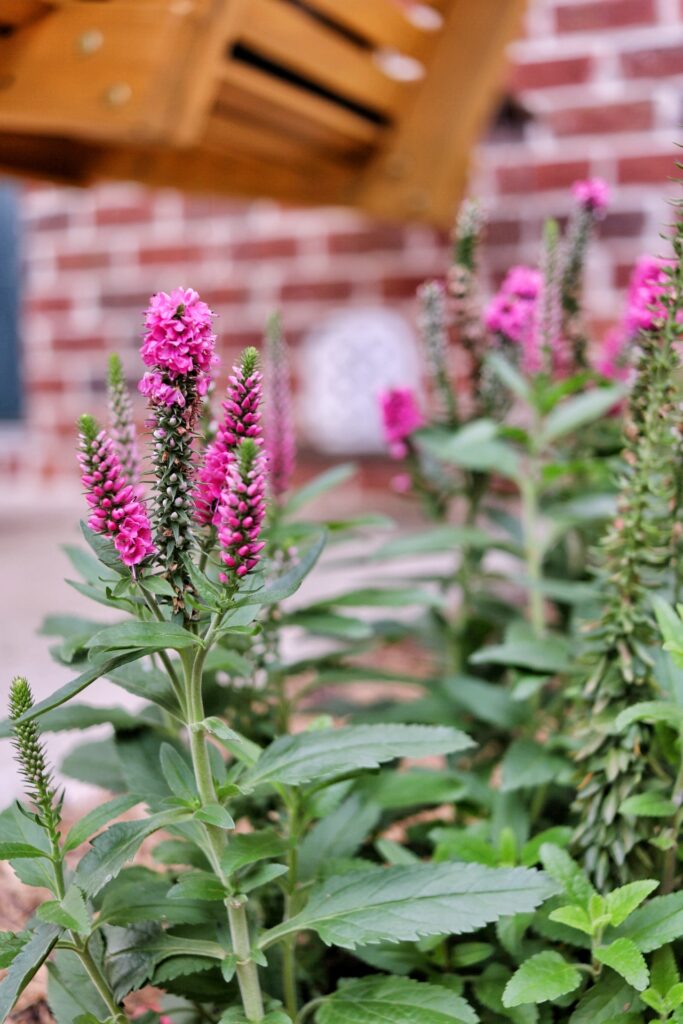
Vernique Rose Speedwell
Actually…there is.
The balloon plant at the far right of the garden came from my parents’ yard last spring and has sat in that pot, completely ignored, ever since. It flourished in the pot, but after I planted it here, it looked for about two weeks like I’d killed it.
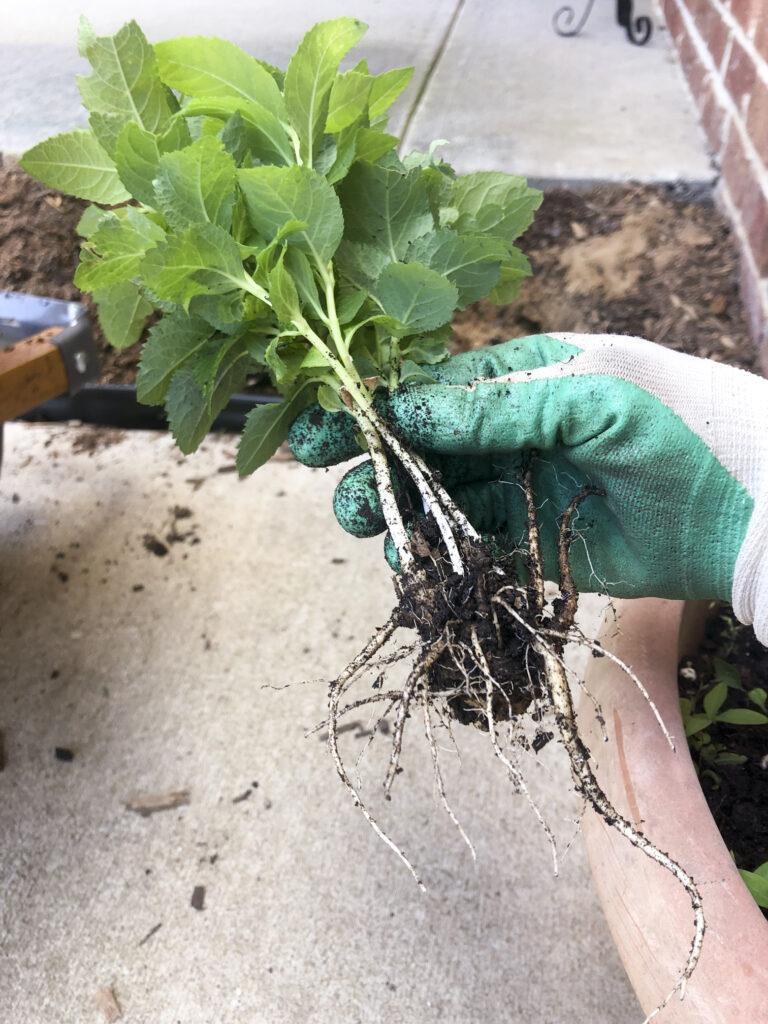
I don’t know whether I was too rough with them, or if it was the fact that they didn’t get any water for a few days after the transplant (oops). Either way, they are doing better now!
I’m happy to report it looks like it’s bouncing back now. So transplanting is one option for DIY-ing your flower garden, but you have to find a source for the flowers first.

There has been a lot of new growth on the balloon flowers I’d almost given up for dead…and I can’t wait to see those little blue-purple flowers open up soon!
I don’t recommend sneaking around in the dark and digging up your neighbors’ overgrown flowers…so ask first! And if you have daylilies or other bulb plants in your yard, they often need to be separated so that’s a good source, too!
New plants, $53.81
How’s that for $110?
If you only ever get one thing out of visiting my website, I hope it’s this: Just because something is faded or worn, dirty or grimy, or a color you no longer love, doesn’t mean it needs to go to the dump. You also don’t necessarily need to run out and buy a bunch of stuff to make a big change. With a little time and some basic supplies, many (probably even most) things can be made new again. If you’re not sure how, a quick search on Google or Pinterest can usually provide an answer (or several…) for most things!
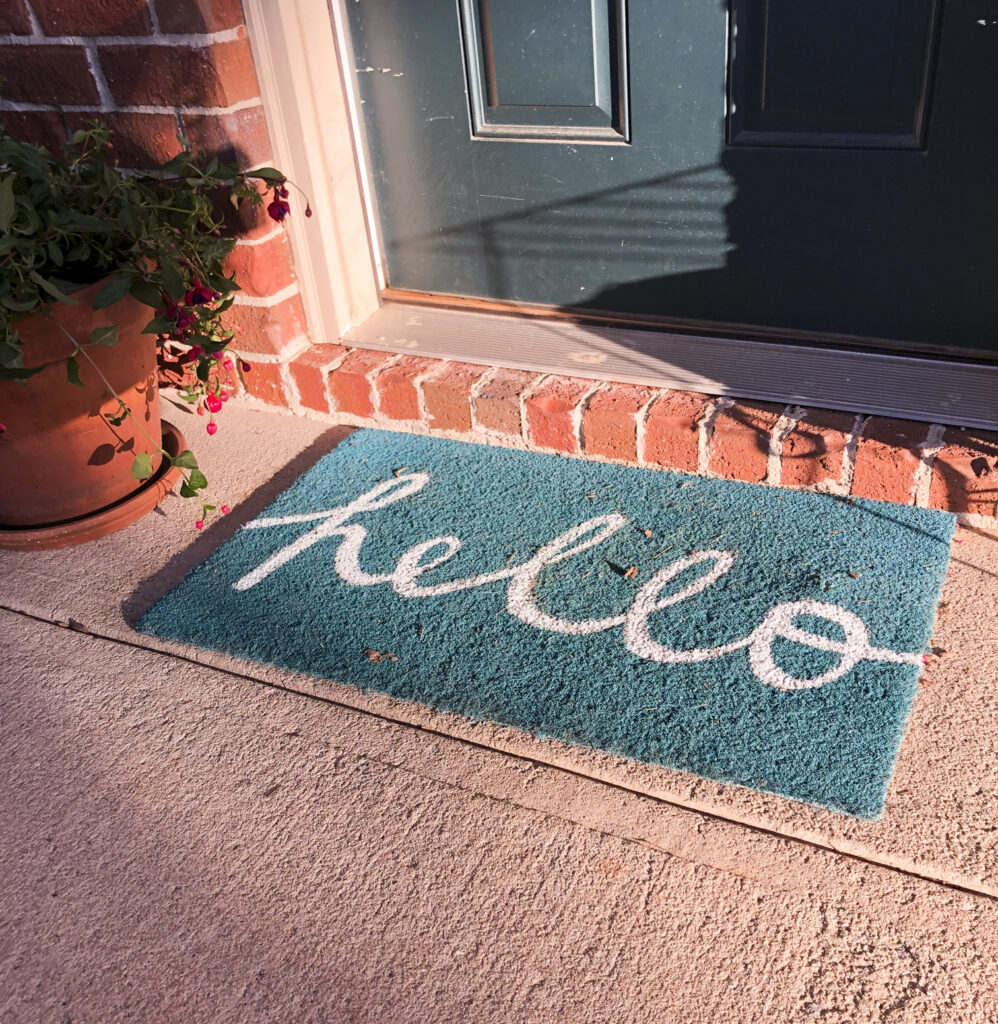
The free doormat looks awfully pretty in the evening sun.
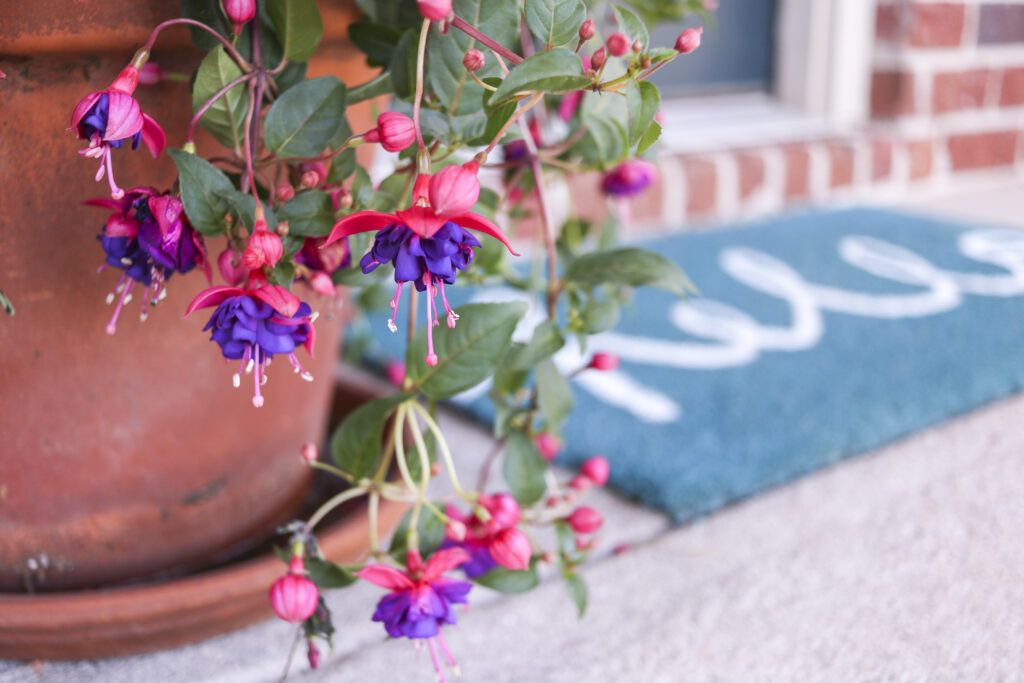
I think fuchsia just might be one of the prettiest flowers out there.
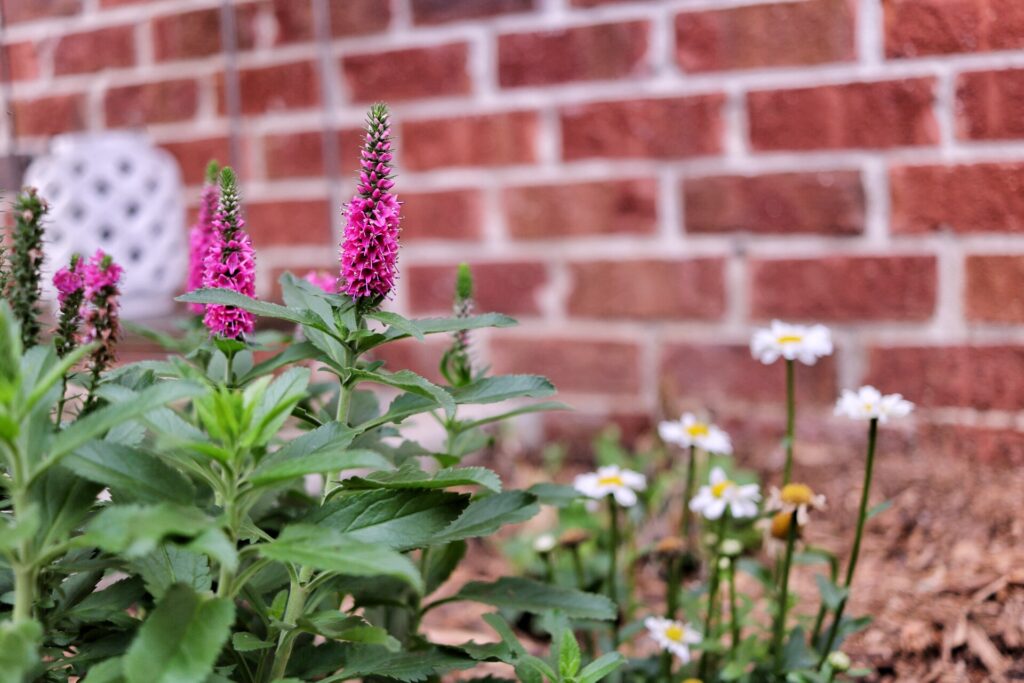
These perennials should come back year after year…unless they sense my black thumb!

The gardenia blossomed last week, so of course I ran back out for another round of ‘after’ photos!

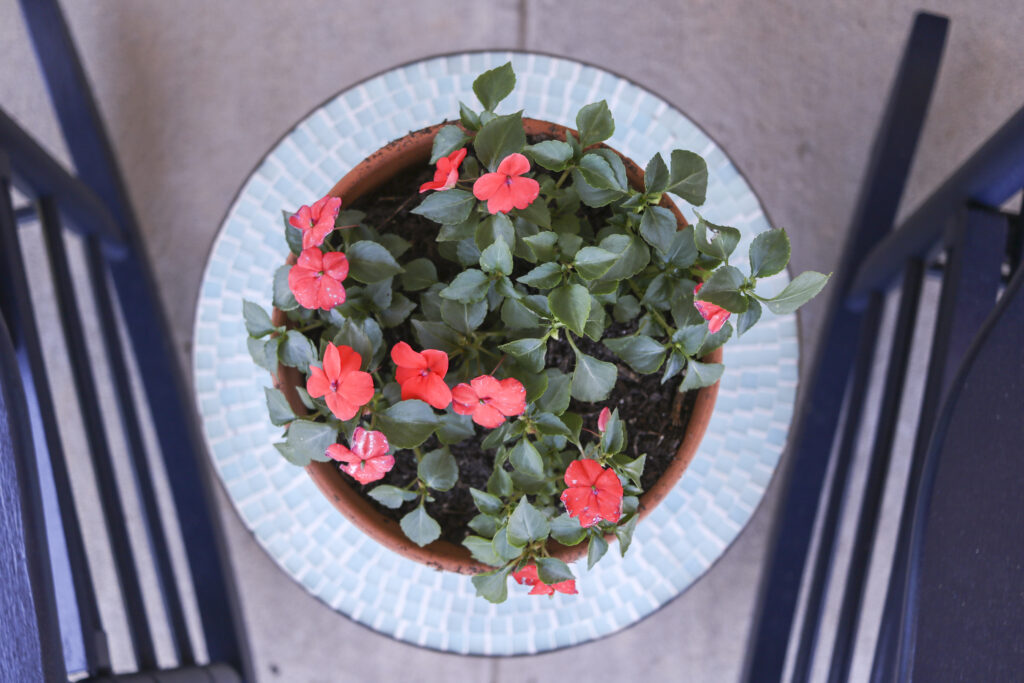
The impatiens gets just the right amount of late afternoon sun and has at least doubled in size in only a few weeks!
Not bad for an almost-free table.
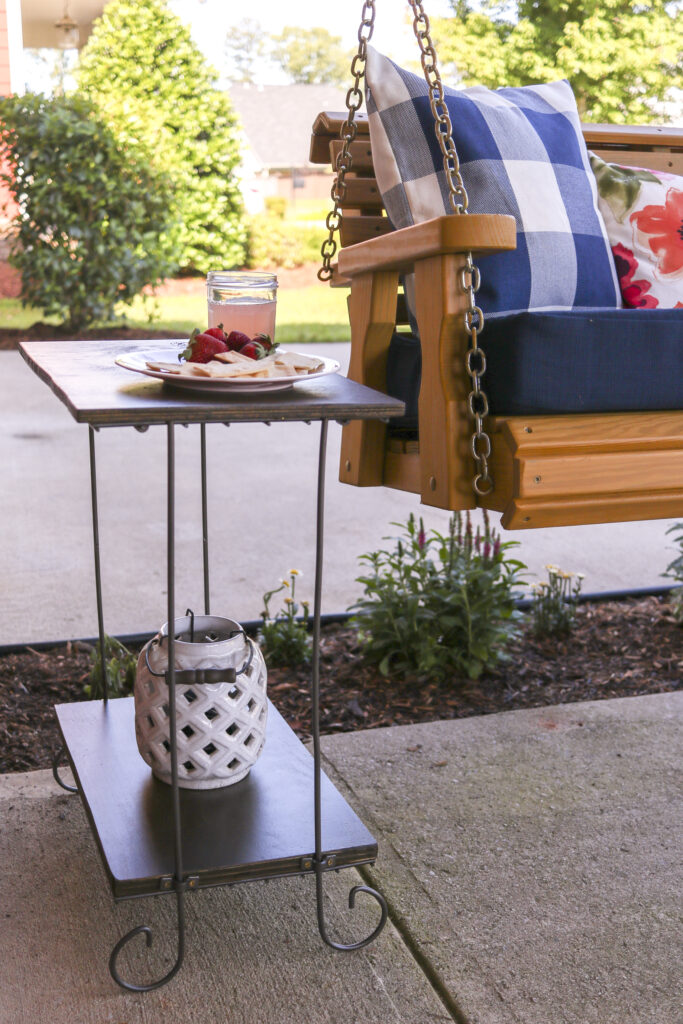
The swing is the perfect place to start the day.
Save These Ideas for Later

DIY Front Porch Refresh Tools + Supplies
Here are all the sources I can share for the DIY front porch refresh, all in one place. Several of the links here are affiliate links, which send a small commission my way if you use them to make a purchase, and again I thank you for your support! I purchased all my plants at my local Lowe’s but in case yours doesn’t carry them, I have included some links to order on Amazon (who knew Amazon sells plants?!).


")


If you’re new around here, thanks for stopping by! Please take a moment to sign up for my email list to receive ideas for free and inexpensive ways to make your house feel like your home, delivered straight to your inbox! 🙂
Laura
Save on Pinterest!