Labor Day weekend took on a whole new meaning this year when our firstborn surprised us by arriving three weeks early. We chose to wait until delivery to find out whether we were having a boy or a girl and were so excited to finally find out that we had a sweet baby GIRL. It’s a moment we’ll never forget, and the surprise was so worth the wait!
The past month has been a wonderful, busy, sleepless blur adjusting to life as parents. Neither of us really knew what we were in for – which was probably for the best! I haven’t spent much time around babies before, and I was worried about nearly every aspect of caring for an infant. It’s amazing how you just kind of figure it out. That said, there have been several tearful breakdowns fueled by sleep deprivation, pain, and hormones, but overall the good parts of the first month far outweigh the struggles.

Our sweet little girl, now somehow 5 weeks old!
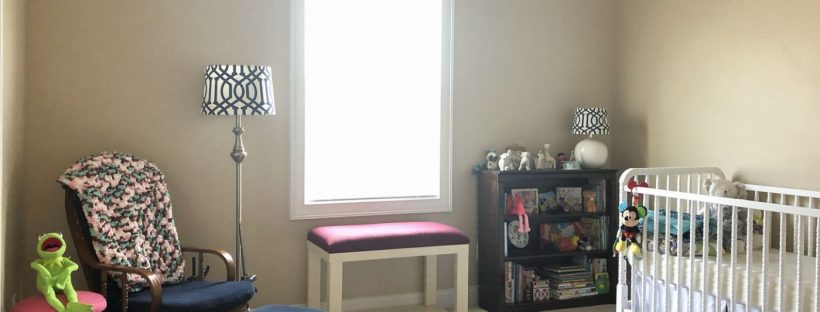
Since we only moved into our new house in late June, we used our time prior to baby girl’s arrival to get as much as possible into a usable and functional condition instead of worrying about anything looking pretty – including her bedroom. Not knowing whether we had a boy our girl coming made it so much easier to control our purchases (It’s easy to leave behind cute outfits and decor in the store when you don’t know!) and not stress over creating a beautiful or fancy nursery that the child wouldn’t appreciate yet at the expense of making sure spaces like our new kitchen were in a usable state. But…
The Plan: Vintage Toy Neutral Nursery
Now that she’s here, we want to take the room from functional to fun. While this is probably the busiest time in my life – dropping what I’m doing every 2-3 hours to feed a hungry little girl – the One Room Challenge is a great motivation to focus on making her room a little more special.
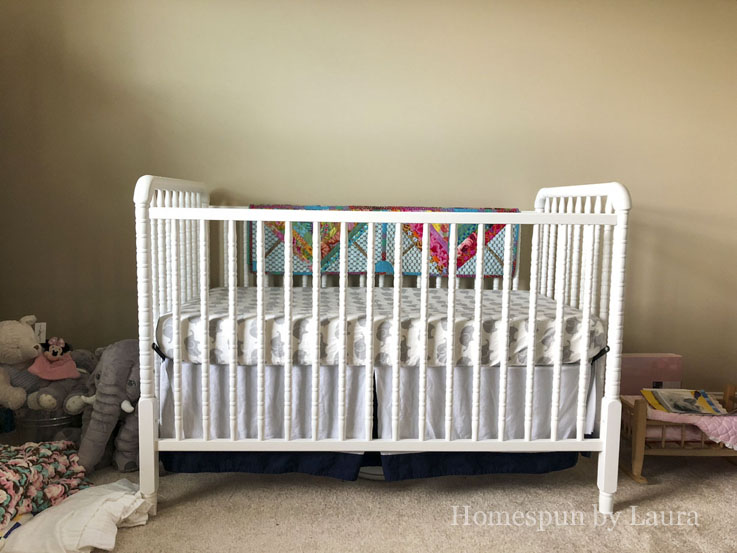
I loved the Jenny Lind cribs my niece and nephew had and chose the same one for our baby.
The One Room Challenge is a 6-week endeavor hosted by Calling it Home to redo a room in one’s house. It’s called a challenge for a reason; it can be a big undertaking! I’m attempting to keep the to-do list reasonable, considering all the other things that are going on in my life right now!

After I found out we had a daughter, visions of making hairbows, sewing dresses, and redoing the dollhouse my parents made for me when I was a child danced in my head, but I won’t create an overly girly bedroom for her. We plan for this bedroom to be for any babies we have in the future, so it won’t be pink or frilly. Little Miss will move into a different bedroom when she’s older, which I’ll enjoy making super girly.
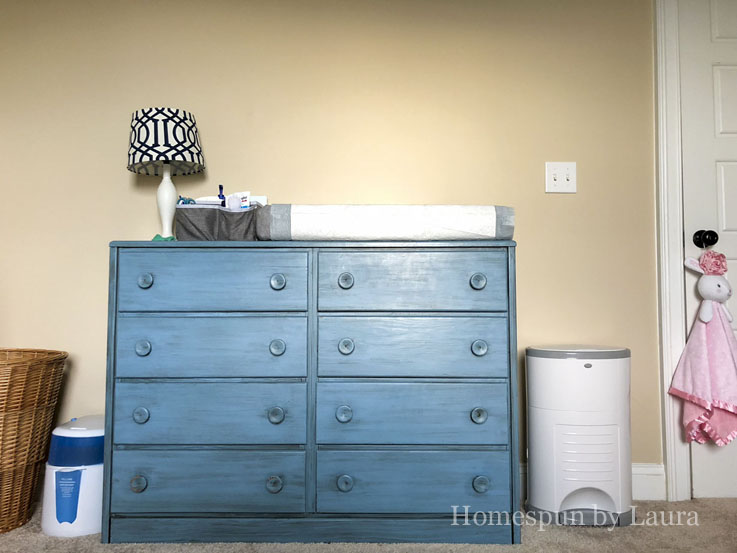
The dresser in her room belonged to my grandparents. My grandmother painted it this antiqued blue in the 80s, and I plan to leave it as is.
Therefore, the big decisions in the room (paint, furniture, upholstery, fixtures) will be neutral so we can change the smaller elements down the road to create a unique twist for any subsequent children. The ‘theme’ for the room will be vintage books and toys; we have so many from our own childhoods that will be a special and fugal way to decorate the room. As with any project I embark upon, I’ll use items we already own when possible, and there will be several DIY projects to keep the cost reasonably low. We are, after all, going to be buying a lot of diapers for the foreseeable future!
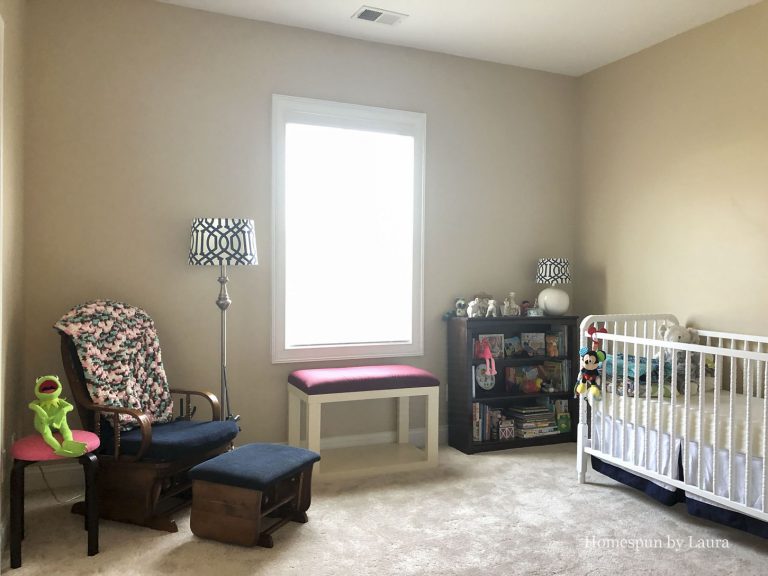
So at the beginning, the to-do list includes:
- Paint and reupholster (or slipcover) glider – purchased for $15 at a neighbor’s yard sale years ago
- Paint and re-cover window bench; add pretty bins to store toys, books, etc.
- Hang art and photos, including art/pages from old children’s books I intend to get to a thrift store to purchase…
- Create an oversized piece of art to hang over crib
- Buy or DIY a ladder to hang blankets
- Buy or DIY picture ledges
- Find a pretty keepsake box to store special papers, hospital bracelets, etc.
- Possibly add a rug to the center of the room
- Replace light fixture with either a ceiling fan or prettier fixture
- Select paint color; paint wall (keep eyes open for rebate at Lowe’s – often offered around holidays like Columbus or Veterans’ Day)
- Create rubber ducky themed bathroom featuring souvenir rubber duckies and décor items left over from my college bathroom
- Use blank wall in closet to create hairbow storage/display
- Better organize the large but cluttered closet
- Use DIY Medal Display Shelf from old house as a curtain rod to hang old curtains from master bedroom at our old house
- Various other small DIY projects, including
- creating a vintage toy lamp,
- adding ribbon trim to lampshade,
- lengthening curtains (ceilings here are higher than at our old house),
- sewing a changing pad cover
- Paint room
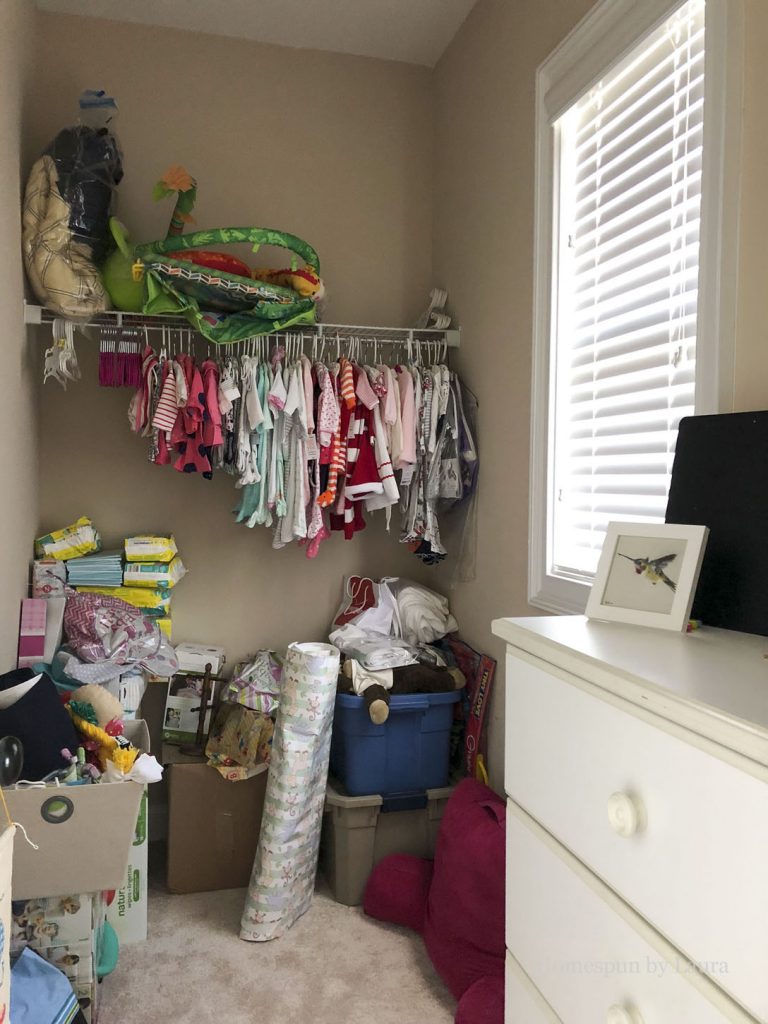
The closet is a large but poorly utilized and cluttered space
Getting it done…
It’s a long list, and it’ll be a challenge to get through it in the roughly 2-hour segments into which my days are currently divided. I’ll do as much as I can, keeping in mind that it’s all just for fun and my most important job right now is to feed and enjoy our little girl while she’s little.
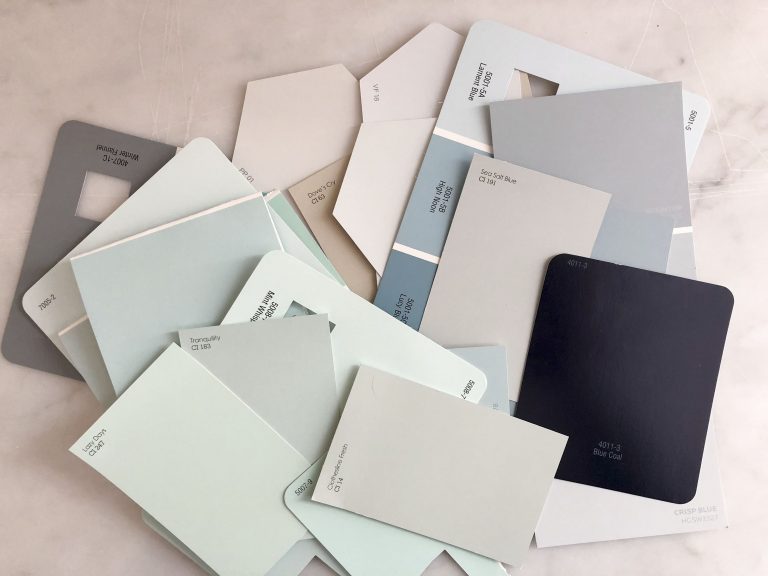
I haven’t determined the wall color yet, but Little Miss and I made a quick stop at Lowe’s last week. I picked up various gray, off-white, and pale aqua/blue/green (and a random navy) swatches to consider, though I don’t plan to paint until near the end of this 6-week endeavor…if at all…!
And check back next week to see what kind of progress we’ve made around here…
This post contains affiliate links, which means I make a small commission at no cost to you if you purchase an item seen here. Hosting a website isn’t free, and I thank you for helping to keep Homespun by Laura on the internet!
