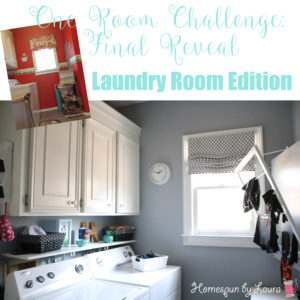
It’s Reveal Day for the Fun, Colorful Laundry Room! This once-boring beige space is now a fun and colorful laundry room with an improved storage situation – and it cost under $100!
A Quick Recap
In the spring 2019 One Room Challenge, I focused on this sad, beige space with the goal of transforming it into a fun, colorful laundry room inspired by two famous TV kitchens.
Why are these two photos so different? Read on to find out!

It’s partially because I forgot to take a final FINAL photo from this angle. Oops! 🙂
During the 6-week long One Room Challenge, participants update one room in their house with the goal of creating a beautiful ‘after’ to enjoy, sharing their progress with the internet along the way. Some projects are smaller budget rooms like this one while others involve tearing down walls and forking over some major dough for materials and accessories.

If you’re new here – thanks for stopping by! I’m Laura and my goal with any project around the house is to transform a space for as little cash as I can by using tools, materials, and decor we already own (when possible) and putting in a lot of elbow grease of my own.
I do the work myself, enlisting help from family members when something is beyond me or requires multiple sets of hands. I shop our house to find accessories and decor. When I can’t find something particular, I’ll DIY it if I can. If I can’t, I’ll head to a thrift store (or even the neighbor’s curb on trash day!), and in a few cases buy new when it’s not do-able or not worth the time it would take to scrounge up something inexpensive. Every now and then I’ll splurge on something fun to keep things interesting.
In this laundry room, I used $93 and things we already had – including paint – to make a colorful transformation.
the before
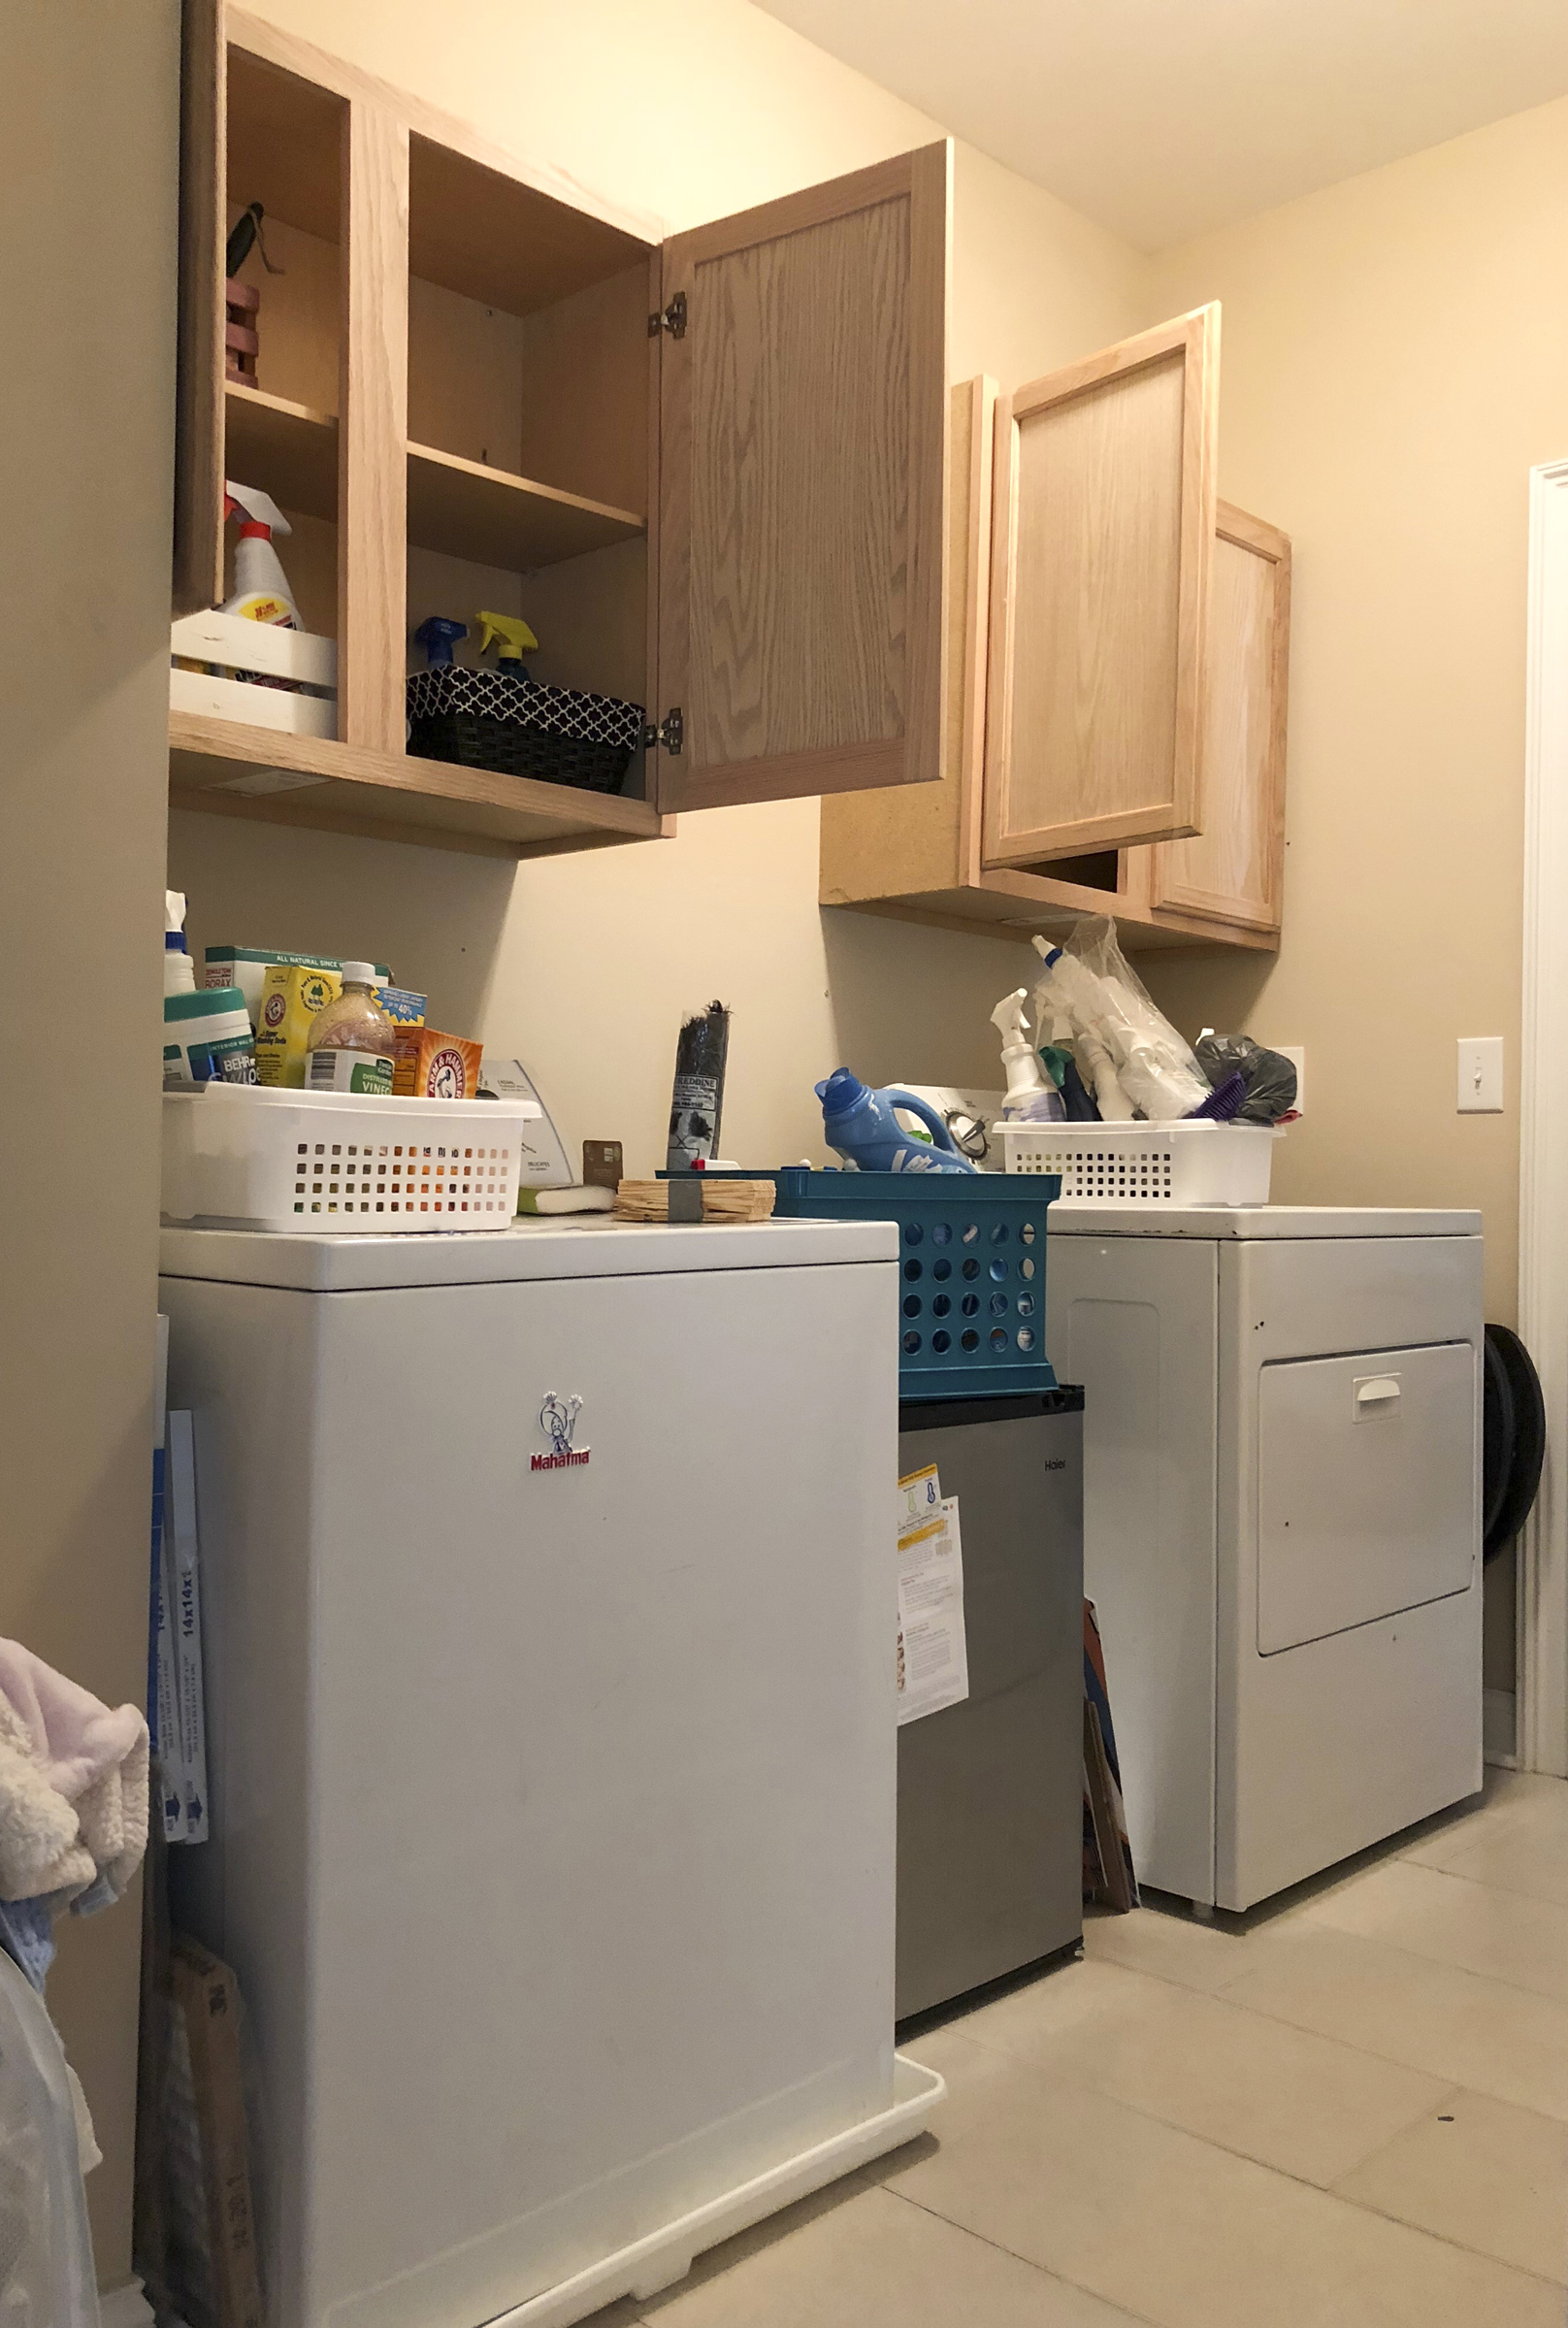
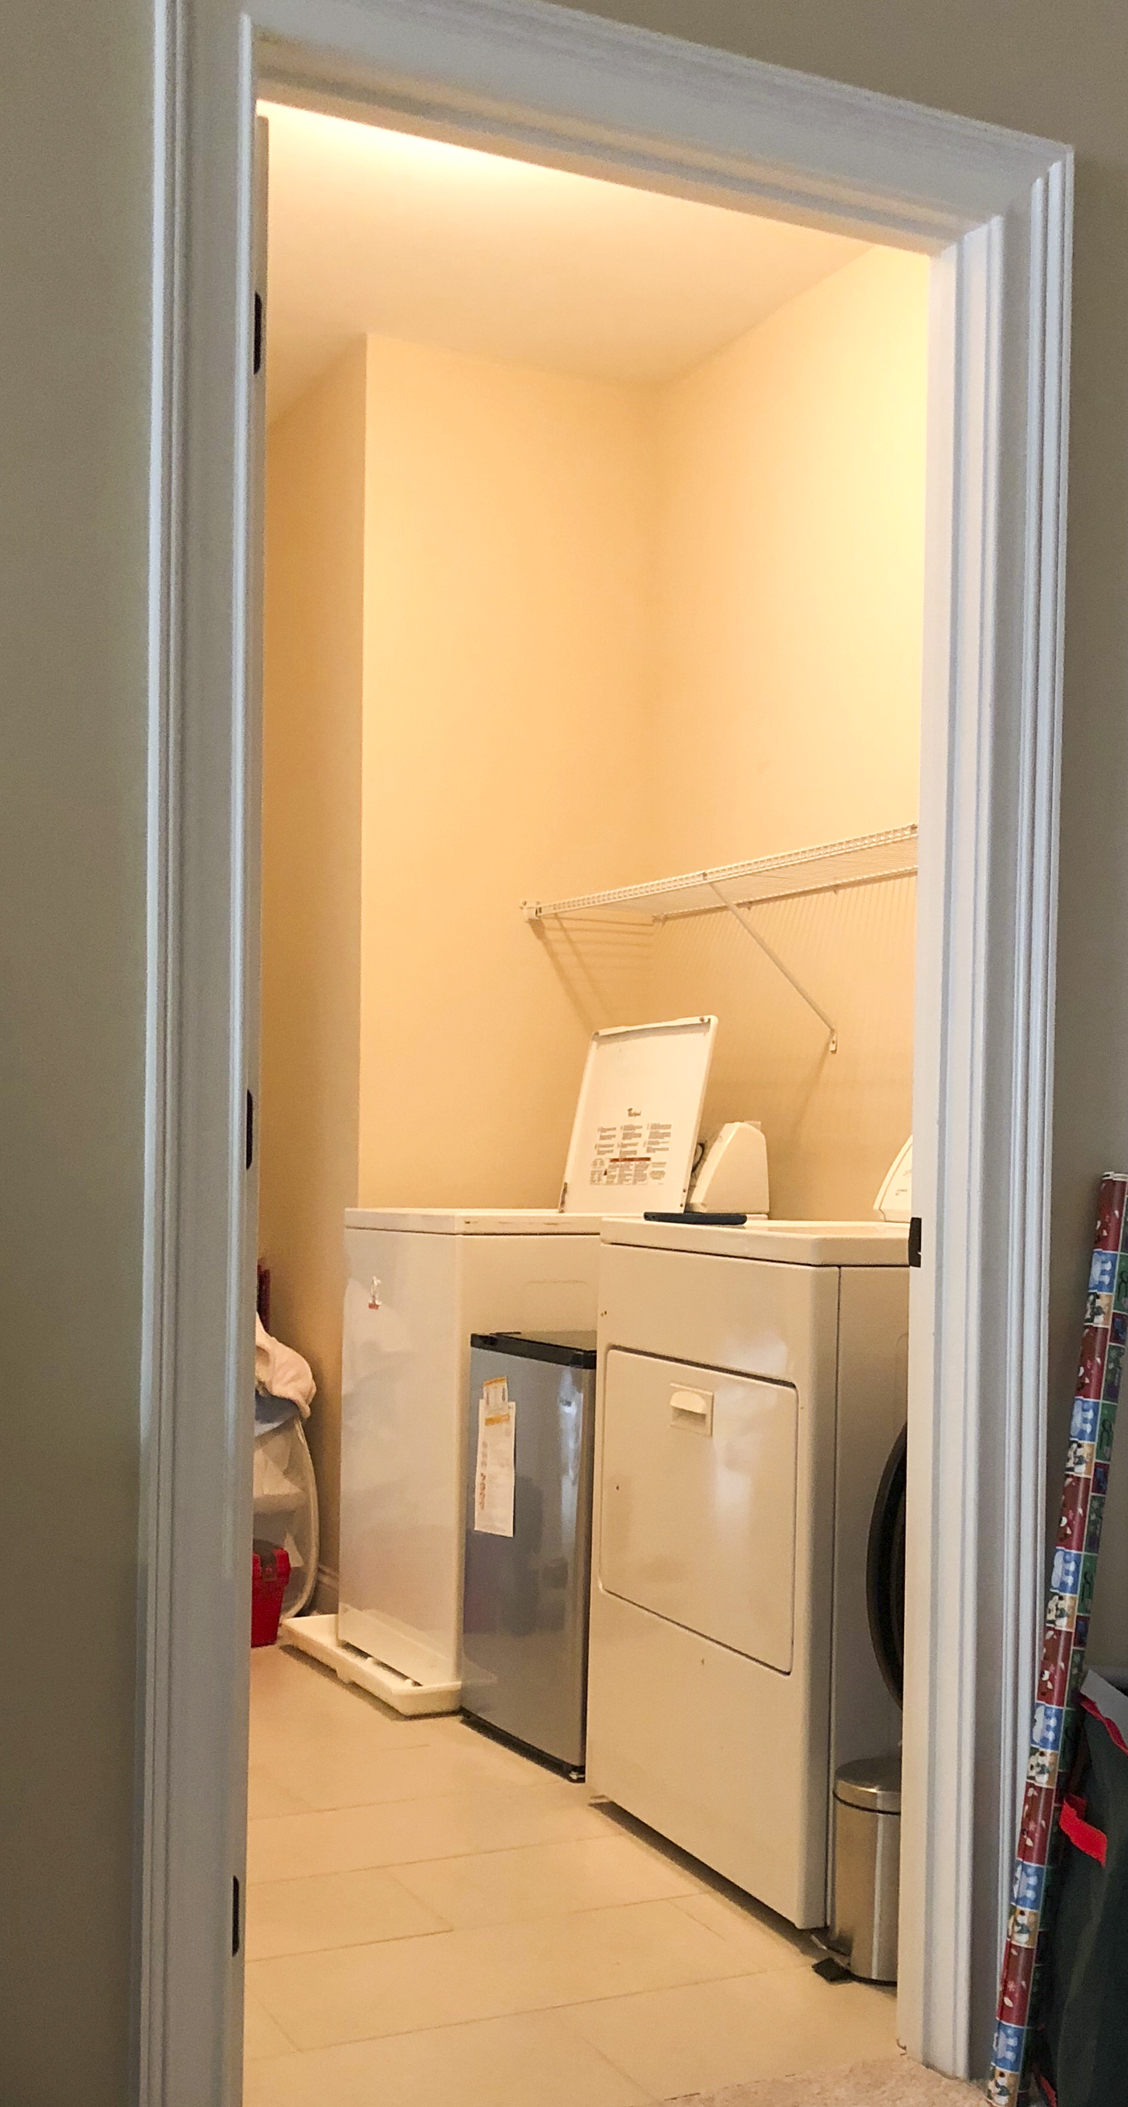
Here’s a quick recap: When we moved in, our laundry room was functional but lacked storage or personality.
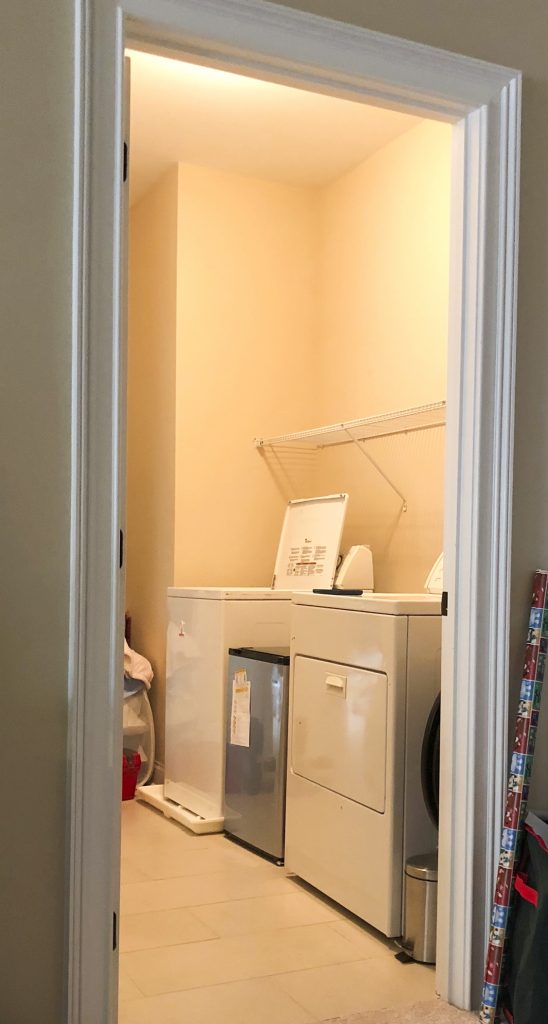
Boring!
For my birthday last year, we added stock cabinets from Lowe’s and moved the wire shelf to the garage, where it now stores some Christmas decorations.
We then left the new cabinets unfinished and unpainted (and crooked…) for over three months.

In progress
If you want to watch the process unfold, you can catch up on Week 1, Week 2, Week 3, and Week 4, and Week 5 here.
the plan
For this particular project, my work time was pretty much limited to our 8-month old daughter’s nap times. I also have a work-from-home job competing for those time slots, so I kept my to-do list pretty small.
The goal was to transform our beige builder-grade laundry room into a fun and colorful space where I don’t mind spending time – on a $100 budget. You can read more detail about the plan for the colorful laundry room in Week 1’s post, but here’s the cliff notes version:
Add some color and personality, pulling inspiration from Monica’s kitchen in Friends…

…and the tent kitchen on the Great British Bake-Off.
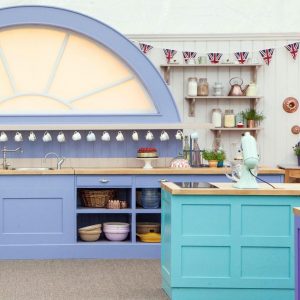
You probably wouldn’t look at my (almost) finished room and think it looks like either of these spaces, but that wasn’t the goal. What I wanted was to include some of the common elements from these rooms in my project so it would FEEL like these rooms look to me.
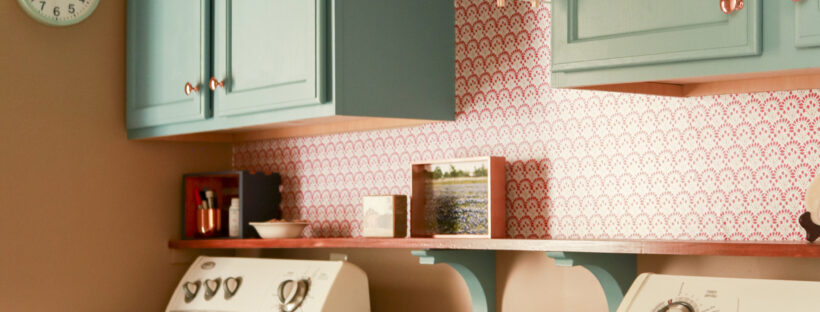
Painted cabinets, stained wood, copper, and open shelving were the main features on my radar.
I also wanted to do a fun feature wall behind the washer and dryer, sort of a backsplash, but ultimately there wasn’t time to do this. I never felt 100% sure of any of the options I considered, and I didn’t want to rush the decision just to do something I didn’t like in the end. So I’m going to live with the space for a while, then go back and make a few tweaks, which I’ll discuss later on. **UPDATE: I wound up making a decision on this! See the end of this post for the final final reveal!**
the budget
I chose to limit myself to spending $100 or less during the space of the One Room Challenge to create the Fun, Colorful Laundry Room. (We bought the new cabinets with birthday money while they were on sale last year. They cost about $150. So the goal is for the total cost of the room including cabinets to come in under $250.)
Here’s the breakdown, including sales tax!
- dowel + hardware: $7.98
- wood for open shelves: $20.13
- furring strip to create shelf braces: $1.55
- wood for 8′ shelf/ledge: $18.01
- paint can to mix free cabinet paint: $3.40
- decorative brackets: $18.15
- Thrift store decor: $7.58
Total: $76.80
This leaves just under $25 to split among my remaining to-do list items: a creative and inexpensive accent wall, cabinet knobs, and a little clock to hang next to the cabinets (again – **UPDATE: See the end of this post for the final final reveal + budget!**).
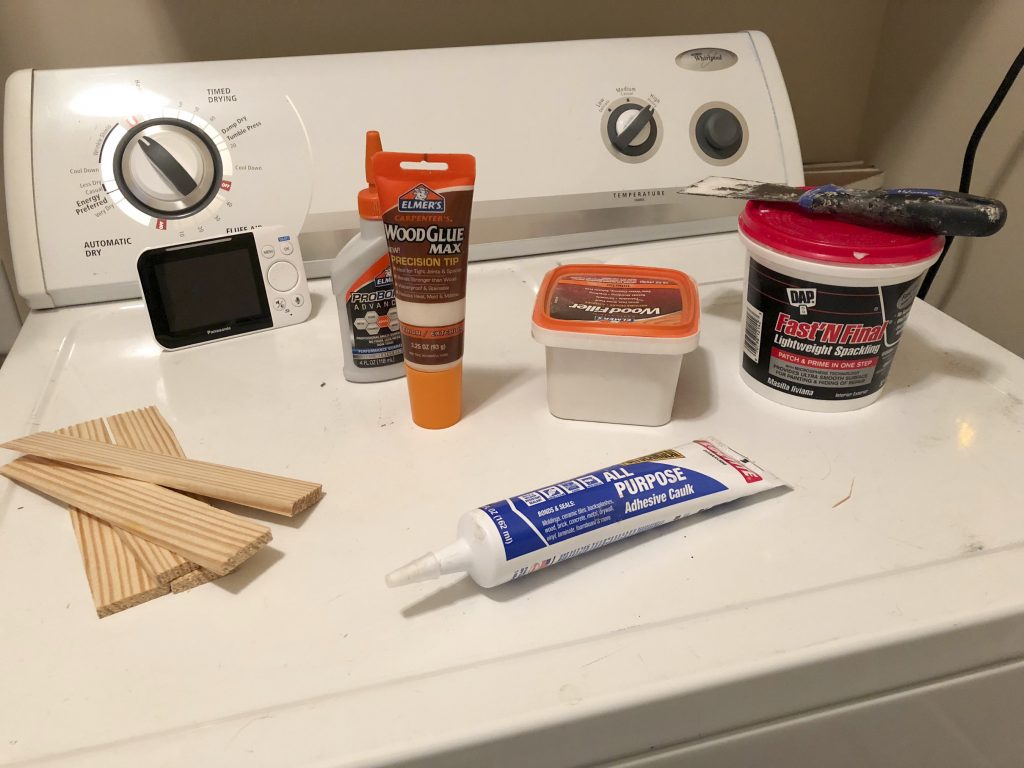
We had all the other tools and materials (screws, nails, wood putty, spackle, putty knife, wood glue, shims, caulk, paint, paint roller, etc.) on hand already. Once you start doing these types of projects, you don’t have to spend so much to buy materials and tools for subsequent projects.
Colorful Laundry Room: the Reveal!
The first four weeks were a little slow for me, but I put on a good kick for the final two weeks and finished nearly all of my to-do list items!
add open shelving
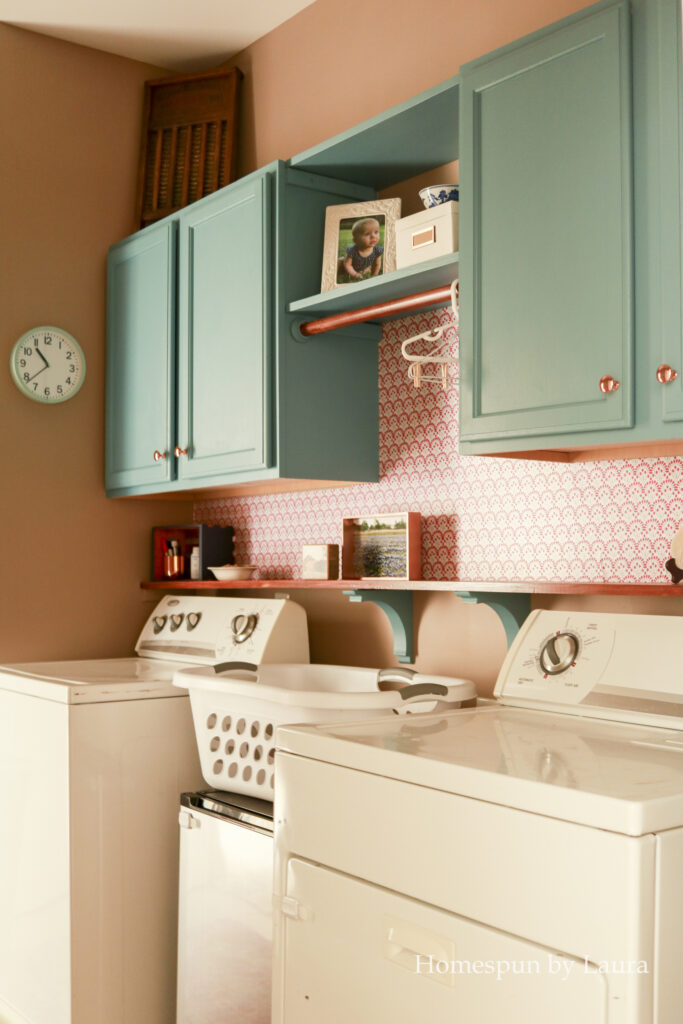
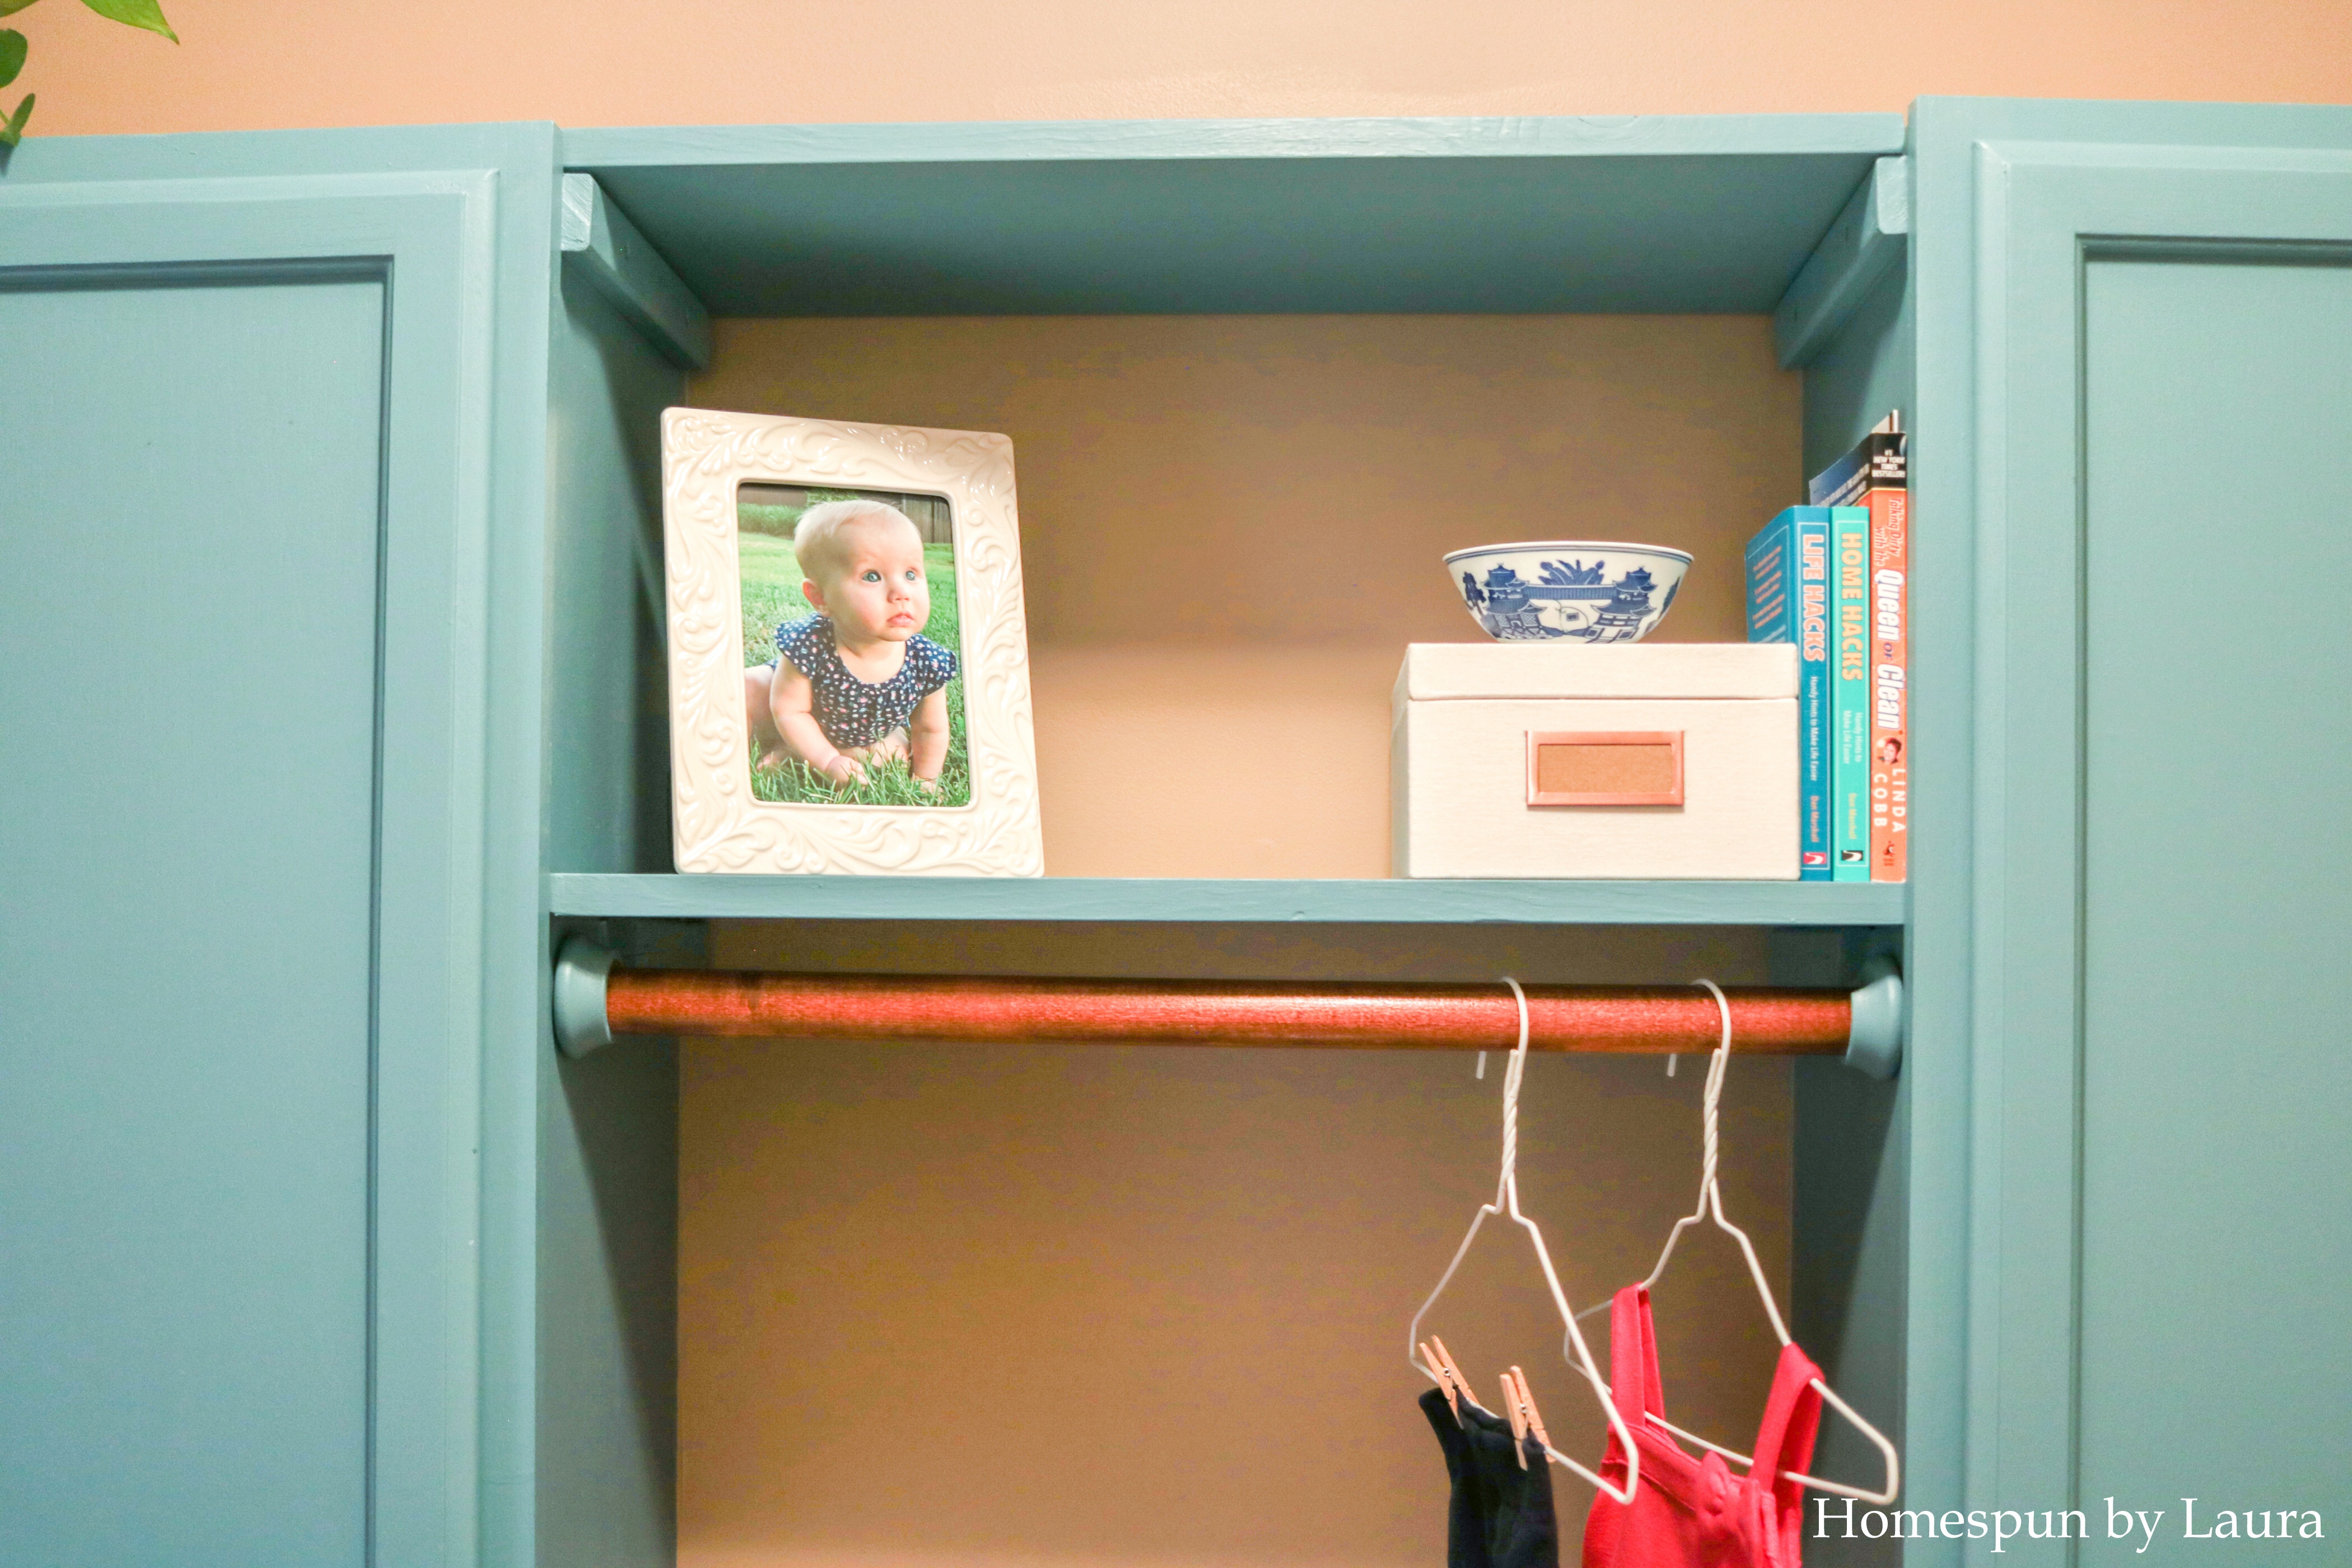
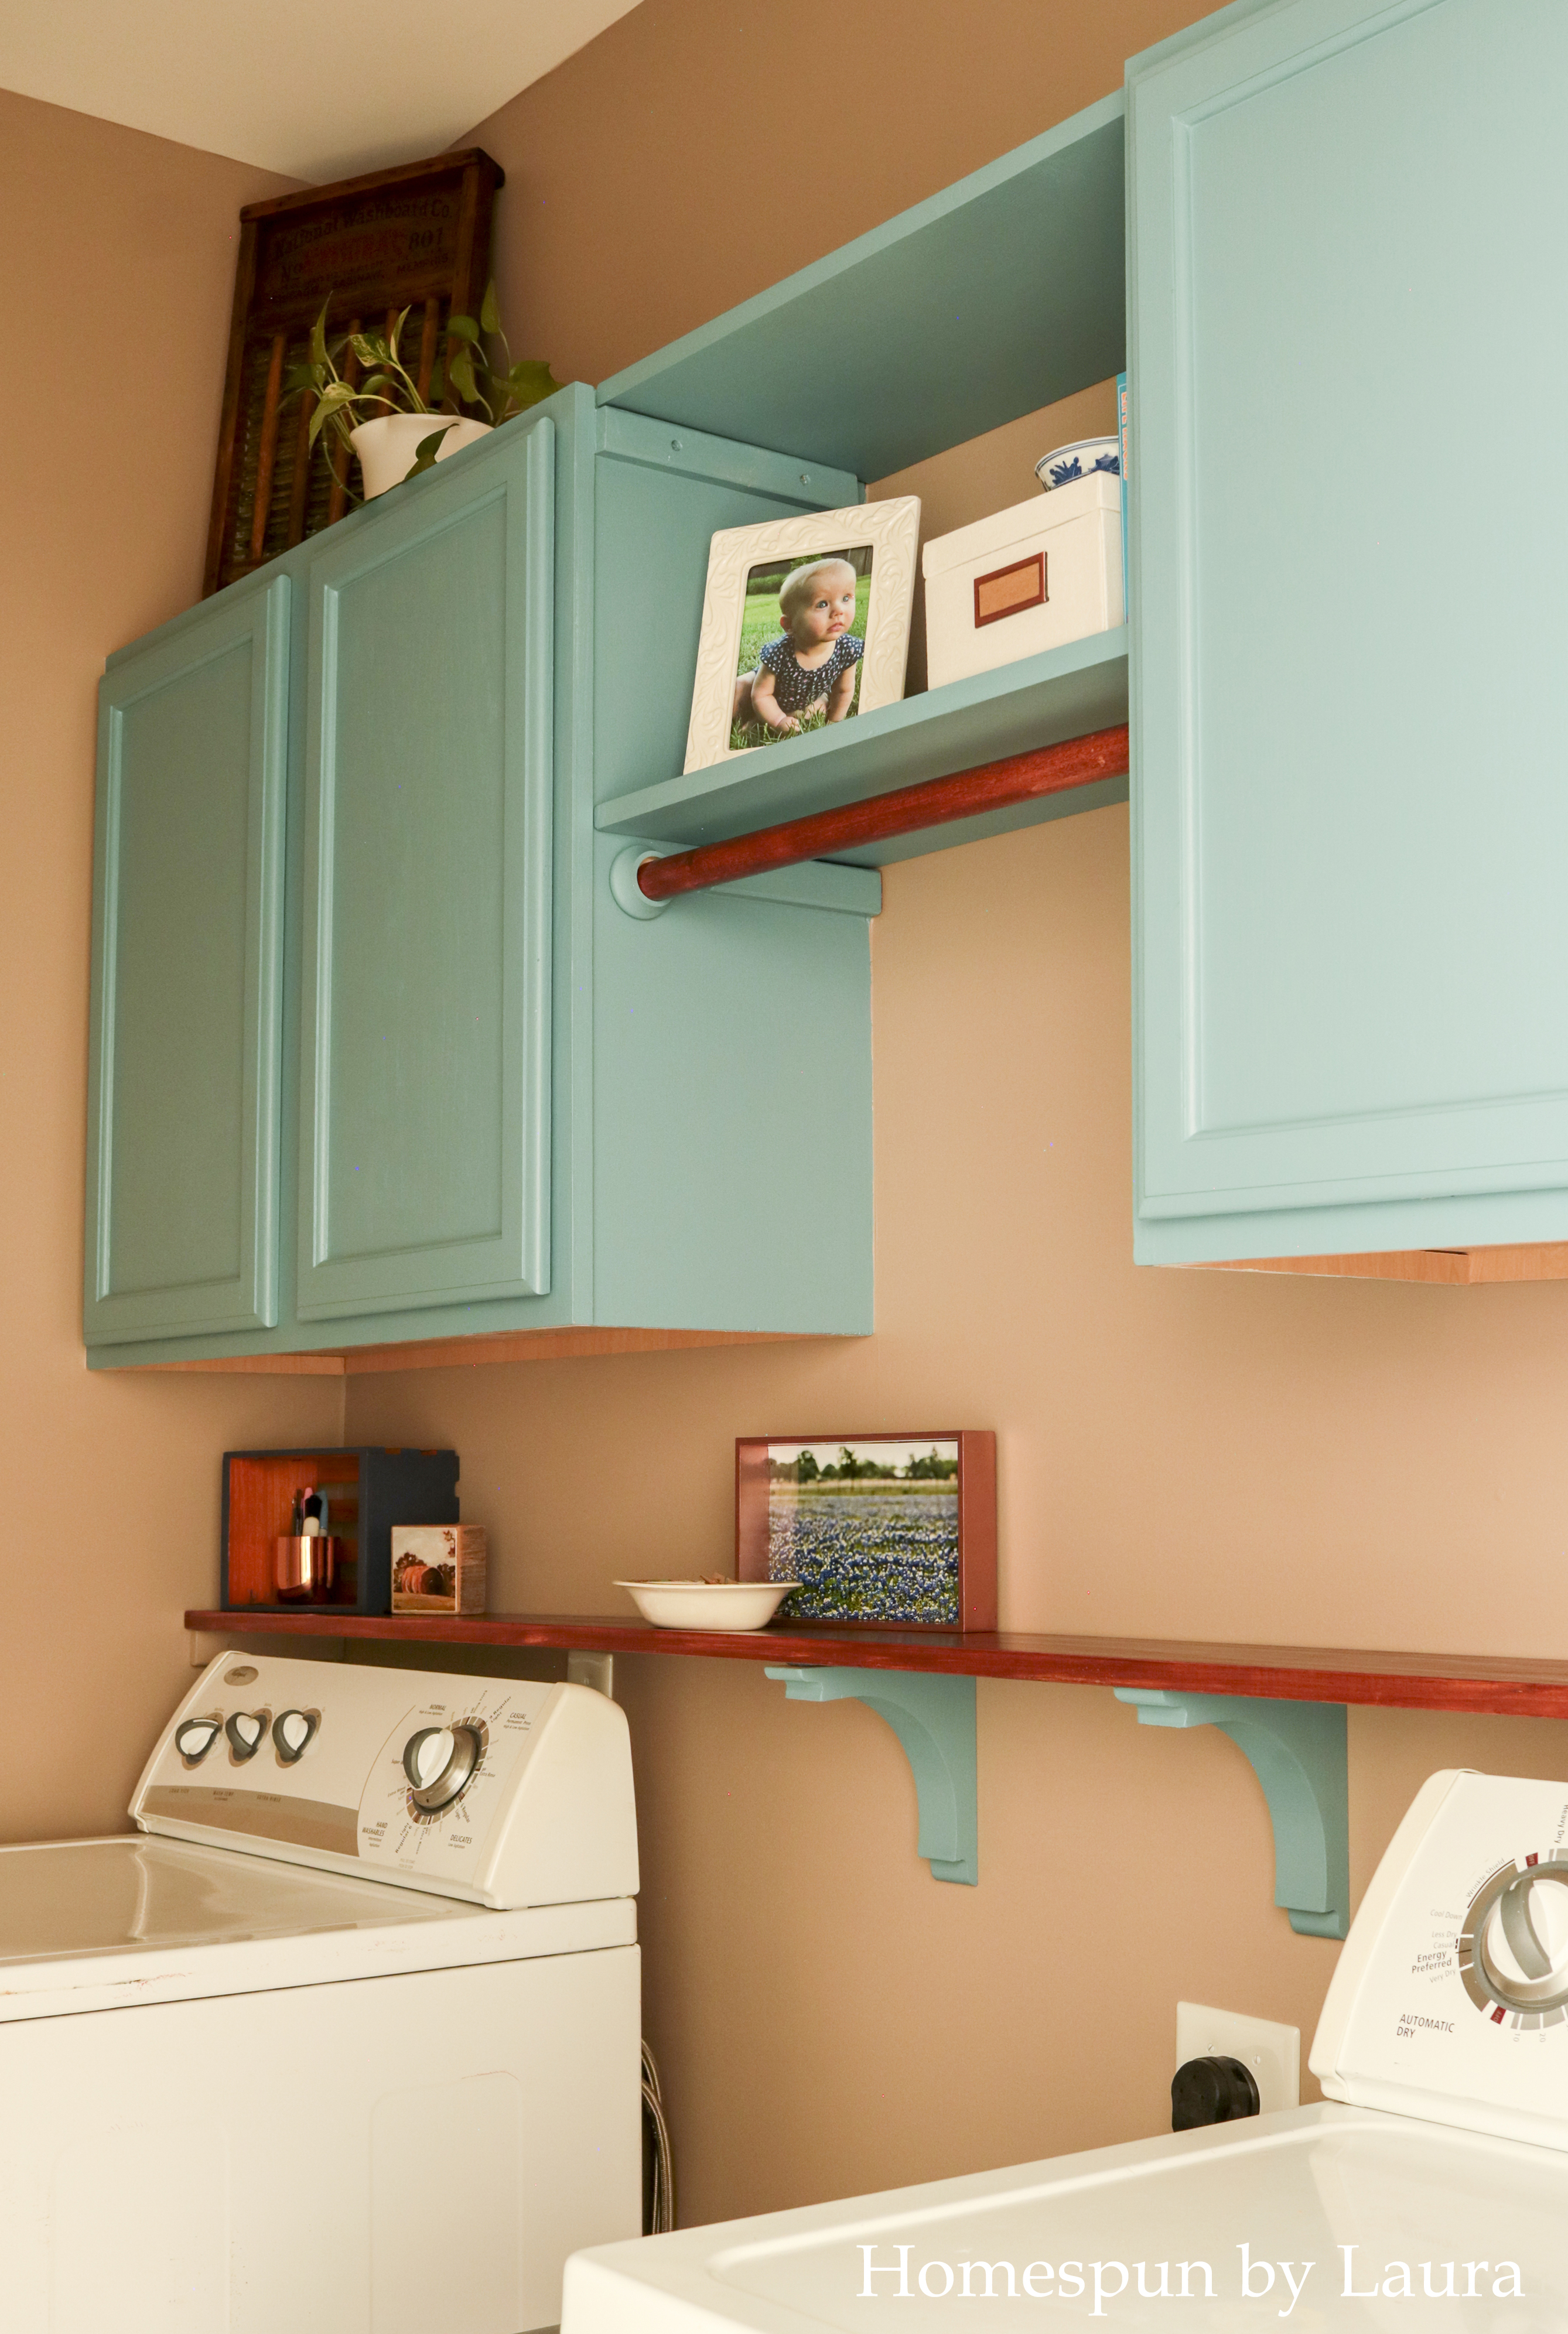
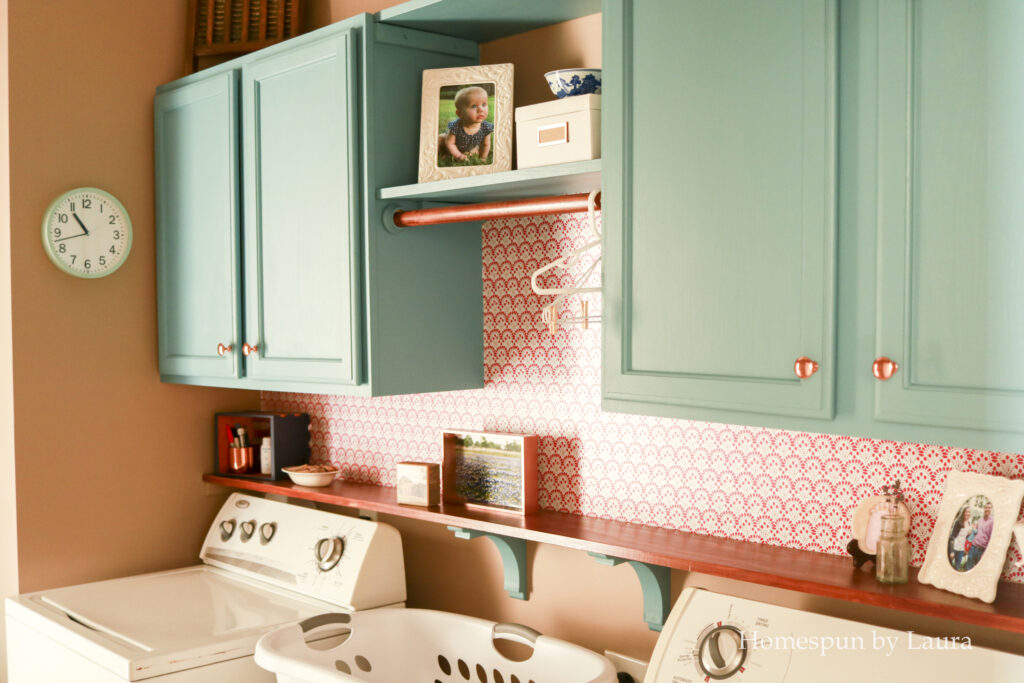
I added two shelves between the cabinets which connected them and created additional storage and display square footage.
They connect the two cabinet units and while I’m not technically using the top shelf for anything at the moment, it wasn’t really an option not to include it.
They’re just a 12″ deep wood panel trimmed down and connected to the cabinets using sections of an inexpensive furring strip. At about $20, the panel for the shelves was the most expensive part of the project after the cabinets.
I saved myself a little bit of time and paint by only putting a single coat on the tops of the shelves because they aren’t going to be visible. A super-tall person might be able to see the top of the bottom shelf, but not too many super-tall people are going to be walking through this space. I put two coats on the bottoms of both shelves since those are visible.
install rod
From the beginning, I wanted a rod where I could hang a few drip-dry clothes to dry. The fact that I installed a ledge only about 20 inches under the rod makes it a little difficult to hang adult-sized shirts but it still works great for baby clothes and unmentionables. I also like the look of the wood stain right there next to the green-blue cabinet color.
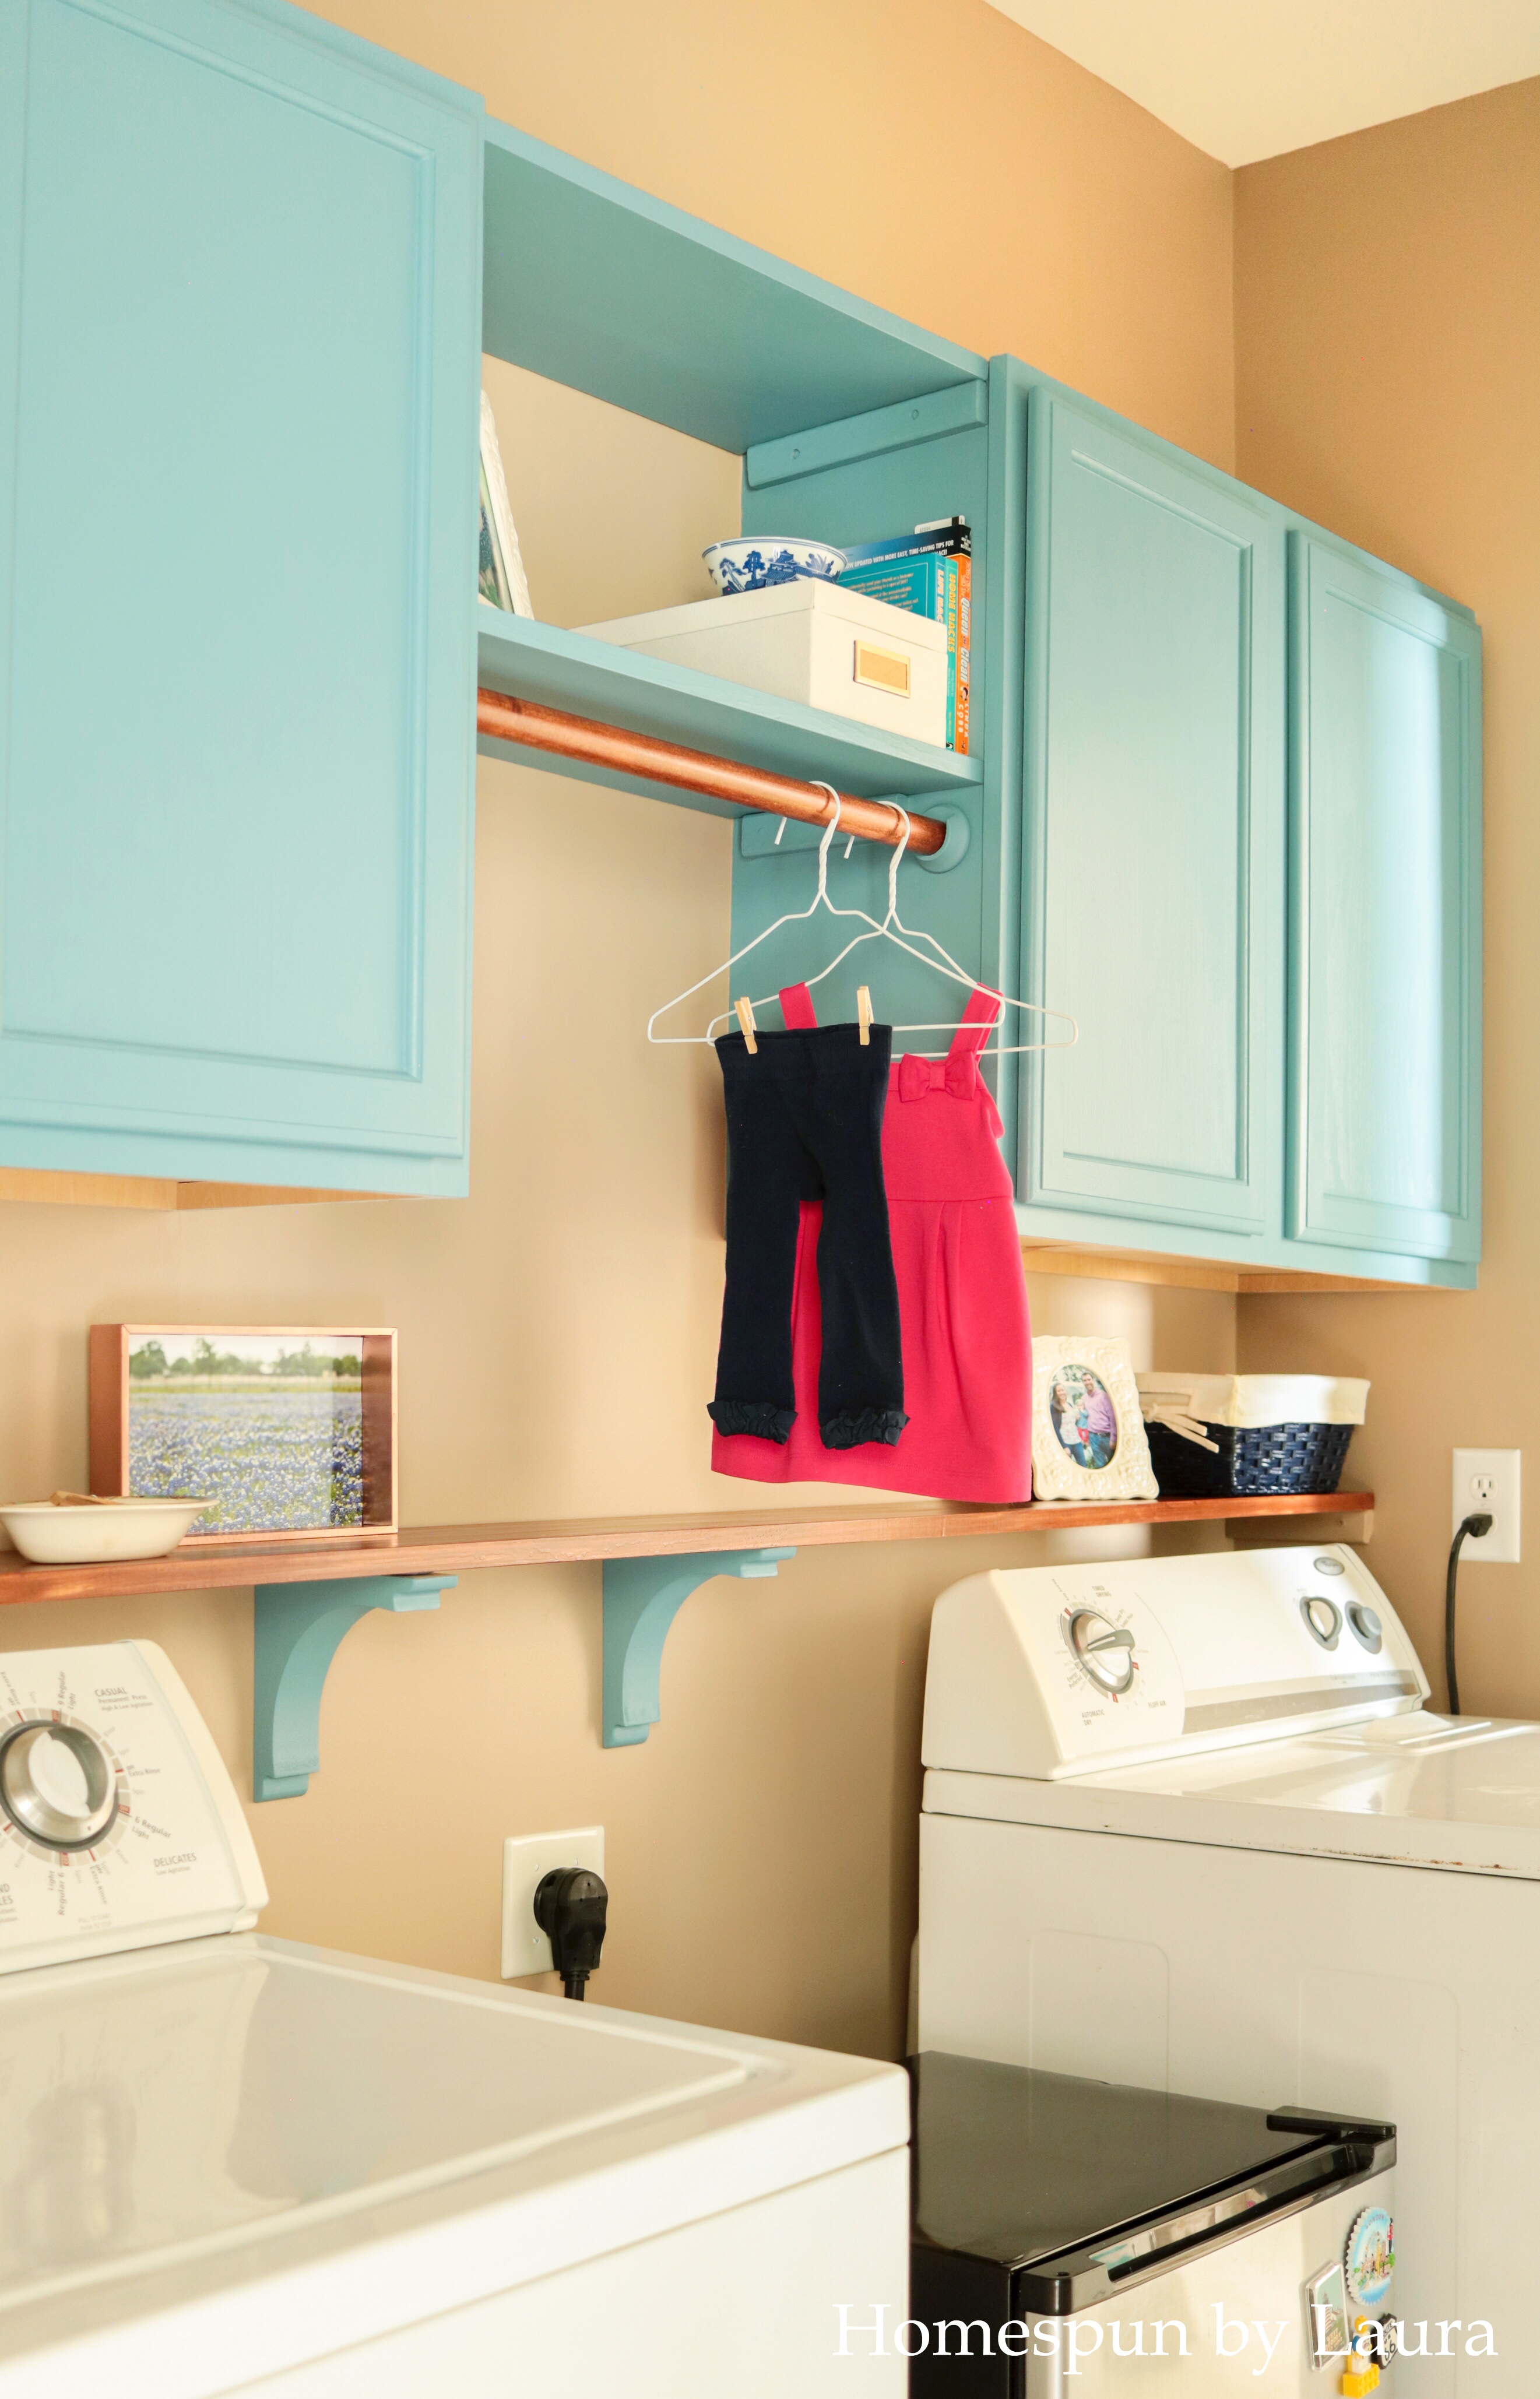
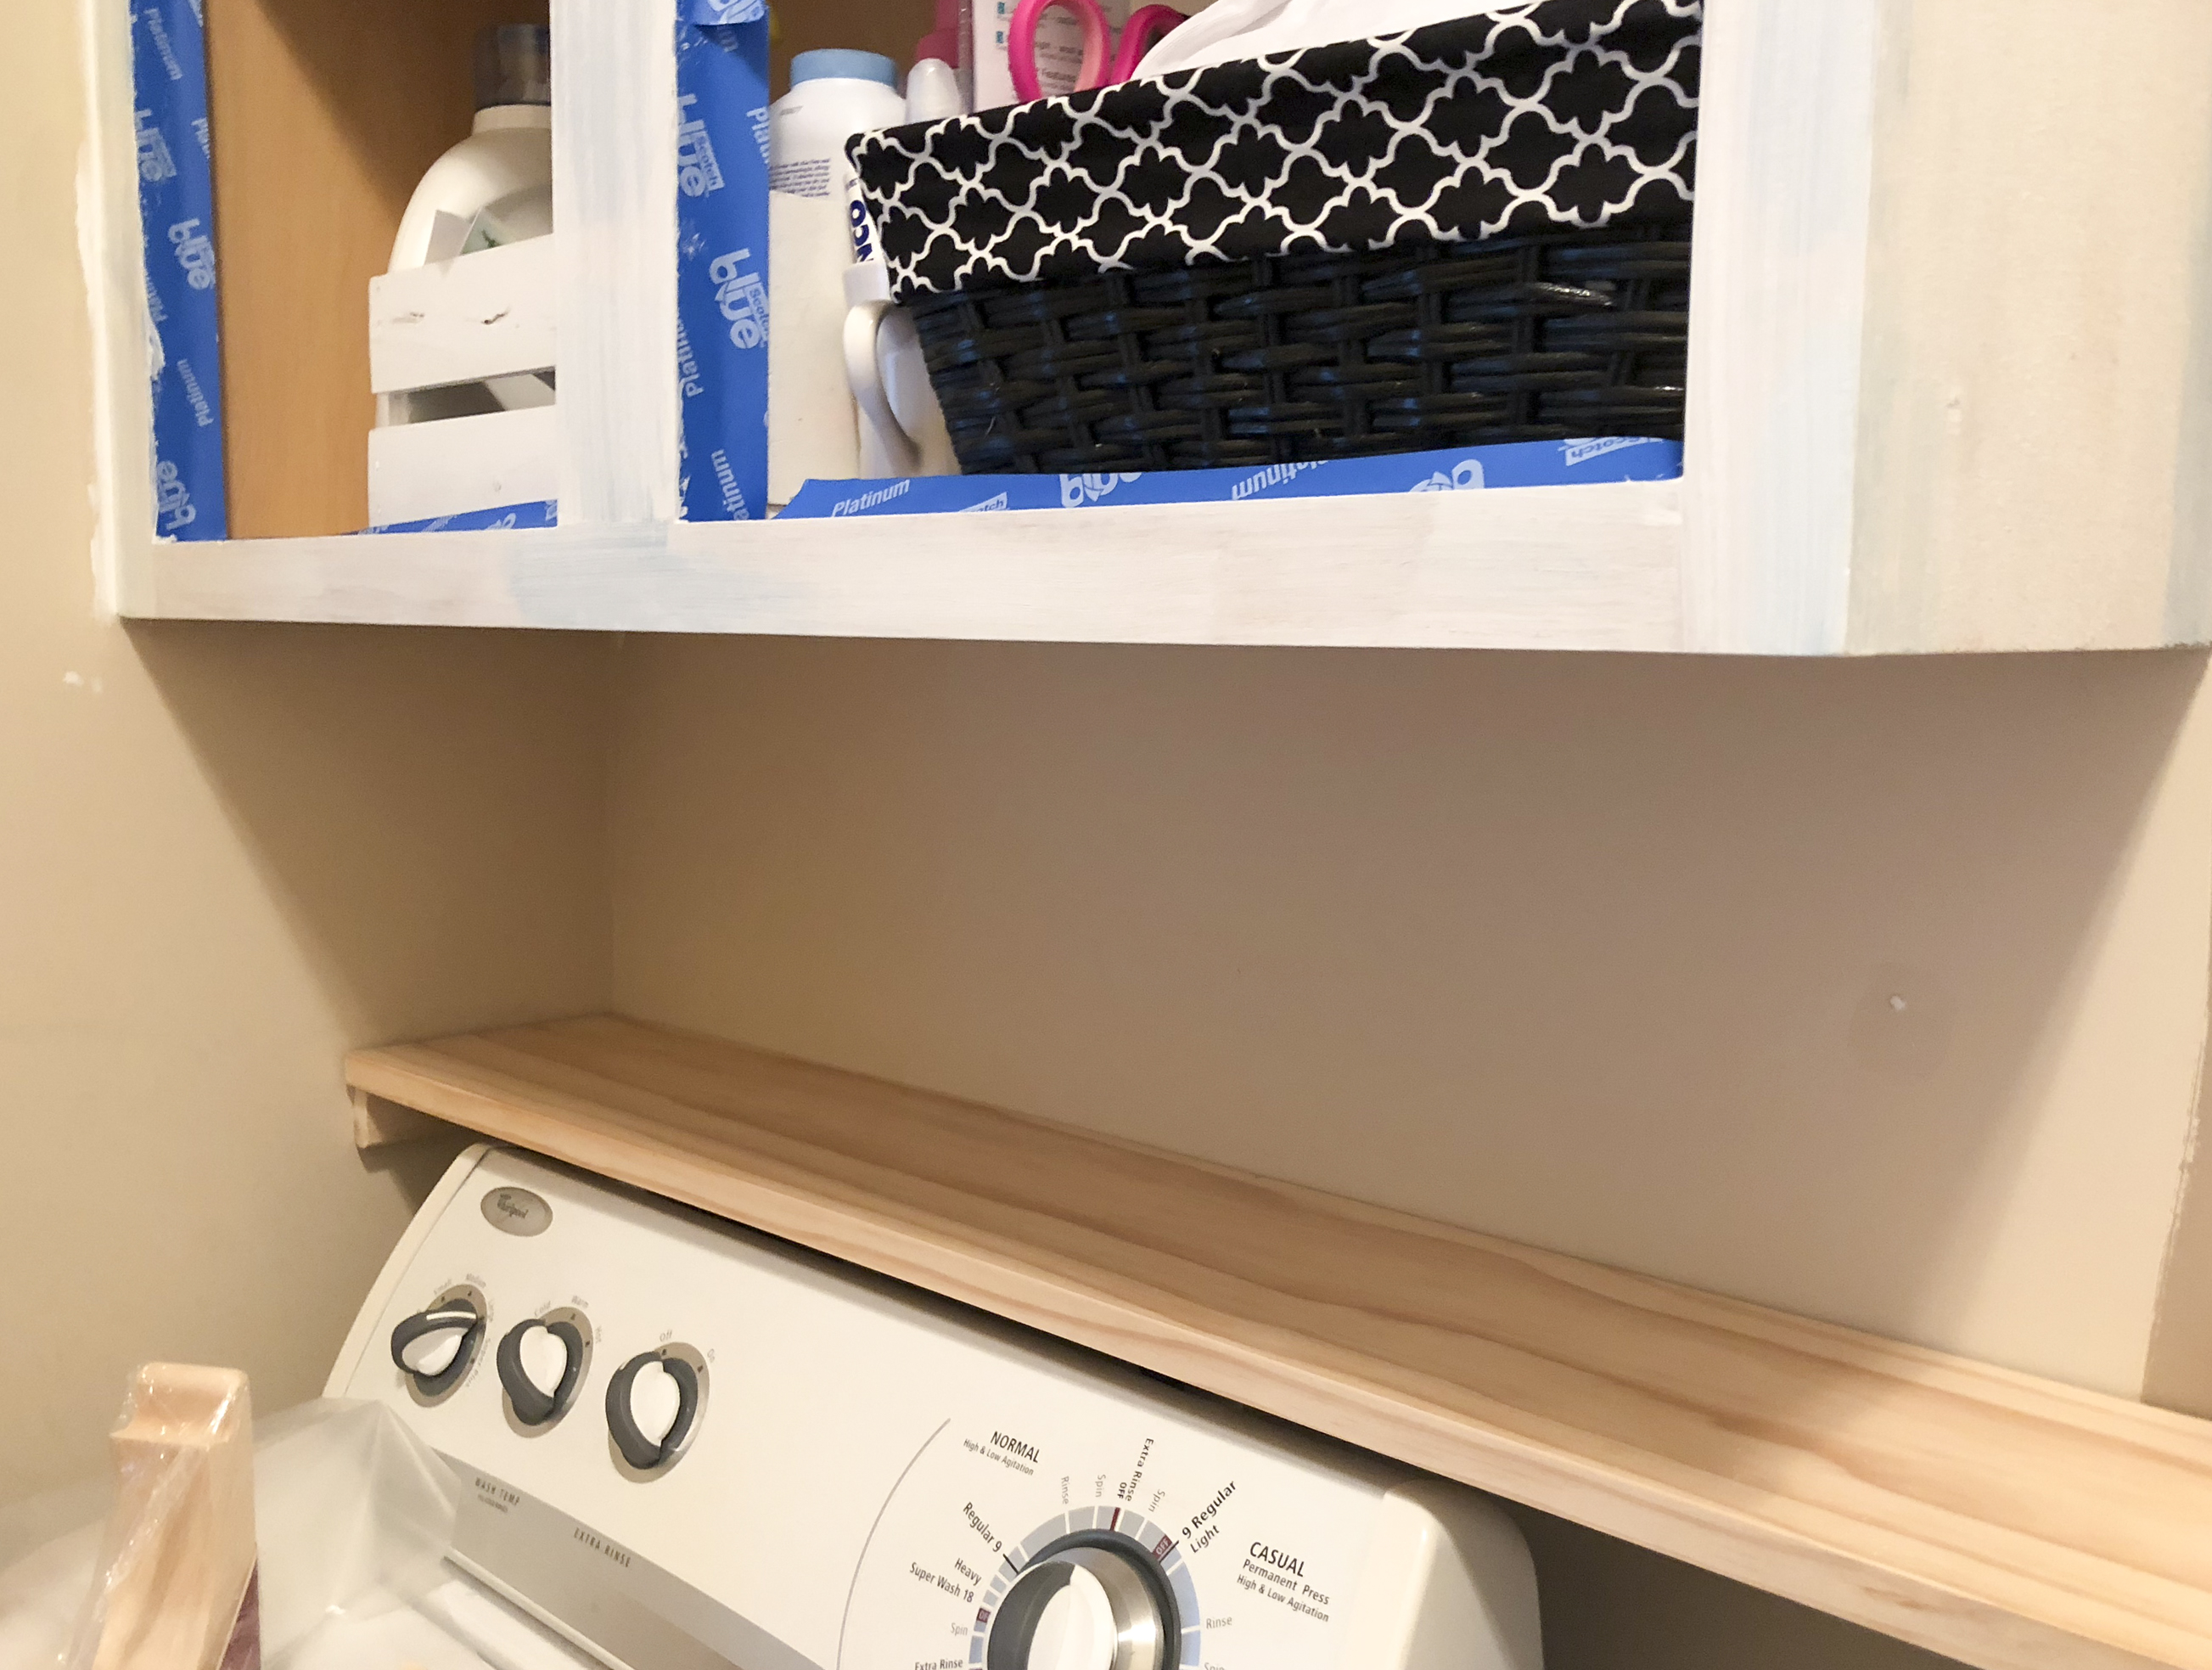
install ledge across length of wall
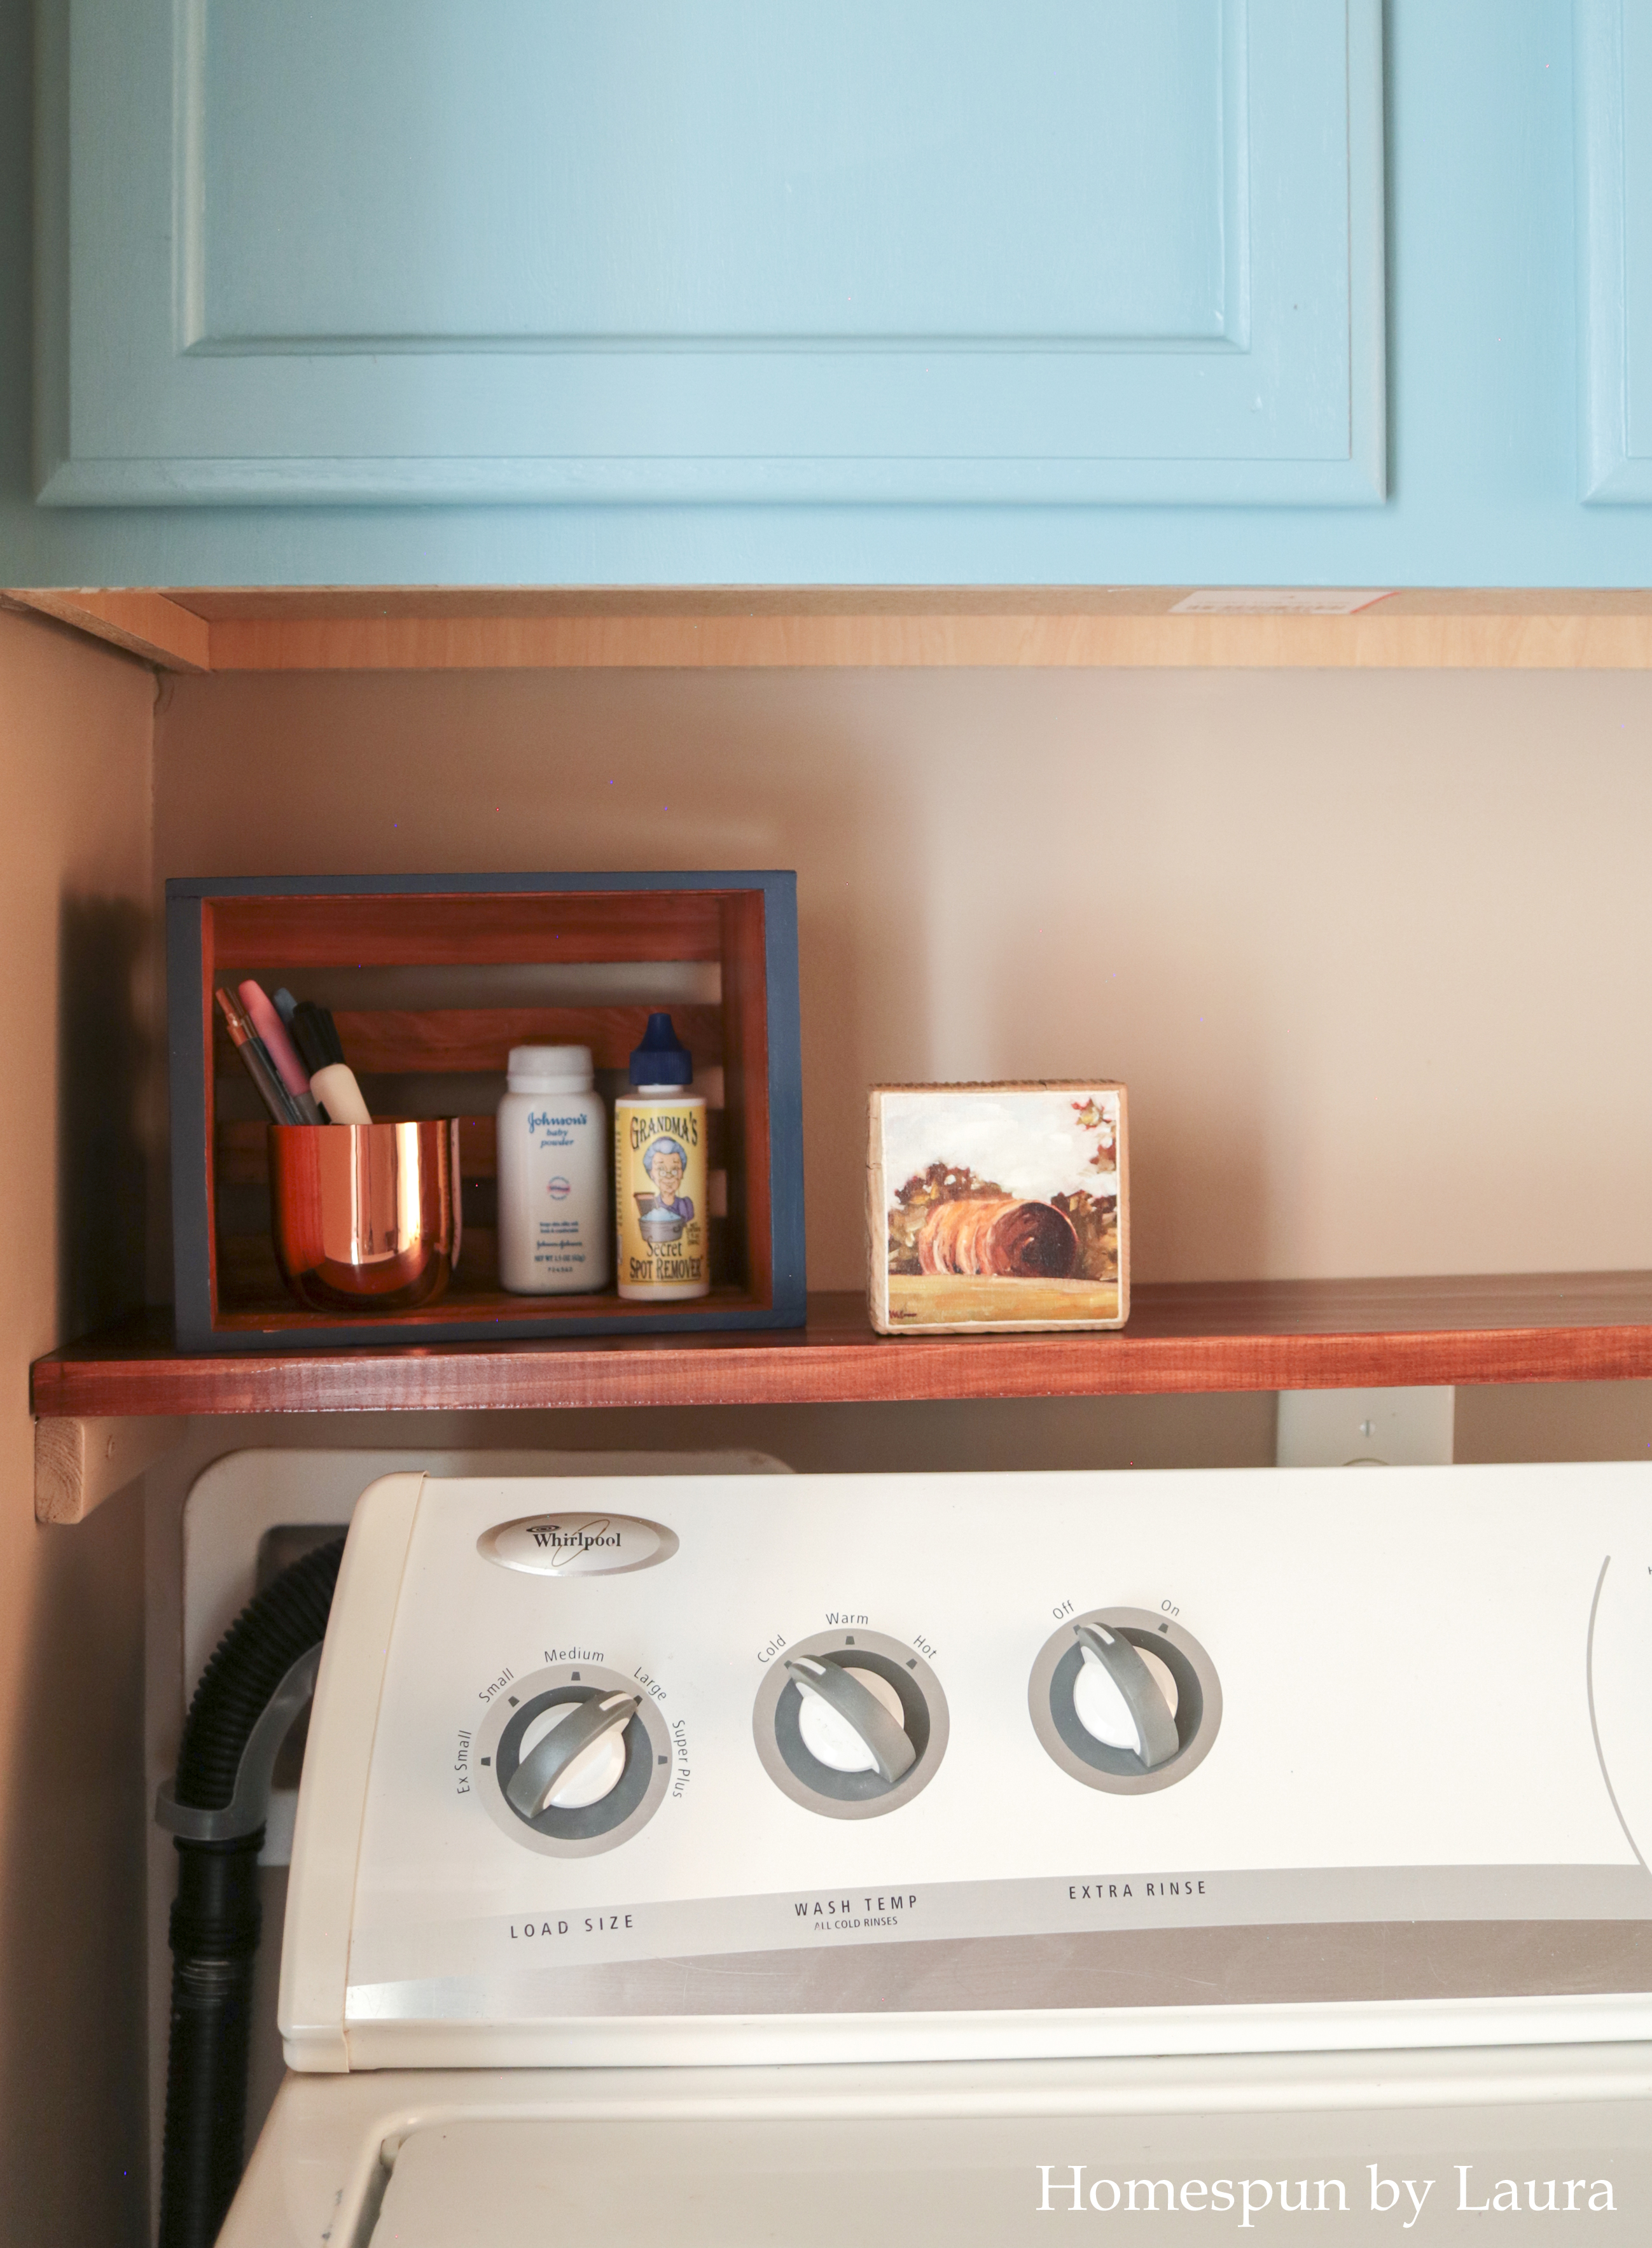
This narrow shelf above the washer, dryer, and fridge is primarily for looks. It does store several small functional items in addition to a couple photos.
At first after measuring we planned to buy a 6″ wood slat for this shelf, but seeing it in person, that didn’t make any sense. A 6″ wood panel is actually only 5.5″ wide and that’s so small not much would be able to go on the shelf. An 8″ panel is actually 7.25″ and is really the smallest that would have worked. As it is, the basket and small crate I have on the shelf barely fit on it.
I used a single coat of English Chestnut (literally scraping the bottom of the nearly empty can I already had to soak up enough stain to cover the entire panel). Two or more coats would have been darker than I wanted, so this worked out well.
I took a shortcut and didn’t stain the bottom. This isn’t a huge deal as no one makes a habit of going into the laundry room and sitting on the floor, and it saved me some time. You can just see it in a few finished photos below if you’re looking for it.
I used small sections of furring strip to secure it to the wall at each end just like the open shelves above it.
Look under the shelf on the left side to see the DIY furring strip bracket. The shelf just sits on top of the two little strips of wood on each end.
It needed some support in the middle, too, so I painted two simple brackets the same color as the cabinets. I love the extra little pop of color they add.
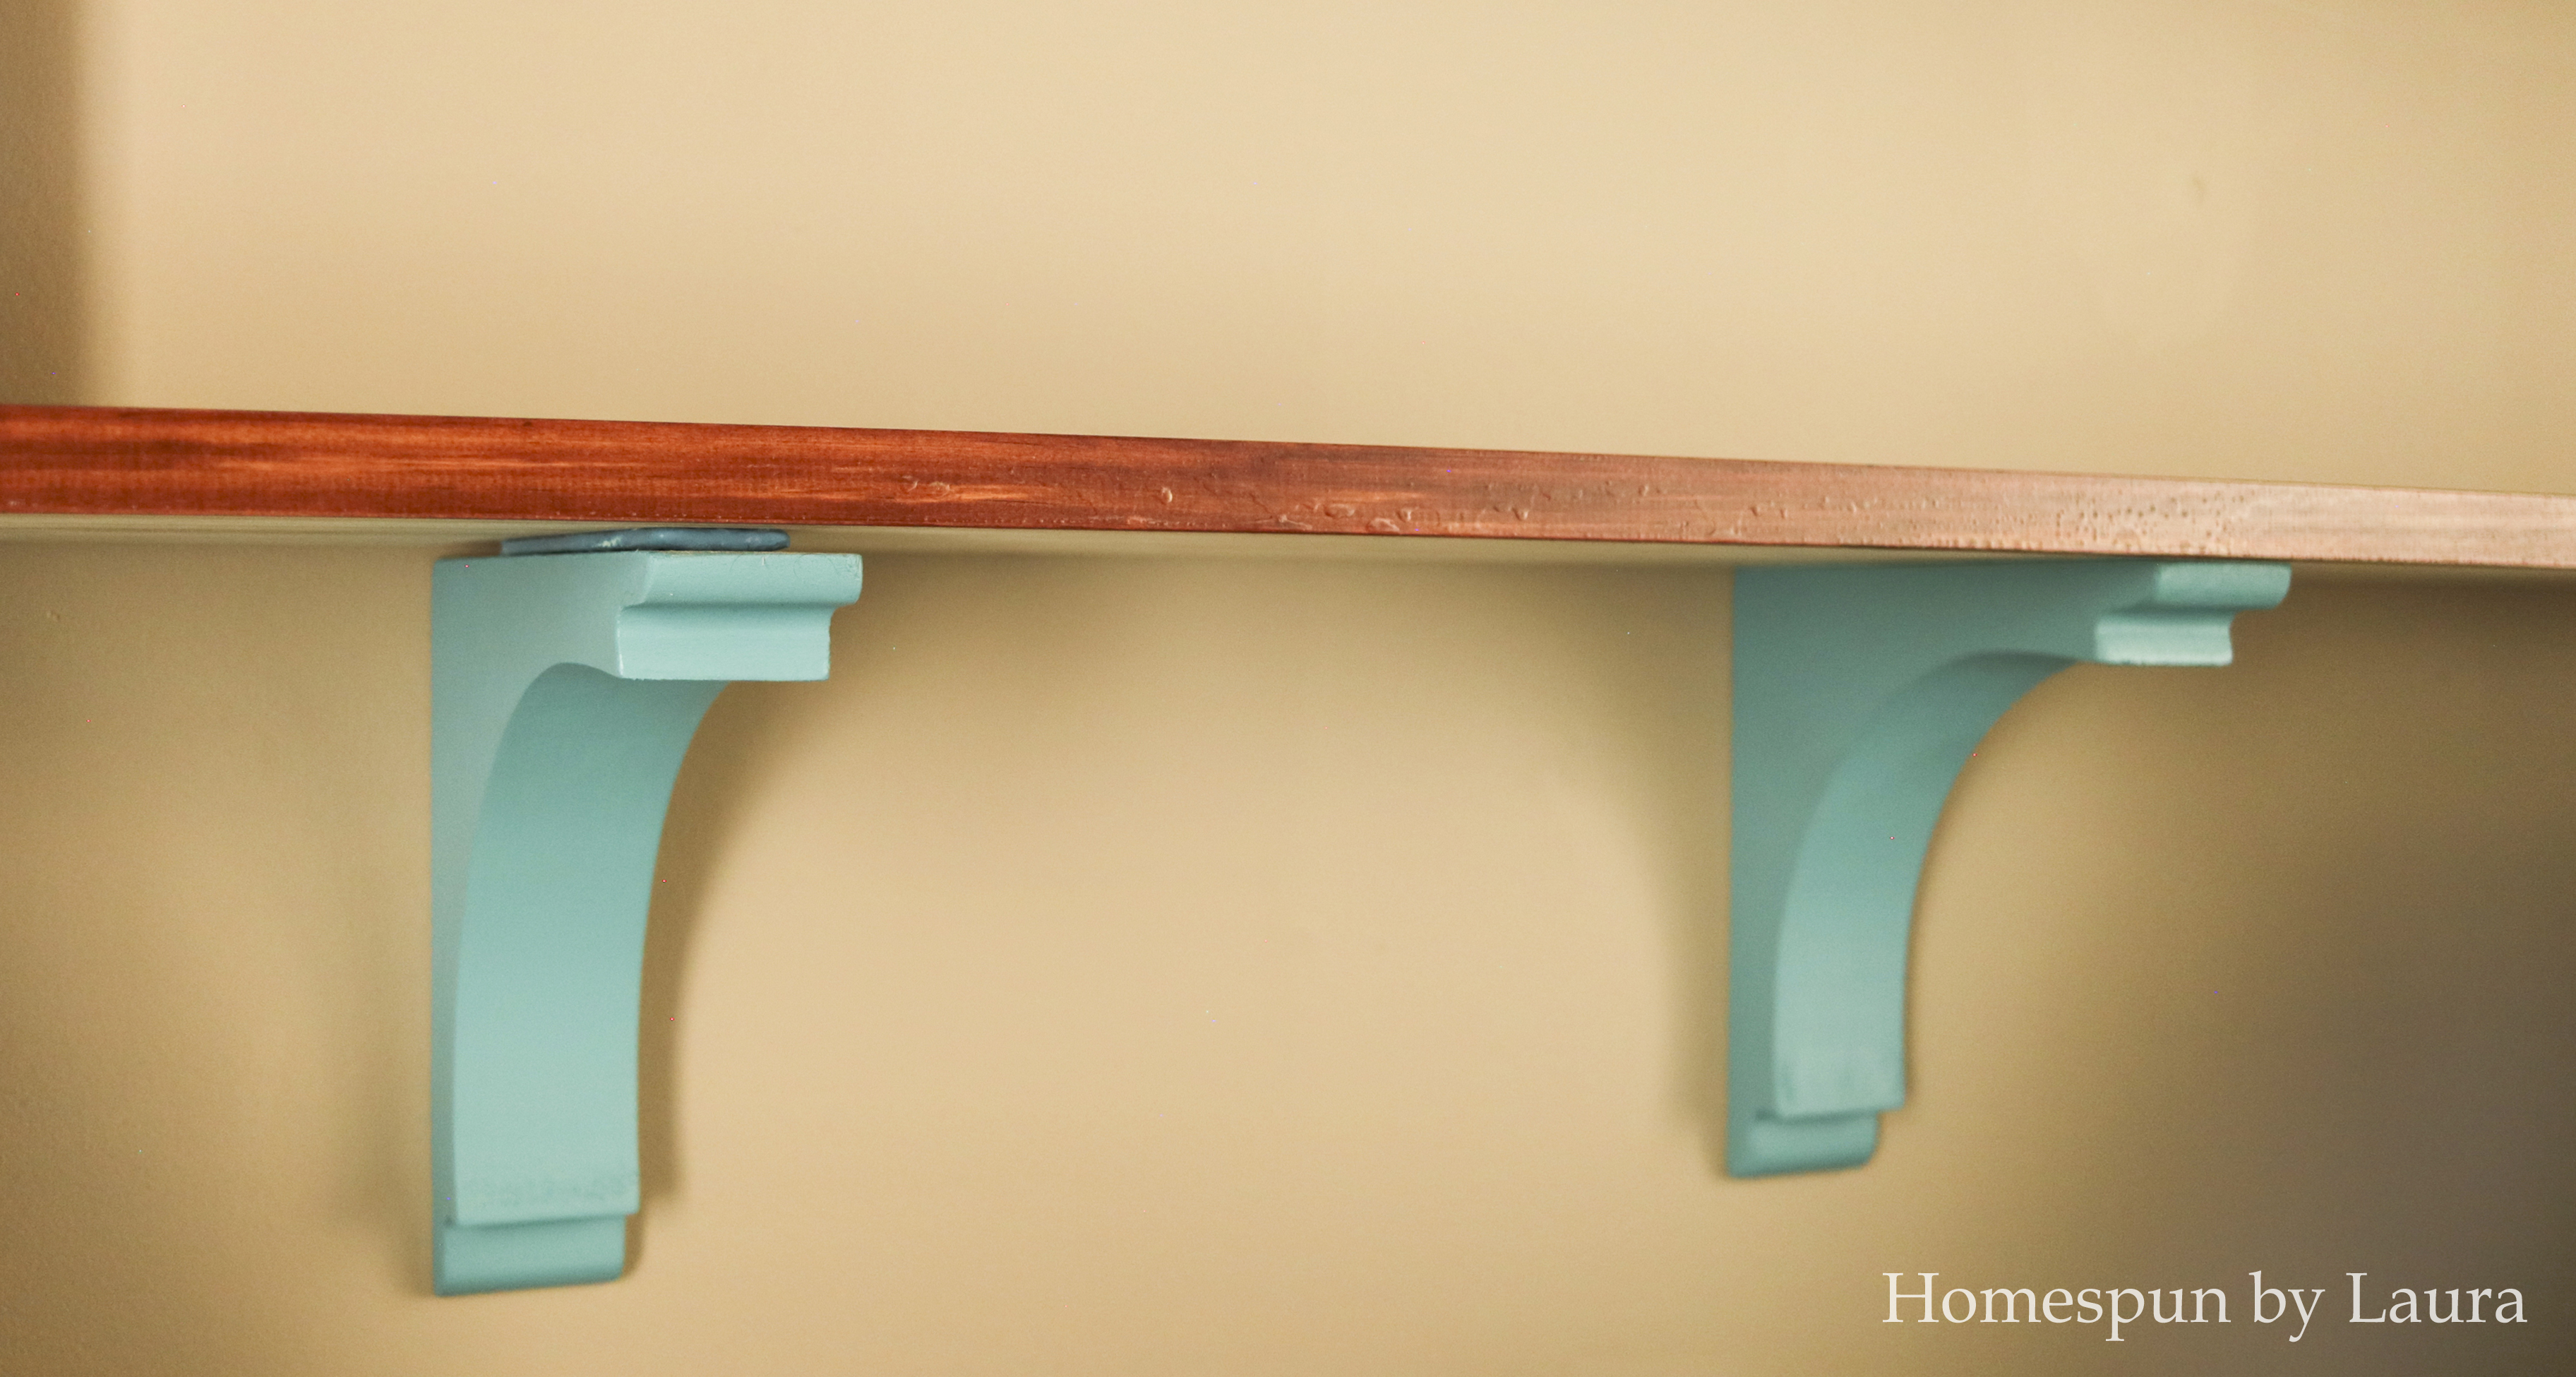
The bracket on the left was slightly too low. A broken paint stick I had used to stir the cabinet paint did the trick. If you look closely, you can see this easy fix.
inject the space with color!
paint + stain cabinets, shelves, ledge, and rod
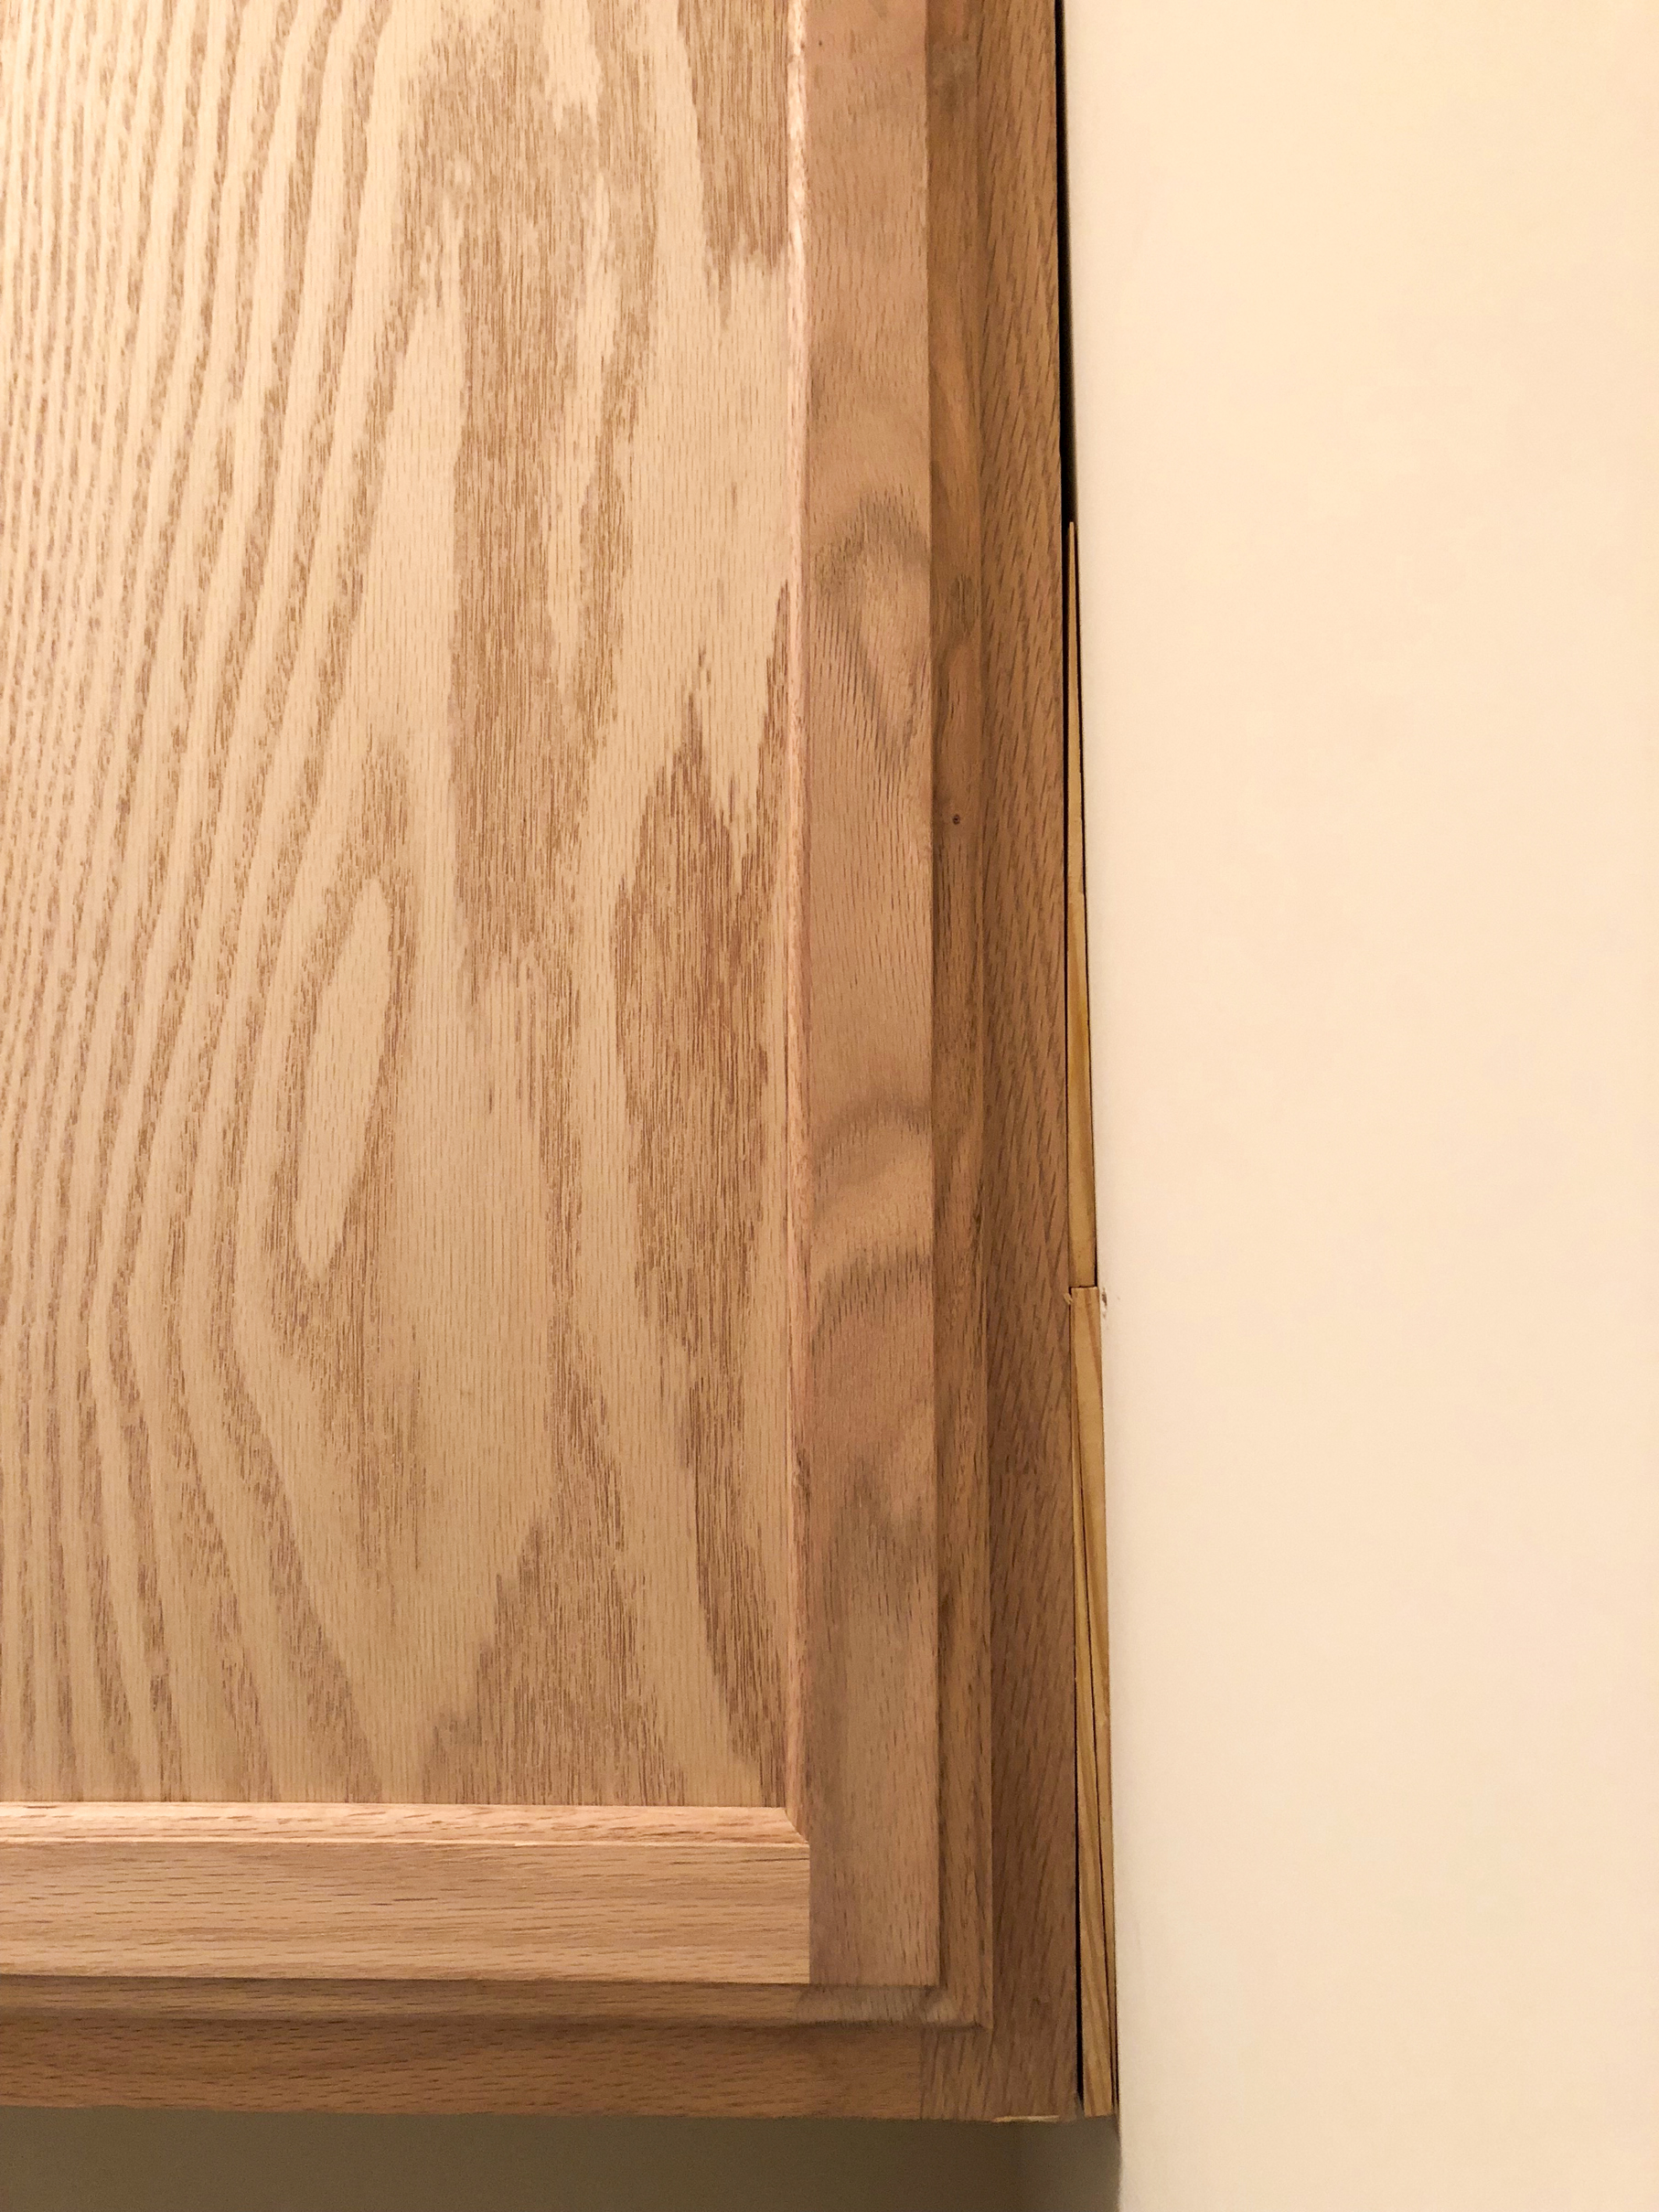
Painting the cabinets was a bigger step than it sounds but it was absolutely worth the effort.
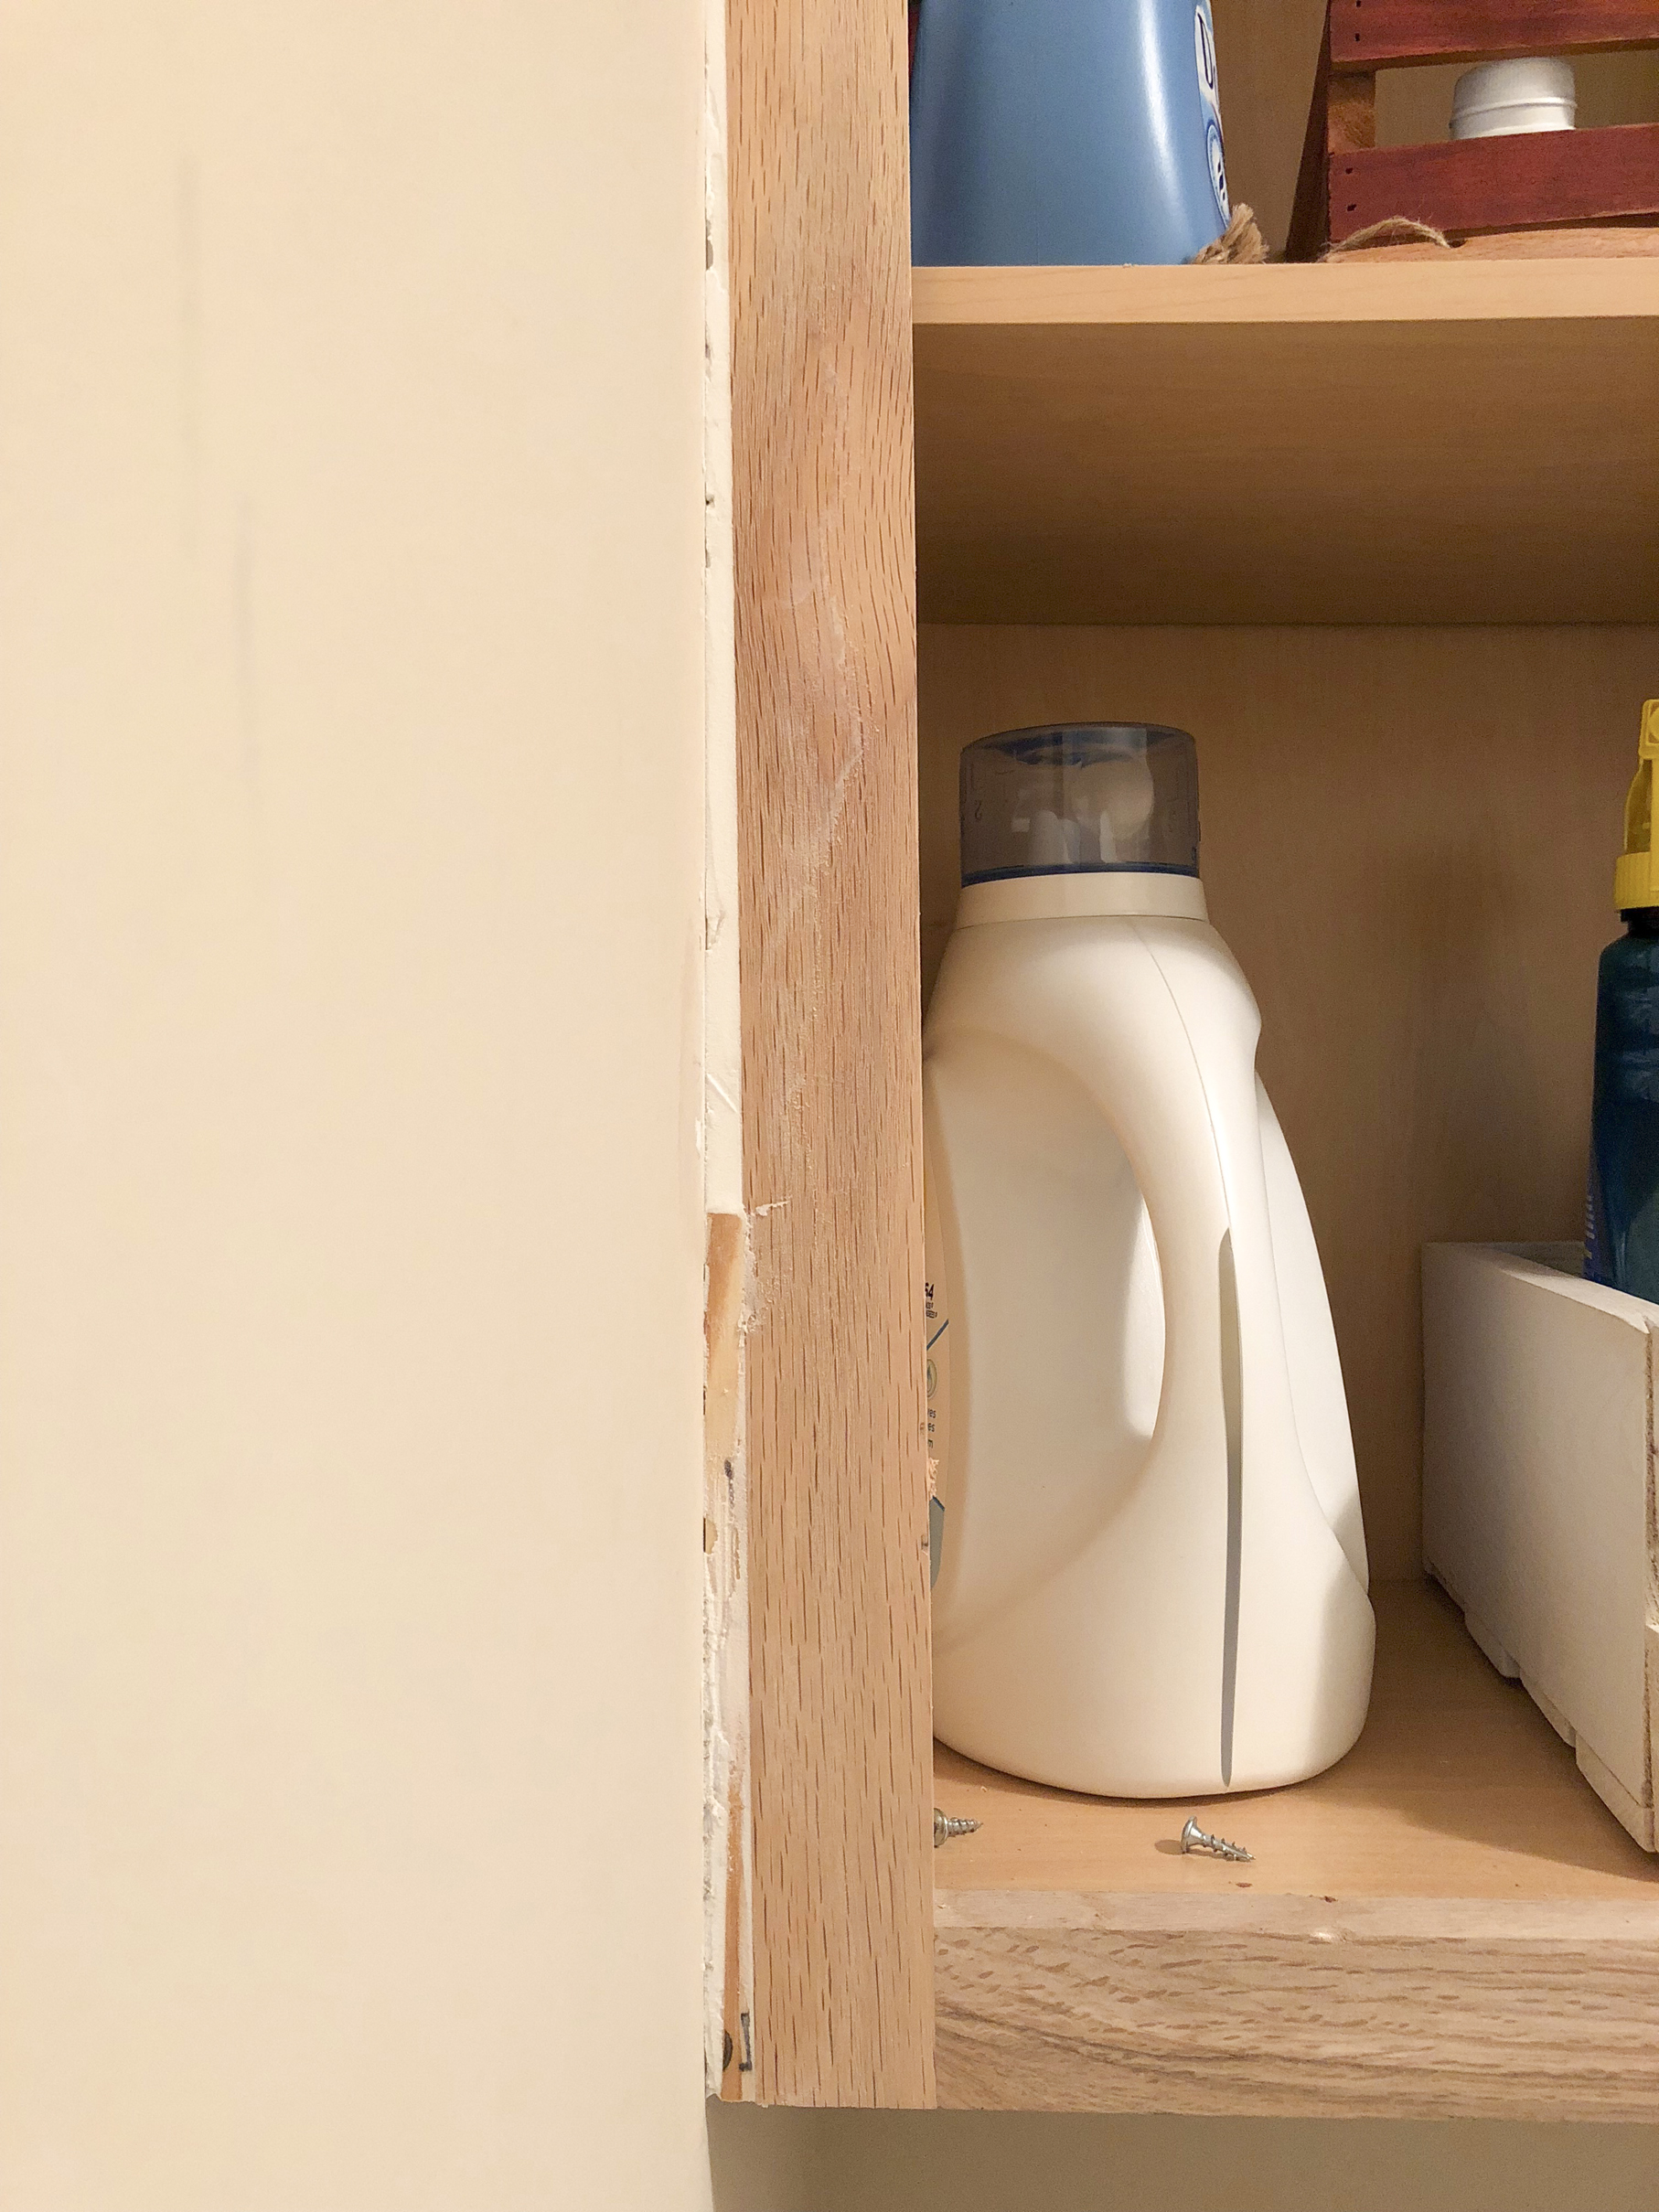
Since they were hung a little…crooked…I had to fill in the gaps between the cabinets and the walls before I could dip the paintbrush in the can. This wasn’t difficult, but it took a few naptimes to complete thanks to multiple layers of spackle needing to dry.
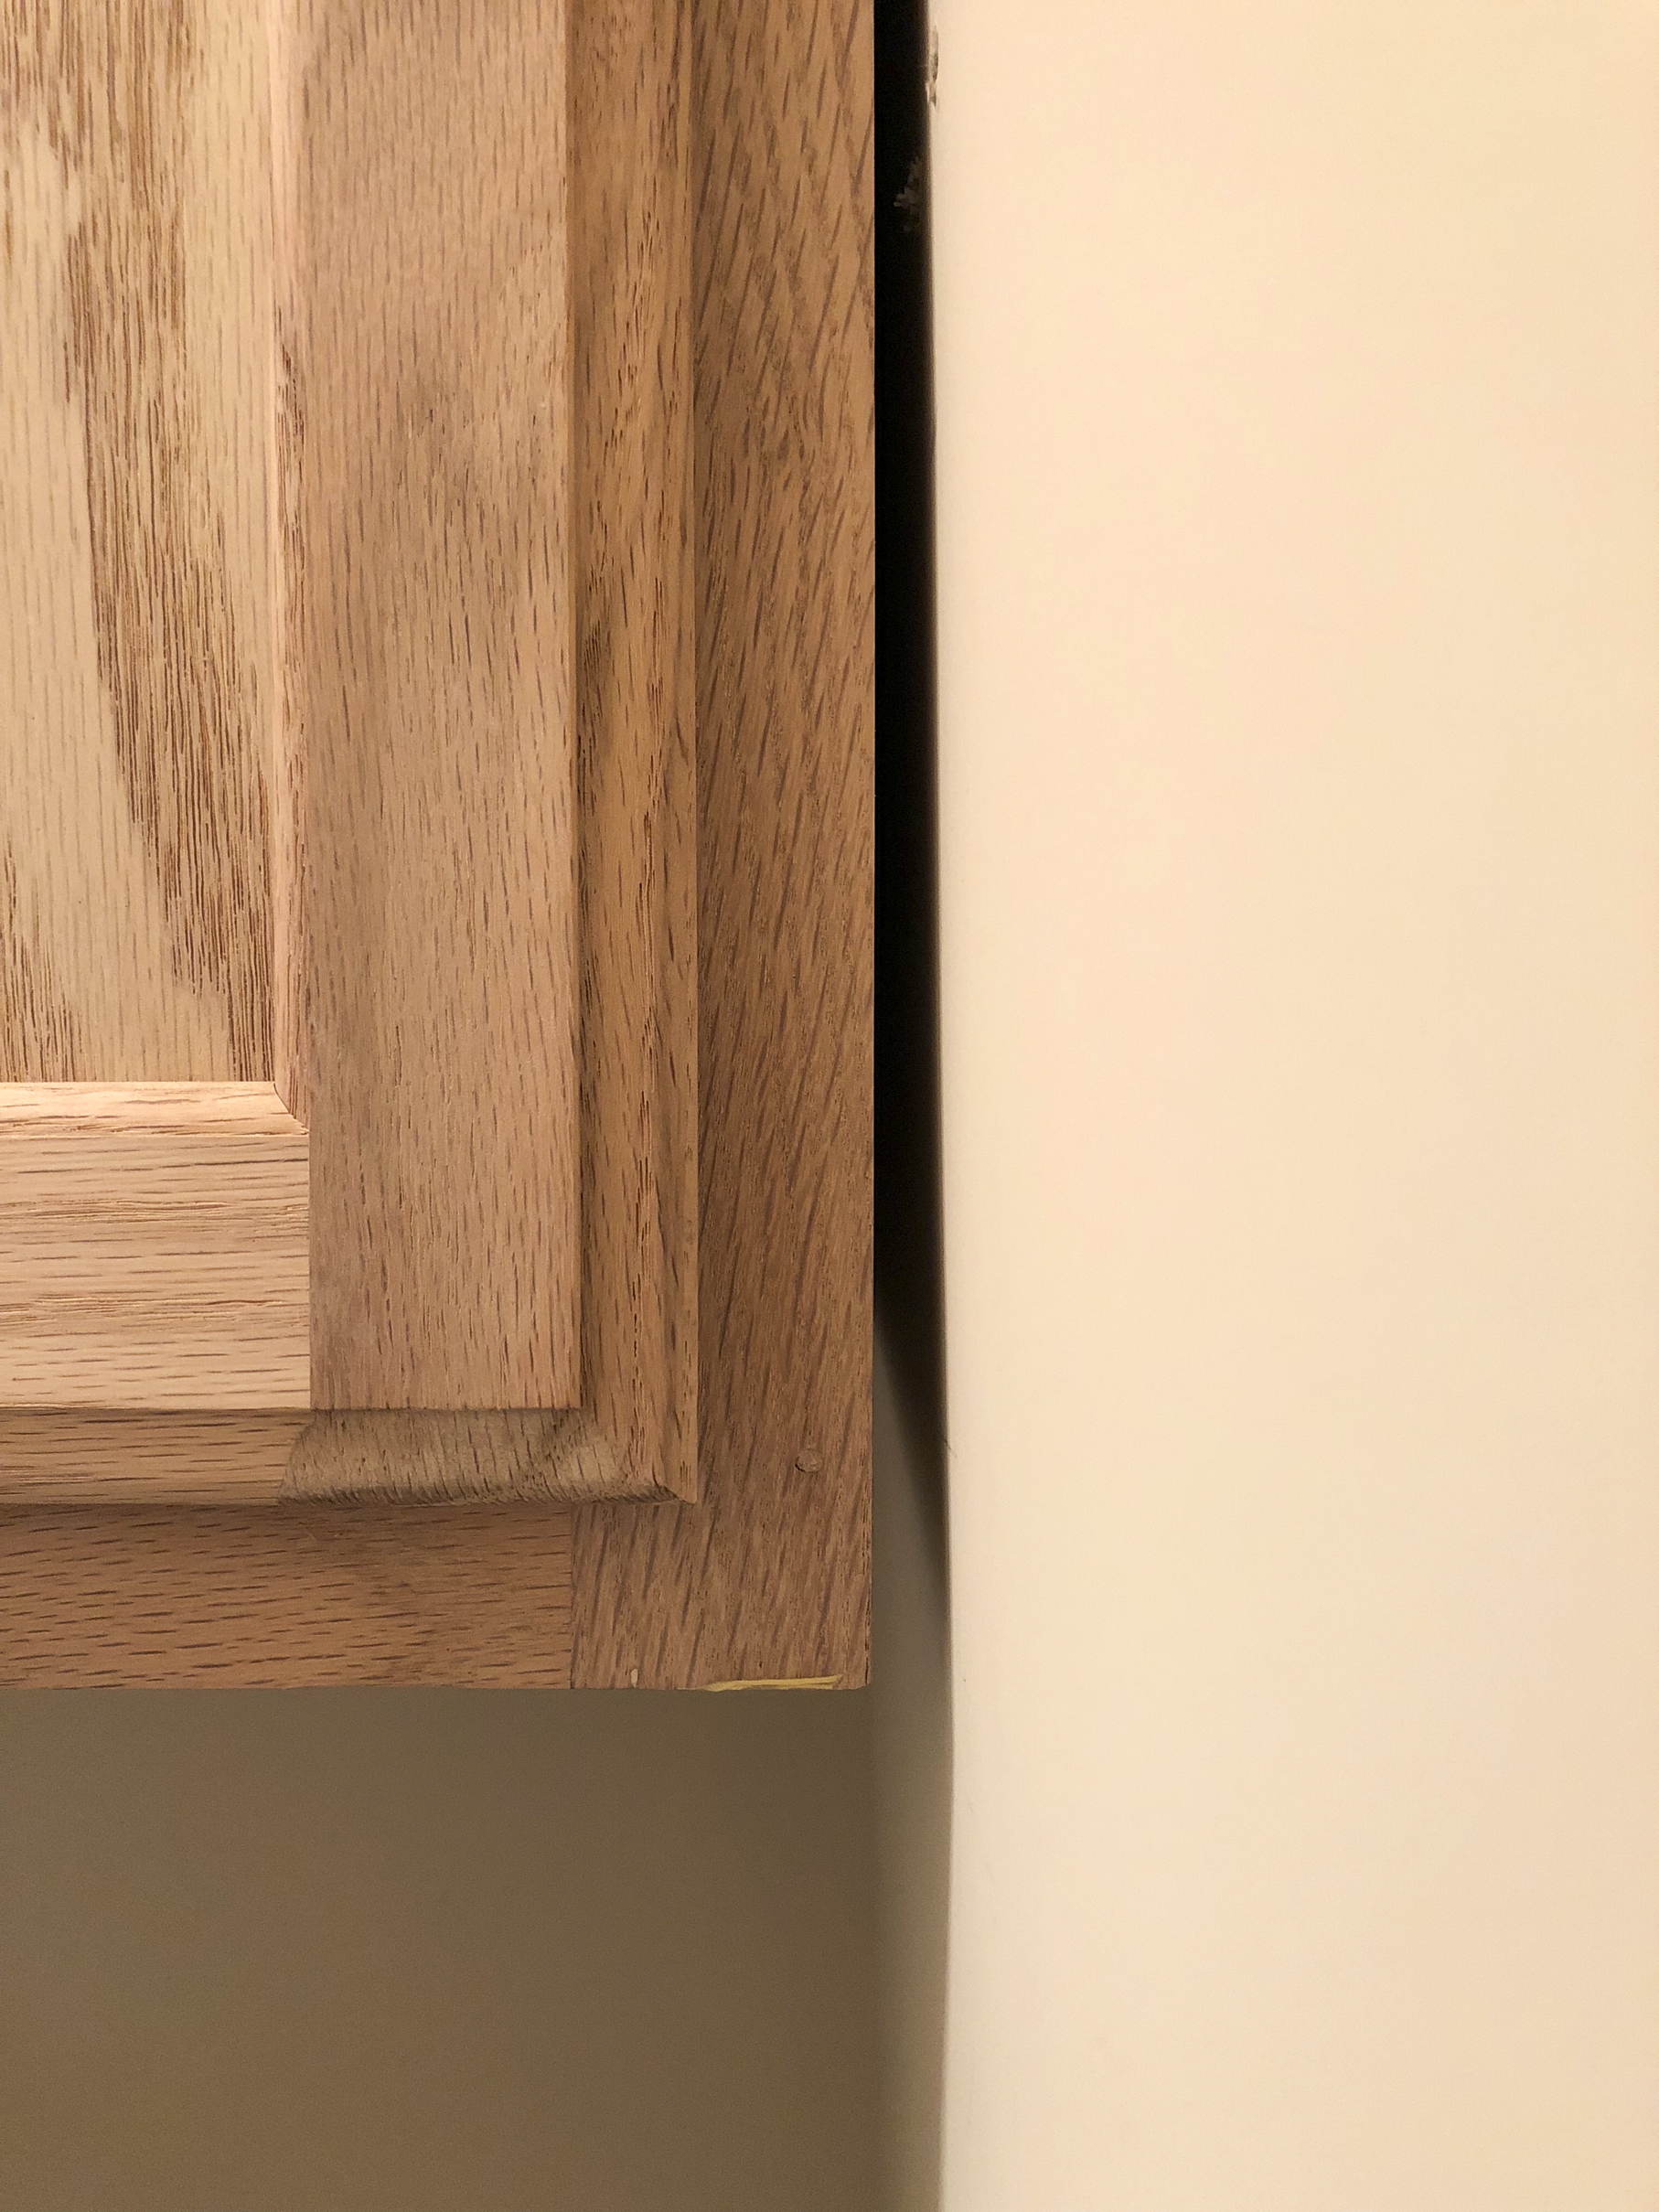
I started by wedging a few shims in the gaps.
Next, I used spackle to fill the remaining space.
I then sanded the cabinets and caulked around the edges to fill the remaining gaps.
Finally, I lugged all the painting supplies upstairs. Before I could prime the cabinets, I had to remove the doors and take them down to the garage where there was space to spread them out.
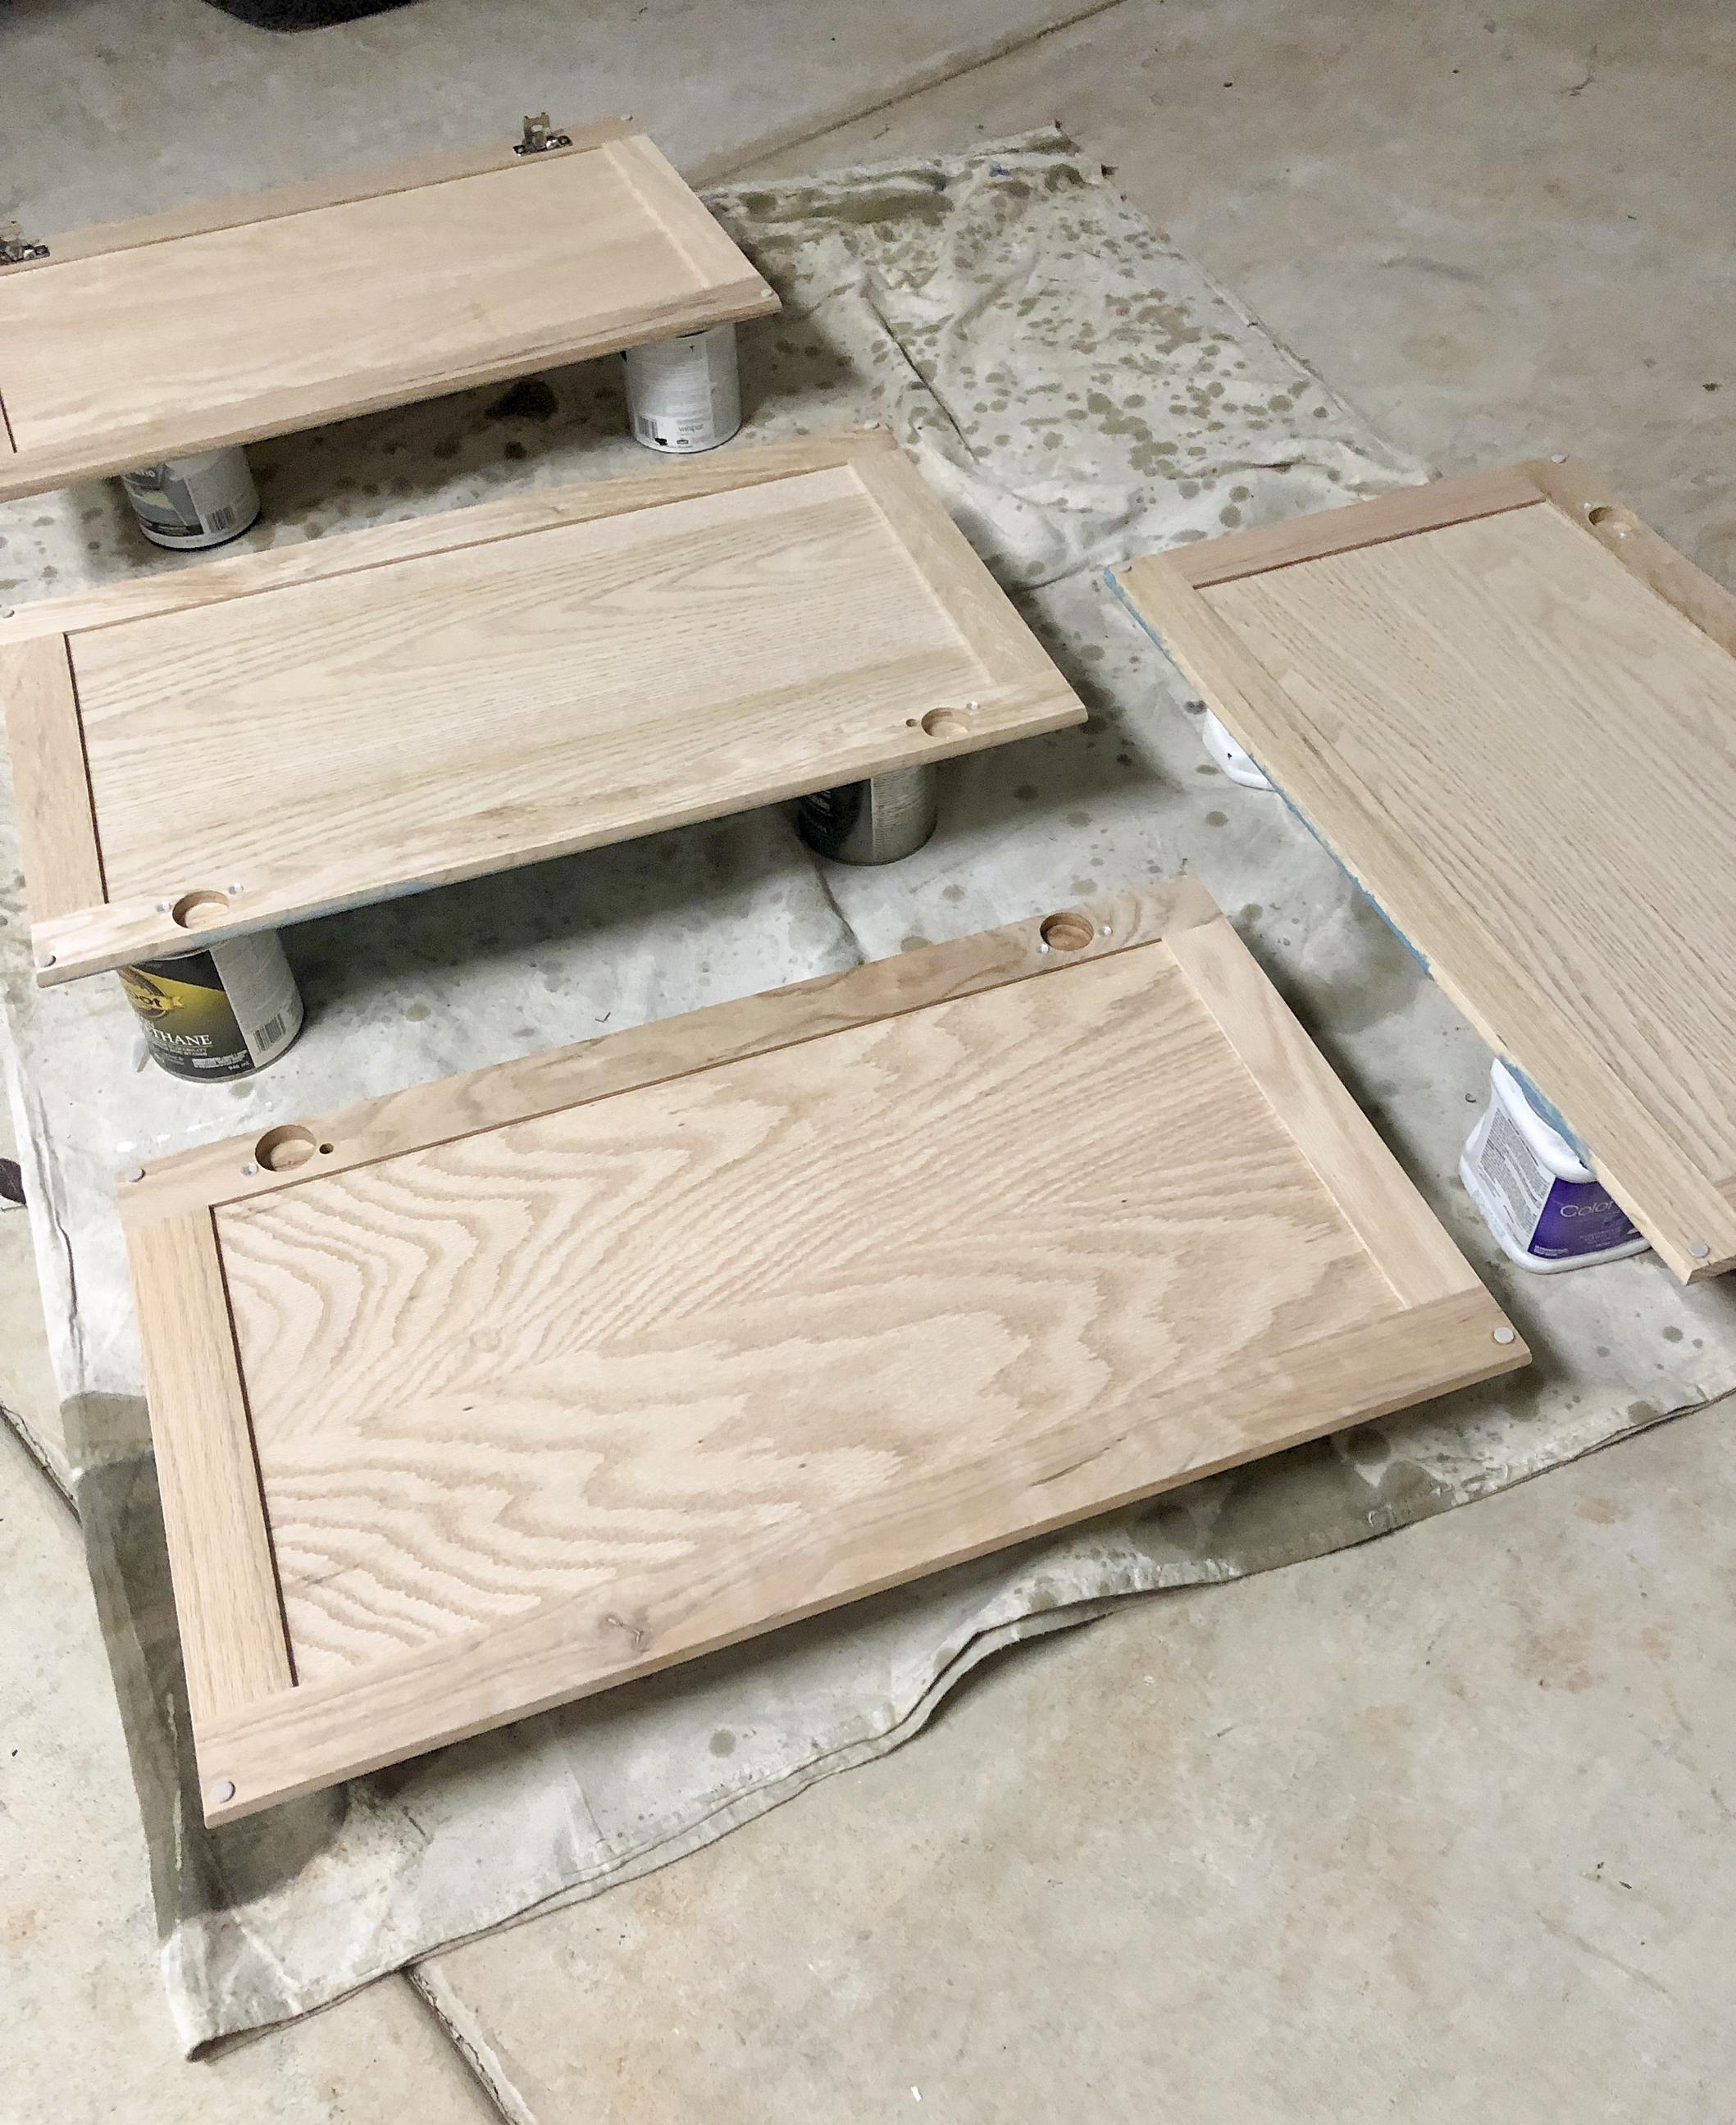
After two coats of primer, I mixed up my custom paint color using old samples I had on my paint shelf. I thoroughly enjoyed this process!
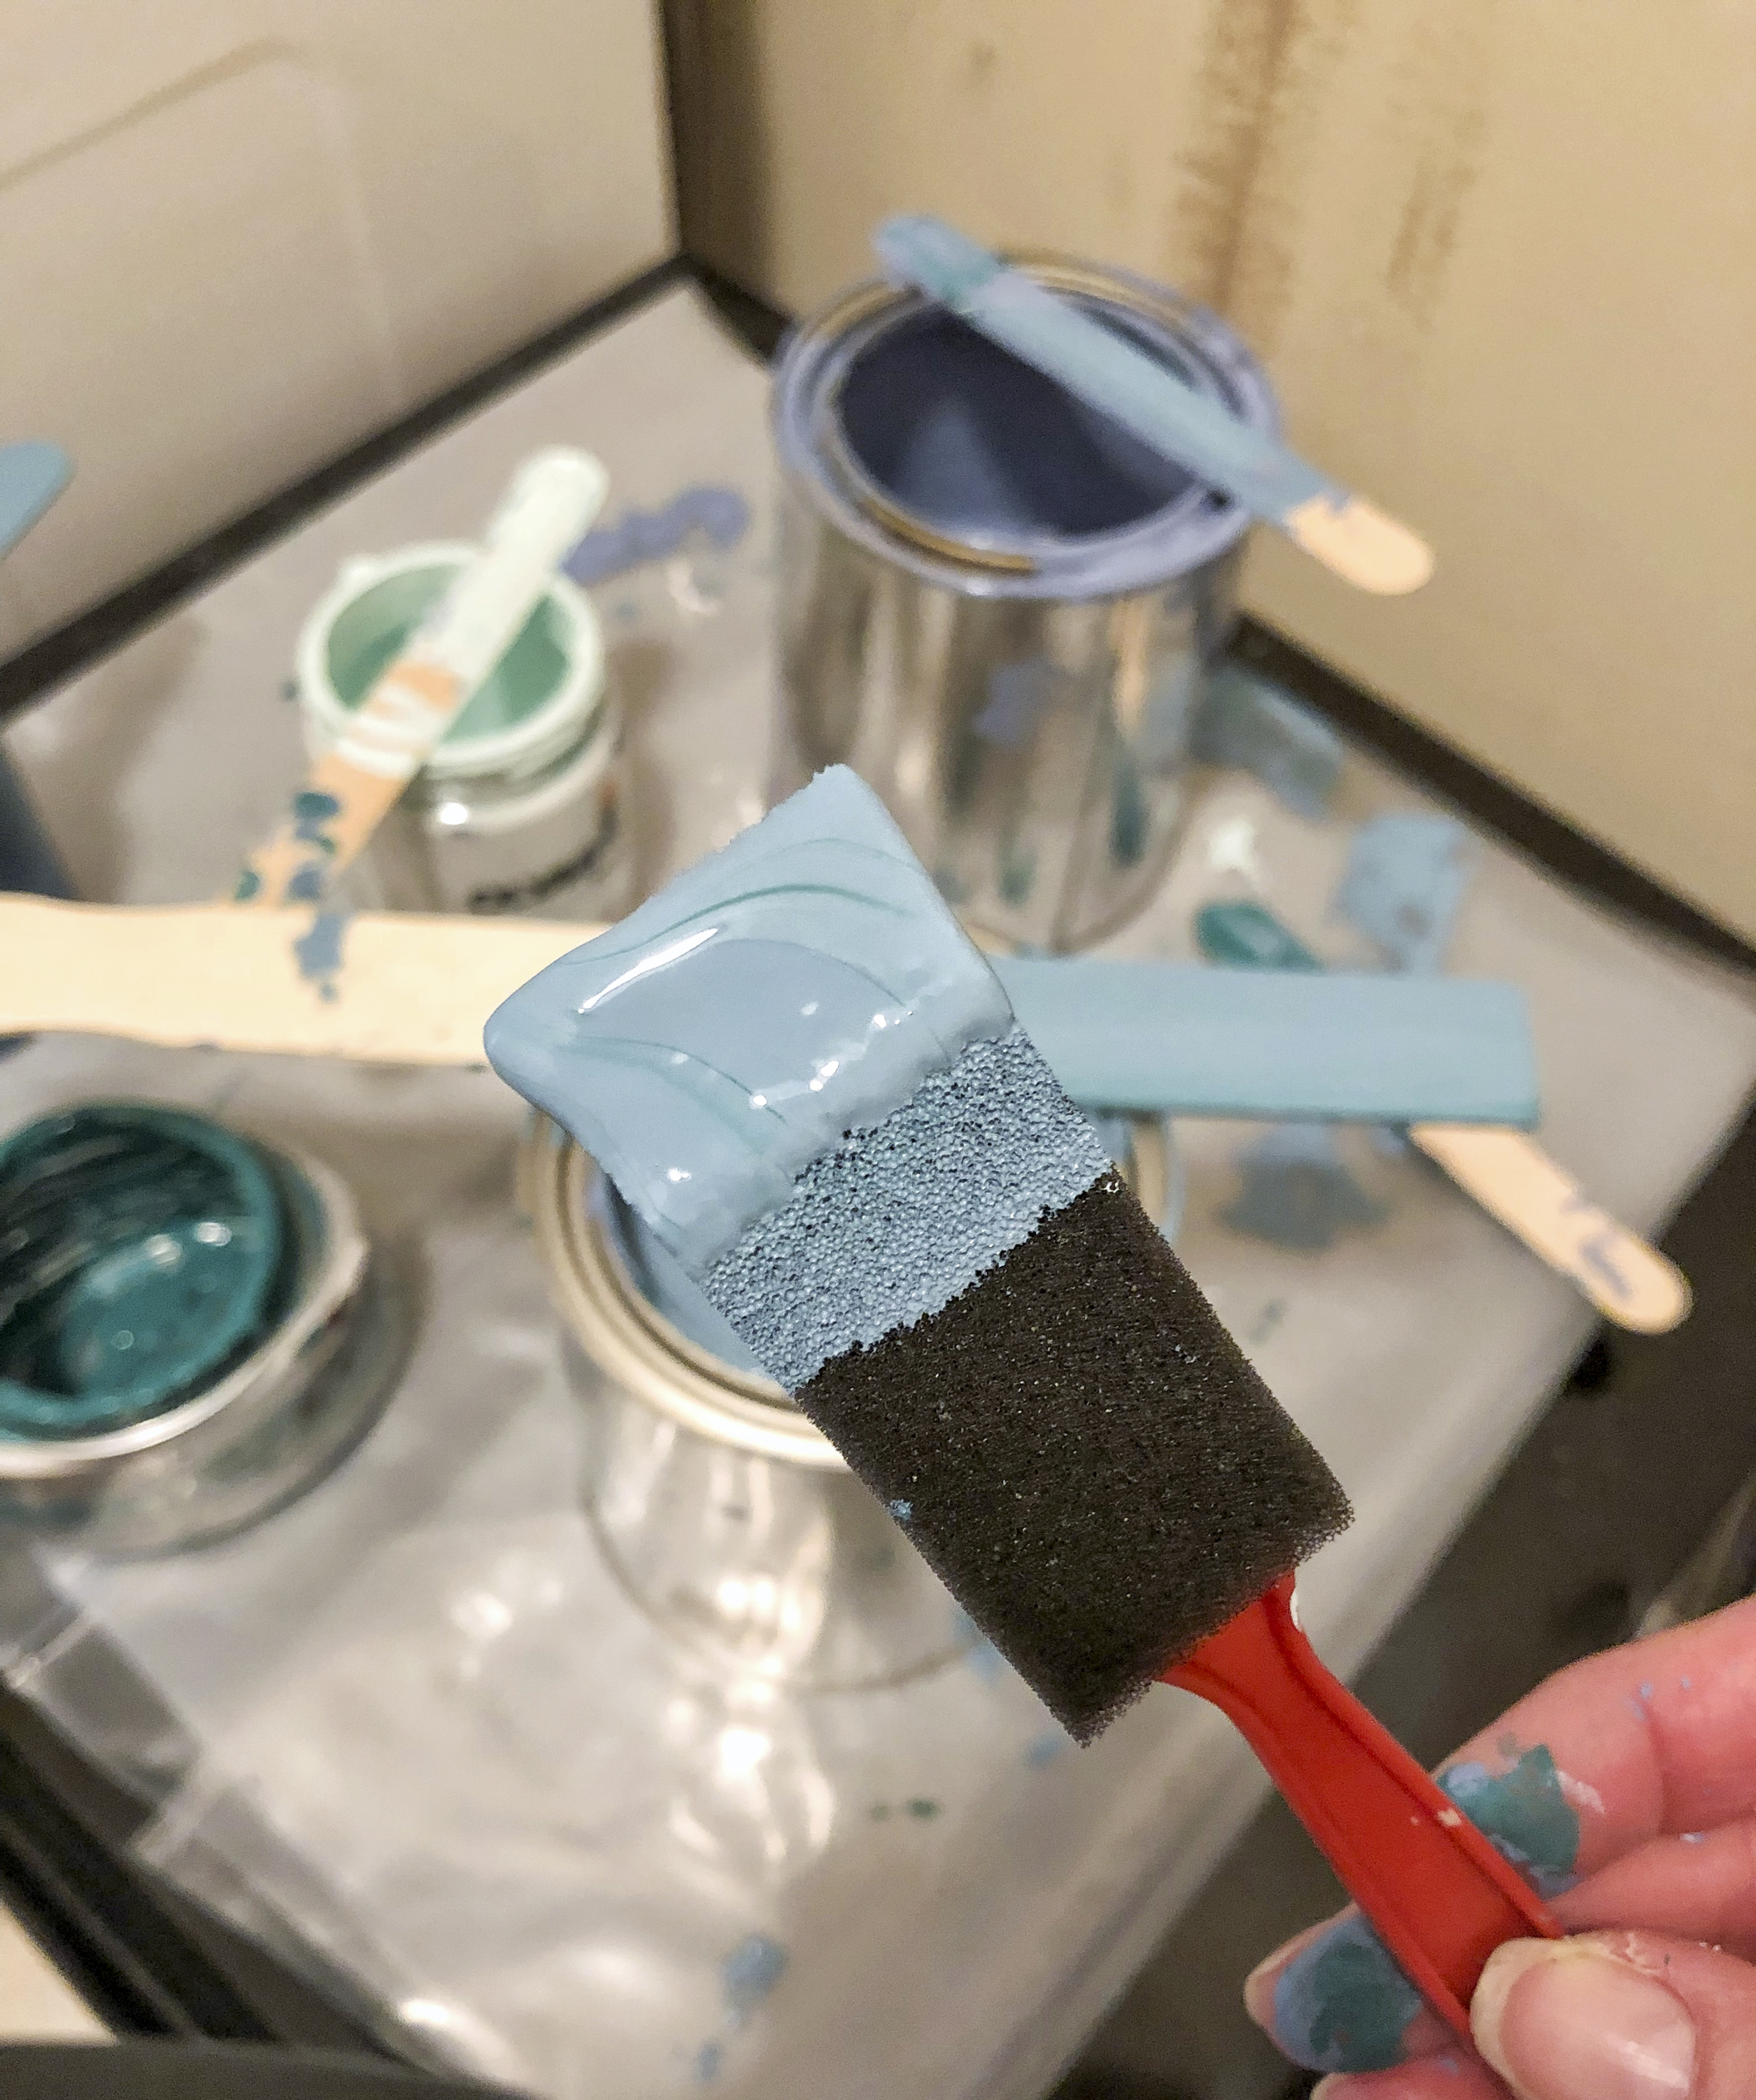
Finally, I painted the cabinets.
create a feature wall
The original plan was to add a decorative backsplash of some kind. I REALLY wanted to put a real brick wall here but that was an unrealistic goal, both budget and time-wise. Another of the many options I considered was a faux white brick wallpaper, and the next idea was to freehand a design on it based on a napkin pattern I liked, but in the end I decided to live with it for now and decide later. No reason to rush it now, other than the self-imposed six week timeline…
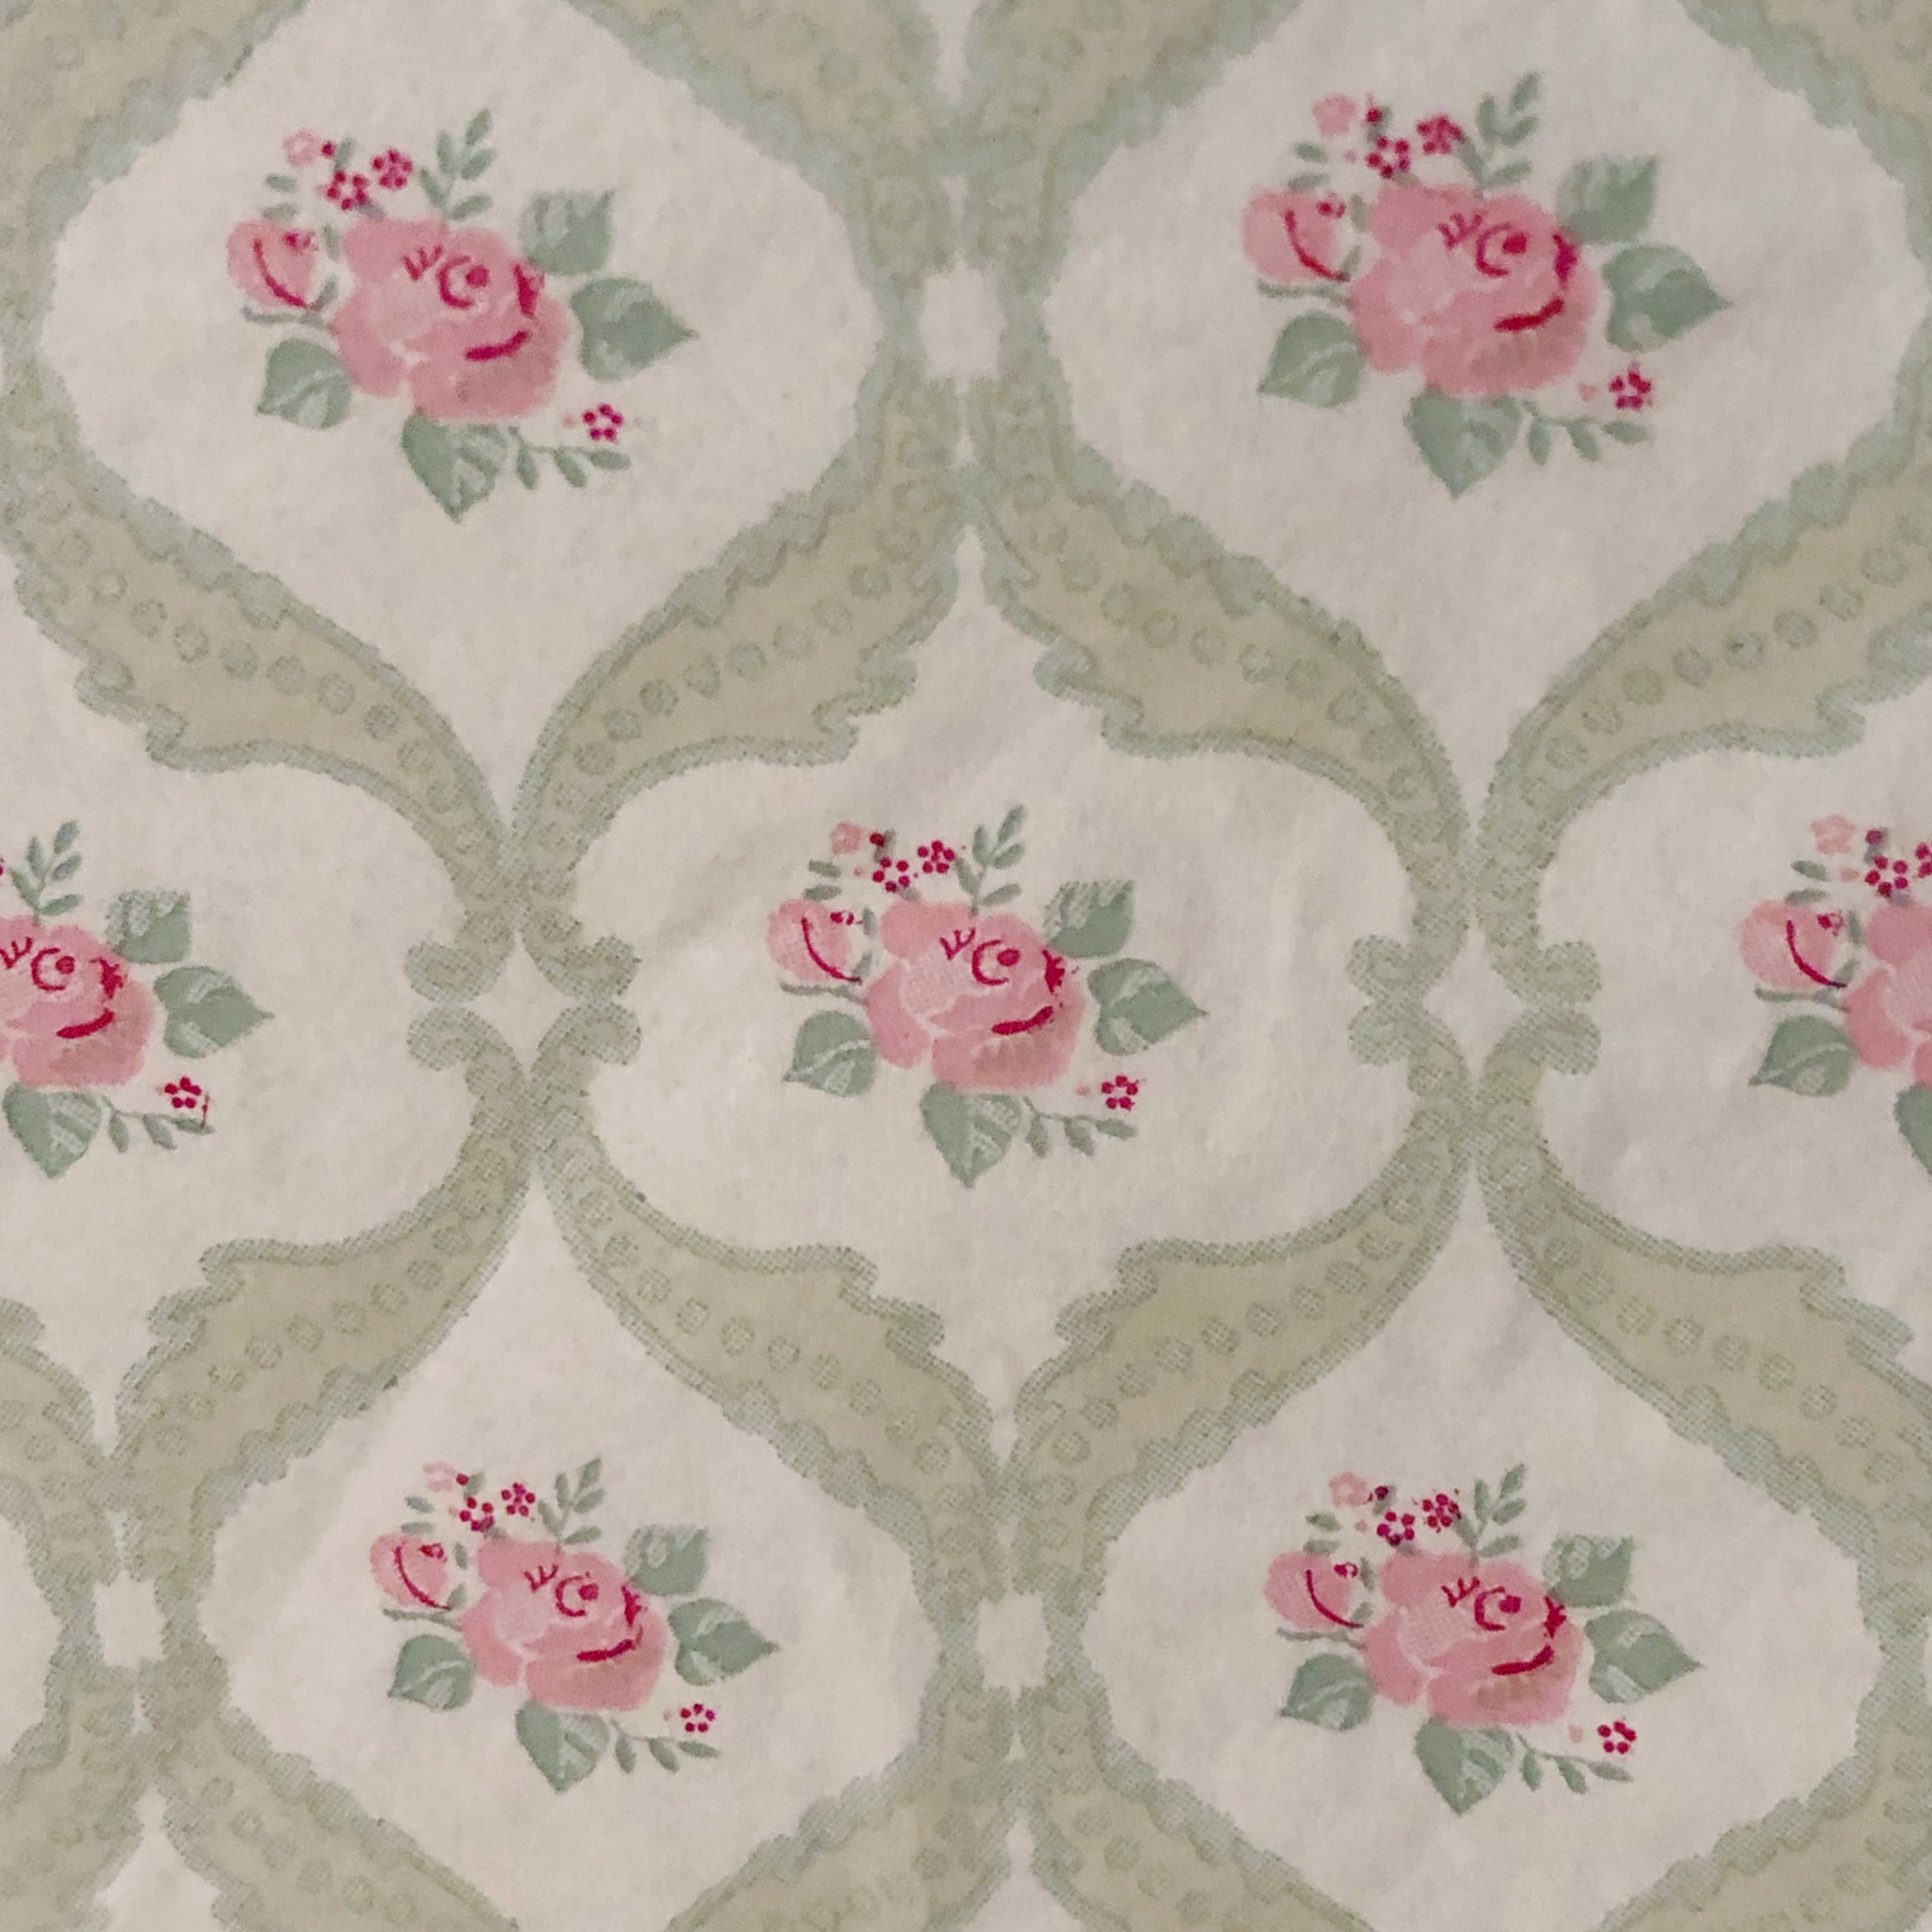
The possible DIY painted backsplash / accent wall / feature wall would be similar to the design on this napkin from IKEA.
Update: I decided in the end to use this Pioneer Woman contact paper to add a little more color to the room. If down the road I decided I don’t like it, it cost $4 and will be easy to remove.

paint wall
This was on the ‘dream’ list, but after I got going with the rest of the project, it became a necessity. The walls were already scratched and marked upon when I started, and my work didn’t help the situation. Instead of buying new paint, I chose to use a nearly-full can of paint that was left over when I painted our old house. I loved the paint color there and thought I would here, too.
The color looks excellent against the cabinet color (and actually was one of the colors I mixed into the custom color I used on the cabinets).
This room is lit by a single fixture, has no windows, and receives minimal natural light from the nearby rooms. Everything looks a little darker and yellow-er than it really is. Including the paint. The rooms in our old house weren’t the brightest since we had tall trees, but they were pretty well flooded with natural light, which in hindsight I realize is what made the paint work so well. At first, I didn’t love it in here as much as I did in our old house, but as time goes by my eyes are adjusting to it! ( It doesn’t look so dark in the photos because they’re edited. It’s very dark in the room without natural light I had brighten them a LOT! The cabinets are also a little darker in real life than they look in the photos, and I absolutely love the color!)
reconfigure + rearrange
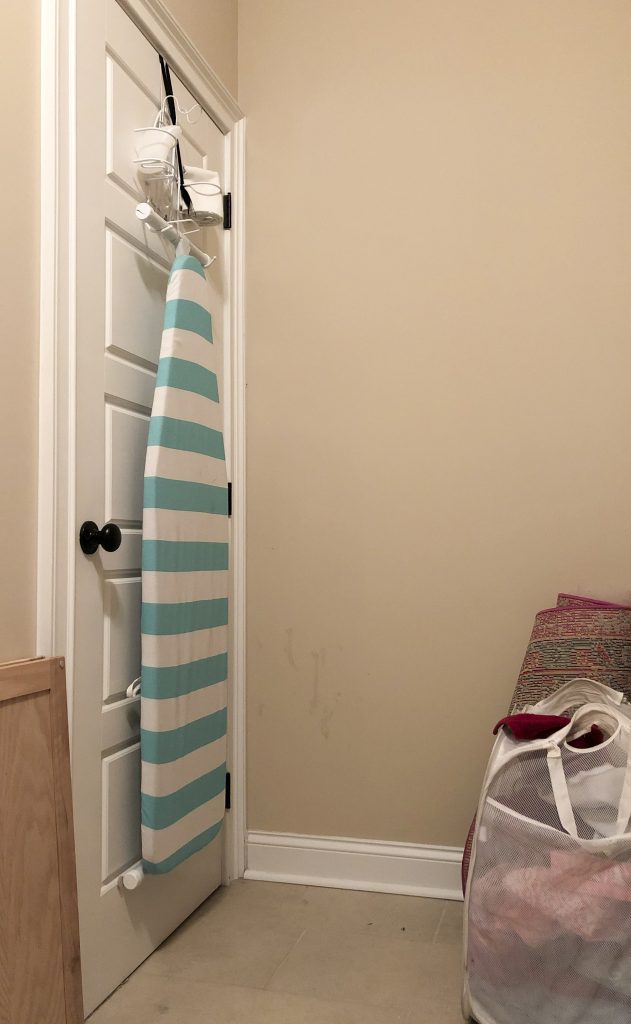
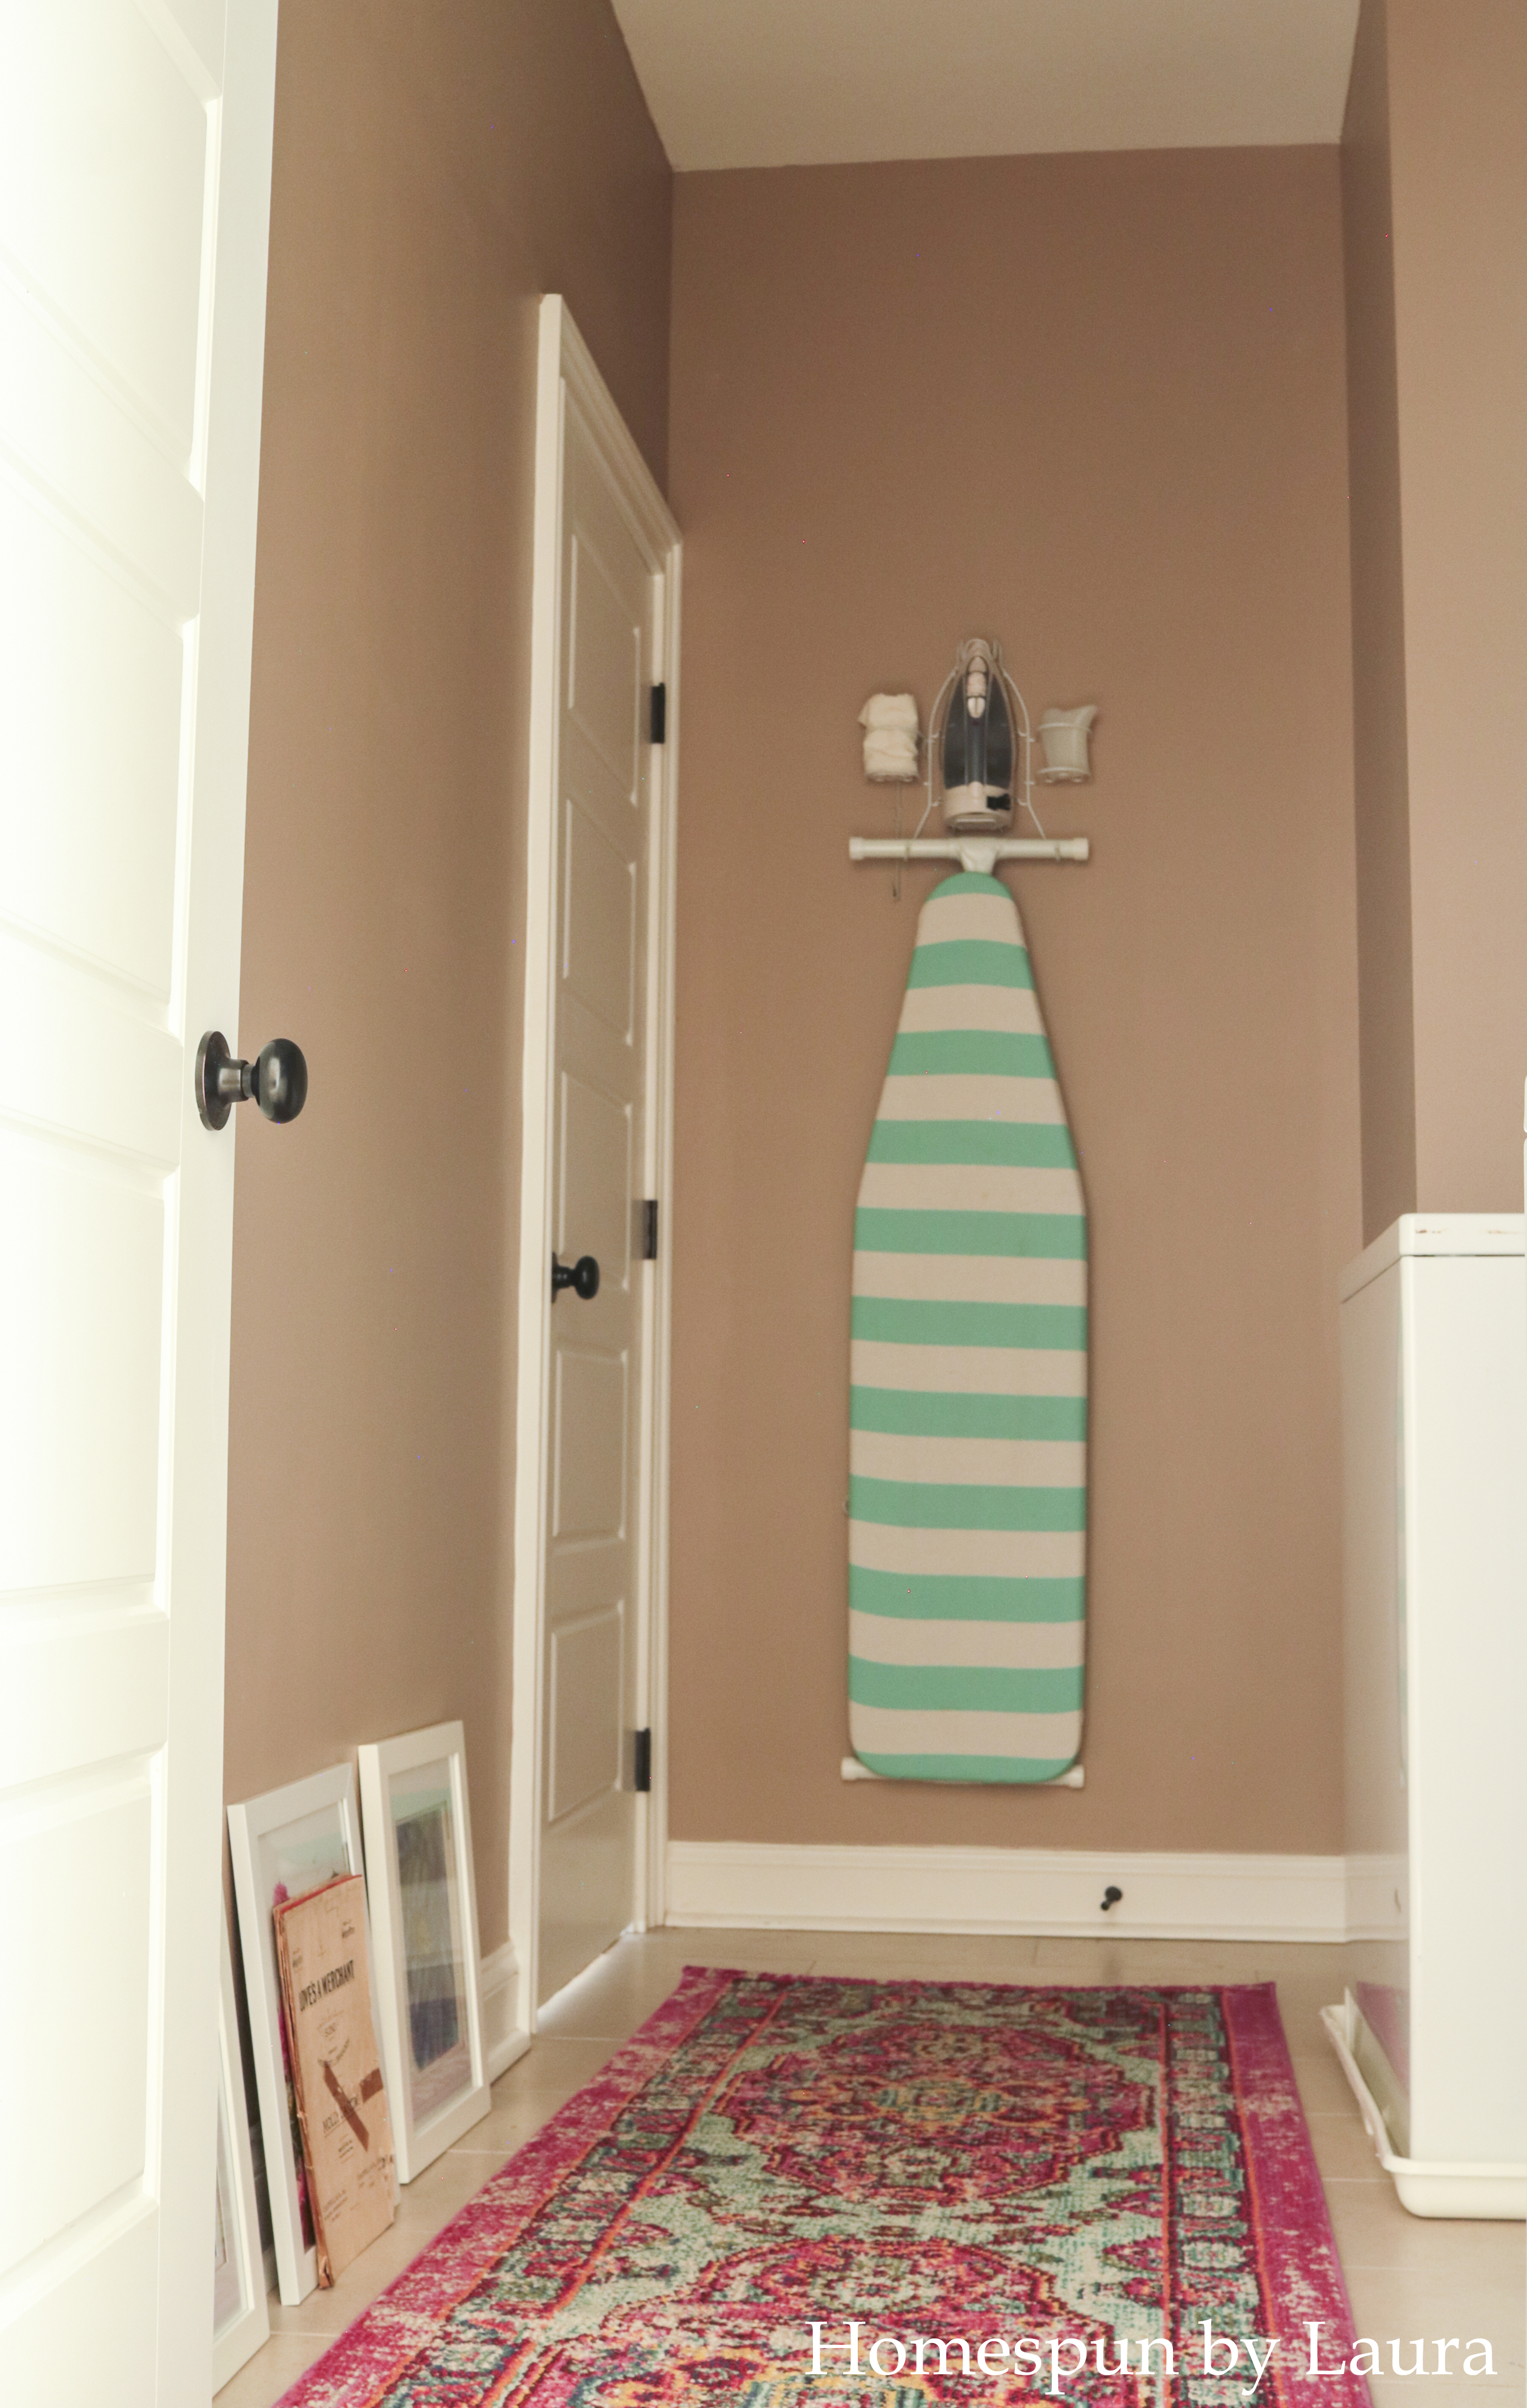
hang iron/ironing board rack
It was fine where it was, but I wanted to move it to the wall. The door it previously hung from leads to the master closet and we walk through it holding a sleeping baby on occasion. The ironing board clattered quietly on the door, but sometimes it was a little too loud. The hanger easily converts for use on the wall, so this was a free change!
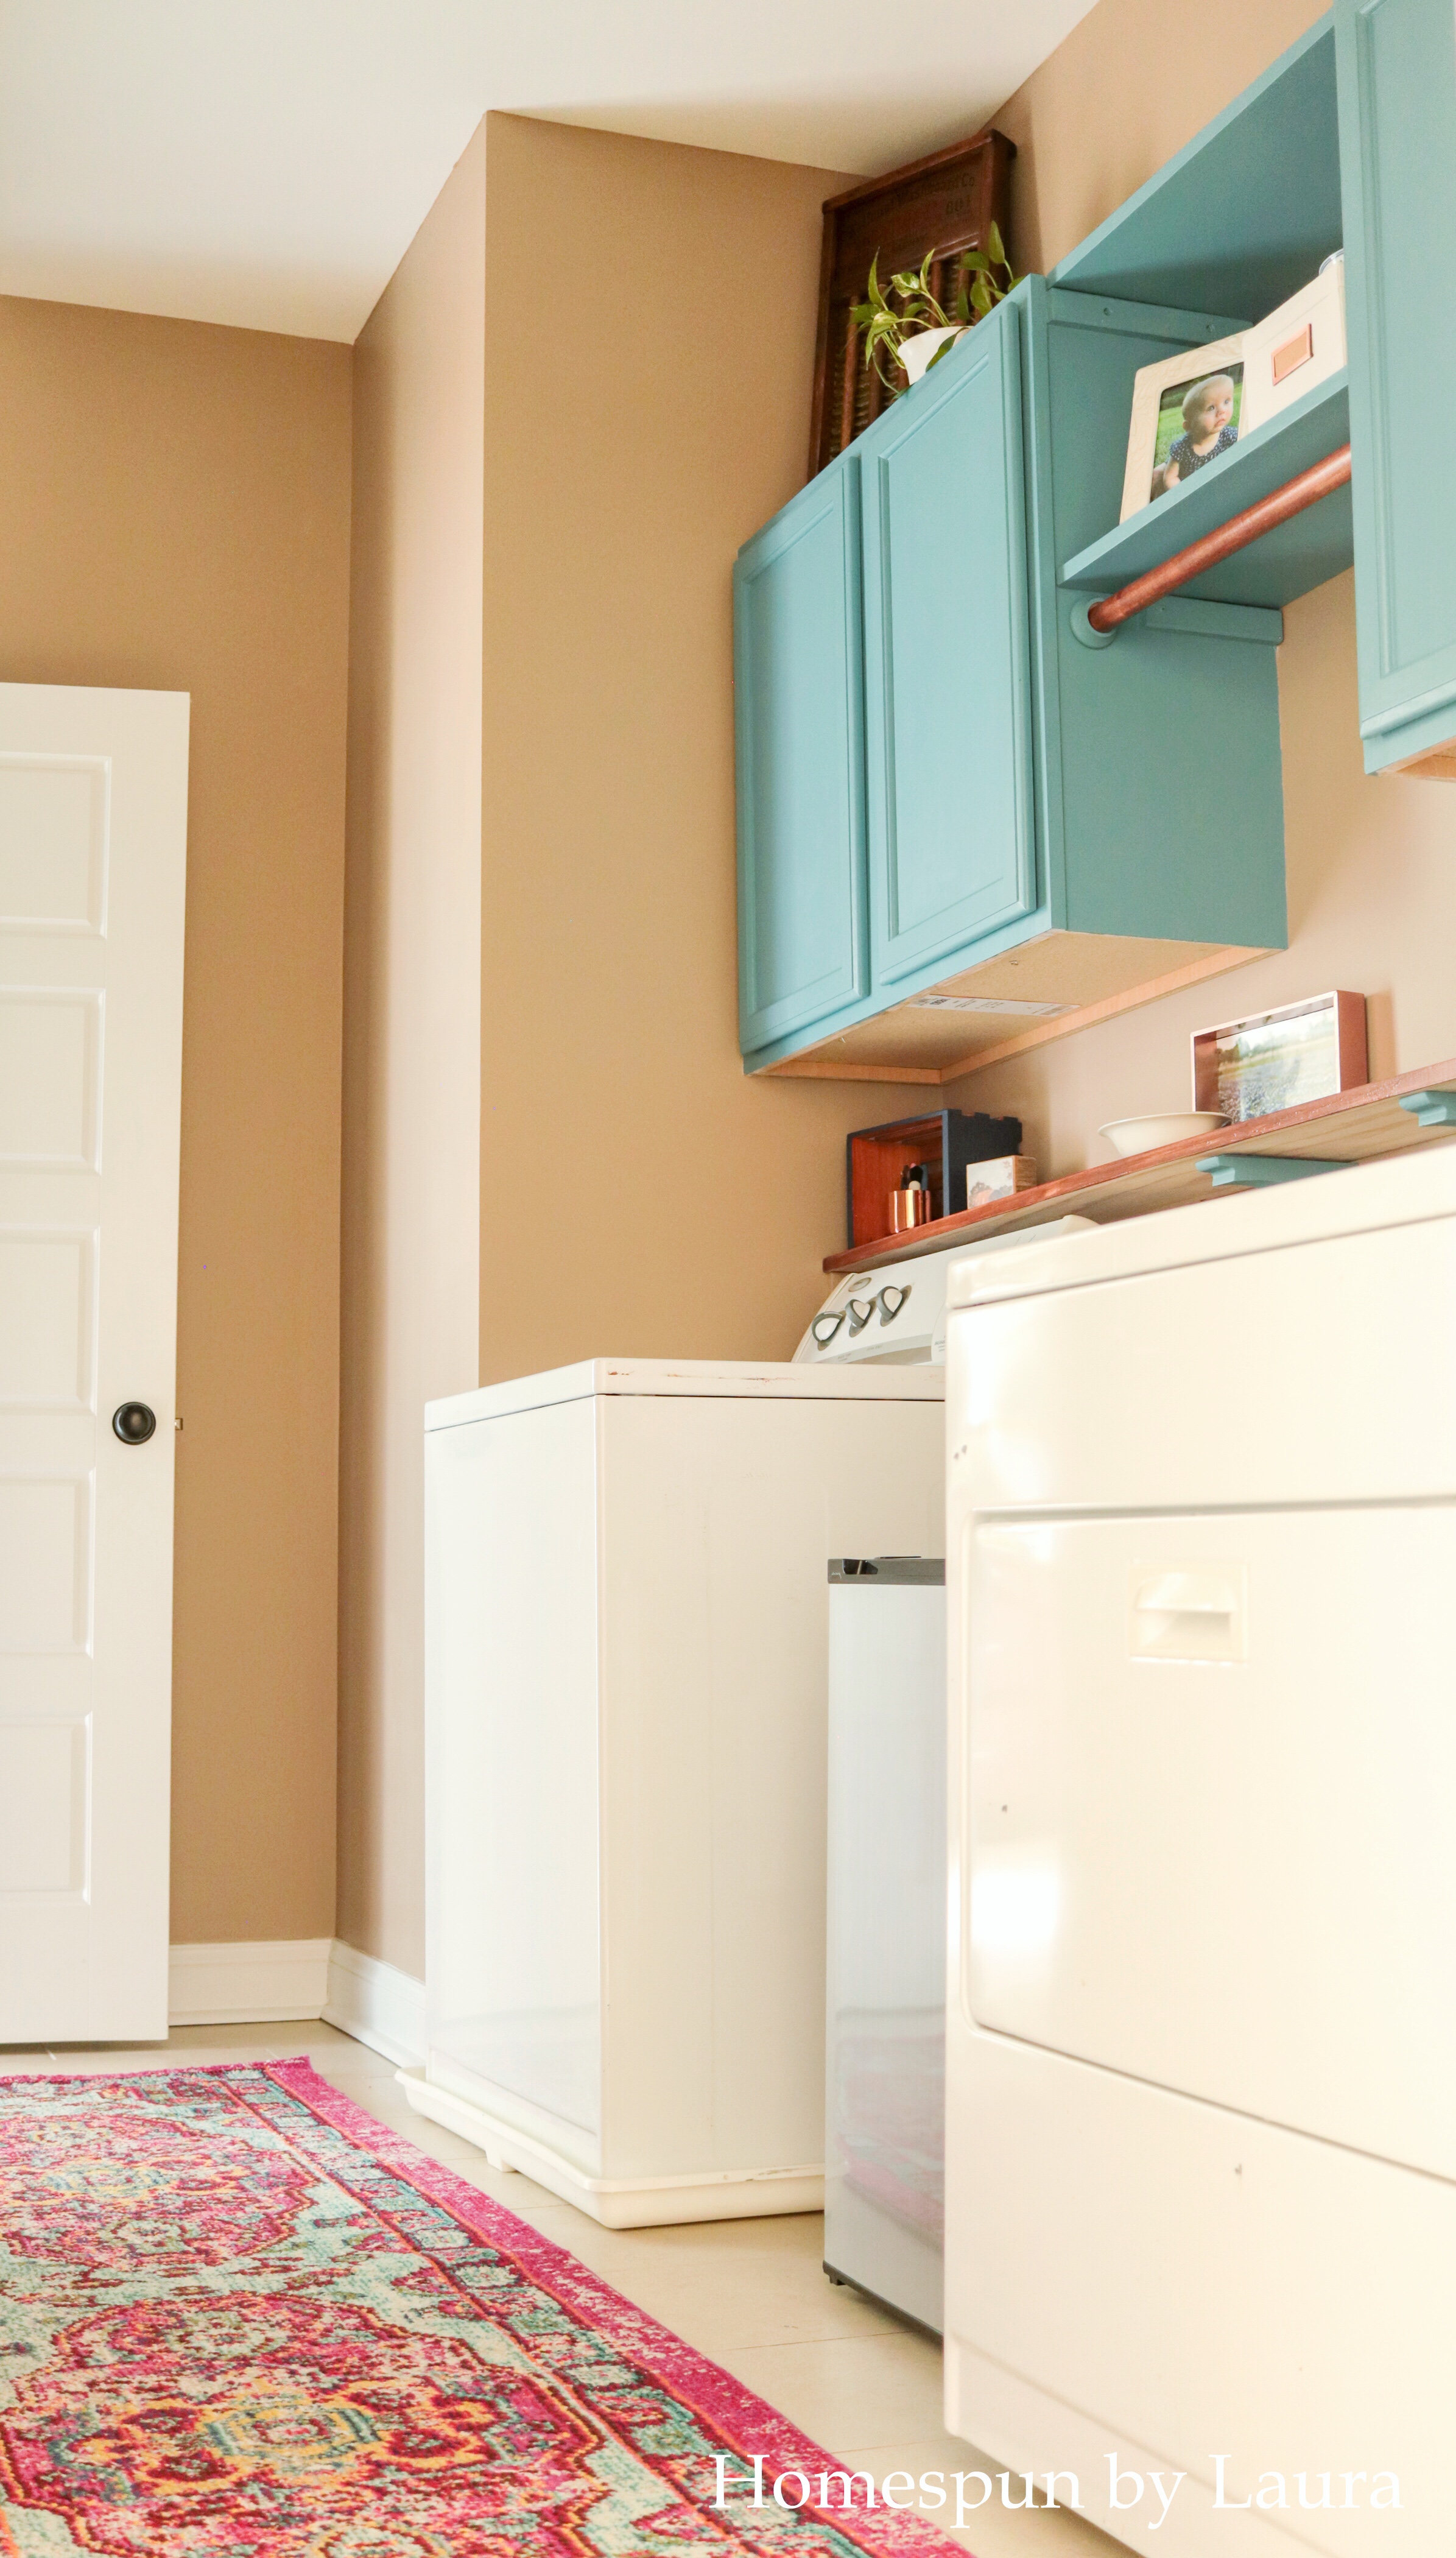
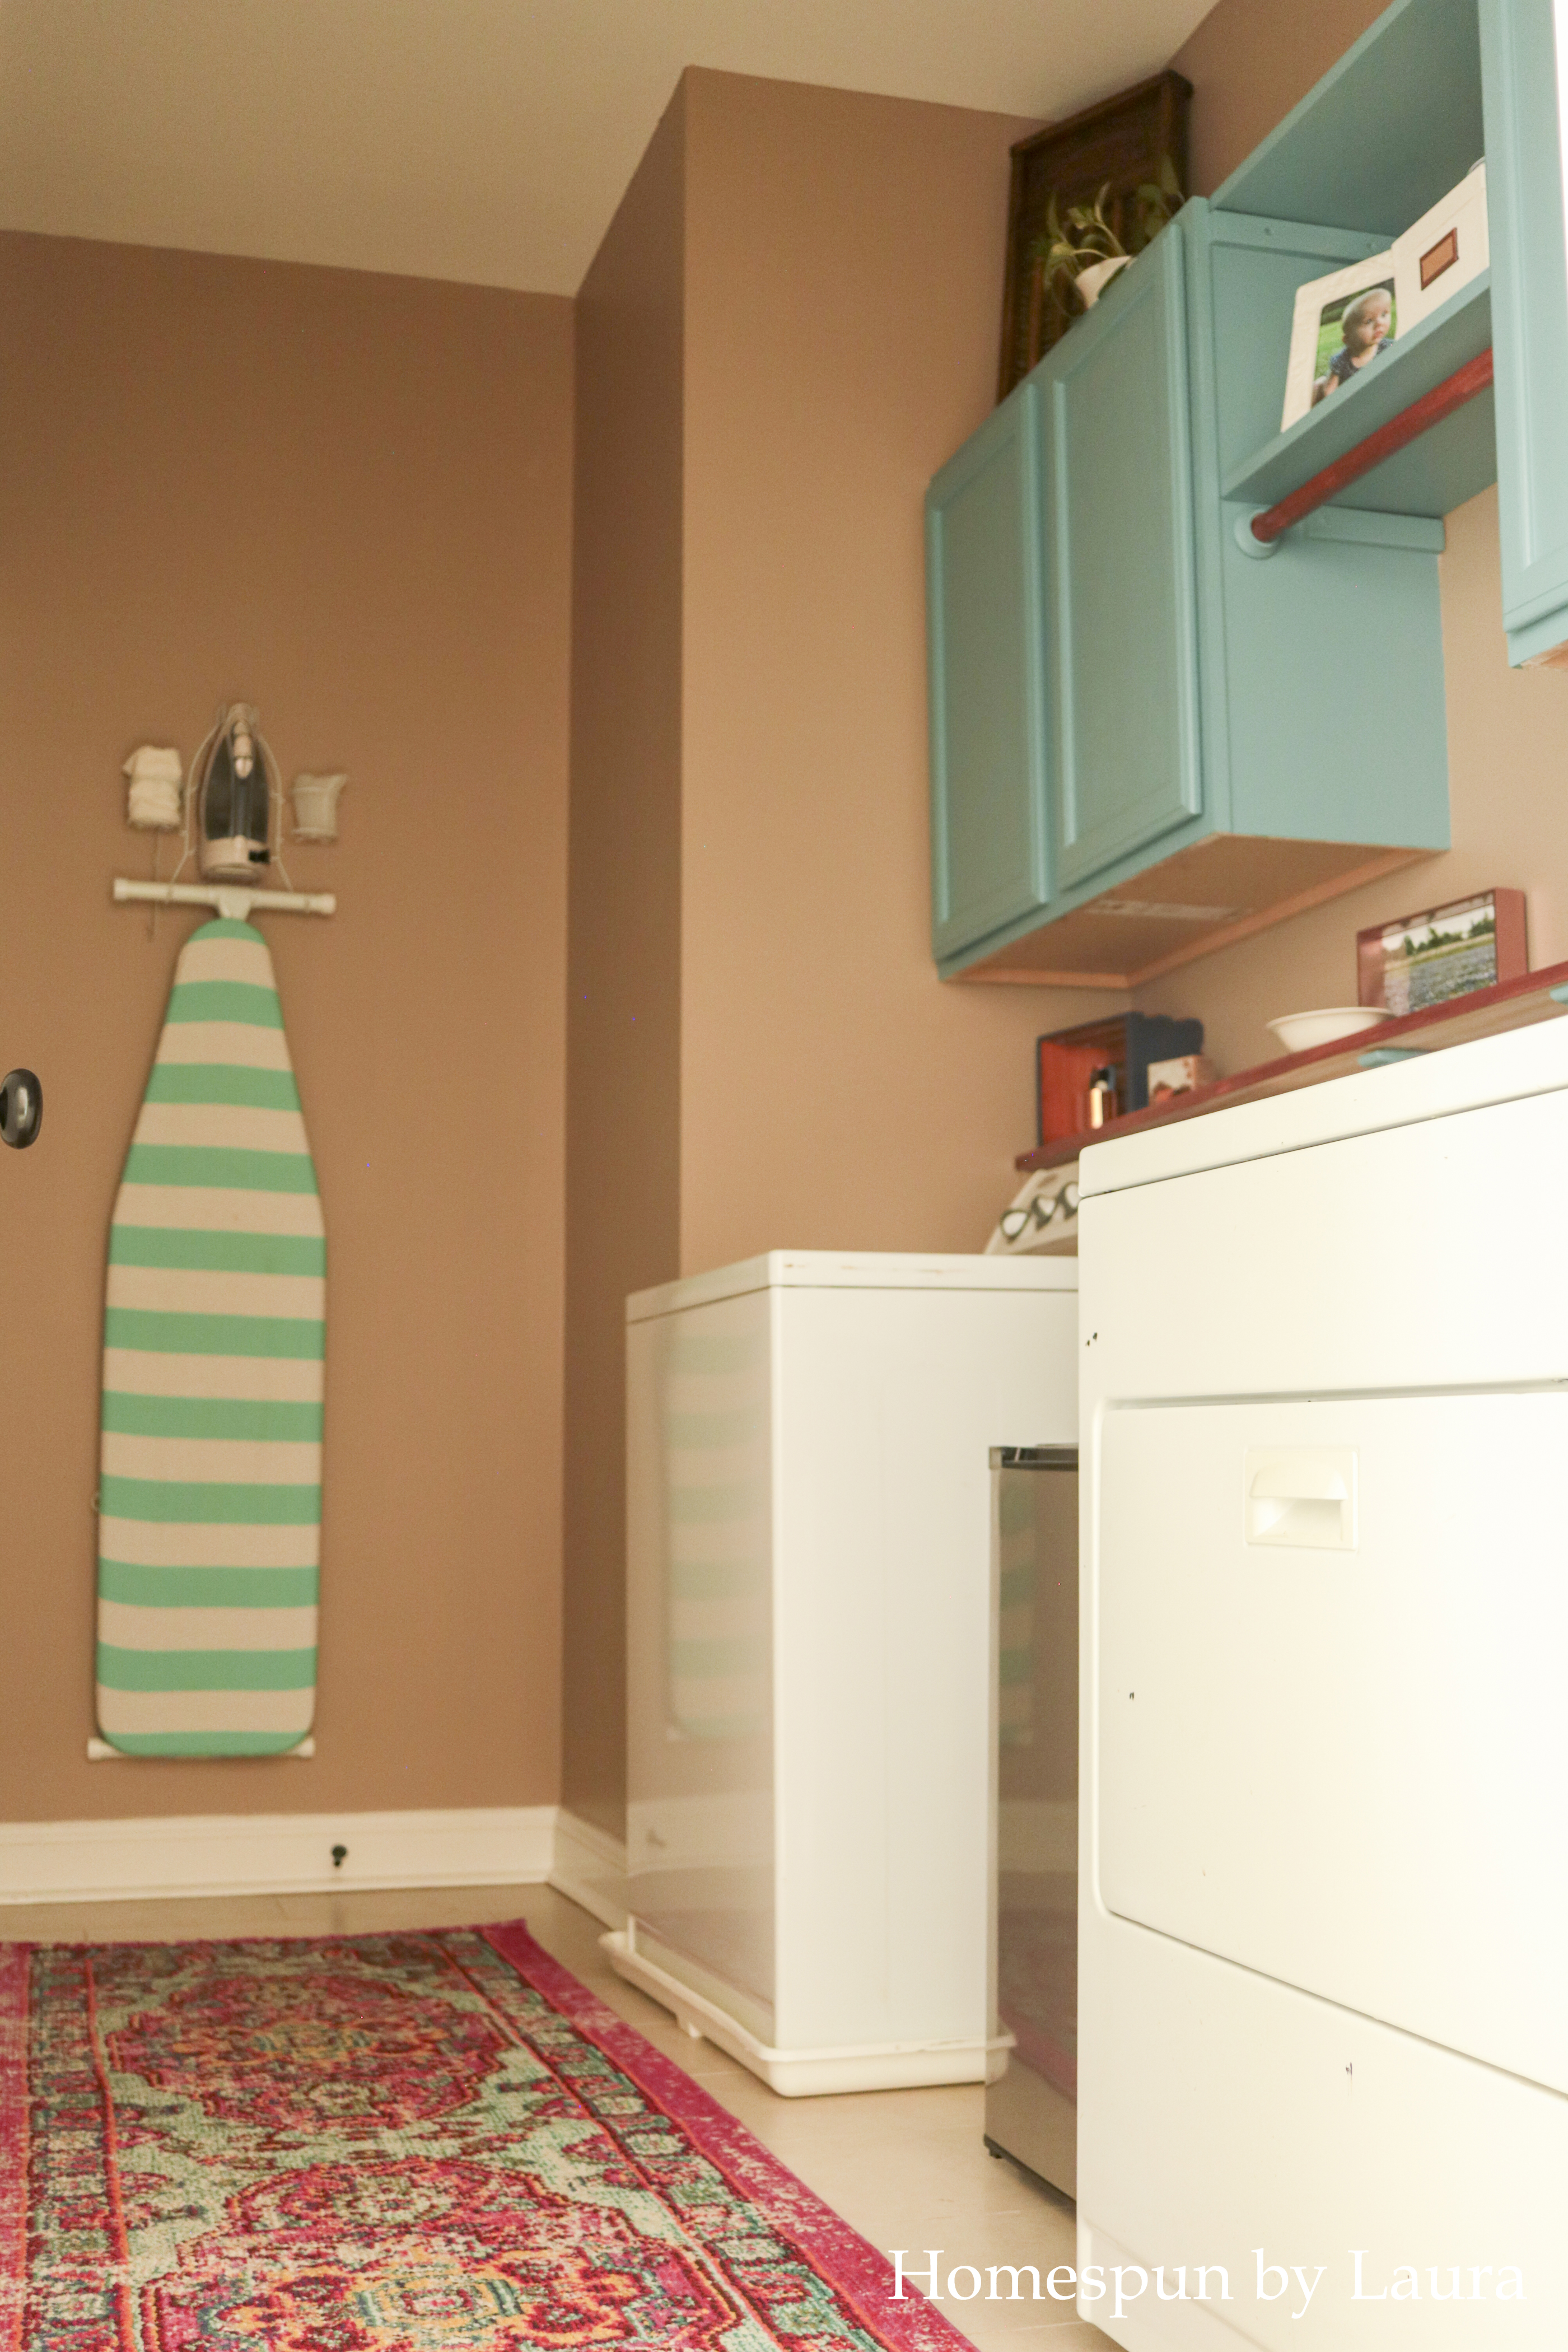
Shift washer, dryer, and mini fridge locations to maximize the space
I wanted the washer and dryer to be placed more or less symmetrically- both against the far walls with a gap in the middle for our mini fridge (laundry room and bedrooms are all upstairs, so we store all the baby’s milk up here to eliminate trips up and down the stairs!). The builder placed hookups just a little oddly, and that placement sort of dictated that the two need to be spread out instead of placed next to each other.
Moving them over created enough room that I can fit a narrow hamper next to the fridge if I can find one with the right dimension. When back-to-college stuff is on the shelves soon would be a good time to look. If not, IKEA probably has what I need. They have everything.
Trim down doors so pretty rug fits under them
The door from our master closet dragged against the tile the worst. When we removed the ironing board, it no longer collected lint as it moved, but there still wasn’t room for the rug to fit under either it or the other door. We (I mean, the Mister) removed them, took them downstairs to the garage, and trimmed them down about a half an inch.
I was not excited about the process of fixing these doors because it was something we’d never done before and it seemed complicated. While I wasn’t the one who actually executed this step, the Mister did it quickly and easily; the hardest part was carrying them downstairs and back up without hitting the wall.
So now the pretty rug that was rolled up in the corner for 10 months has a place to spread out!! And I love it. It really makes the space to me. (That’s an affiliate link, so if you make a purchase, I make a few cents at no additional cost to you. Thanks!)
Finishing Touches
I finished off the space with photos, a plant, a few small DIY projects, and some decor items I stole from other places around the house.
top of cabinet decor
I found the old washboard at an antique store early last year and hung on the door to the laundry room. I wanted to put something on top of the cabinets without it looking cluttered, and the washboard seemed perfect for the job. The plant is a Golden Pothos that I’ve had for several years and haven’t killed yet, so it seemed like a good idea to put it here (Update: due to lack of watering and probably lack of light, I had to move the plant).
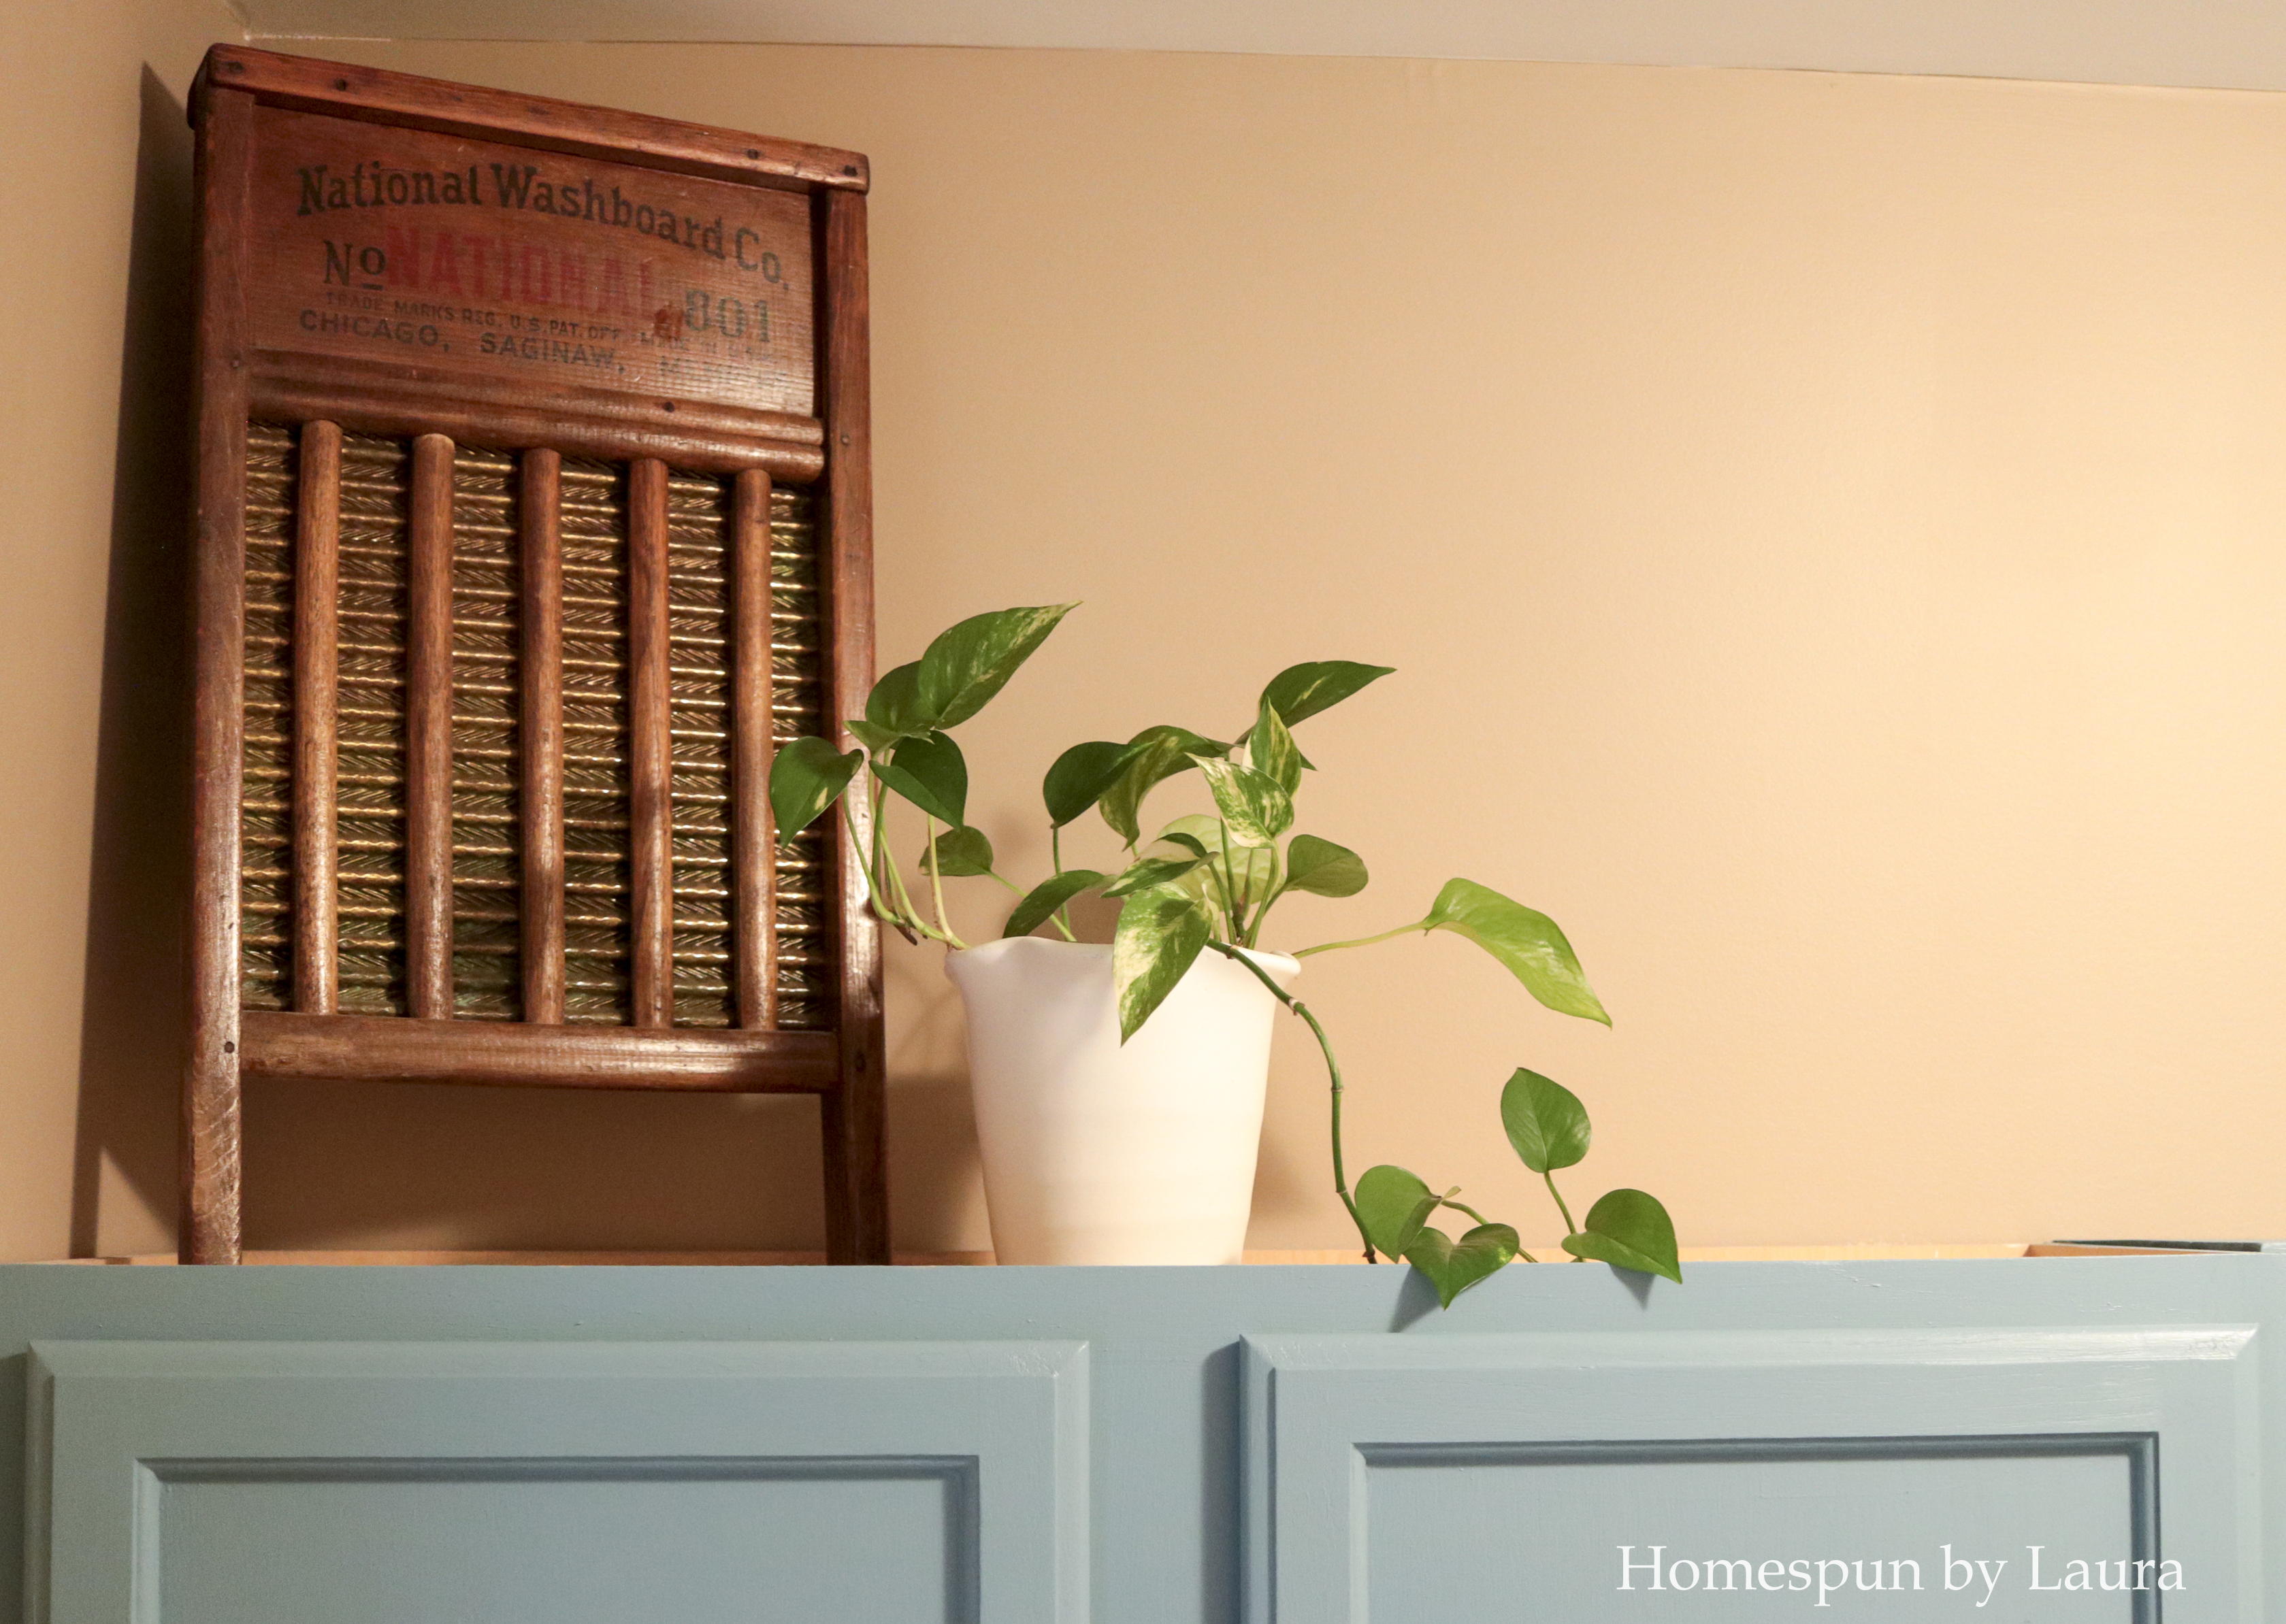
I only water it once every few weeks when I suddenly remember it, so it won’t be too often that I have to go up there to give it water. It’s a low-light plant so I hope it will continue to thrive in the low-light laundry room. I bought handmade pot at the Findery for surprisingly cheap in Waco, TX two years ago.
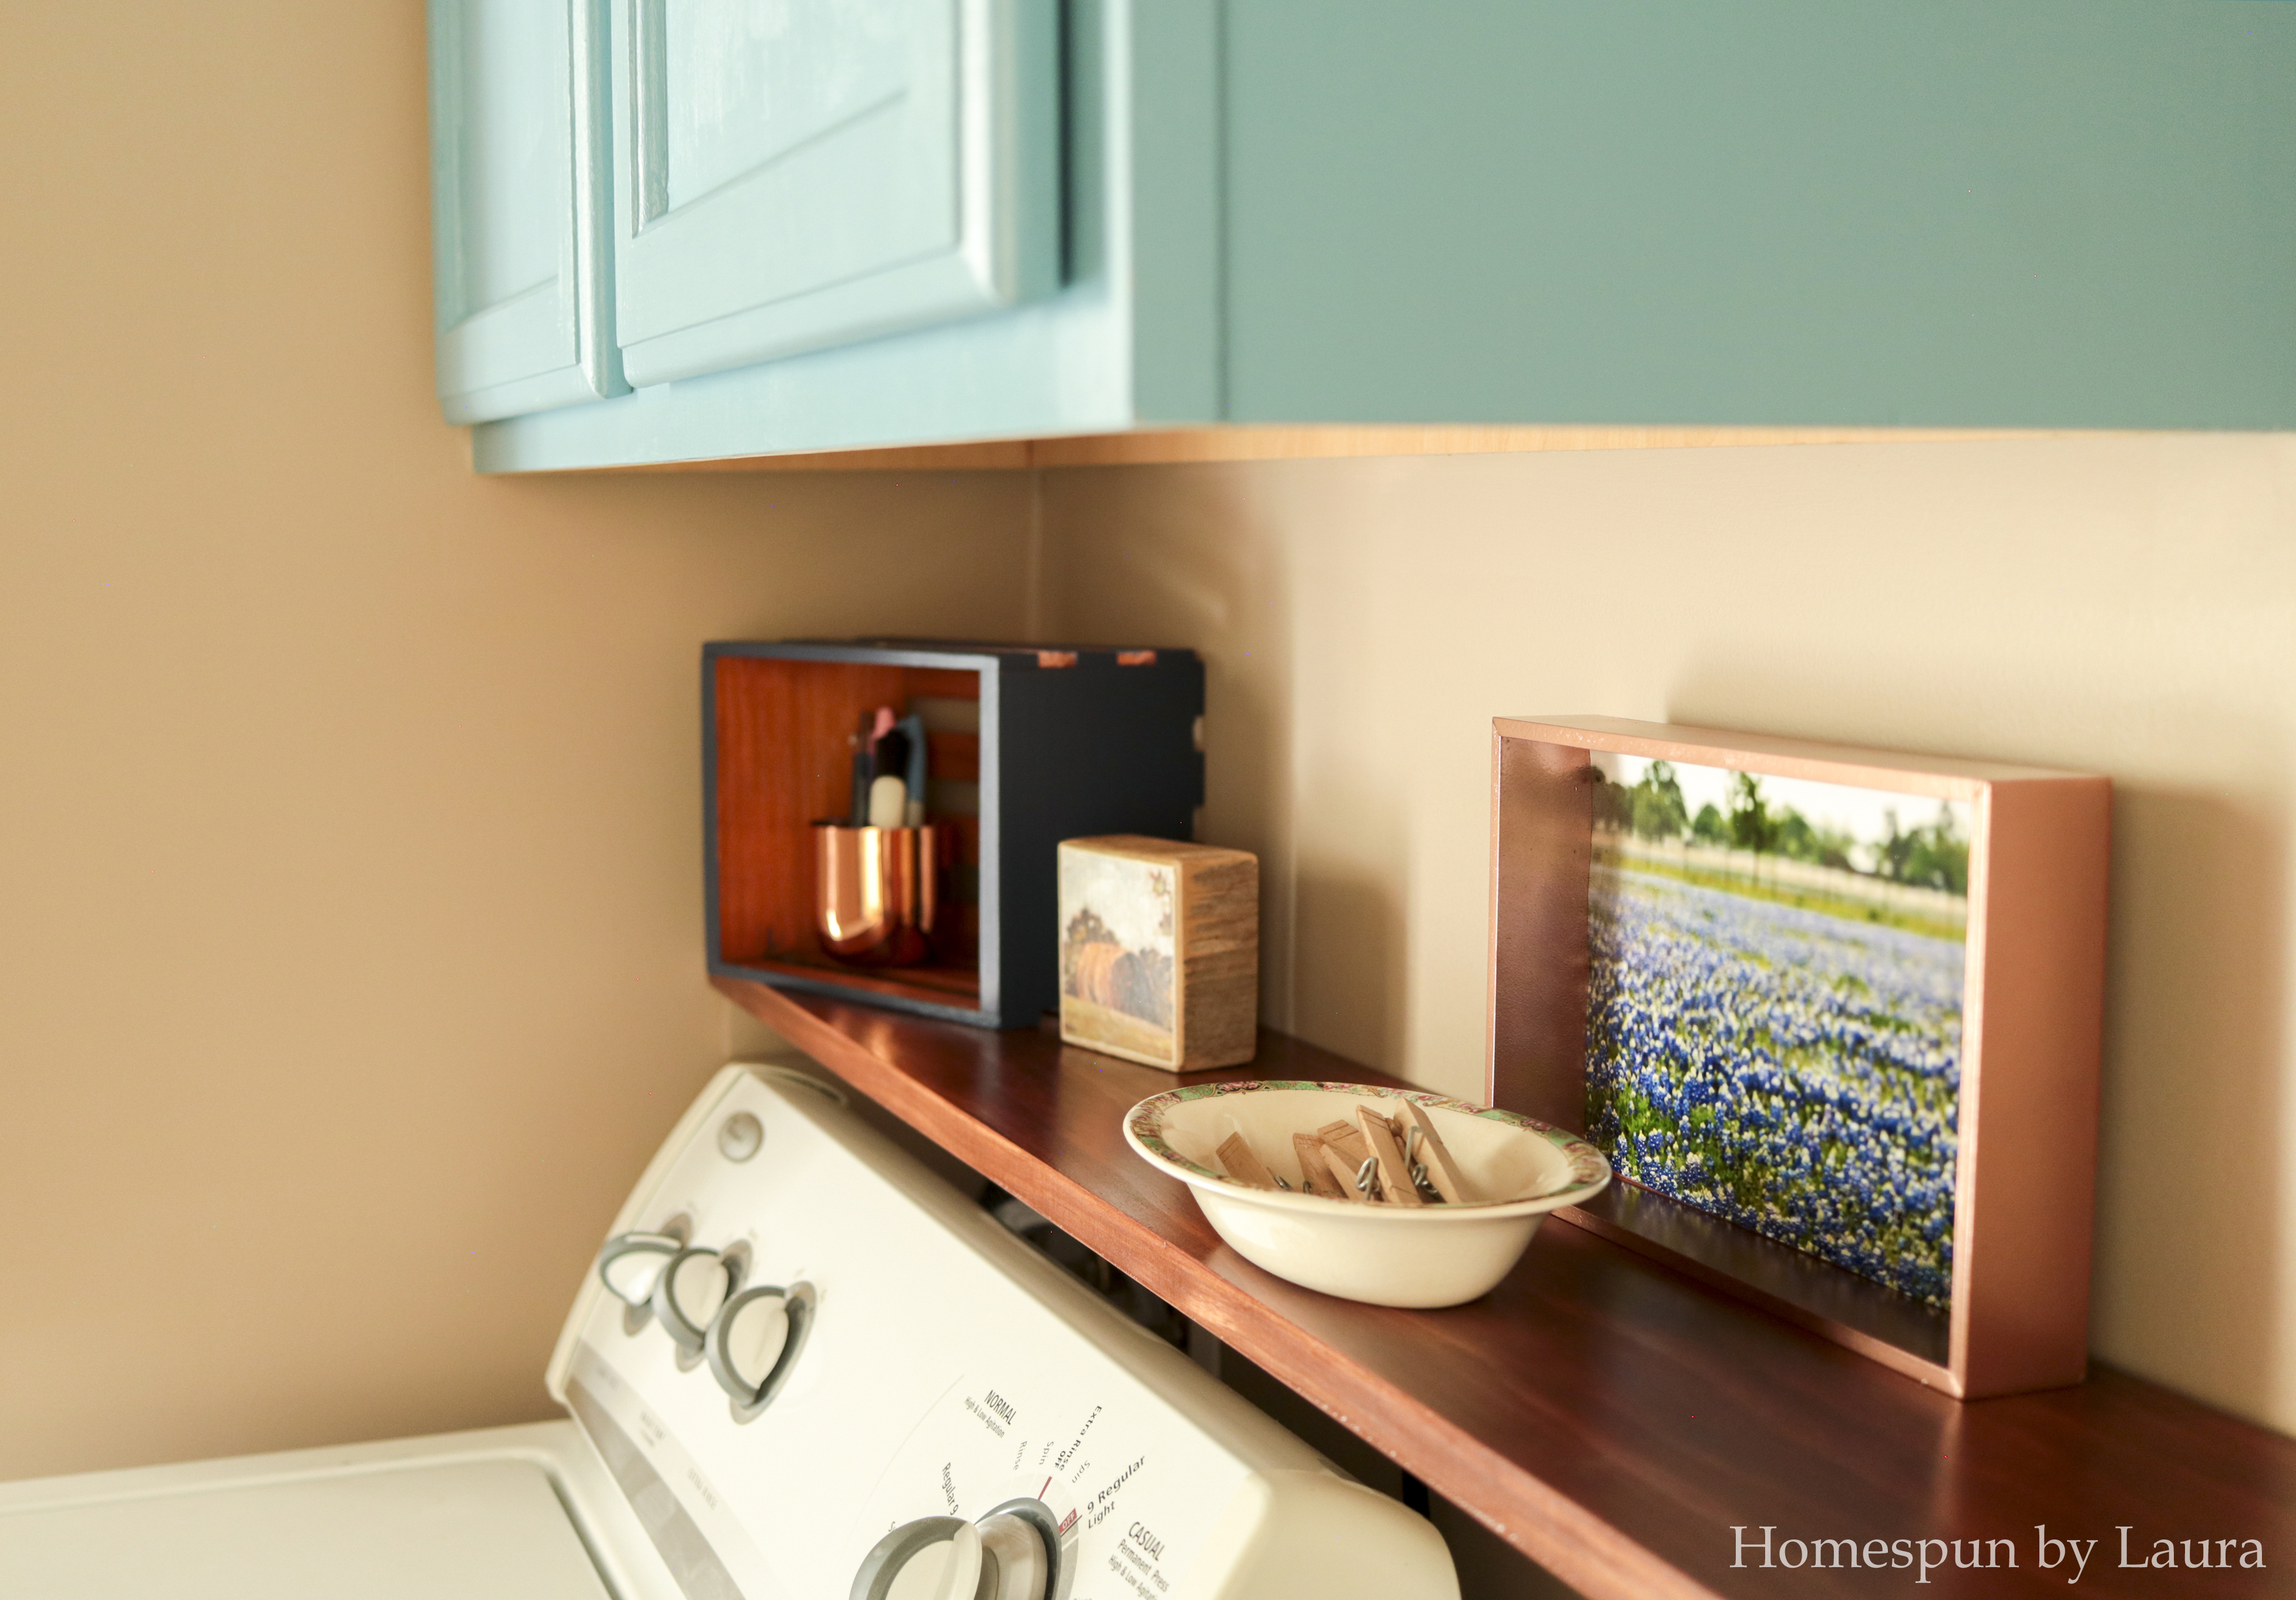
DIY copper photo frame
The frame for my bluebonnets photo (taken on a different trip to Texas!) was an inexpensive and easy DIY. The frame was $1.79 at Goodwill a few weeks ago, and thought it would be great for the ledge. I didn’t have the exact visual in my head for what I’d do with it at the time, but I knew it would come to me. I dug out some rose gold spray paint we already had (it took about 15 coats to cover all the red!) and trimmed down an 8×10 print I had never framed to fit in the opening, et voila!
Thrift store art: $1.79 + spray paint from collection + photo from vacation = cheap, easy DIY art
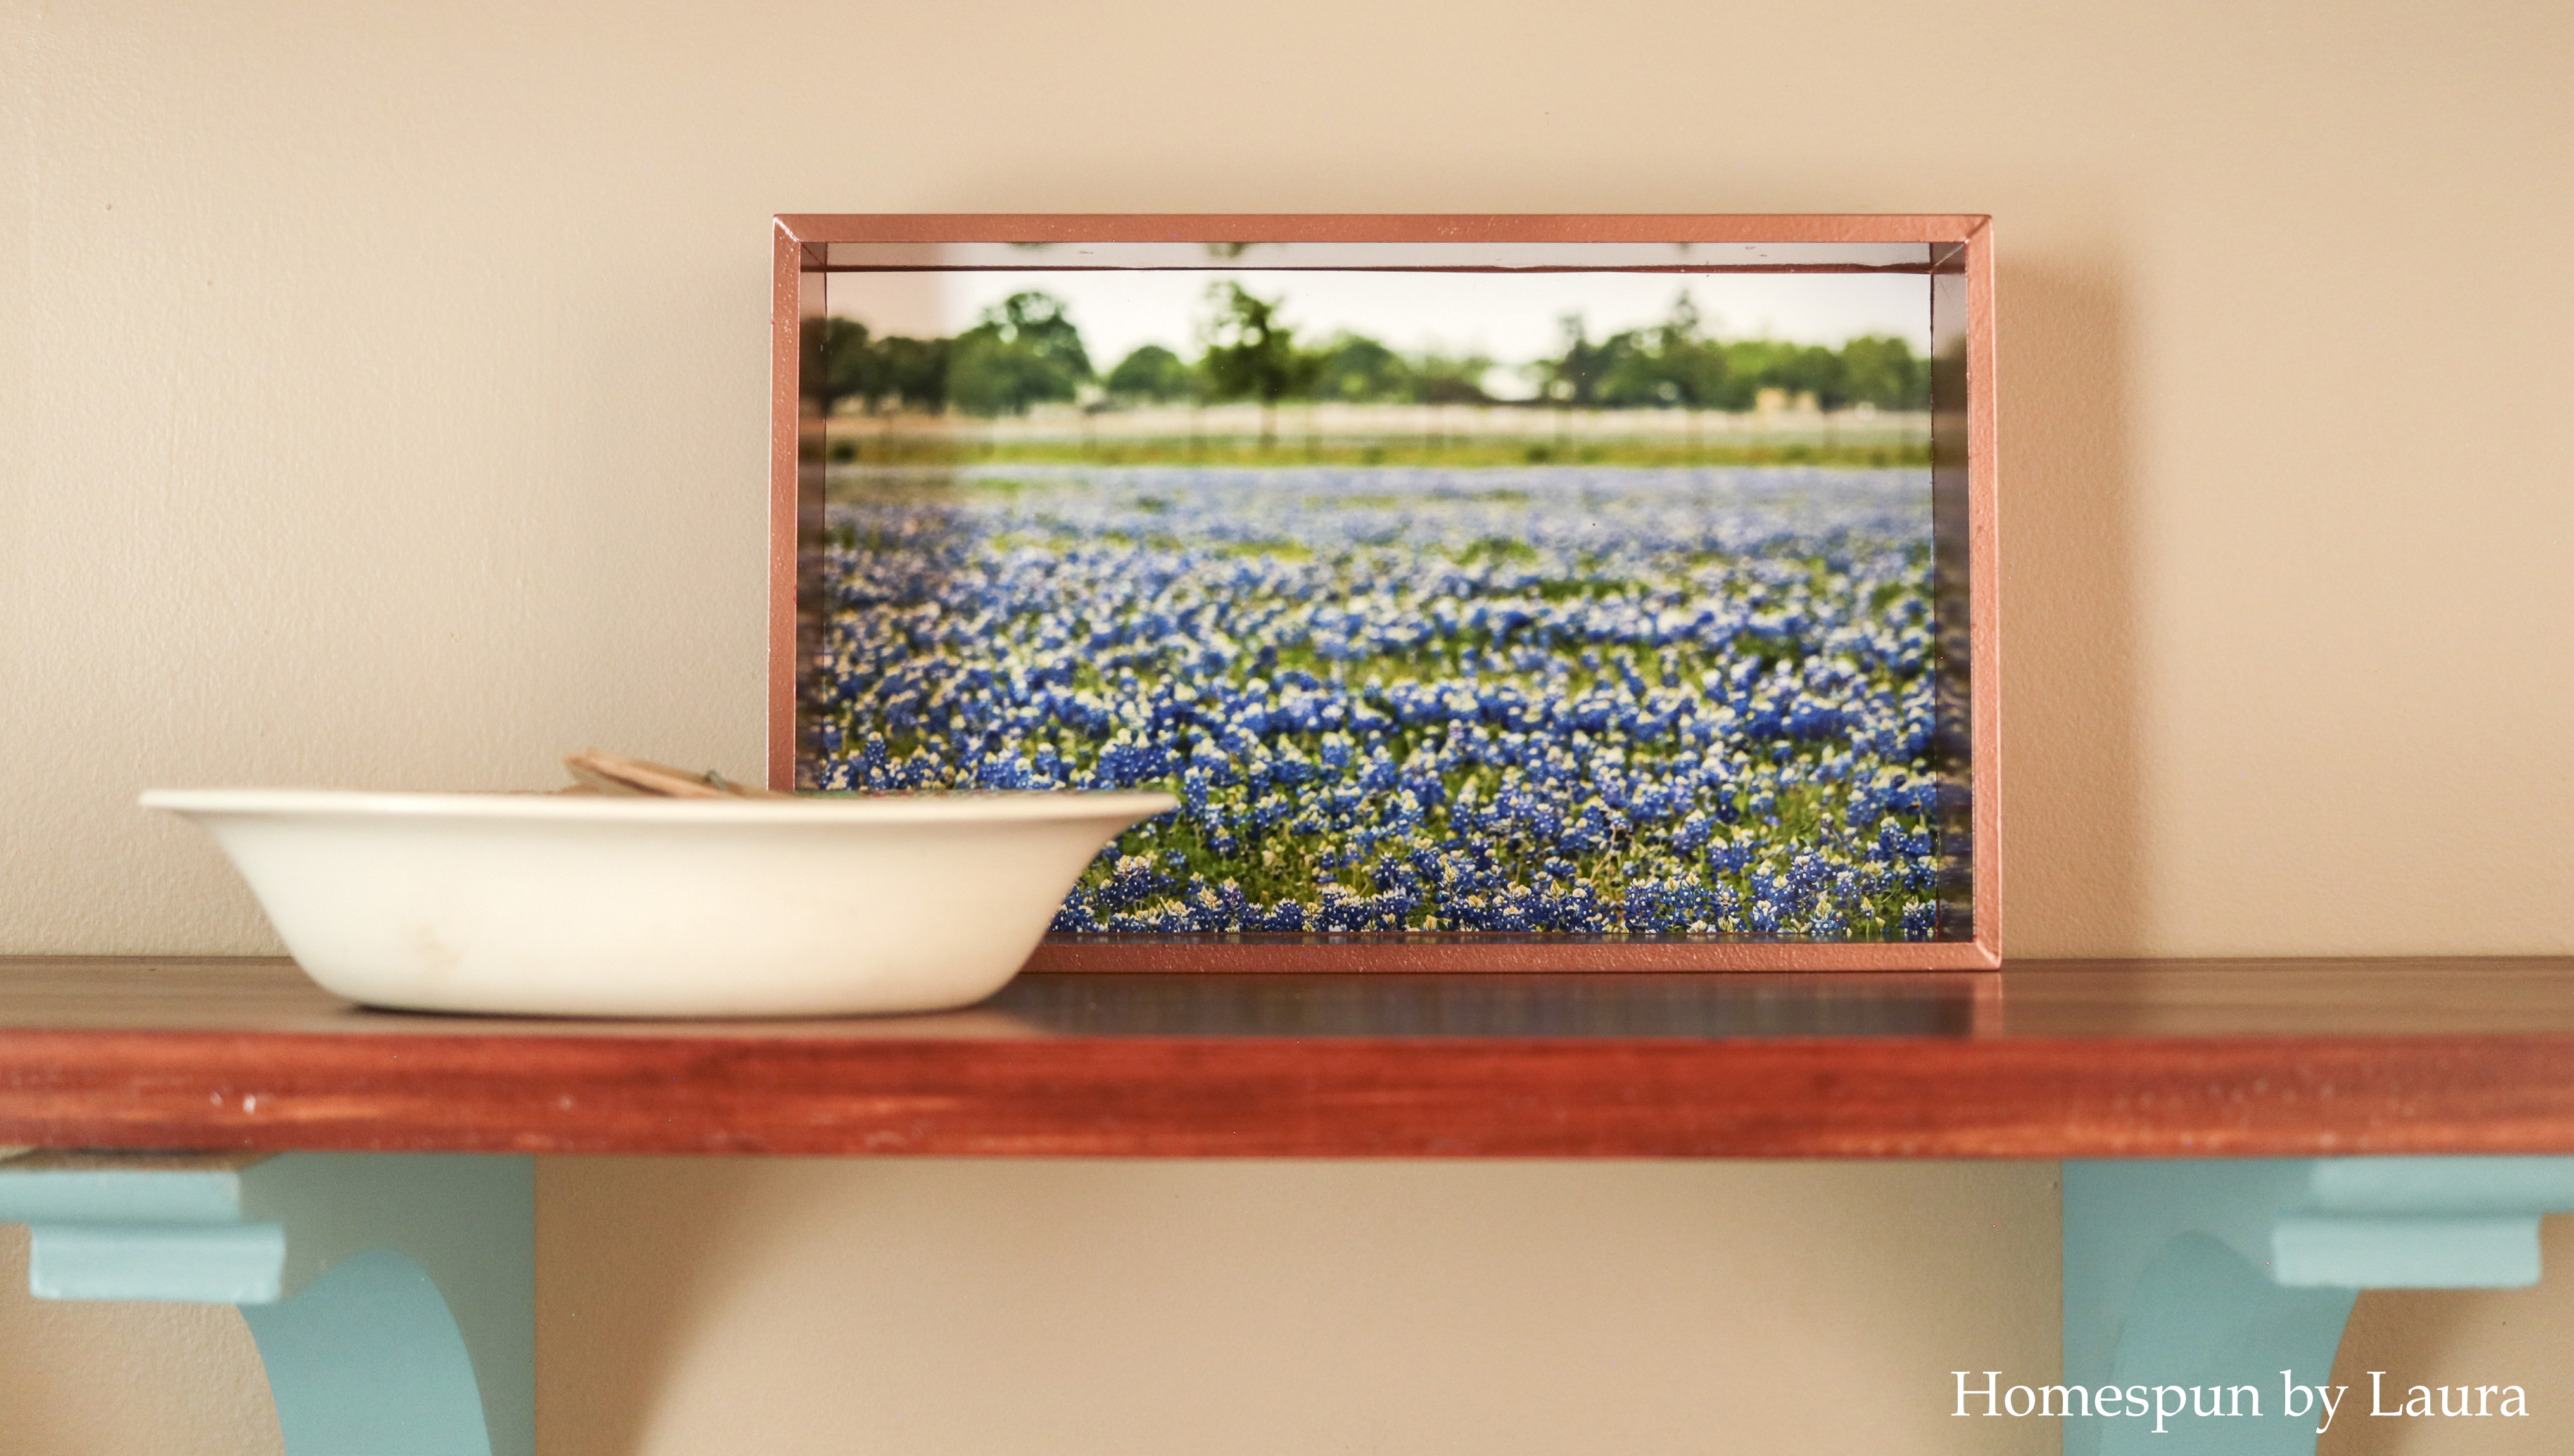
If you’ve never been to Texas during bluebonnet season, you should definitely plan a trip!
family photos
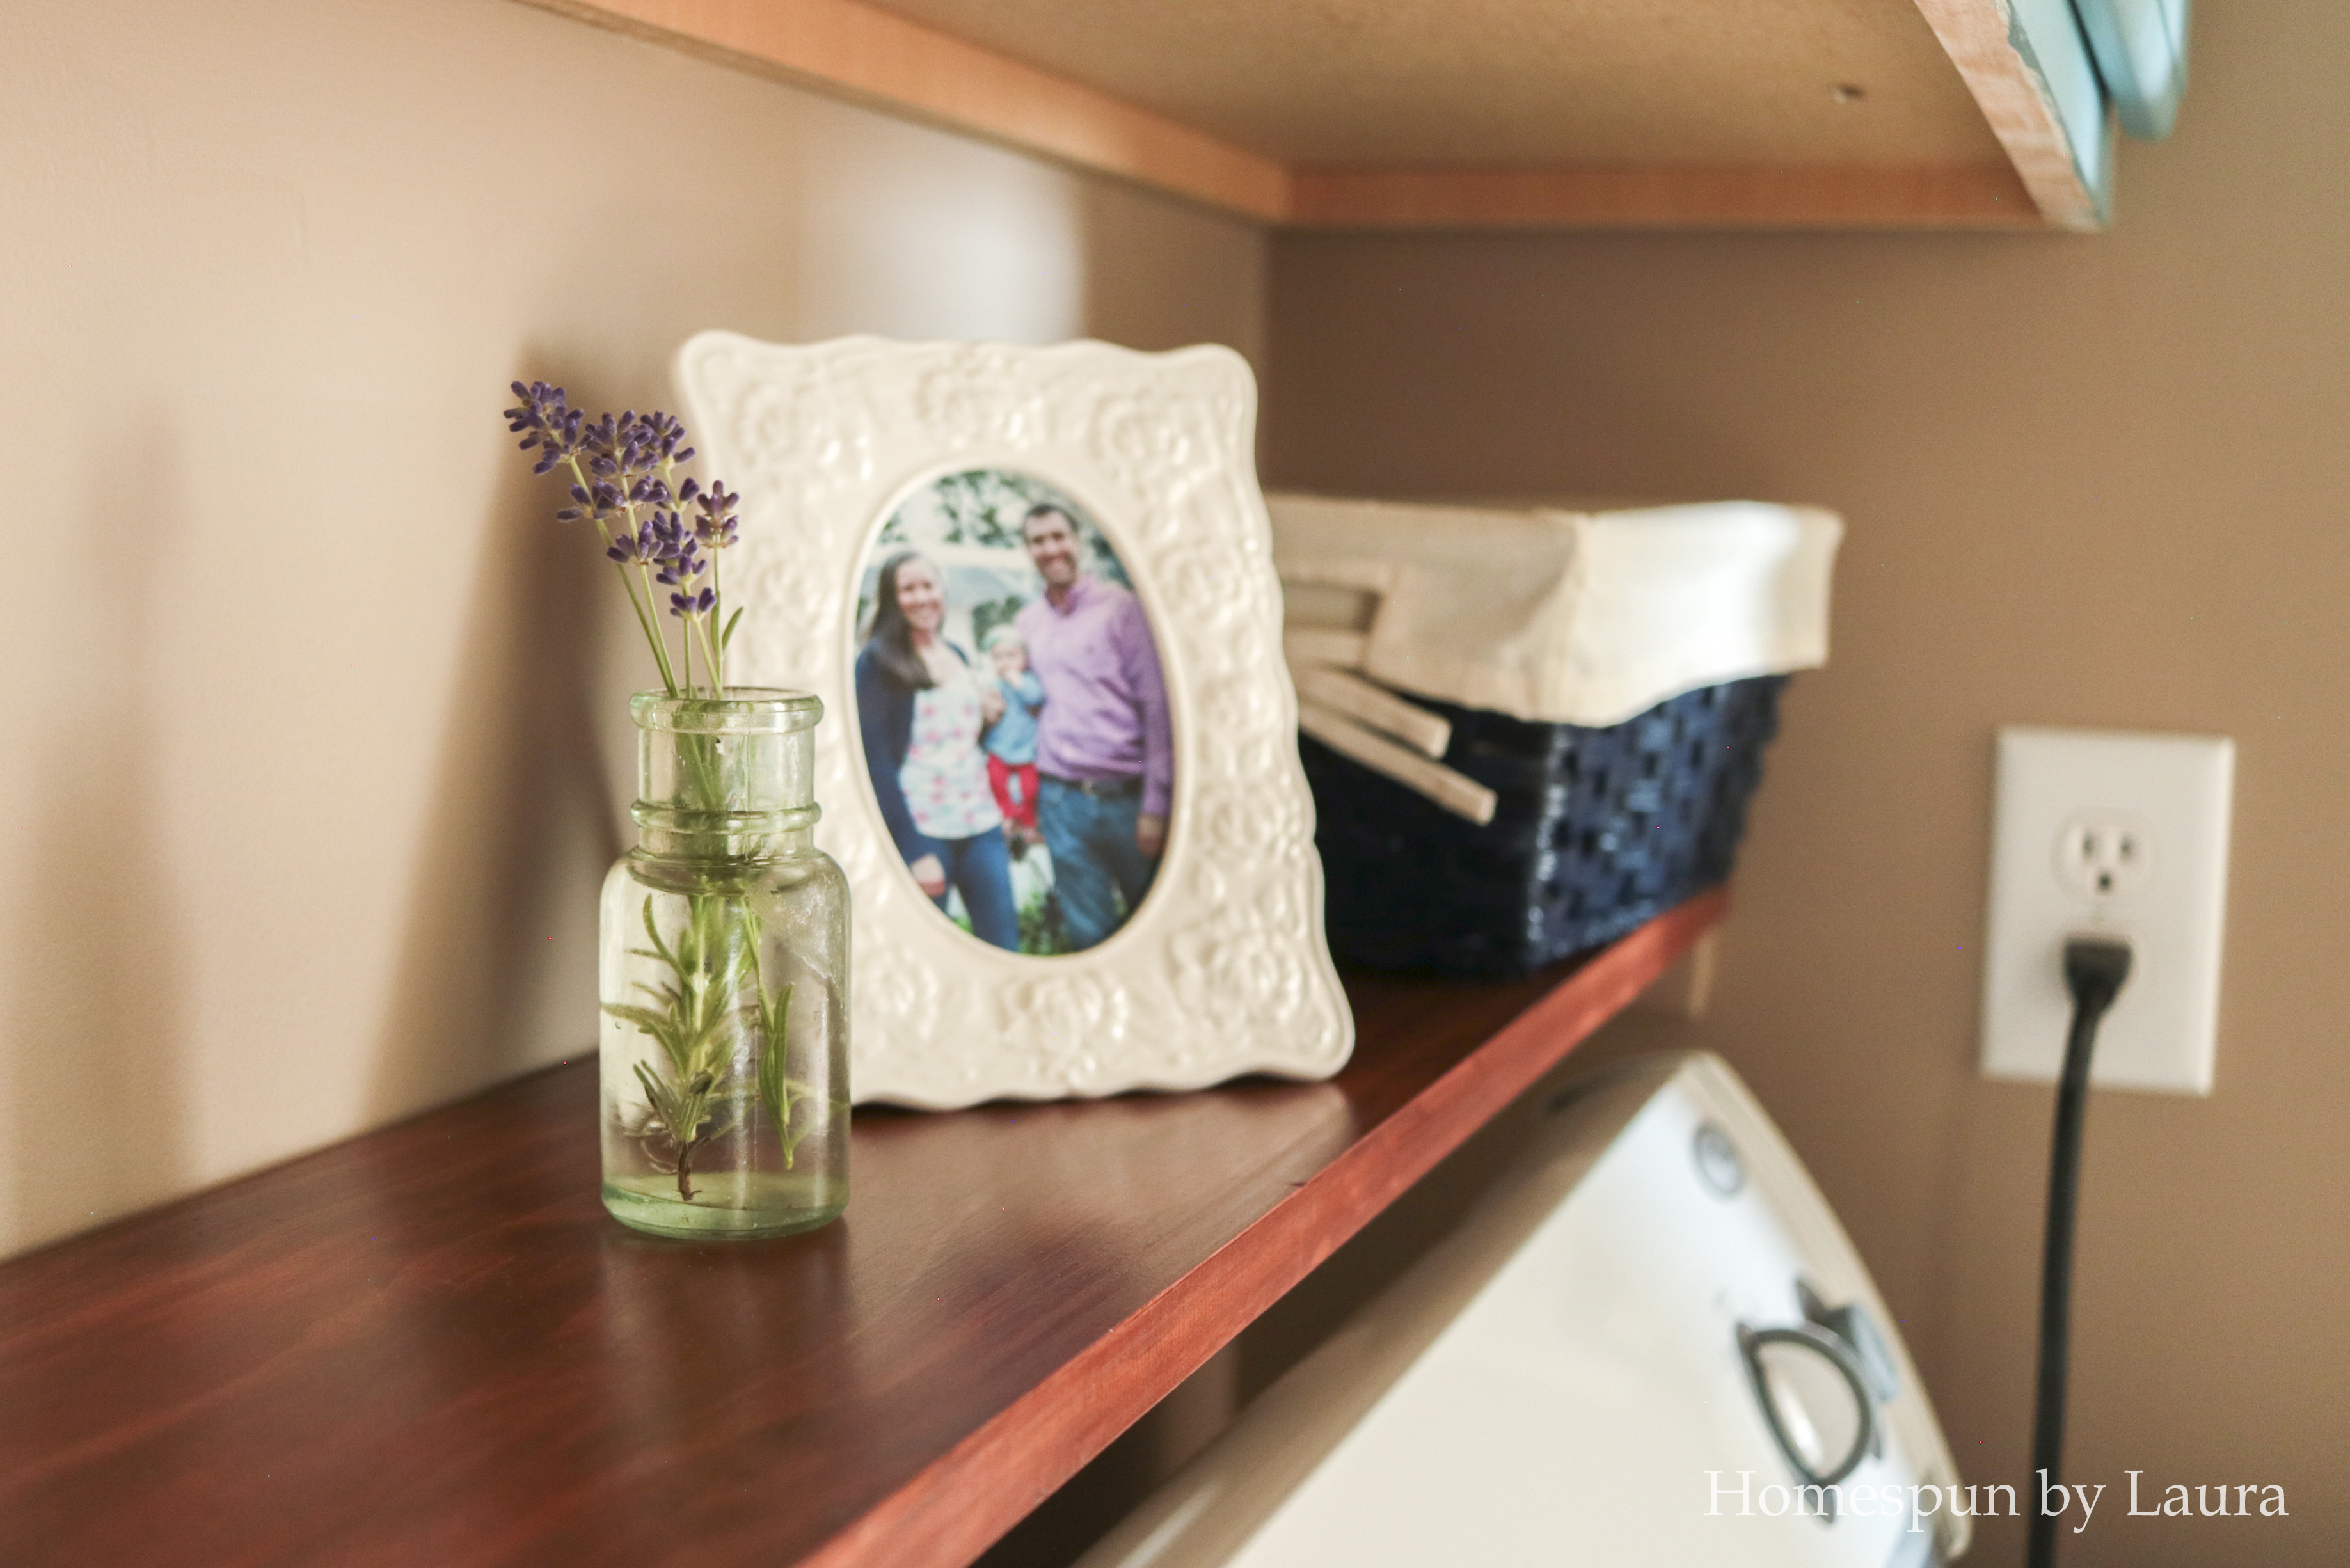
We’ve been in our house for about 10 months now but we’ve hung very few things on the wall (in our defense, all but two of those months we’ve been adjusting to parenthood and sleeplessness!) except for a couple of vintage cross-stitches in our daughter’s room. We had no family photos anywhere except for a single one of the baby when she was a day old. We’ve now increased the quantity of family photos in our house by 200%! The frames are some my aunt sent my way earlier this year as she was getting rid of some things she no longer wanted. Thanks, Auntie!
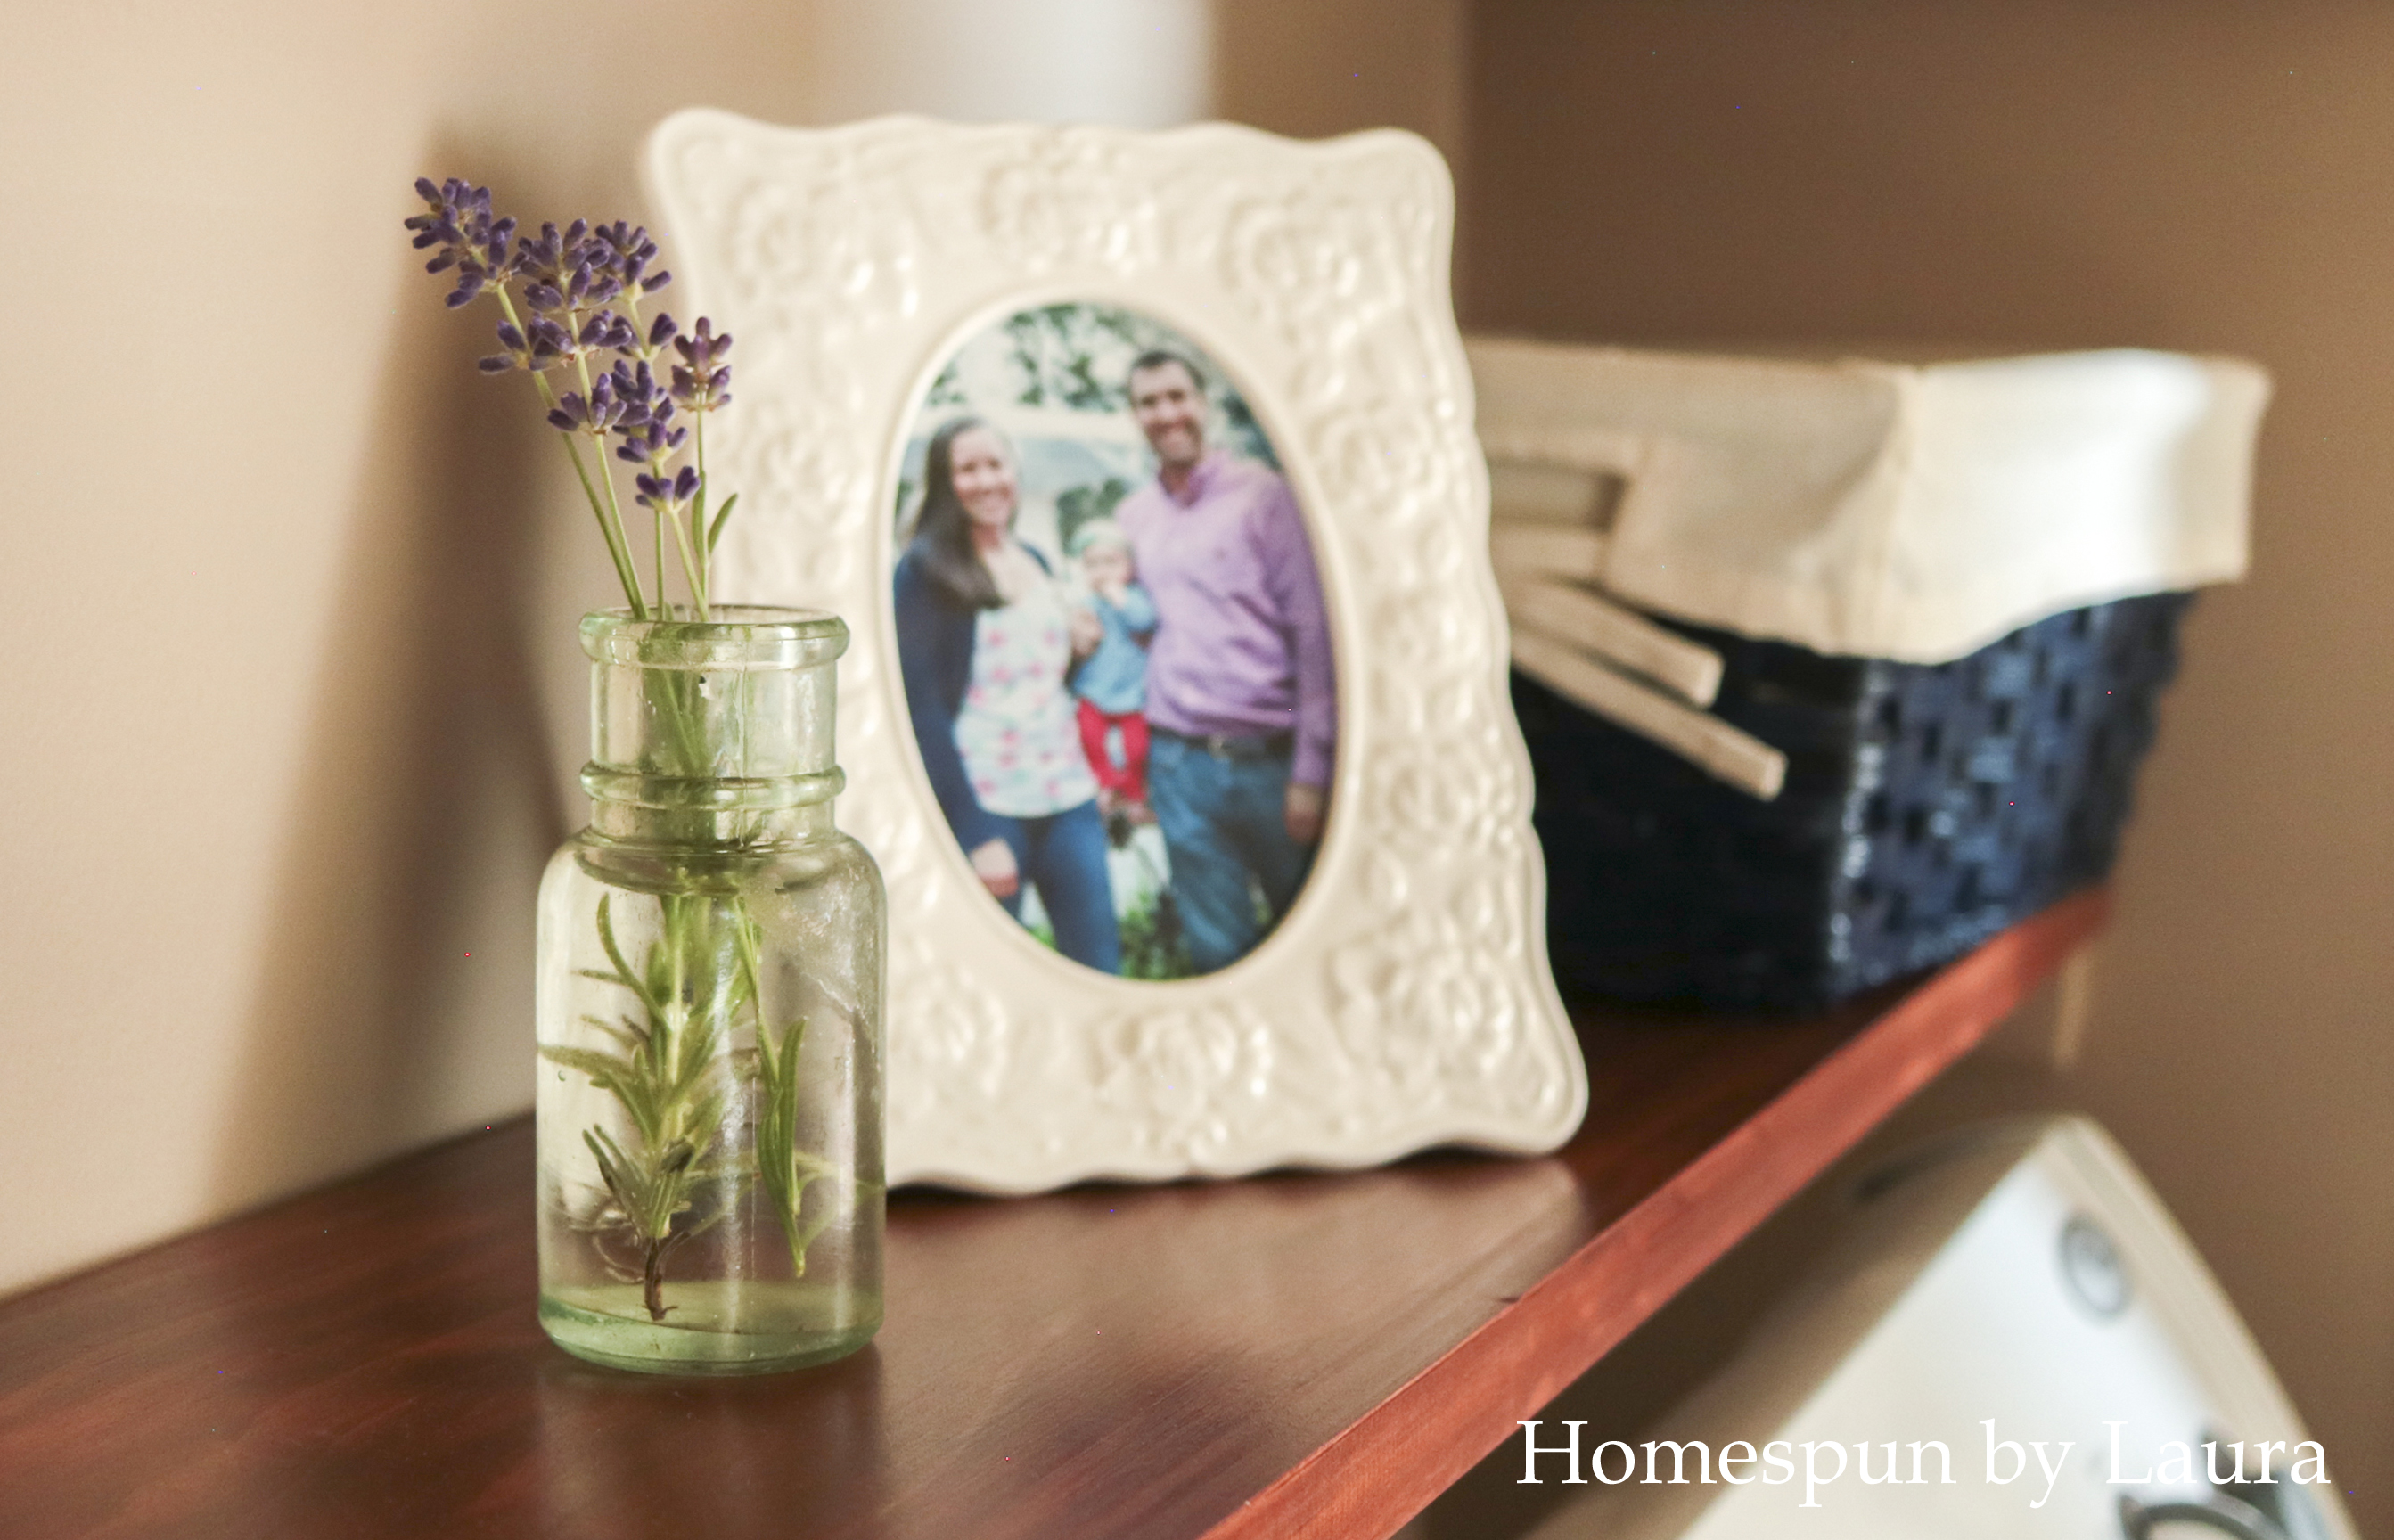
The jar holding the lavender is one of about 30 I found in our old neighborhood when a crew dug up the road to update some big pipes under it. It took a lot of scrubbing to get 100-ish years of dirt off of it.
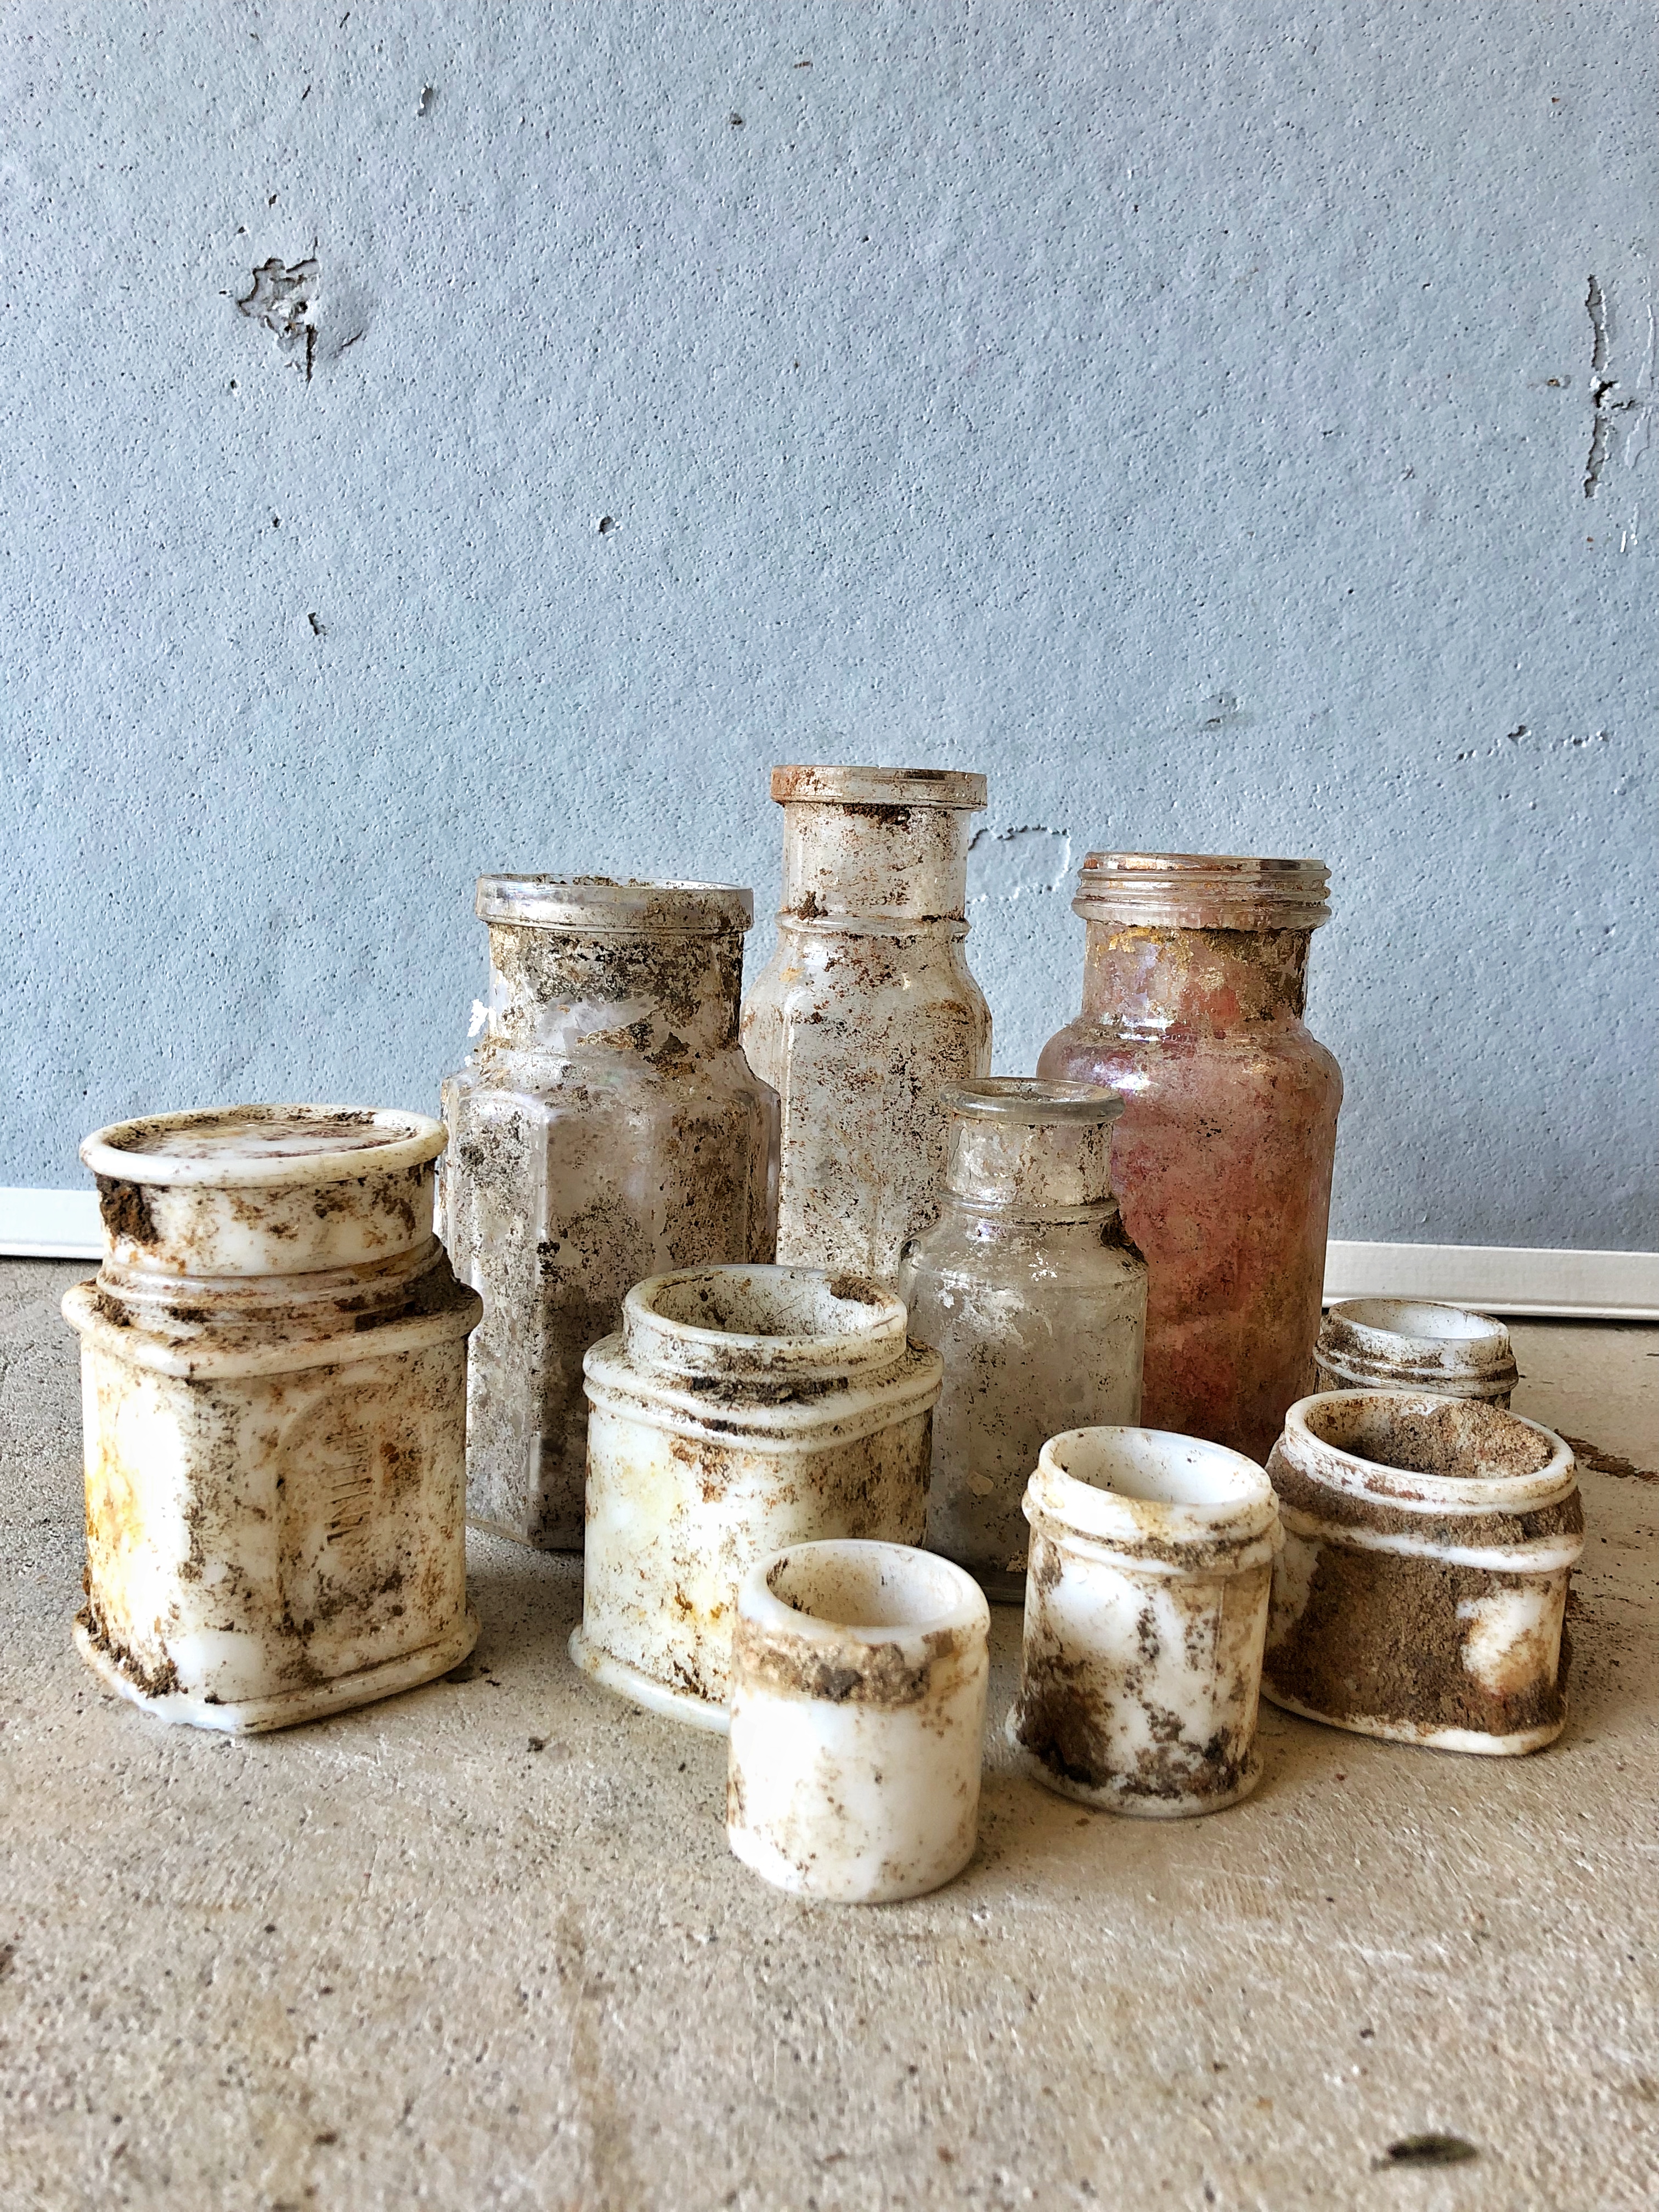
The rest of the ones in this batch are going to require some additional scrubbing before they’re ready to display anywhere. There are even more still hanging out in a grocery bag in the garage.
I love that the jar represents local history and that it came from a street a few blocks away from where we once lived.
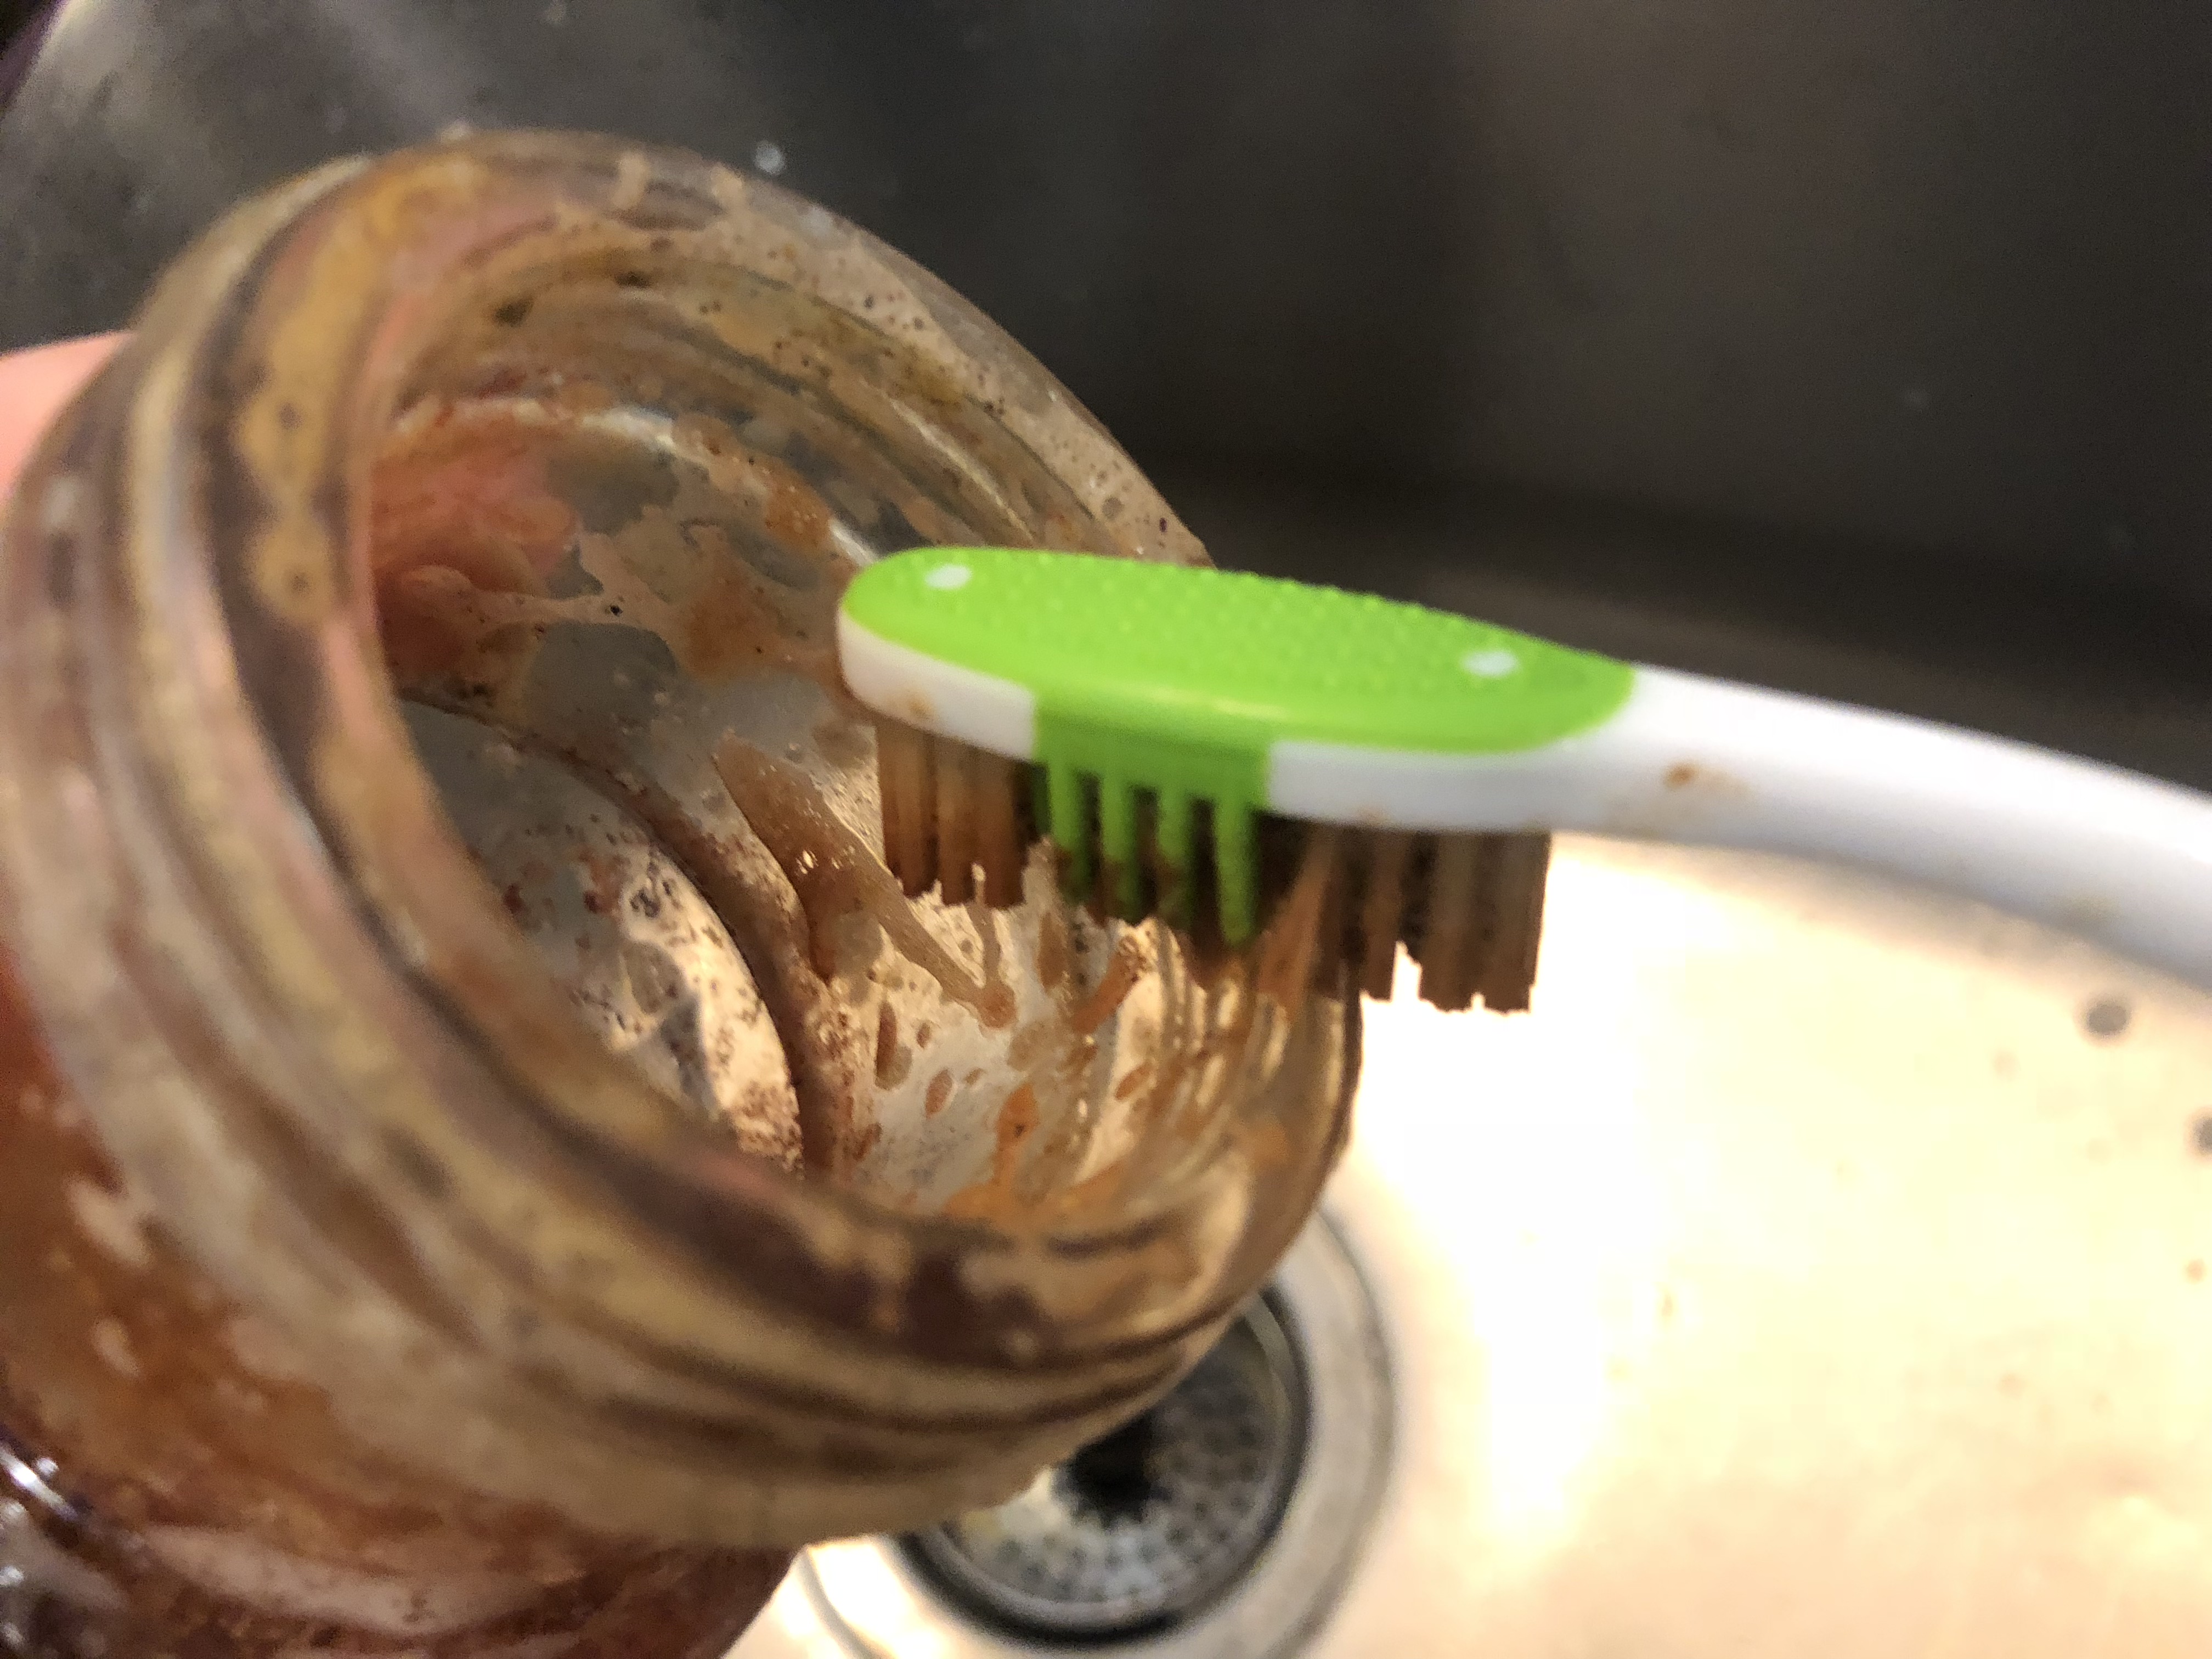
Don’t ask to borrow a toothbrush at our house!
I thought I had killed the lavender plant but just left in the pot in the backyard and ignored for six months. It was such a pleasant surprise early this spring when I started to sees little bit of green growth at the end of the dead plant. It was an even more pleasant surprise when I noticed tiny purple buds at the end of the green growth a few weeks later.
functional decor
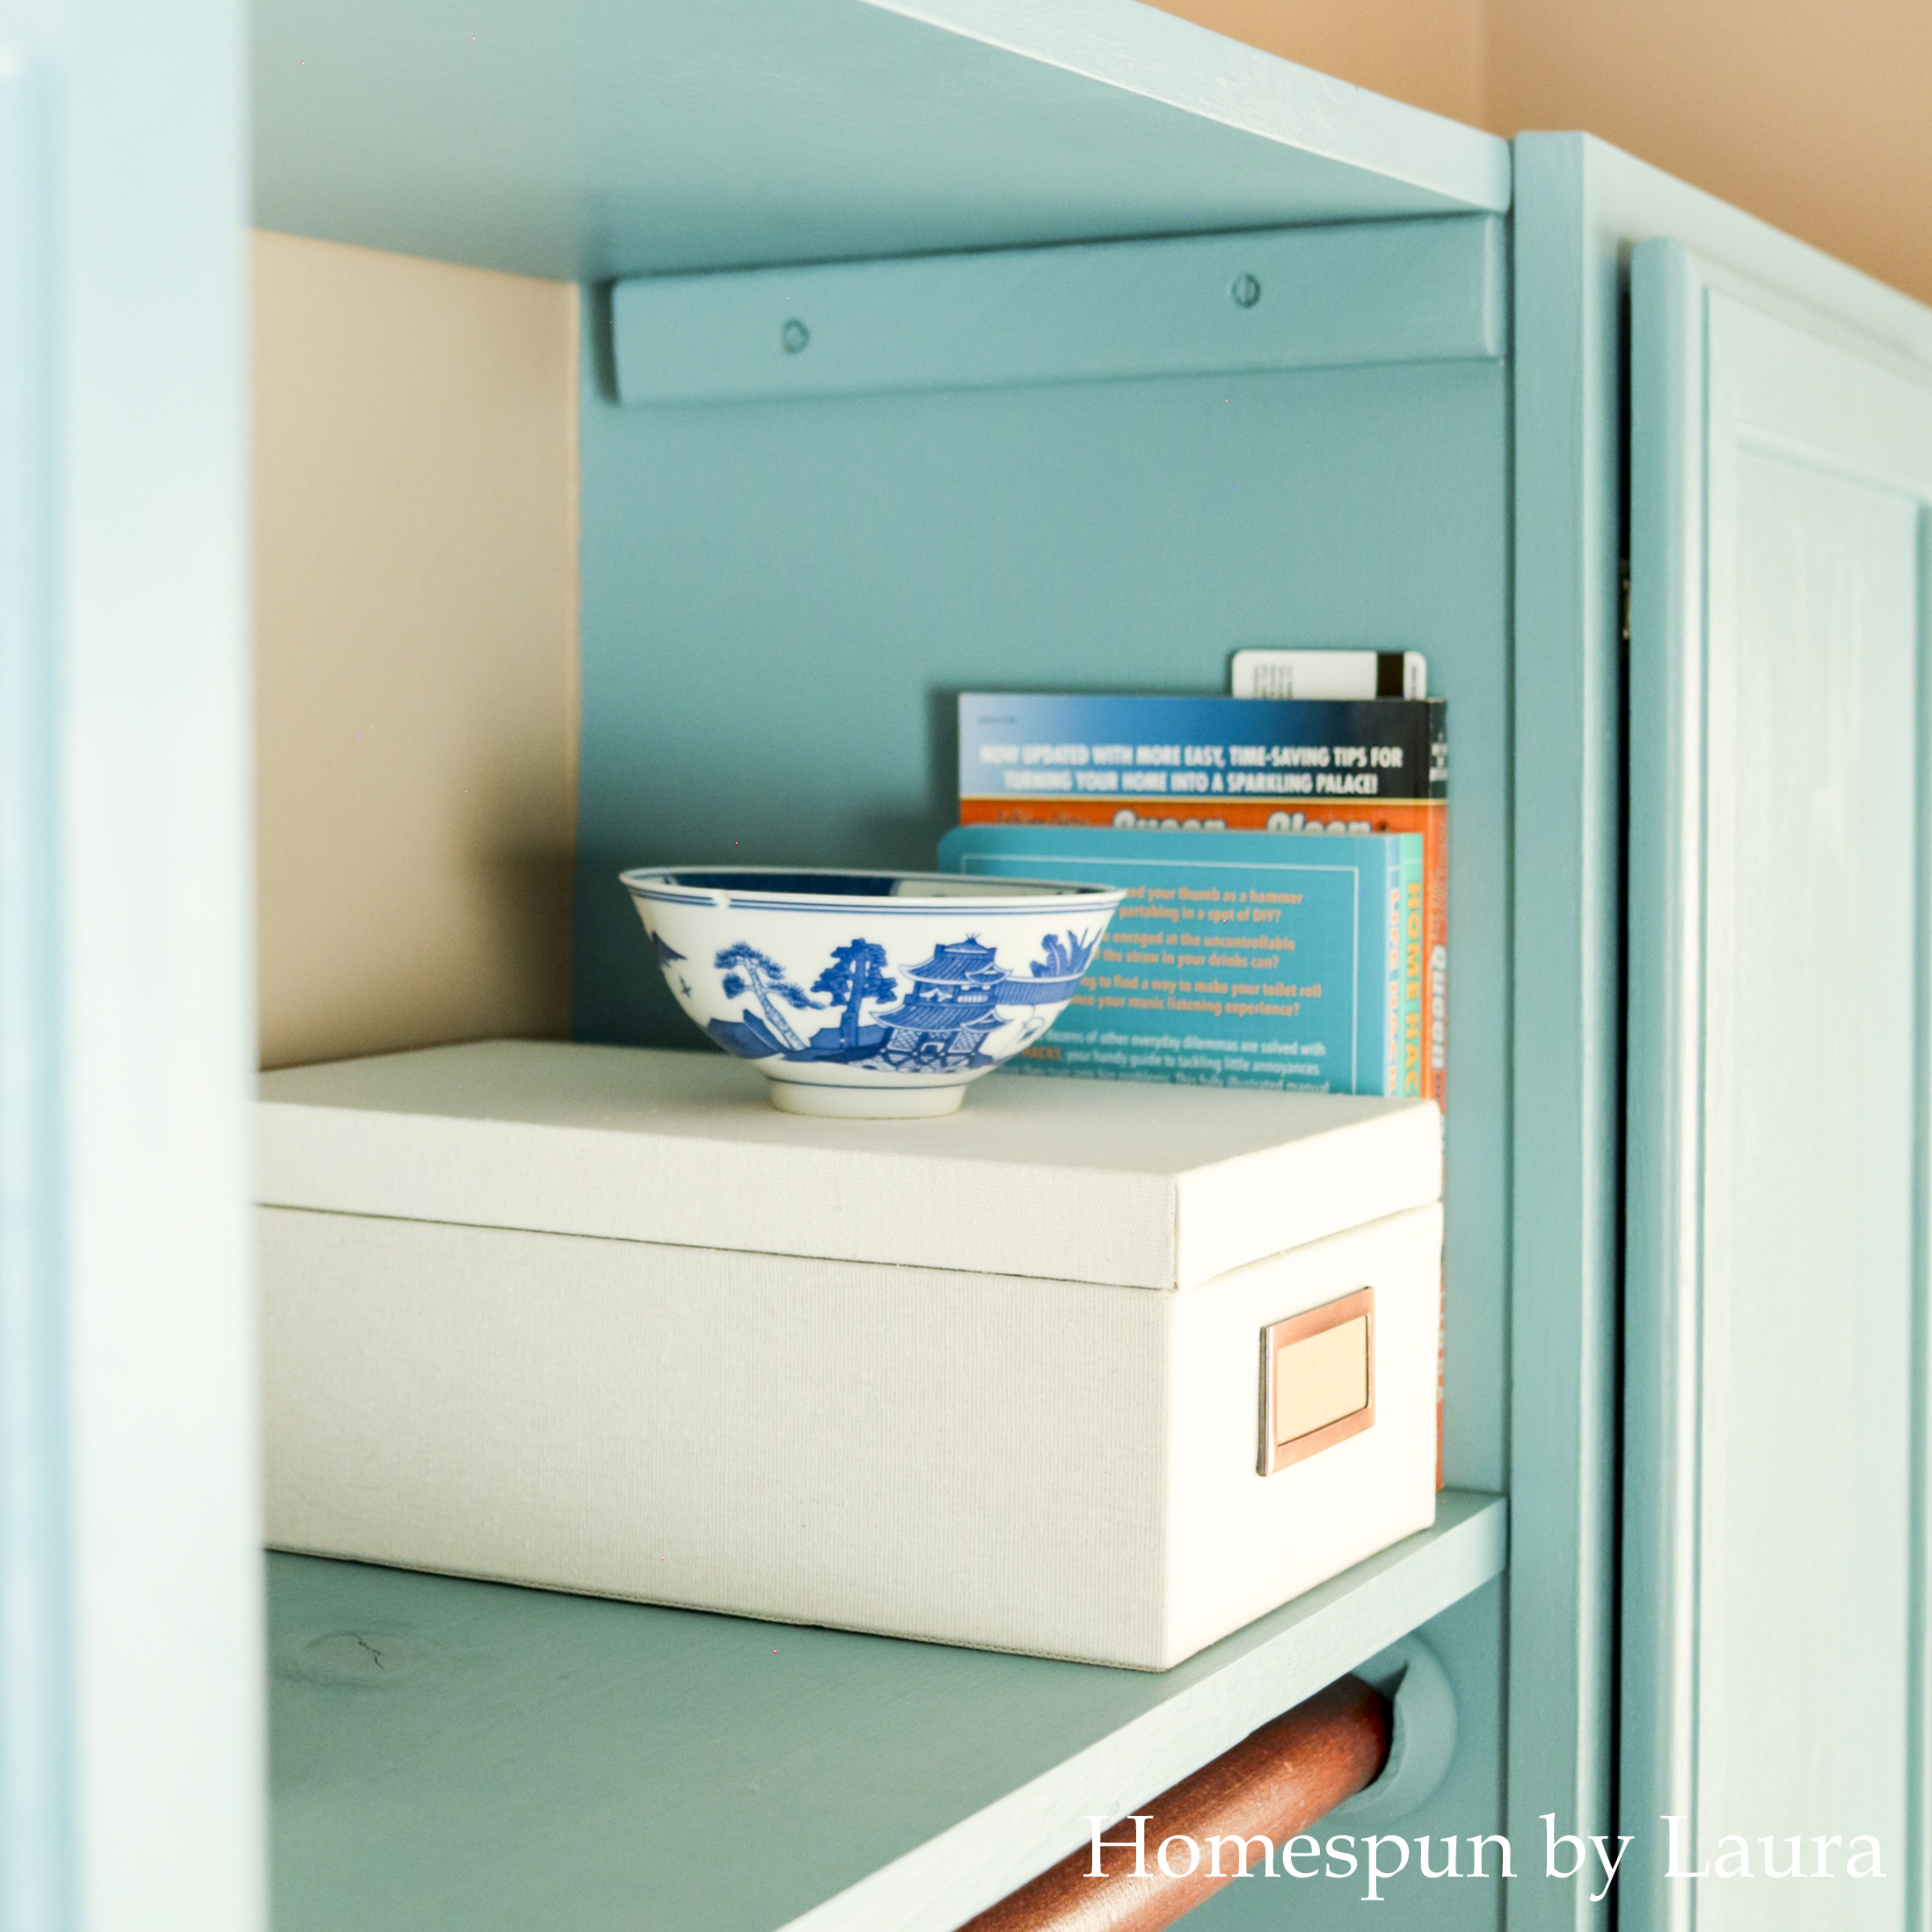
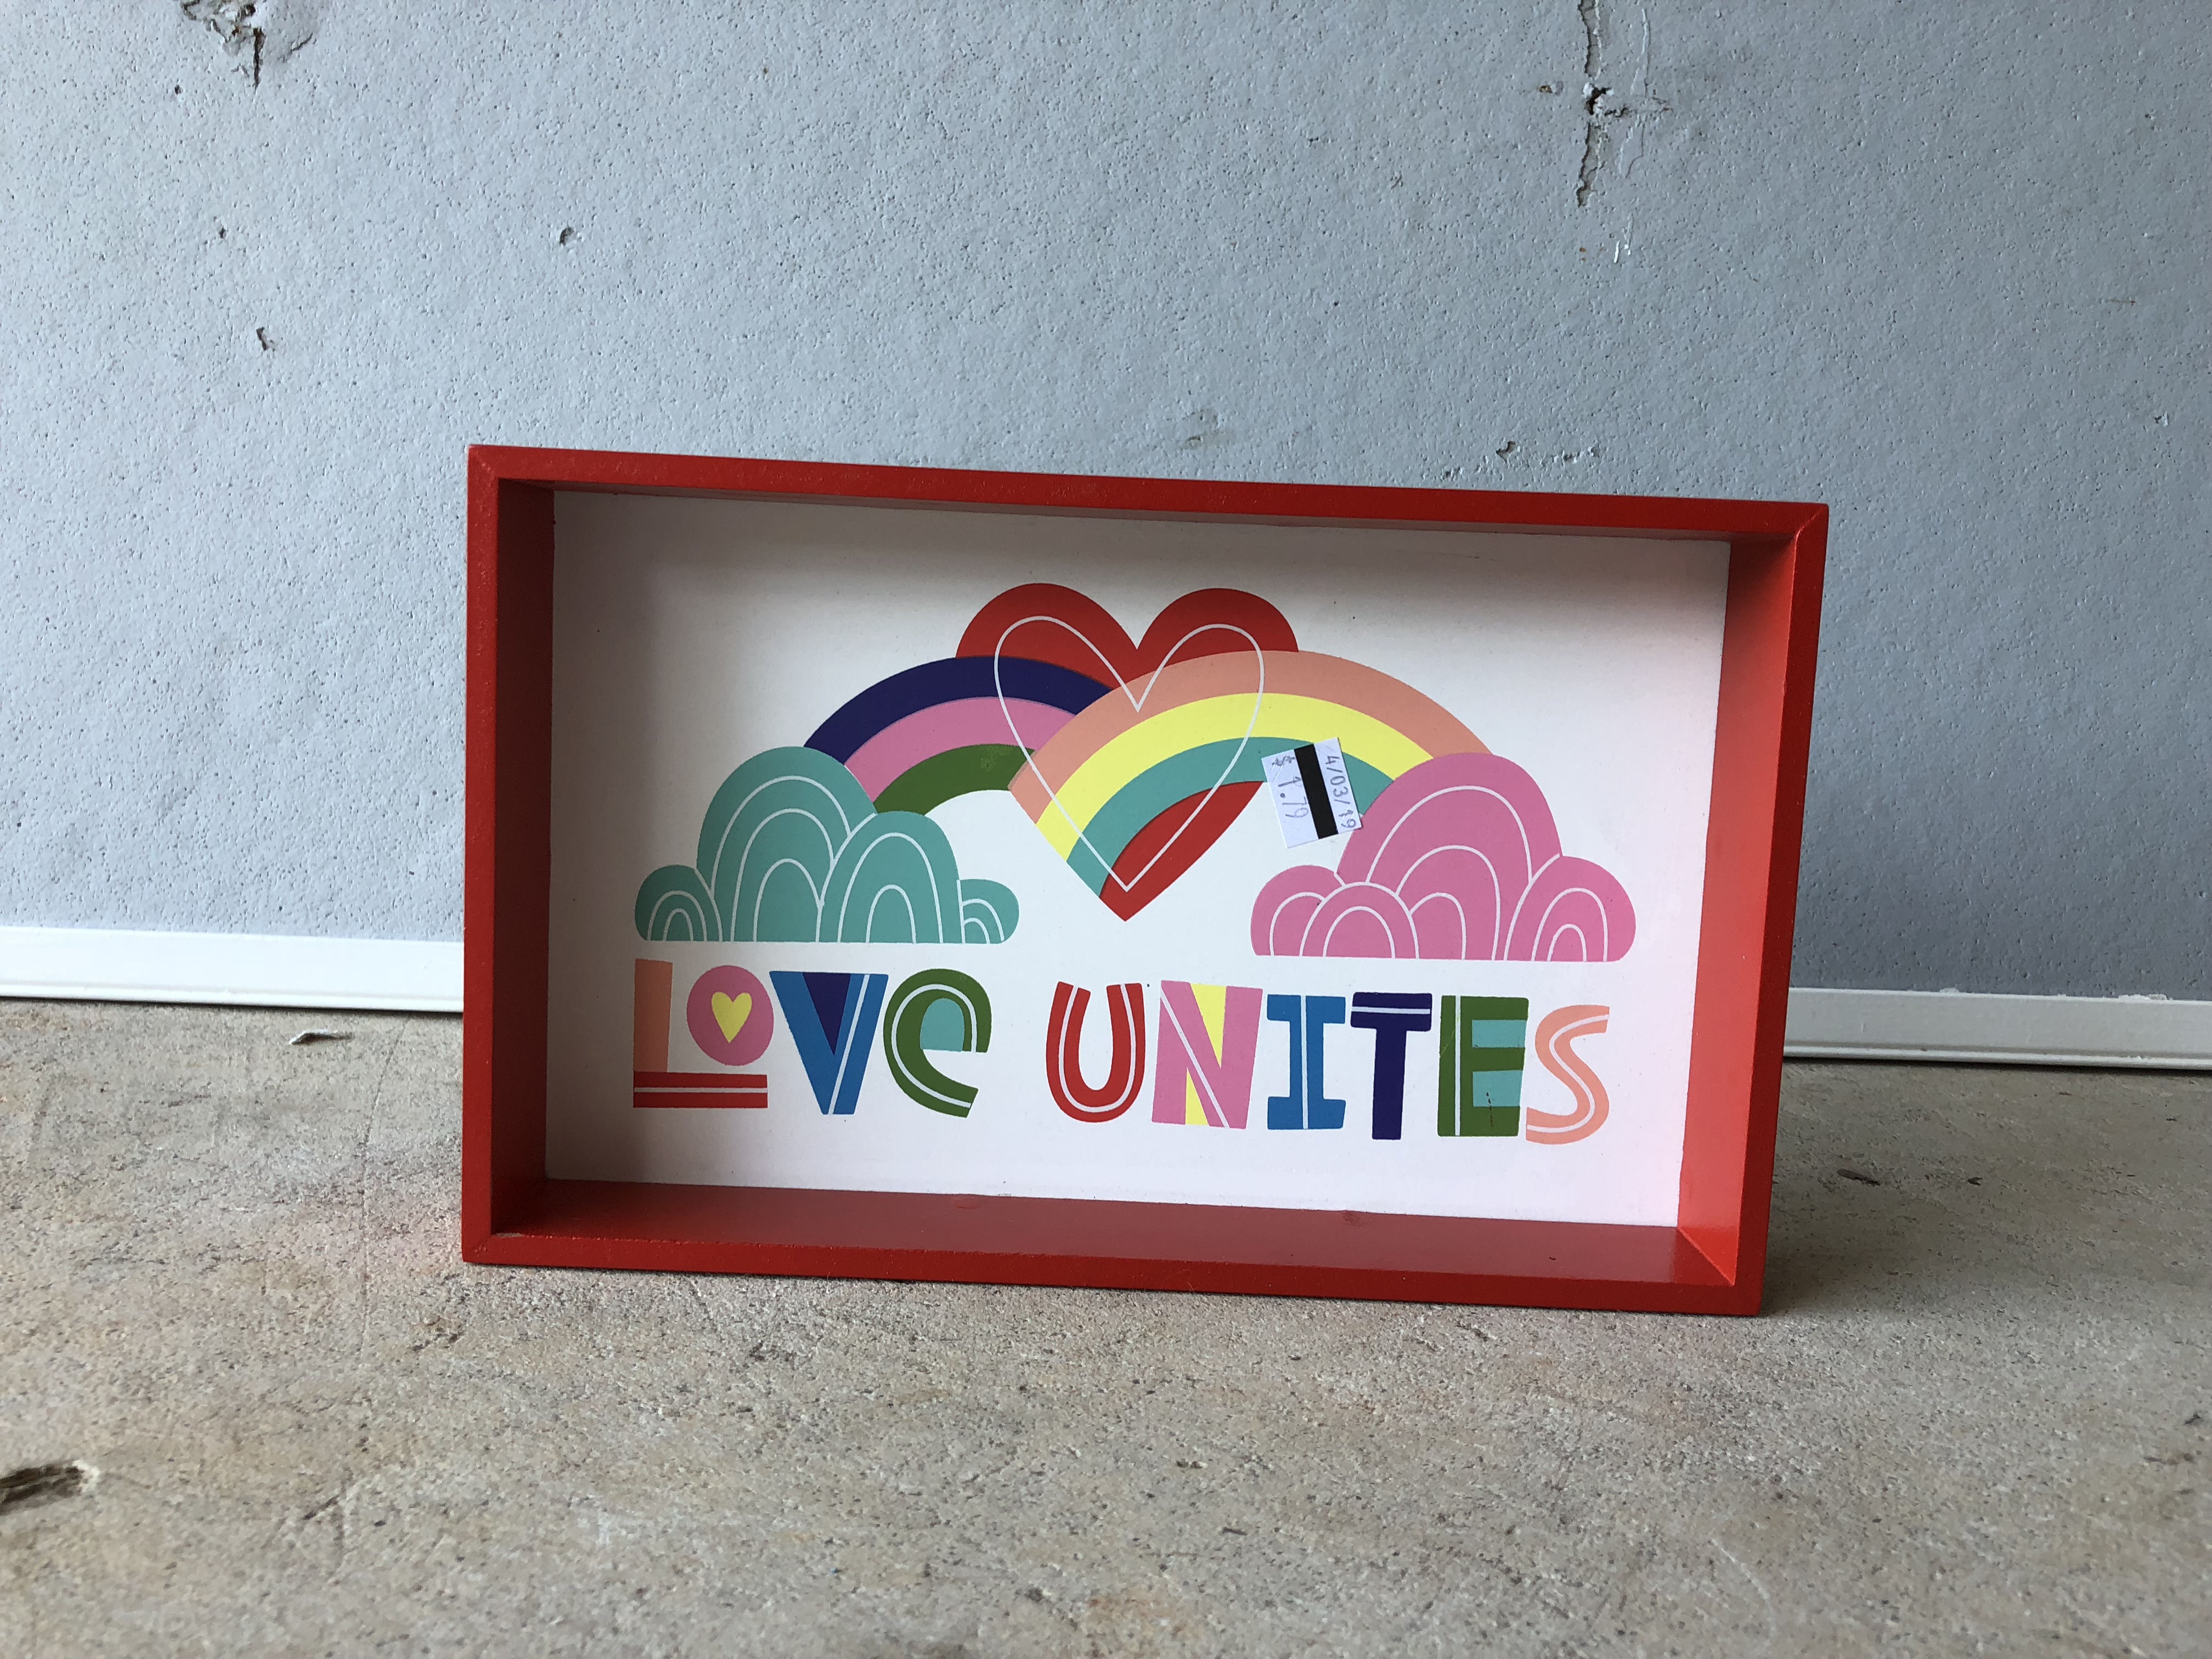
I found the box here at Goodwill on the same trip I mentioned previously for $5.79. I like the slightly off-white linen look and I love that the label holder has a copper finish. Inside the box are cedar blocks and a couple essential oils. The box is a Hearth and Hand overstock that would have been $10.99 at Target! I don’t know if it’s nationwide or just in our area that Target sends unsold items to Goodwill, but I’ve gotten lucky several times finding new Target items for half the price at Goodwill.
The little blue willow bowl was a $1 thrift store find years ago, and the books about household cleaning and ‘hacks’ were gifts in recent years.
On the ledge, I included two items that I used in different places in our old house. A couple coats of paint altered their appearance to what I wanted for this space.
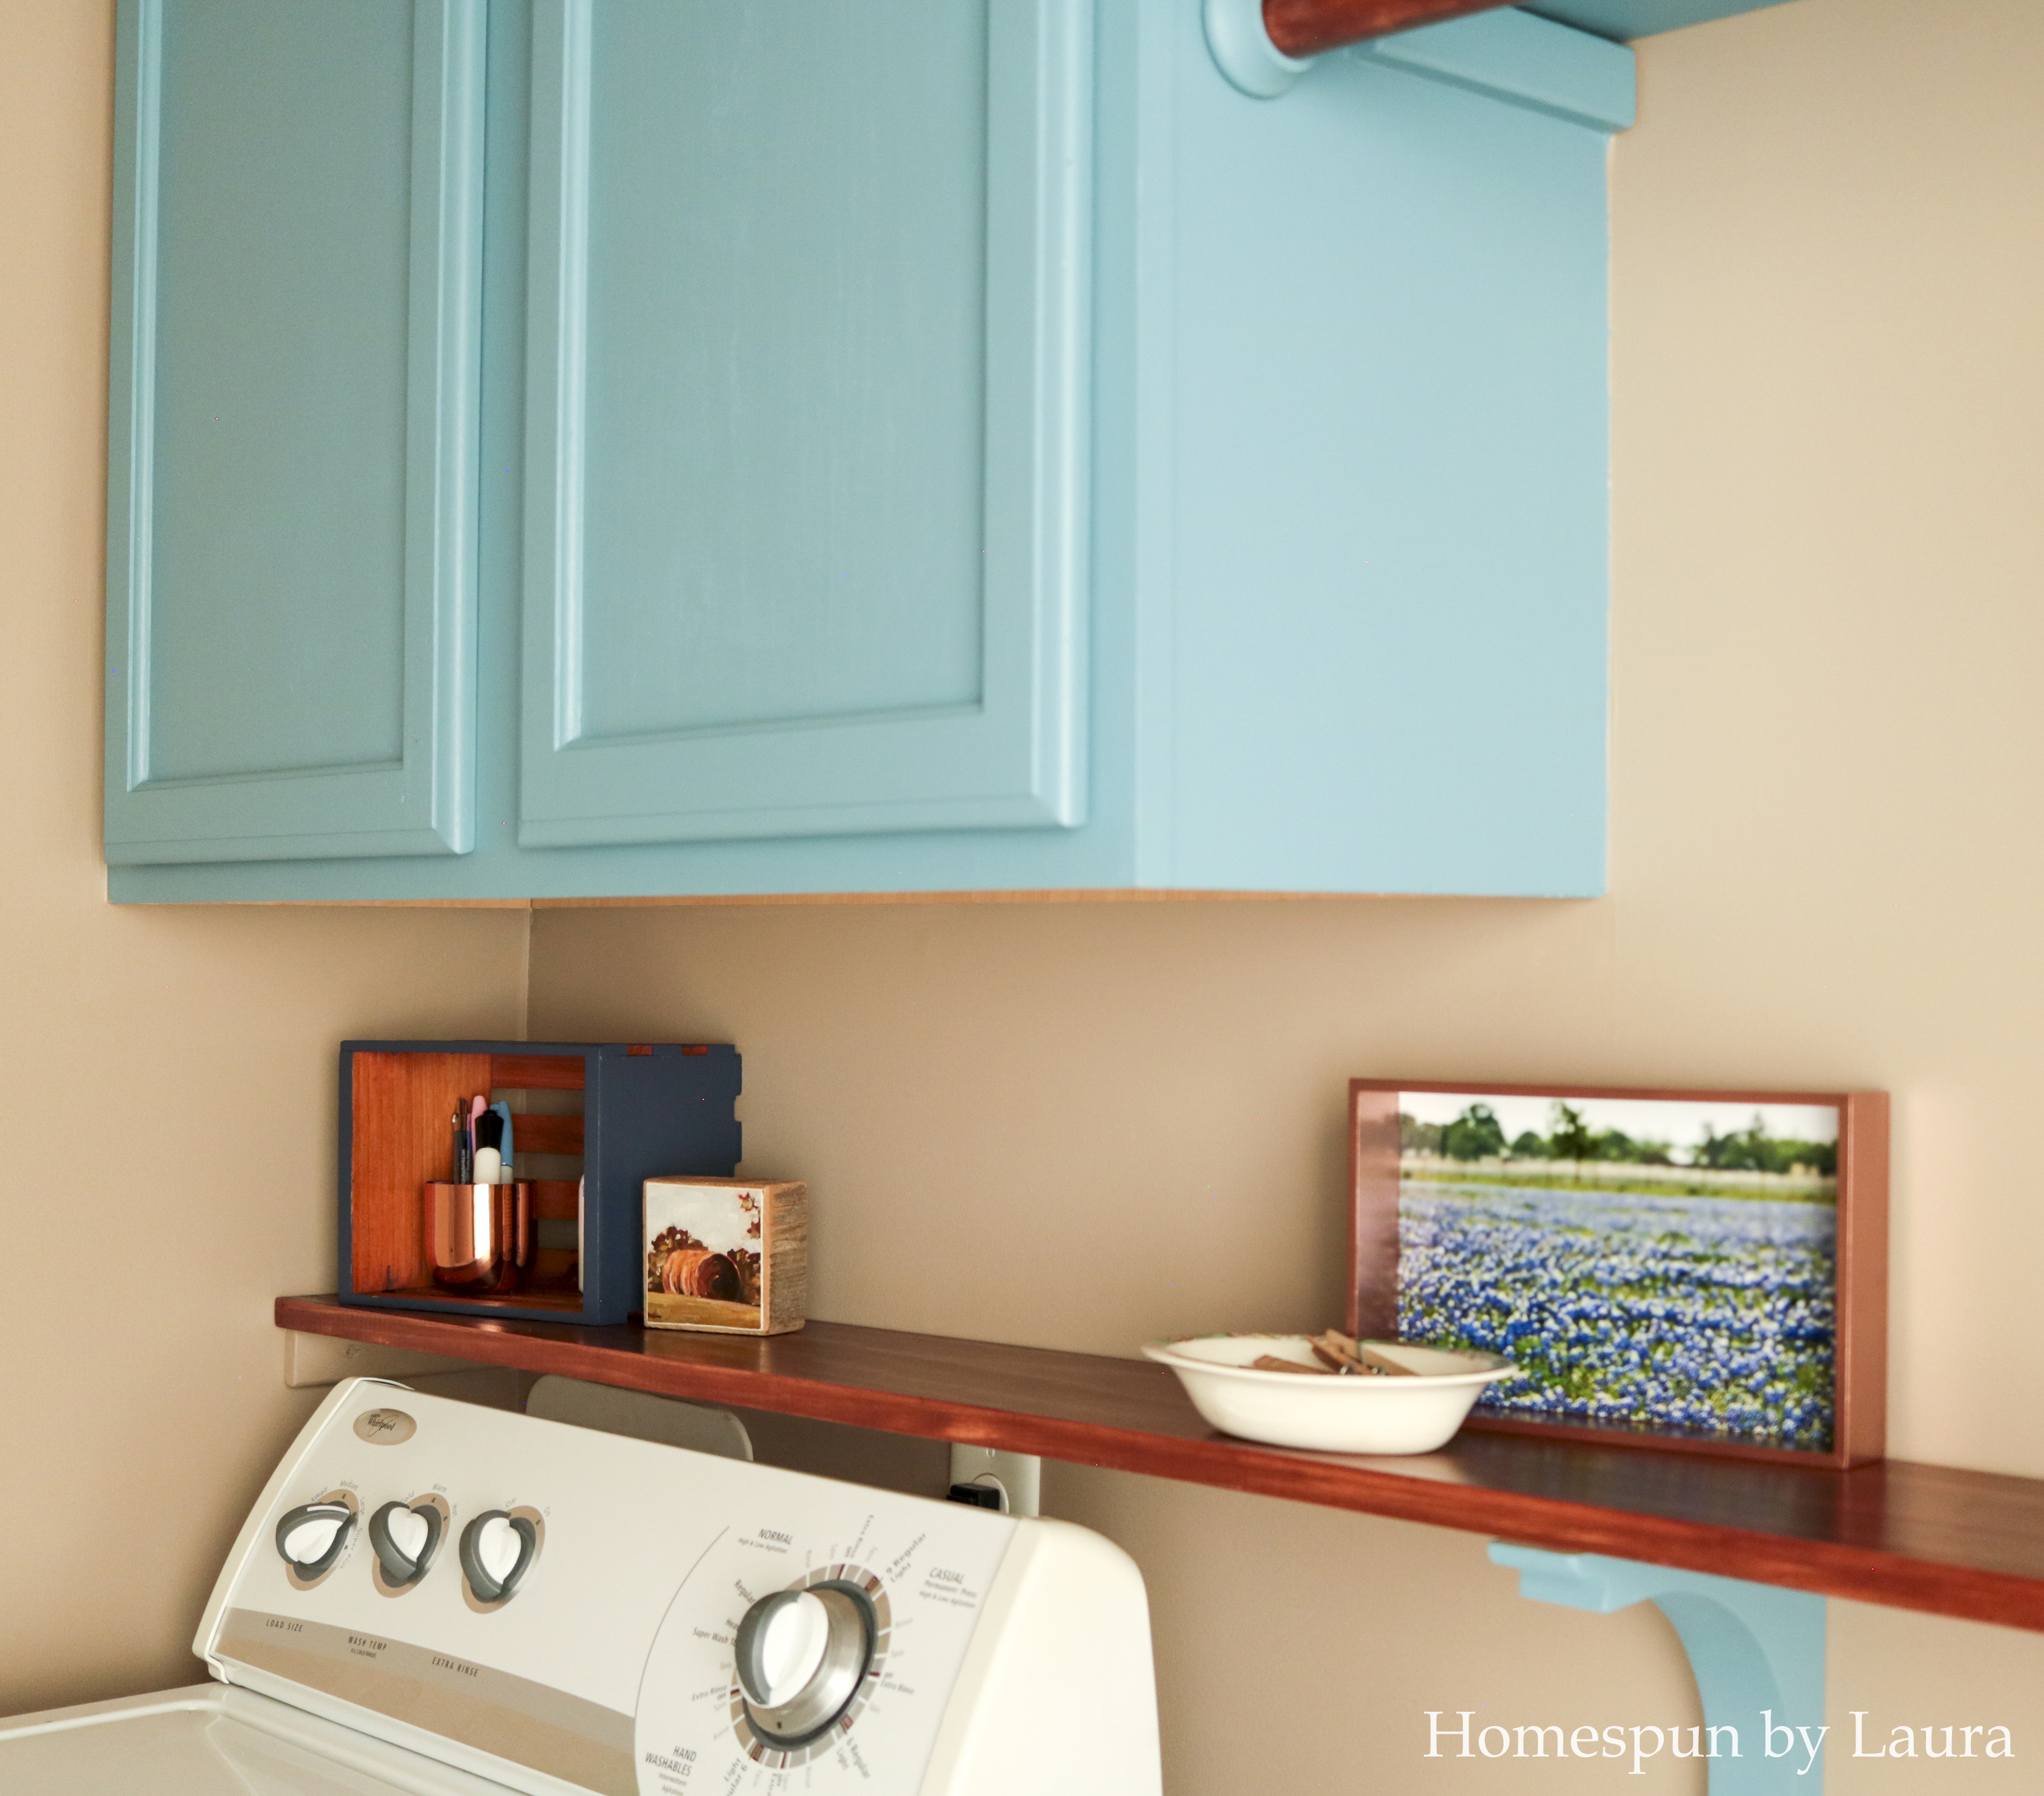
The tiny crate and its mate were once stacked on my sewing room desk to create some additional storage for small items. The red was great in that room but I liked the contrast of the navy and cedar for this room.
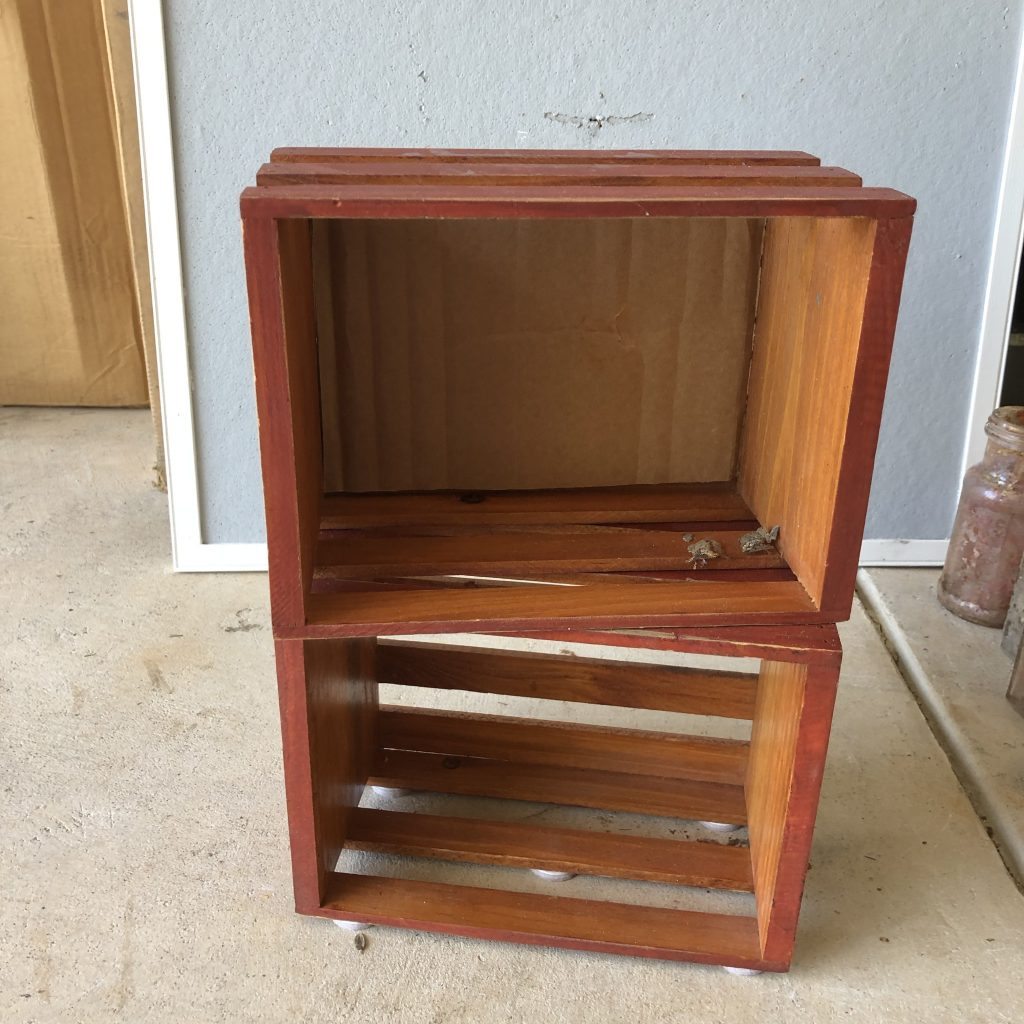
The other crate is in one of the cabinets holding small items as I think it would have made the ledge a little cluttered.
The pretty print around the rim of the little bowl holding clothespins caught my eye at a thrift store a few years ago. The copper cup was another thrift store find in the past. It holds pens and permanent markers for putting dates on bottles of baby milk and a tiny pair of scissors for cutting tags off new clothes (this only happens rarely but when it does it’s nice to not have to search).
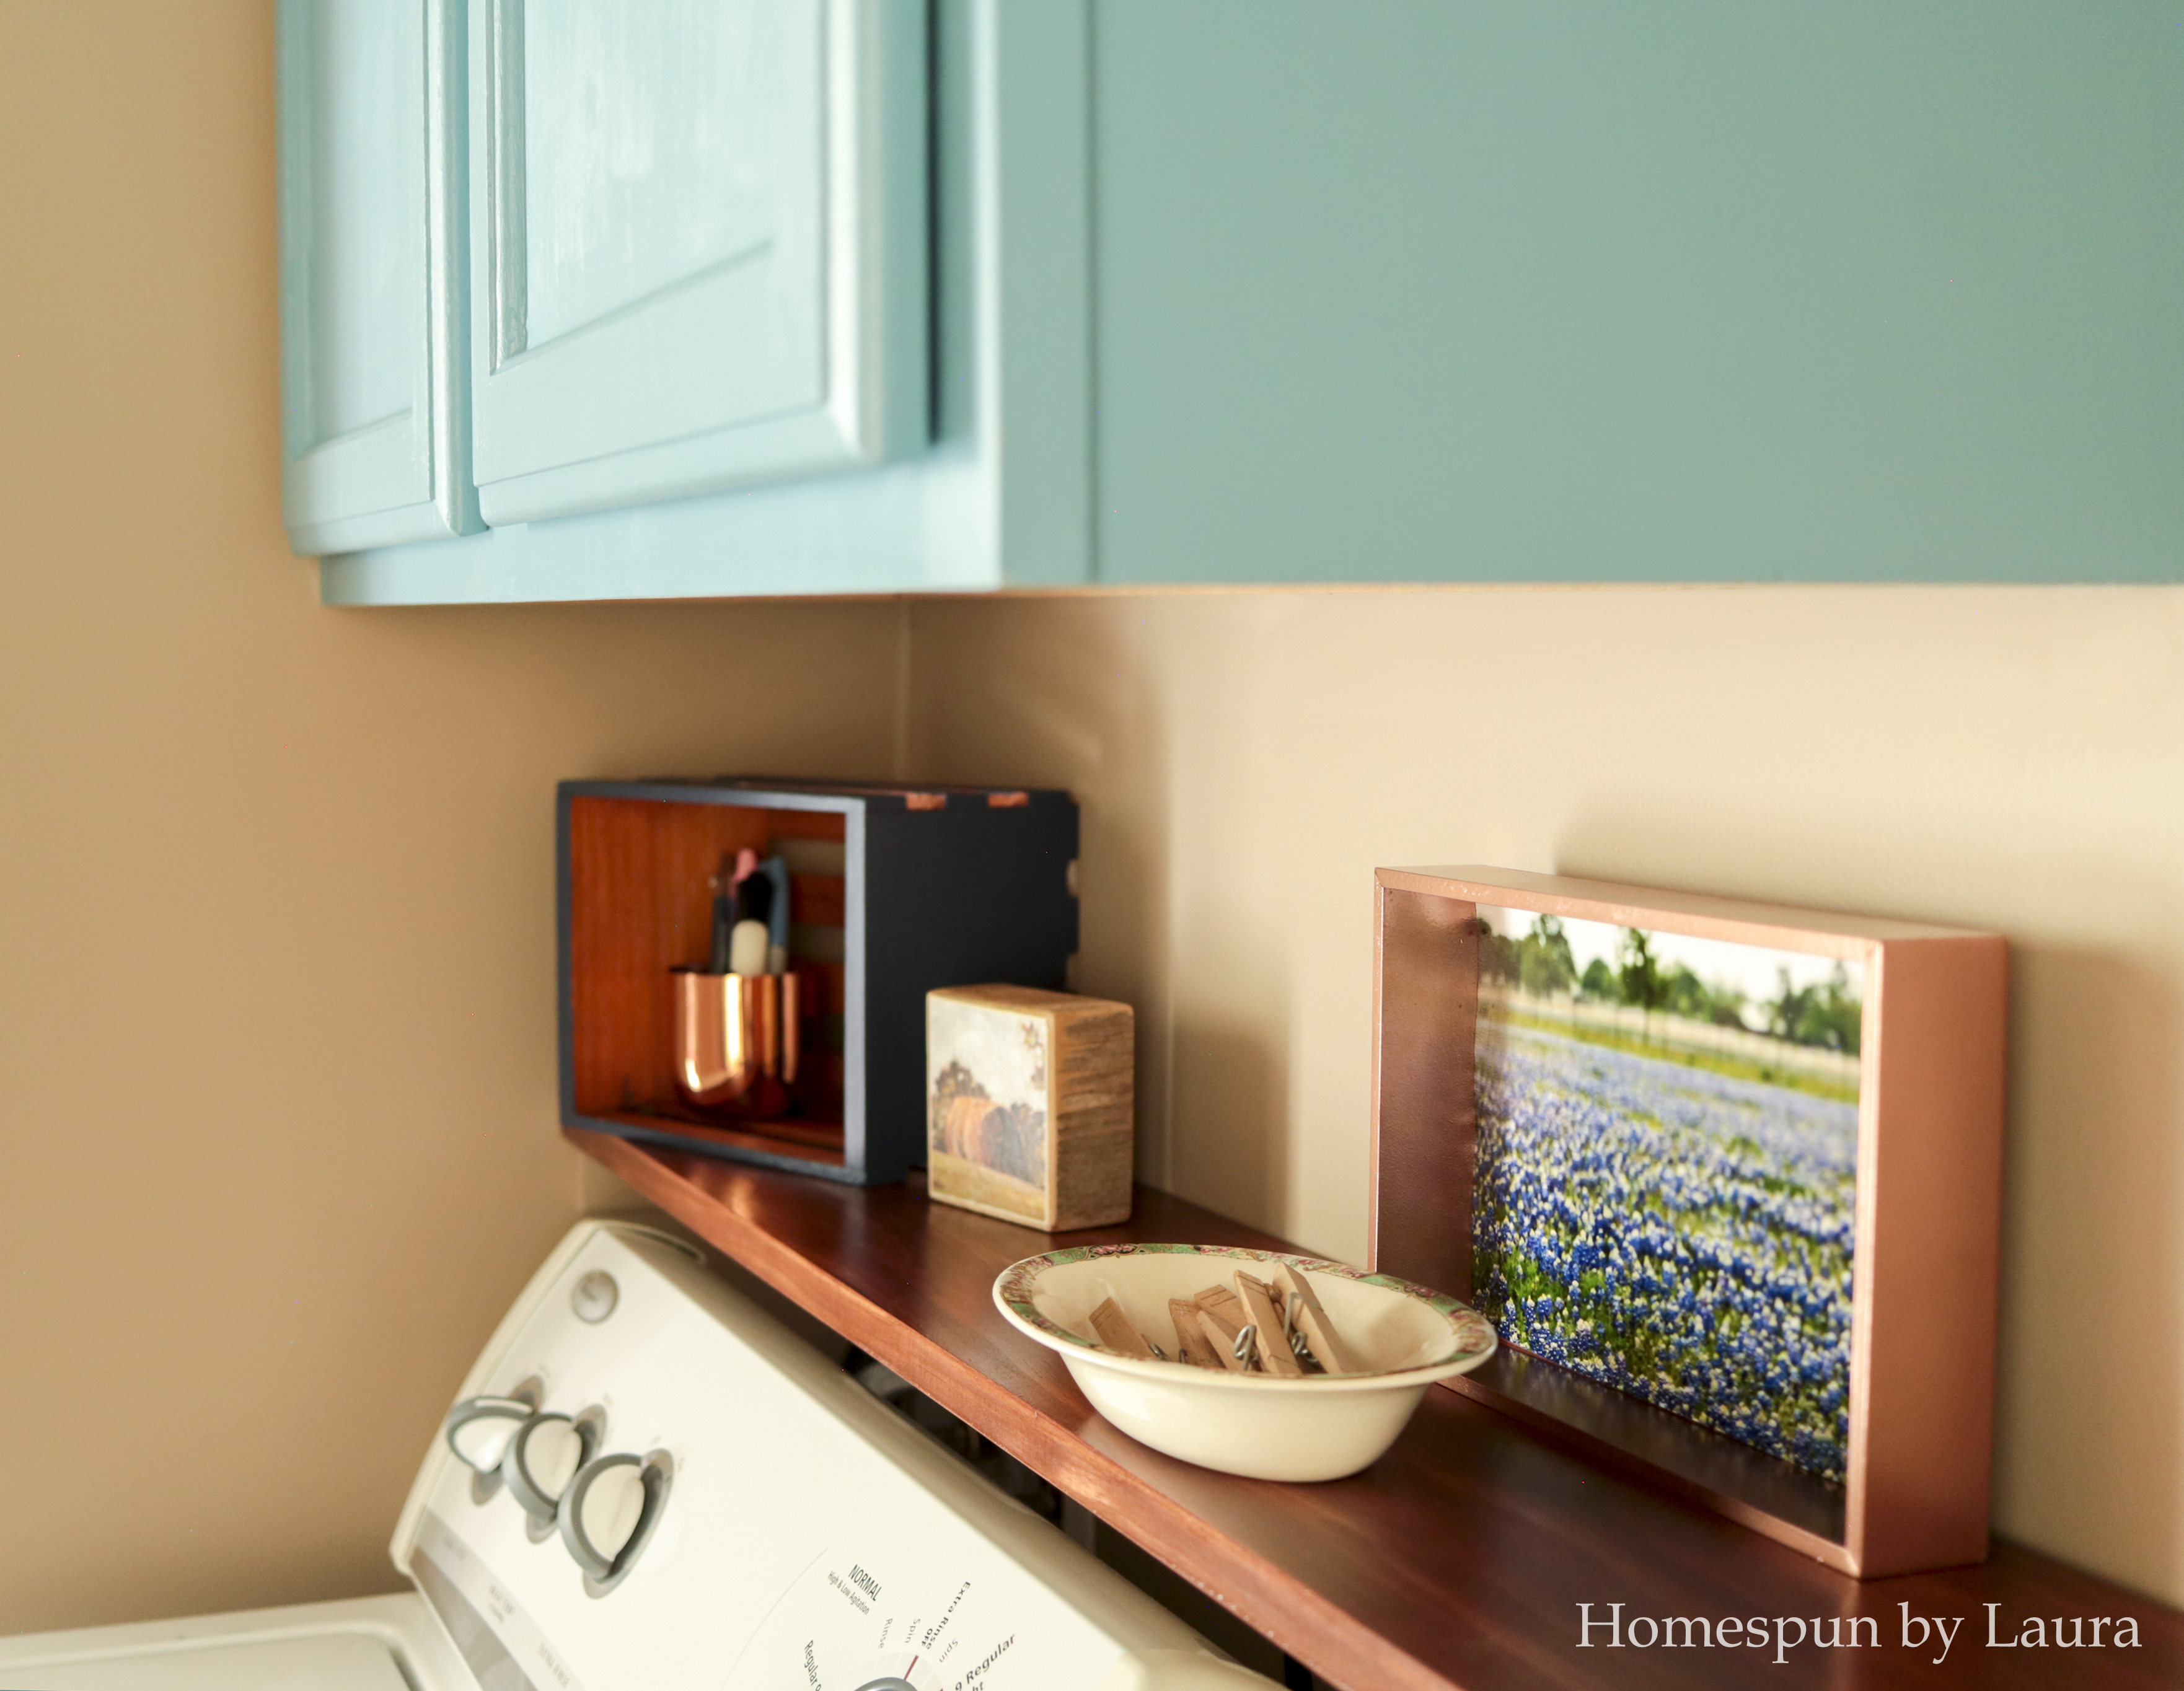
The wooden block is a small version of one of Mary Gregory‘s artworks. I love the scenes she paints of rural Texas life (yes, I do have a small obsession with the state of Texas). I have prints of her artwork in several rooms in our house.
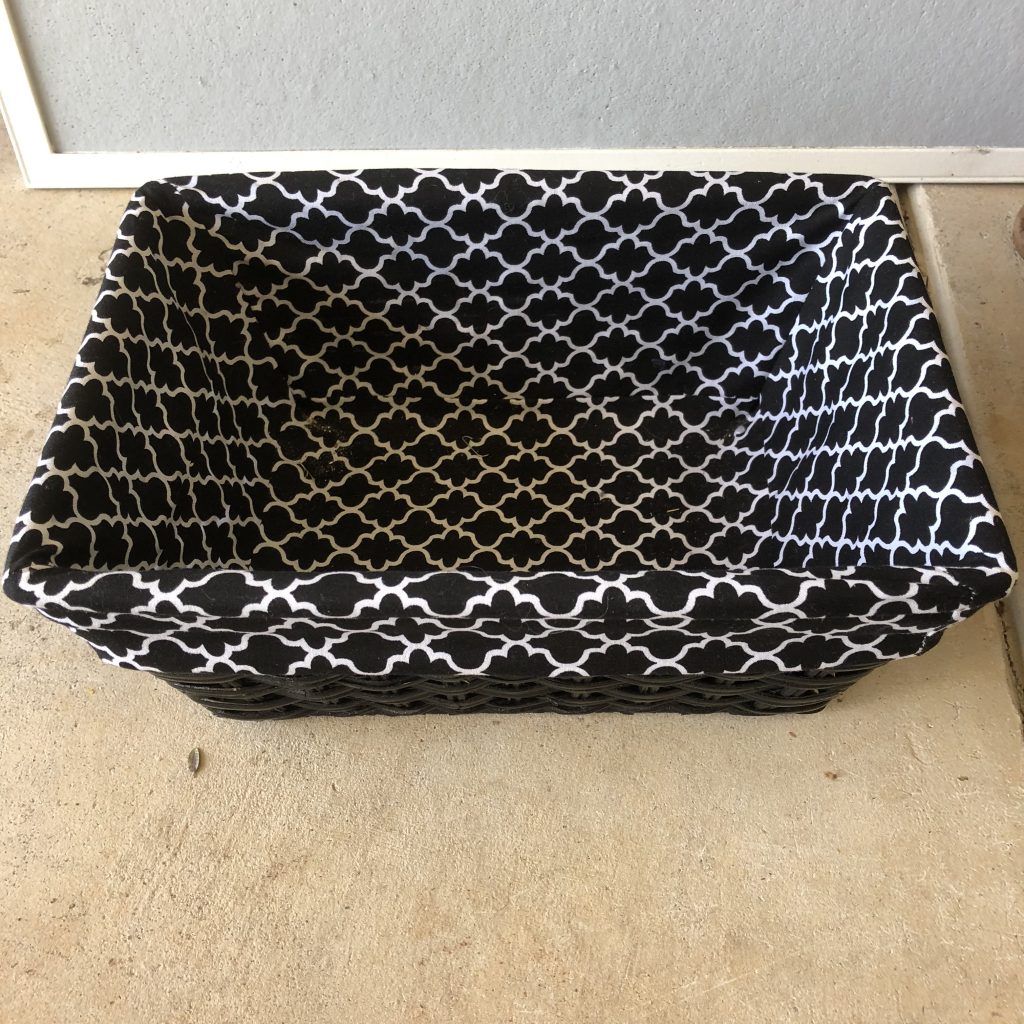
Last, I gave these baskets a coat of navy spray paint from my stash. I replaced the black-and-white liners I sewed for them (using the original liner as a pattern) when I redid our old laundry room for a previous One Room Challenge. I saved the original liners just in case and am using them again now.
The one you see on the ledge is currently home to old grocery bags to use as free trash bags throughout our upstairs, but I think I might put cleaning rags in it instead and stash the bags in the cabinet. Having the rags more easily accessible might make me more likely to clean…?
The other basket is in the cabinet above the washing machine and keeps delicates bags within easy reach.
remaining to-do items
The easiest lingering to-do list item is to frame and hang the antique sheet music art on the back wall. I ran out of time before we went out of town for the weekend but it will be a quick job next week.
There is room left in the budget to add several additional (inexpensive!) items to the room: a creative backsplash/accent wall, cabinet knobs, and a clock.
backsplash/accent wall
I briefly discussed my indecision on the backsplash/feature wall earlier and my plan to live with it as is for a while before I decide what to do. Whatever it is, it will need to be cheap or free!
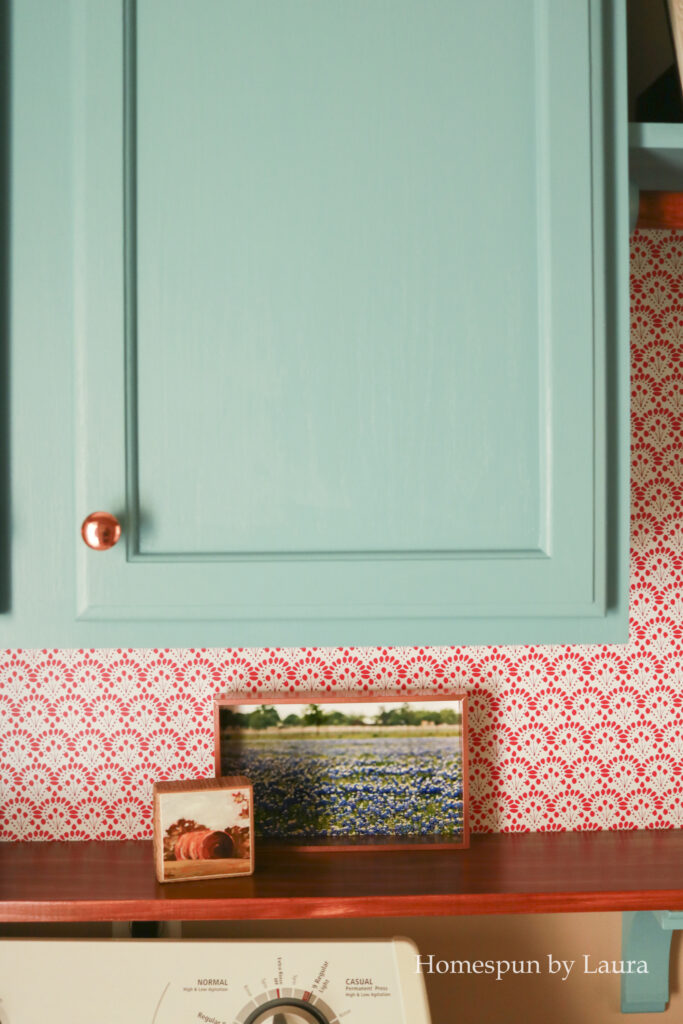
This $4 Pioneer Woman contact paper from Wal-Mart has really brightened up the space!
copper cabinet knobs
Copper cabinet knobs are harder to find than I expected. I found some I think I’ll like at a price within my budget on the Home Depot website pretty early on in the process but wanted to check in-store knobs at Hobby Lobby, Lowe’s, Home Depot, Target, and IKEA before ordering them (I usually need to see something in person before I know if I like it). I have now eliminated all those options and will likely order the Home Depot knobs online this week. The ones at Target are probably my favorite in-store ones, so I might buy those and the Home Depot ones, compare them in the room, and return the ones I don’t like.
*Update: I decided on the Home Depot ones!
I can check for spinach in my teeth every time I do laundry 😀
small clock
I’d like to put a clock in the room where I can see it from the couch in our upstairs loft space, which means it would need to go on the wall to the left of the cabinets. Since the cabinet door needs to be able to open fully, the clock will need to be a fairly low-profile. The one I already have sticks out from the wall too much and the cabinet door would bang on it every time I open it. I’ll look at a thrift store first then will try Hobby Lobby or Target for a sale item if a few trips around the thrift store don’t yield a result.
*Update: This $5 clock from Wal-Mart does the trick just fine – and it doesn’t tick (or does it? I honestly can’t remember!)!!
This is what $100 and approximately 100 hours can do to a boring, dysfunctional laundry room!
Phase 2
There are several additional things I would like to do over time for Phase 2 of the laundry room (it’s be no fun to just ‘finish’ a space, would it?):
- Replace light fixture, probably with something copper.
- I also think it would be fun to paint the ceiling a faint blue or blue-green shade.
- I’d like to construct some sort of counter surface above mini fridge for storing laundry basket/folding clothes. Using butcher block for this would be ideal. In the meantime, my laundry basket will just sit on the mini fridge (not pictured because it’s currently full of all the paint supplies I threw in it to take photos!).
- Build a laundry drying rack similar to the one I made the last time I updated a laundry room for the One Room Challenge (that we left behind in our old house) and install it on the wall next to the ironing board. Fortunately, there’s no fuse box to hide so this time around it will be MUCH simpler.
Thanks so much for visiting my little corner of the internet and reading about this project!!! Don’t forget to take a look at the projects everyone else did and check my stories on Instagram this week to see a few of my favorites!
Here’s a parting reminder of what a little bit of paint, a hundred bucks, and a few weeks worth of naptimes can do to a boring beige laundry room!

For all you other ORC people, congrats on making it to the finish line! Time to kick back and enjoy the space you worked so hard on. As for me, I’ll be catching up on all the laundry I haven’t been able to do for a couple weeks now…
Thanks for stopping by.

Take a look at my previous One Room Challenge projects here:
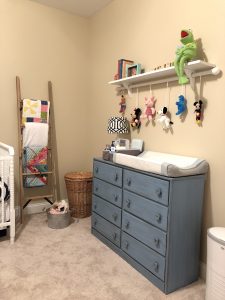
The Vintage Toy Nursery (still in progress…)
The Office / Sewing & Craft Room (the time I started it)
The Office / Sewing & Craft Room (the time I finished it!)

The Laundry Room (old house)